Table of Contents
Advertisement
Quick Links
PM1330 REV. 0
E: 23-01-2021
T M
OWNER´S MANUAL
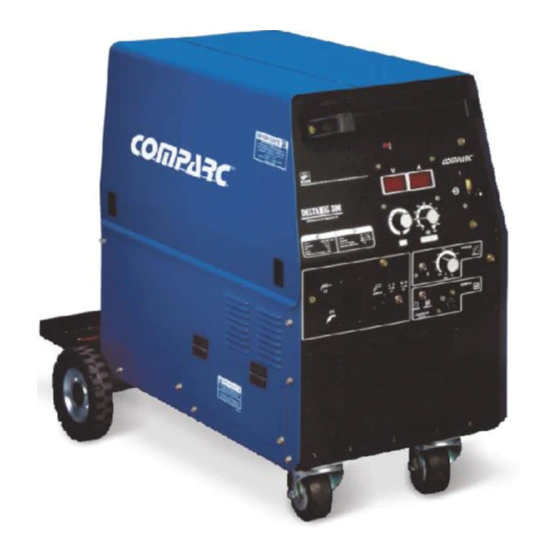
DELTA MIG 300
ARC WELDING POWER SOURCE
PROCESSES
MIG (GMAW).
DESCRIPTION
CV
CONSTANT VOLTAGE OUTPUT (CV).
DC
DIRECT CURRENT OUTPUT (DC).
3
THREE PHASES.
Phases
VISIT OUR W EBSITE AT: www.comparcwelders.ca
GIVE THIS MANUAL TO THE OPERATOR
OWNER´S MANUAL
302-573
Advertisement
Table of Contents
Troubleshooting

Related Manuals for Comparc DELTA MIG 300


Summary of Contents for Comparc DELTA MIG 300
- Page 1 PM1330 REV. 0 E: 23-01-2021 OWNER´S MANUAL DELTA MIG 300 ARC WELDING POWER SOURCE PROCESSES MIG (GMAW). DESCRIPTION CONSTANT VOLTAGE OUTPUT (CV). DIRECT CURRENT OUTPUT (DC). THREE PHASES. Phases VISIT OUR W EBSITE AT: www.comparcwelders.ca GIVE THIS MANUAL TO THE OPERATOR OWNER´S MANUAL...
-
Page 2: Table Of Contents
TABLE OF CONTENTS ARC WELDING SAFETY PRECAUTIONS ................i SECTION 1 -- SAFETY SIGNAL WORDS ................1 SECTION 2 -- SPECIFICATIONS ..................... 1 2 - 1. Volt-Ampere Curves.......................... 1 2 - 2. Duty Cycle ............................2 SECTION 3 -- INSTALLATION ....................2 3 - 1. -
Page 3: Arc Welding Safety Precautions
ARC WELDING SAFETY PRECAUTIONS ARC WELDING can be hazardous. WARNING PROTECT YOURSELF AND OTHERS FROM POSSIBLE SERIOUS INJURY OR DEATH. KEEP CHILDREN AWAY. PACEMAKER WEARERS KEEP AWAY UNTIL CONSULTING YOUR DOCTOR. In welding, as in most jobs, exposure to certain hazards occurs. Welding is safe when precautions are taken. The safety information given below is only a summary of the more complete safety information that will be found in the Safety Standards. - Page 4 FLYING SPARK AND HOT METAL can 1.- Wear approved face shield or safety goggles. Side shields recommended. cause injury 2.- Wear proper body protection to protect skin. Chipping and grinding cause flying metal . As welds cool, they can throw off slag. CYLINDERS can explode if damaged.
- Page 5 CONSIGNES DE SÉCURITÉ POUR LE SOUDAGE À L’ARC MISE EN GARDE LE SOUDAGE À L’ARC peut être dangereux. SE PROTÉGER ET PROTÉGER LES AUTRES CONTRE LES BLESSURES GRAVES VOIRE MORTELLES. TENIR LES ENFANTS À L’ÉC RT. LES PERSONNES QUI PQRTENT UN STIMULATEUR CARDIAQUE NE DOIVENT PAS NON PLUS S’APPROCHER DU POSTE DE SOUDAGE, A MOINS D’AVOIR CONSULT UN MÉDECIN. Le soudage, comme la plupart des travaux, présente certains dangers.
- Page 6 LE SOUDAGE peut causer un incendie ou une explosion. 5. Prendre garde aux incendies et toujours avoir un extincteur à proximité. Ne pas souder sur des récipients fermés comme des 6. Se rappeler que si I’on soude sur un plafond, un plancher, une cloison réservoirs, des fûts ou des tuyaux: ils peuvent exploser.
-
Page 7: Section 1 - Safety Signal Words
SECTION 1 - SAFETY SIGNAL WORDS The following safety alert symbol and signal words are used throughout this manual to call attention to and identify different levels of hazard and special instructions. WARNING statements identify procedures or practices which must be followed to WARNING avoid seriuos personal injury or loss of life. -
Page 8: Duty Cycle
2-2 DUTY CYCLE. WELDING LONGER THAN RATED DUTY CYCLE can damage unit or gun and void CAUTION warranty. Do not weld at rated over output longer than shown duty cycle chart. M INUT ES Definition Duty Cycle is percentage of 10 minutes that unit can weld at rated load without overheating. -
Page 9: Installing Work Clamp
3-2 INSTALLING WORK CLAMP. 1.- Work Cable from Unit. 2.- Contact Piece. 3.- Screw. 4.- Work Clamp. 5.- Washer. Tools Needed 9.5, 11.1 mm(3/8, 7/16") Figure 3-3 Work clamp. 3-3 INSTALLING WELDING GUN (WELDING GUN NOT INCLUDED) 1 Drive Assembly 2 Gun Securing Knob 3 Gun End Loosen securing knob. -
Page 10: Spool Wire Installation
3-6. SPOOL WIRE INSTALLATION. For 8" and 12" (standard) wire spools turn unit off and disconnect it. 1.- Hub spool. 2.- Pin of Hub spool. 3.- Wire spool / Reel. 4.- Hud spool cap. Turn the hub spool cap counter clockwise and remove it. -
Page 11: Selecting A Location And Connecting Input Power
3-8. SELECTING A LOCATION AND CONNECTING INPUT POWER GND/PE Tools Needed: 3/8 in 3/8 in 1 in ( for air?ow GND/PE Connect First Do not overtighten jumper link nuts. 230 VOL 0 VOLTS VOLTS Have only quali?ed persons make this installation. Jumper Links Check input voltage available at site. -
Page 12: Threading Welding Wire
3-9 THREADING WELDING WIRE Wire Spool Welding Wire Inlet Wire Guide Pressure Adjustment Knob Drive Roll Outlet Wire Guide Gun Conduit Cable Lay gun cable out straight. Tools Needed: Hold Wire tightly to keep it from unraveling. 6 in (150 mm) Open Pressure Assembly Push Wire Thru Guides Into Gun, Pull and Holl Wire, Cut of End... -
Page 13: Section - 4 Operation
SECTION - 4 OPERATION SEE SAFETY SIGNALS AT THE CAUTION BEGINING THIS MANUAL 4-1 LOCATION OF CONTROLS IN WELDING POWER SOURCE. VOLTMETER AMMETER ADJUSTMENT VOLTAGE MAIN SWITCH TRIGGER WIRE SPEED CONTROL TORCH SPOT TIME CONNECTOR CONTROL SPOT SWITCH REMOTE 14 RECEPTACLE 2T/4T SELECTOR 1- Insulating Gloves. -
Page 14: Input Power Switch
INPUT POWER SWITCH.Place the power switch in ON position energizes the welding power source. Place the power switch in the OFF position the unit shuts down. FIGURE 4-5 INPUT POWER SWITCH VOLTAGE ADJUSTMENT Use this control to set the arc voltage. FIGURE 4-6 VOLTAGE ADJUST 1.- WIRE SPEED CONTROL. -
Page 15: Selector Of Spot
FUNCTION SELECTOR: Place the switch in the position ( I ) activate the function: 1.- Dotting: Welding by time intervals, the duration of each interval (from when the torch trigger is pressed) will depend on the position pre-set in the control of the spot time. SPOT TIME CONTROL. -
Page 16: Section 5 -- Maintenance And Troubleshooting
SECTION - 5 MAINTENANCE &TROUBLESHOOTING WARNING SEE SAFETY SIGNAL AT THE BEGINING THIS M ANUAL ROUTINE MAINTENANCE TIME MAINTENANCE Every month Above normal equipment use: Check all labels ( see 6 month entry ), repair any damaged insulation or replace holder or work cable, clean internal parts ( see 6 month entry ), clean and tighten connections at holder cable and work clamp. -
Page 17: Troubleshootings
TROUBLESHOOTINGS. Trouble Remedy No weld output; Be sure Power switch is On wire does not feed. Replace building line fuse or reset circuit breaker if open Reset circuit breaker CB1 Secure gun trigger connections Have Factory Authorized Service Agent check Power switch. Have Factory Authorized Service Agent check all board No weld output;... -
Page 18: Section - 6 Electrical Diagram
SECTION - 6 ELECTRICAL DIAGRAM Figure 6-1 Electrical Diagram... -
Page 19: Section 7 -- Parts List
SECTION - 7 PARTS LIST 7-1 MAIN ASSEMBLY ITEM No. PART NO. DIA. MKGS DESCRIPTION QUANTITY PC2023 BASE PR0922 WHEELS REAR MR05740 SWIVEL CASTER PF0738 PANEL , FRONT PB1770 BAFFLE CENTRAL PS1365 BRACKET PT3614 TERMINAL INPUT CONNECTIONS PM0822 CHOPPER MODULE CHOPPER MCH300.015 PB1793 BAFFLE PC2025... - Page 20 FIGURE 7-1. MAIN ASSEMBLY...
- Page 21 ITEM No. PART NO. DIA. MKGS DESCRIPTION QUANTITY MS03936 SUPPORT FOR HANDLEBAR TUBE PF0738 PANEL, FRONT MP08463 POTENTIOMETER 100 Kohm 2W MP08416 KNOB MR00503 4 SOCKETS, RECEPTACLE MI00138 SW1,SW2,SW3 TOGGLE, SWITCH MR02583 RC 3 14 SOCKETS, RECEPTACLE MF02333 LIGHT MM04109 OPTICAL FILTER (RED COLOR) PT1826 CIRCUIT CARD, DIGITAL METERS...
- Page 22 ITEM No. PART NO. DIA. MKGS DESCRIPTION QUANTITY MS03942 TRANSDUCER, HALL DEVICE PS1581 TRANSDUCER, SUPPORT HALL DEVICE PT0923 TERMINAL PWR, BLACK PT0924 TERMINAL PWR, RED PA1161 GUN ADAPTER PB1769 GEARED MOTOR BASE Mm04273 MOTOR DRIVE & GEARS MC10192 CB 1 CIRCUITO RESET 10 AMPS.
- Page 23 WARRANTY POLICY 2°.- SOLDADORAS INDUSTRIALES INFRA S.A. DE C.V. warranty UNIFORM WARRANTY FOR SIISA MACHINES. will be F.O.B. Factory at Naucalpan México, or F.O.B. at an authorized service facility as determined by manufacturer. Therefore no compensation SOLDADORAS INDUSTRIALES INFRA, S.A. DE C.V. (SIISA), or reimbursement for transportation costs of any kind will be allowed.
- Page 24 CROSSFIRE ® LIMITED WARRANTY Effective April 14, 2018 (This limited warranty supercedes all prior warranties and is exclusive with no other warranties or garuntees implied.) This warranty applies to the original purchaser and is 6. Voiding Warranty subject to the terms and conditions listed below. This The limited warranty is void if the Crossfire product has Limited Warranty is for new equipment sold after the been repaired, changed, or modified by anyone other then...
- Page 25 NOTES...
- Page 26 SERVICE CENTER MAP CANADA LTD 325 Healey Road, Unit 1, Bolton, ON L7E 5C1 Canada Phone: (905) 951-2788 Toll Free: (800) 757-4445 Fax: (905) 951-6256...
Need help?
Do you have a question about the DELTA MIG 300 and is the answer not in the manual?
Questions and answers