Table of Contents
Advertisement
Quick Links
PROCESSES
MIG (GMAW).
DESCRIPTION
CV
CONSTANT VOLTAGE OUTPUT (CV).
DC
DIRECT CURRENT OUTPUT (DC).
3
THREE PHASES.
Phase
VISIT OUR W EBSITE AT: www.comparcwelders.ca
GIVE THIS MANUALTO THE OPERATOR
OWNER´S MANUAL
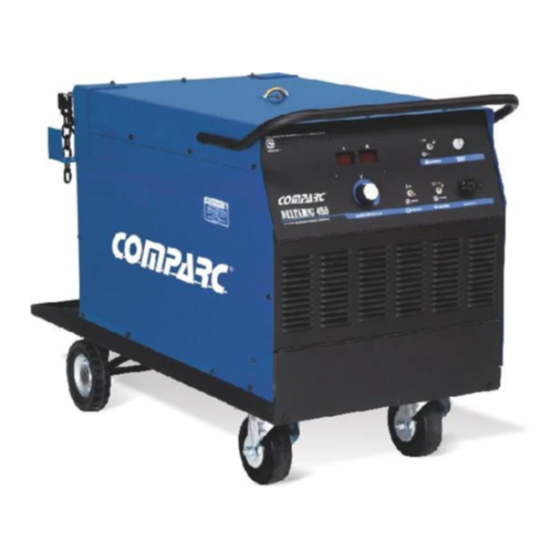
DELTA MIG 455
ARC WELDING POWER SOURCE
OWNER´S MANUAL
T M
PM1327 REV. 0
E: 21-01-2021
302-573
Advertisement
Table of Contents
Troubleshooting

Related Manuals for Comparc DELTA MIG 455


Summary of Contents for Comparc DELTA MIG 455
- Page 1 PM1327 REV. 0 E: 21-01-2021 OWNER´S MANUAL DELTA MIG 455 ARC WELDING POWER SOURCE PROCESSES MIG (GMAW). DESCRIPTION CONSTANT VOLTAGE OUTPUT (CV). DIRECT CURRENT OUTPUT (DC). THREE PHASES. Phase VISIT OUR W EBSITE AT: www.comparcwelders.ca GIVE THIS MANUALTO THE OPERATOR OWNER´S MANUAL...
-
Page 2: Table Of Contents
TABLE OF CONTENTS ARC WELDING SAFETY PRECAUTIONS ................i SECTION 1 -- SAFETY SIGNAL WORDS ................1 SECTION 2 -- SPECIFICATIONS ..................... 1 2 - 1. Volt-Ampere Curves.......................... 2 2 - 2. Duty Cycle ............................2 SECTION 3 -- INSTALLATION ....................3 3 - 1. -
Page 3: Arc Welding Safety Precautions
ARC WELDING SAFETY PRECAUTIONS ARC WELDING can be hazardous. WARNING PROTECT YOURSELF AND OTHERS FROM POSSIBLE SERIOUS INJURY OR DEATH. KEEP CHILDREN AWAY. PACEMAKER WEARERS KEEP AWAY UNTIL CONSULTING YOUR DOCTOR. In welding, as in most jobs, exposure to certain hazards occurs. Welding is safe when precautions are taken. The safety information given below is only a summary of the more complete safety information that will be found in the Safety Standards. - Page 4 FLYING SPARK AND HOT METAL can 1.- Wear approved face shield or safety goggles. Side shields recommended. cause injury 2.- Wear proper body protection to protect skin. Chipping and grinding cause flying metal . As welds cool, they can throw off slag. CYLINDERS can explode if damaged.
-
Page 5: Section 1 - Safety Signal Words
SECTION 1 - SAFETY SIGNAL WORDS The following safety alert symbol and signal words are used throughout this manual to call attention to and identify different levels of hazard and special instructions. WARNING statements identify procedures or practices which must be followed to WARNING avoid seriuos personal injury or loss of life. -
Page 6: Volt-Ampere Curves
2-1 VOLT-AMPERE CURVES. The volt-ampere curves show the minimum and maximum voltage and amperage output capabilities of the welding power source. Curves of other settings fall between the curves shown. GMAW MAX. FCAW MIN. CD AMPERES 2-2 DUTY CYCLE. CAUTION EXCEEDING DUTY CYCLE CAN DAMAGE UNIT OR GUN TORCH AND VOID WARRANTY. -
Page 7: Section 3 - Installation
SECTION 3 - INSTALLATION CAUTION SEE SAFETY SIGNAL AT THE BEGINING THIS M ANUAL GMAW Gun 14 Pins -Solid Wire Weld Connection (GMAW); Wire Power Source Feeder Reverse Polarity (Electrode Positive.) Work Piece GMAW Gun -Flux cored weld connection(FCAW); Straight 14 Pins Wire Polarity (Electrode Negative.) -
Page 8: Installing Support For Mig Gun
3-3 INSTALLING SUPPORT FOR MIG GUN. To place the support for MIG gun on welding power source, follow instructions bellow. Remove two screws (1/4" x 1/2" ) in cover (2) and side deckl (3) as shown in f igure. Place the support on the cover (1) and beside deck (2) as shown in f igure. Ensure the support (1) with screws (1/4"... -
Page 9: Selecting And Preparing Weld Output Cables
3-4 SELECTING AND PREPARING WELD OUTPUT CABLES. 1.- Weld circuit cable. To select weld cable size, proceed as follows a)- Calculate total cable length in weld circuit b)- Determine maximum welding current and duty cycle. To wire feeder. c)- Use table 3-1 to select proper cable size. 10 ft (3m) 2.- Terminal lug. -
Page 10: Shielded Gas Connections
3-6 SHIELDED GAS CONNECTIONS. WARNING SEE SAFETY SIGNALS AT THE BEGINING THIS MANUAL Be sure gas cylinder is held to running gear, wall, or other stationary support so cylinder can not fall and break off valve. 1.- CAP. 2.- CYLINDER VALVE. Remove cap, stand to side of valve, and open valve slightly. -
Page 11: Weld Output Terminals
3-8 WELD OUTPUT TERMINALS WARNING ELECTRICK SHOCK can kill. 1- Access door. 2- Positive Terminal (+), High Inductance. Use this terminal for MIG STAINLESS STEEL WELDING. 3- Positive Terminal (+), Low Inductance. Use this terminal for most wire feeding GMAW process (FCAW and SAW ). However, since usage and application vary. -
Page 12: Section - 4 Operation
SECTION - 4 OPERATION SEE SAFETY SIGNALS AT THE CAUTION BEGINING THIS MANUAL 4-1 LOCATION OF CONTROLS IN WELDING POWER SOURCE. 1- ''POWER'' Switch. ON - OFF 2- ''V CONTROL'' Switch. PANEL - REMOTE. 3- ''OUTPUT'' Switch. ON-REMOTE. 4- ''VOLTAGE ADJUSTMENT'' Control. Turn clockwise to increase voltage. -
Page 13: Voltage Adjustment Control
''VOLTAGE ADJUSTMENT'' CONTROL * VOLTAGE ADJUSTMENT control. To increase arc voltage output, turn control clockwise. Voltmeter value changes as control is turned. W hile welding this control can be adjusted. VOLTAGE ADJUSTMENT Figure 4-5. ''VOLTAGE ADJUST'' 4-6 DIGITAL METERS. DIGITAL VOLTMETER AND AMMETER. W hith "contactor off". -
Page 14: Operation Sequence For Gmaw, Fcaw, Saw And Cac-A
CAUTION Breathing welding fumes can be hazardous to your health. 4-8 OPERATION SEQUENCE FOR GMAW, FCAW, SAW AND CAC-A. 1.- Cylinder. 2.- Cylinder valve. 3.- Gun torch trigger. Before welding open cylinder valve, to activate the trigger the arc welding is started. Finishing welding shut the cylinder valve. -
Page 15: Section 5 -- Maintenance And Troubleshooting
SECTION - 5 MAINTENANCE &TROUBLESHOOTING WARNING SEE SAFETY SIGNAL AT THE BEGINING THIS M ANUAL 5-1 ROUTINE MAINTENANCE TIME MAINTENANCE Above normal equipment use: Check all labels ( see 6 month entry ), repair any damaged Every month insulation or replace holder or work cable, clean internal parts ( see 6 month entry ), clean and tighten connections at holder cable and work clamp. -
Page 16: Overload Protection
OVERLOAD PROTECTION. Disconnet unit before inspection. 1.- CIRCUIT BREAKER CB1 (10 AMP). Protect the 120 V c.a. cicuit for overload. ''Presss button to reset breaker'' 2.-CIRCUIT BREAKER CB2 (10 AMP). Protect the 24 V c.a. cicuit for overload. ''Presss button to reset breaker'' 3.- Fuse f1 (5 AMP) Protect at control transformer from overload, if F1 open, fan motor and output unit stops. - Page 17 PROBLEM REMEDY No weld output, wire feed is Connect the work clamp for assure electric contact working. Consult your dealer or Service Center to review the connections and when necessary the electronic board. Low weld output current. Be sure jumper links is in position according voltage available at site.. Adjust the control voltage according application.
-
Page 18: Section - 6 Electrical Diagram
SECTION - 6 ELECTRICAL DIAGRAM Figure 6-1 Electrical Diagram... -
Page 19: Section 7 -- Parts List
SECTION - 7 PARTS LIST 7-1 MAIN ASSEMBLY Item Quantity I.D. D e s c r i p t i o n Part No. PC0145 Safety chain PC0990 Cover, top PM0347 Handlebars PS0881 Support for cylinder PS1027 Sopport for MIG gun. PT3620 Panel, left side PT3621... -
Page 20: Main Assembly
18 17 5 16 Figure 7-1 Main assembly. -
Page 21: Rectifier Assembly
7- 2 RECTIFIER ASSEMBLY REF. Part No. D E S C R I P T I O N Quantity PP3780 Heatsink intermediate large PP3781 Heatsink intermediate small Heatsink for AC PP3783 Heatsink, connection left PP3783 PP3782 Heatsink, connection right PP3779 Headsink outside Stud threadeds positive-negative PB1962... - Page 22 CROSSFIRE ® LIMITED WARRANTY Effective April 14, 2018 (This limited warranty supercedes all prior warranties and is exclusive with no other warranties or garuntees implied.) This warranty applies to the original purchaser and is 6. Voiding Warranty subject to the terms and conditions listed below. This The limited warranty is void if the Crossfire product has Limited Warranty is for new equipment sold after the been repaired, changed, or modified by anyone other then...
- Page 23 NOTES...
- Page 24 SERVICE CENTER MAP CANADA LTD 325 Healey Road, Unit 1, Bolton, ON L7E 5C1 Canada Phone: (905) 951-2788 Toll Free: (800) 757-4445 Fax: (905) 951-6256...
Need help?
Do you have a question about the DELTA MIG 455 and is the answer not in the manual?
Questions and answers