Advertisement
Quick Links
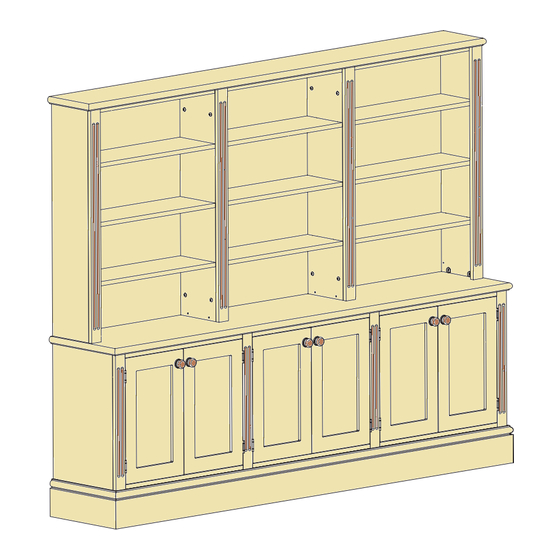
Dresser – Multi
Assembly Instructions
•
Take great care handling and lifting parcels
•
Open parcels with care to avoid damage
•
Check the label to see the contents of each parcel
•
If you have ordered several items, keep it simple: only unpack one item at a time
•
Use the the Parts Diagram sheet to identify and distinguish between parts
•
Any questions: call us on 01227 833333, or email sales@jali.co.uk
YOU WILL NEED
5mm Pozi
Power Drill +
Screwdriver
2mm Drill Bit
& Pozi Drive
FIXINGS INCLUDED
Plus Door Handles with Bolts as required
White Cam
Nickel Cam
25mm WSH
20mm PAN
Screw
Adjustable
Foot Plate
Foot
Assembly Instructions: Multi Section Dresser
EXTRA
•
•
•
Cam Bolt
16mm CSK
Screw
Screw
Magnetic
Catch
You must fix your product safely in place. Depending
on your situation, you may choose to use a drill,
suitable screws and wall plugs
You may wish to use Wood Glue to fix skirting in place
To ensure a perfect fit with your room skirting board,
you may use a saw to scribe the relevant parts during
assembly
45mm CSK
Screw
16mm PAN
Screw
Magnetic
Catch Plate
30mm CSK
25mm CSK
Screw
Dowel
Connector
in some cases
Page 1 of 11
Screw
Hinge
Advertisement

Related Manuals for jali Dresser-Multi


Summary of Contents for jali Dresser-Multi
- Page 1 If you have ordered several items, keep it simple: only unpack one item at a time • Use the the Parts Diagram sheet to identify and distinguish between parts • Any questions: call us on 01227 833333, or email sales@jali.co.uk YOU WILL NEED EXTRA •...
- Page 2 HOW DO CAM & BOLTS WORK? 1. Screw in the Cam Bolt, up to 3. Push the two parts together, the shoulder, into the 5mm hole so that the Cam Bolts disappear in one part. into the middle of the Cams. 2.
- Page 3 Here’s just the example lower section in more detail. Each box is made up of a Box Top, Box Base, Box Back, LH Side, RH Side and Valance. Look out for engravings to help identify parts. Depending on your design, boxes may feature Shelves, Dividers and/or Doors. Refer to the Parts Diagram to confirm this arrangement.
- Page 4 2. For all the remaining Box Sides use White Cams instead, as they will be hidden. Place the White Cams in all the available holes, facing outwards. Attach the Adjustable Feet using the Foot Plate and 20mm PAN Screws for each assembly. However, you should pilot drill these first to avoid splitting the wood.
-
Page 5: Box Assembly
6. Place White Cams in the Box Base, Box Top and Valance cam holes. Depending on your design, the Valance strip could be taller than this example. Screw Cam Bolts into the 5mm holes along the Box Base front edge. Leave the 6mm Box Top holes for now. Cam Bolt White Cam Valance... - Page 6 8. Once the Shelves and the Box Base are Fit 45mm CSK Screws through the 4mm holes placed in the RH Side, the LH Side can be (in the RH Side) into the Box Top, Box Base and located. Ensure that the Shelves with cams Shelves with cams align with the Cam Bolts in the LH Side, and lock these into place.
- Page 7 11. Carefully stand the boxes up and position them adjacent to each other in the correct order. If they are too large to do safely, you’ll Fix with need to enlist some help. Adjust Connecting Screws the feet height as necessary to bring the boxes in line with each other.
- Page 8 13. Locate the Countertop to the Box Tops using Dowels. It can be glued into place, screwed into place with 45mm CSK Screws from beneath, or left as is. For exceptionally wide units the Countertop and Skirting may be supplied in several lengths. Fit Cam Bolts into the 5mm holes on the Countertop.
- Page 9 Lower Section THE UPPER SECTION The upper section box assembly follows the Box Top LH Side same principles as the lower section, however these boxes do not feature Bases or Valances. 19. Assemble each remaining Shelf box in turn, referring back to the previous steps.
-
Page 10: Final Assembly
Countertop Cam Bolts. 21. Once all boxes are locked in place, the Uprights can be attached as before. As with all Jali products, you must take responsibility for the safety of your furniture. Any tall unit presents a hazard, especially in the presence of children and pets. - Page 11 AND YOU’RE DONE! #jali #dresser #makeityours Assembly Instructions: Multi Section Dresser Page 11 of 11...
Need help?
Do you have a question about the Dresser-Multi and is the answer not in the manual?
Questions and answers