Table of Contents
Advertisement
Quick Links
INTRODUCTION
Thank you for choosing this De'Longhi product. Please take a few
minutes to read these instructions. This will prevent running any
risks or damaging the appliance.
Below you will find all the information necessary for operating
your local air conditioner.
The appliance must be placed where there are no obstacles to
air intake and output.
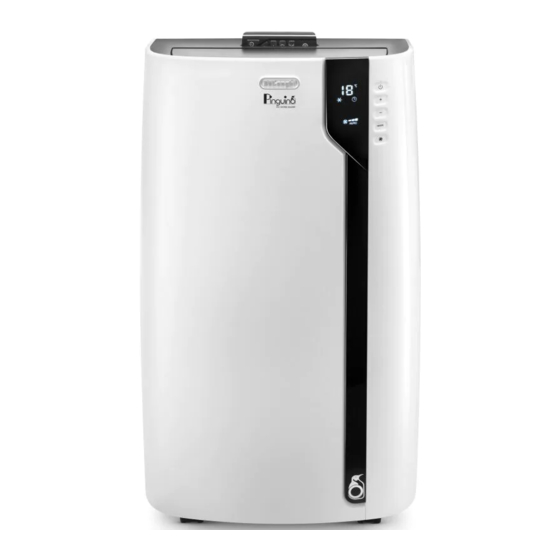
DESCRIPTION
Description of the appliance (See page 3 - A)
A1 Air outlet grille
A2 Control panel
A3 Handles
A4 Wheels
A5 Filter
A6 Air intake grille
A7 Air exhaust hose housing
A8 Air intake grille
A9 Power supply cable
A10 Drainage hose with cap
A11 Remote control signal receiver
Description of accessories (See page 3 - B)
B1 Wall flange with cap
B2 Air exhaust hose
B3 Hose adapter (2 pieces)
B4 Wall mounting accessory
B5 Crosspiece grille
B6 Cap for crosspiece hole
B7 Crosspiece
B8 Screws
B9 Window outlet
B10 Remote control
Electrical Connection
Before plugging into the mains, check the following:
•
the mains voltage is the same as that indicated on the plate
on the back of the appliance;
•
the socket and electrical line are sized to support the load
required;
•
the socket is the proper type for the plug, otherwise, re-
place the socket;
•
the socket is connected to an efficient earthing system. The
manufacturer is not responsible in the event of non-com-
pliance with these injury prevention standards.
•
The power cable must only be replaced by special-
ised technicians.
USE
The instructions below will enable you to prepare your air con-
ditioner for operation as efficiently as possible. Before use, make
sure the air intake and outlet grilles are unobstructed.
Please note: This appliance is provided with an auto-evapora-
tion feature for condensate removal during cooling and dehu-
midifying modes.
AIR CONDITIONING WITHOUT INSTALLATION
Just a few simple steps and your local air conditioner will ensure
your comfort:
Screw a hose adapter B3 to one end of the air exhaust hose
•
B2.
•
Fit the other adapter B3 in the air exhaust hose housing A7
on the back of the appliance (see fig. 1).
•
Screw the end of the hose without an adaptor to the adap-
tor previously attached to the appliance (see fig. 1).
Sash window
•
Fit the crosspiece grille B5 to the crosspiece B7 and attach
it using the 4 screws provided B8 (fig. 2).
•
Open the window.
Put the crosspiece B7 in the window, extending it the en-
•
tire width of the window (fig. 3).
•
Once the crosspiece has been extended, it can be attached
by screwing in the remaining two screws provided.
•
Lower the window (fig. 4).
•
Set the local air conditioner near the window. Insert the air
exhaust hose B2 previously assembled in the grille on the
crosspiece B7 (fig. 5). Make sure the air exhaust hose is not
obstructed.
•
When not using the appliance, the crosspiece hole can be
covered with the cap B6 provided.
Double casement window
Apply the window outlet B9 to the air exhaust hose B2 that
•
was previously assembled, as shown in fig. 6.
•
Open the window or French door slightly and set the outlet
B9 in place as shown in figure 7.
Limit the length and curves of the air hose as much as
possible, avoiding any obstruction.
14
Advertisement
Table of Contents

Related Manuals for DeLonghi Pinguino PACEX100SILENT


Summary of Contents for DeLonghi Pinguino PACEX100SILENT
- Page 1 INTRODUCTION Thank you for choosing this De’Longhi product. Please take a few The instructions below will enable you to prepare your air con- minutes to read these instructions. This will prevent running any ditioner for operation as efficiently as possible. Before use, make risks or damaging the appliance.
-
Page 2: Air Conditioning With Installation
AIR CONDITIONING WITH INSTALLATION CONTROL PANEL (page. 4 - C) If desired, your appliance can also be installed semi-permanent- CONTROL PANEL DESCRIPTIONS ly following the distances shown in the figure 8. C1 ON/STAND-BY (on/off) key In this case, the following steps are necessary: C2 Function selection key MODE (air conditioner, •... - Page 3 FUNCTIONS AVAILABLE FROM THE REMOTE CONTROL • Select the desired fan speed by touching the key. ONLY The speeds available are: (See page 4 - D) Minimum speed: when maximum ECO REAL FEEL FUNCTION (fig. 16) silent opera tion is desired. ECO REAL FEEL is the innovative De’Longhi technology that Medium speed: when the noise works simultaneously on temperature reduction and humidity...
-
Page 4: Operation Using The Remote Control
OPERATION USING THE REMOTE CONTROL • In particularly severe environmental conditions (large size of the environment, high temperature or humidity outside, (See page 4 - D) poor insulation of the room, too many of people or strong • Aim the remote control at the receiver (A11) on the local air heat load in the room, strong exposure to the sun ...) this conditioner. -
Page 5: Turning The Appliance On And Off
TURNING THE APPLIANCE ON AND OFF CLEANING THE APPLIANCE • Insert the plug in the socket. We suggest cleaning the appliance with a damp cloth and then drying it. • Press the (D1) button on the remote control (when For safety reasons, do not wash the local air conditioner with the local air conditioner is turned on, the last function set water. -
Page 6: Technical Specifications
TECHNICAL SPECIFICATIONS TO AVOID DAMAGE TO THE UNIT: Attention! NEVER TRANSPORT OR TURN THE APPLIANCE UPSIDE DOWN OR Power supply voltage see rating label ON ITS SIDE. IF THIS OCCURS, WAIT 6 HOURS BEFORE TURNING Max. absorbed power THE APPLIANCE ON, 24 HOURS IS RECOMMENDED. After the unit during air conditioning “... -
Page 7: Troubleshooting
TROUBLESHOOTING Check the following points before calling the authorised Technical Service Centre in your area. PROBLEMS CAUSES SOLUTIONS The local air conditioner does not turn on lt is not plugged in plug it in there is no power wait the internal protection device was call the help centre triggere The local air conditioner works for a...
Need help?
Do you have a question about the Pinguino PACEX100SILENT and is the answer not in the manual?
Questions and answers