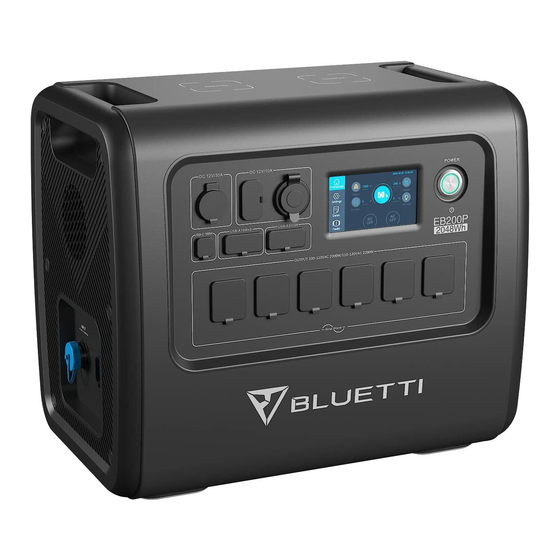
Summary of Contents for Bluetti EB200P
- Page 1 Please read this manual before use and follow its guidance. Keep this manual for future reference.
- Page 2 Please read this manual before use and follow its guidance. Keep this manual for future reference.
-
Page 3: Table Of Contents
CONTENTS 1. BRIEF INTRODUCTION…………………………………......……… 01 2. ABBREVIATION…………………………………………........01 3. SAFETY INSTRUCTION ………………………......………………01 4. IN THE BOX…………………………………..........………02 5. FUNCTIONS………………………………...........………… 04 6. LET`S GET STARTED…………………………......……………… 05 7. TOUCHSCREEN OPERATION…………… …………....………………05 8. CHARGIN G …………………...………..…..........………08 9. DISCHARGING……………………………..………........…… 11 10. APPLICATION SCENARIO ………………………....……………..11 11. EXAMPLES OF LOADS ………………..………......……………… 11 12. -
Page 4: Brief Introduction
1.BRIEF INTRODUCTION The EB200P features continuous output power at 2,200W from the pure sine wave inverter and a built-in unique 30A NEMA TT-30 receptacle designed for the RV,and 100W PD3.0 USB-C port, 900W MPPT controller are all integrated. 2.ABBREVIATION be automatically turned off if the load on it is less than 50W over a span of 4 hours. -
Page 5: In The Box
PV Charging Cable (XT90 - MC4) 1PCS For solar charging, up to 15A,900W. Car Charging Cable 1PCS (XT90 - Cigarette Lighter Port) Charge EB200P by car. Multi-functional Aviation Cable (XT90 - Aviation) 1PCS Expand the charging methods via PV input port. User Manual 1PCS Please read the manual before use and follow its guidance, keep this manual for future reference. - Page 6 Optional Accessories Picture Category Type Lead-acid Battery Charging Clamp Charging EB200P through lead-acid battery only. Optional DO NOT charge the lead-acid battery via this cable. Input Multi-functional Input Cable Cable (XT90 - DC7909) Expand the charging methods via AC input port.
-
Page 7: Functions
Traditional ports for routers/cameras, old Place your phone(if wireless charging laptop etc. supported) on the top of the EB200P vertically, and turn on the DC in mainpage on screen. DC 12V/30A output Special 30A output port can be adapted to Touchable interaction LCD display appliances widely,perfect for RV. -
Page 8: Let`s Get Started
6. LET`S GET STARTED (1) Startup: short press the power button, the indicator light is on, and the machine is in standby mode. (2) Shutdown: press and hold the power button for more than 2 seconds, and the indicator light will be off and the machine shut off. The LED indicator lamp status warning BMS Over current or short circuit protection Turn off after the indicator light flashes... - Page 9 EU output: 230V/50Hz UK output: 230V/50Hz DC Input Source: Select the right method you choose to charge EB200P. ECO Mode: While it`s on, the AC output ports will be automatically turned off if the load on it is less than 50W over 4 hours.
- Page 10 Tap the “BMS Maintenance” icon to view the status of battery, and it can also be accessed directly from the shortcut icon in the mainpage; Tap the “Fault History” icon, all the fault information generated by the EB200P in daily use.
-
Page 11: Charging
8. CHARGING (1) From AC Wall outlet Turn EB200P ON and connect the plug of adapter to the wall outlet, the other side to AC input port. Charging will automatically stop when it reaches 100% (4.6-5.1Hrs). AC socket AC-DC adapter (2) From the solar panels Connect the solar panels(in series or parallel) with Open Circuit Voltage range 10V-145V. - Page 12 (3) Car Charging Press the power button and connect it to the cigarette lighter port through the car charging cable. Enter the setting interface as shown in (Figure2) through the display screen to set DC input source to car mode; The product can be charged with 8.2A maximum current.
- Page 13 (6) Dual Charging Set the DC input source to PV to achieve AC + PV Dual Charging Set the DC input source to others to achieve AC + T500/Lead-Acid Battery Charging. - 10 -...
-
Page 14: Discharging
9. DISCHARGING 10. APPLICATION SCENARIO 11. EXAMPLES OF LOADS - 11 -... -
Page 15: Estimation Of Operating Time
12. ESTIMATION OF OPERATING TIME Television Smartphone LED Light Bulb 165-200Times Around 75-85hrs Around 21-23hrs Electronic Tools Refrigerator Slow Cooker Around 7-9hrs Around 17-19hrs Around 19-21hrs 200W - 12 -... -
Page 16: Technical Specifications
13. TECHNICAL SPECIFICATIONS Charging Discharge Working Dimensions Working Temperature Temperature Humidity Noise 5-12VDC, 5VDC,3A 15W Total 18Wx2 AC-DC Adapter Solar Charging Car Charging Battery Charging 58.8VDC,8A 10V-145VDC/15A 11-28.8VDC/8.2A - 13 -... -
Page 17: Troubleshootings
14. TROUBLESHOOTINGS - 14 -... -
Page 18: Faq (Frequently Asked Questions)
15. FAQ (Frequently Asked Questions) - 15 -... -
Page 19: Declaration
16. DECLARATION - 16 -... - Page 20 Company: Address: Mail: Company: Address: Mail: P/N:17.0303.0375-00A0...


Need help?
Do you have a question about the EB200P and is the answer not in the manual?
Questions and answers