
Related Manuals for Andover Controls ACX 780


Summary of Contents for Andover Controls ACX 780
- Page 1 ACX 780/781 Installation Guide ACX 780/781 Installation Guide Technical Manuals Online! - http://www.tech-man.com firealarmresources.com...
- Page 2 Andover Controls Corporation. Produced in the United States of America. Infinity is a trademark of Andover Controls Corporation. All other trademarks are the prop- erty of their respective owners. ACX 780/781 Installation & User's Guide, Version: F, February 1998...
- Page 3 Preface The ACX 780/781 Installation Guide presents instructions for installing the ACX 780 and ACX 781 access controllers on an Infinet network. It first presents site prep- aration information and then step-by-step installation instructions. ACX 780/781 Installation Guide Technical Manuals Online! - http://www.tech-man.com...
- Page 4 Andover Controls Corporation Technical Manuals Online! - http://www.tech-man.com firealarmresources.com...
-
Page 5: Table Of Contents
Parts Required .......................... 10 Mounting ..........................10 Connecting the AC Power Cable to the Power Supply ............14 Wiring the Infinet to the ACX 780/781 ..................15 Wiring the Infinet to the Infinity CX 9000 or 9200 ..............16 Wiring Inputs..........................18 Supervisory Input Circuits ....................... - Page 6 Figures Figure 1. Dimensions/Location of Mounting Holes and Knockouts in Cabinet, in inches (mm)..................11 Figure 2. Inside the ACX 780/781................13 Figure 3. Metal Plate and Screw for Power Supply Wire...........14 Figure 4. Infinet Cable Wiring ..................15 Figure 5. Attaching the Infinet Cable to Infinity CX 9000 or 9200 ......16 Figure 6.
-
Page 7: Setting Up The Acx 780/781 Controller And Infinet
Setting Up the ACX 780/781 Controller and Infinet The ACX 780/781 is a building access controller that can control access to up to eight doors. For each door, you may control access with either Wiegand or ABA card readers, which read access cards, or security keypads, which accept access codes. -
Page 8: Site/System Setup Requirements
Le présent appareil numérique n’émet pas de bruits radioélectriques dépassant les limites applicables aux appareils numériques de la class A prescrites dans le Règlement sur le brouillage radioélectrique édicté par le ministère des Communications du Canada. Andover Controls Corporation Technical Manuals Online! - http://www.tech-man.com firealarmresources.com... -
Page 9: Controller Dimensions And Weight
Hardware Installation Controller Dimensions and Weight Each ACX 780/781 is 26 × 19 × 6 in. (660 × 483 × 152 mm) and weighs 40 lbs (18.2 kg). Power Requirements Caution The ACX 780/781 should receive power from its own independent, unswitched circuit. -
Page 10: Lightning Protection
Andover Controls # 01-2100-299. Building Ground Requirements Warning Be sure that all Infinity products from Andover Controls Corporation are grounded to true earth ground. This kind of ground protects the equipment from transients and other power surges in the area. -
Page 11: Inspecting The Ground
• Is connected using a small gauge wire thinner than 14 AWG (16 or 18AWG, for example, or less than 2.5 mm 2 ). 2. Be sure your Andover Controls cabinet is connected to the ground with a copper conductor that terminates at the distribution panel. -
Page 12: Special Wire For Card Reader Inputs
(1.0 mm 2 ) (0.35 mm 2 ) Sensor Engineering * 500 ft (152 m) 200 ft (60 m) Proximity (12V at ACX 780) 250 ft (76 m) 100 ft (30 m) Proximity (12V at Reader) 500 ft (152 m) -
Page 13: Special Wire For Keypad Inputs
You can extend the length of this cable up to 500 ft. Output Requirements Each ACX 780/781 has the following outputs: • Eight door outputs that control a door through card reader or keypad access. Each output is a Form C door latch relay rated at 120 VAC/ 30 VDC, 5 A maximum. -
Page 14: Input Requirements
Hardware Installation Input Requirements Caution Andover Controls inputs are designed to be used with the specified card readers, two-wire door switches, two-wire motion sensors, and other two-wire input devices; they do not provide sufficient power to operate sensors requiring an external power supply of 12 or 24 VAC/DC. -
Page 15: Laying Out The Site Setup
• Location of the controller. • Serial number. • Model name and number. • Communications port the Infinet connects to on the ACX 780/781 controller. Then collect the tags. You will need to know where your controllers are located when you later assign a name to each controller and each input and output. -
Page 16: Installing The Acx 780/781
Caution You must keep the ACX 780/781 in the UL listed enclosure provided. 1. Before you begin, open the front door of the ACX 780 cabinet. Figure 1 shows the dimensions (in inches) of the UL listed cabinet that Andover Controls provides and the location of the mounting screw holes. -
Page 17: Figure 1. Dimensions/Location Of Mounting Holes And Knockouts In Cabinet, In Inches (Mm)
.64 (16) 17.00 (432) 1.00 (25) 1.52 1.65 Dia (39) (412) 2.40 (61) × × Knockout 1.39 (34) 9 Places for a 1 1/4 NPT 16.25 (413) 1.37 (35) 19.00 (483) ACX 780/781 Installation Guide Technical Manuals Online! - http://www.tech-man.com firealarmresources.com... - Page 18 Hardware Installation Caution Never drill holes in the ACX 780/781 cover or boards. A metal shaving could easily short circuit the electronics. 2. Position two standard No. 8 screws for the precut eyelets in the cabinet or backplate, and hang the cabinet or backplate on the screws.
-
Page 19: Figure 2. Inside The Acx 780/781
SCAN OVERRIDE RESET OUTPUTS ERROR INFINET NO SRV OUTPUT 1 AUTO — +24V SHLD +15V -15V OUTPUT 2 SERVICE AUTO AC PWR PORT ACX78X OUTPUT 3 AUTO IN10 IN11 OUTPUT 4 WARNING HIGH VOLTAGE PRESENT DISCONNECT AUTO IN12 POWER PRIOR TO SERVICING IN13 OUTPUT 5 IN14... -
Page 20: Connecting The Ac Power Cable To The Power Supply
Figure 3. Metal Plate and Screw for Power Supply Wire Metal Plate Insert Wire Here 3. Place the neutral wire under the metal plate behind the screw labeled NEU. Andover Controls Corporation Technical Manuals Online! - http://www.tech-man.com firealarmresources.com... -
Page 21: Wiring The Infinet To The Acx 780/781
Class A FCC limits and to ensure reliable communications. Figure 4 illustrates how to wire the Infinet cable to the removable terminal block connector in the upper left corner of the ACX 780/781. Figure 4. Infinet Cable Wiring Infinet Connection –... -
Page 22: Wiring The Infinet To The Infinity Cx 9000 Or 9200
COMM1 or COMM2, the RS-232 port for COMM1 or COMM2 is disabled. On a 9200, you can also select COMM4. 4. Trim back the shield over the wires. Andover Controls Corporation Technical Manuals Online! - http://www.tech-man.com firealarmresources.com... - Page 23 –IN and jumper it to the screw labeled –OUT. 8. Tighten both screws to hold the wire there. 9. Slip the shield in under the screw labeled SHLD and tighten the screw to hold it there. ACX 780/781 Installation Guide Technical Manuals Online! - http://www.tech-man.com firealarmresources.com...
-
Page 24: Wiring Inputs
We recommend you run input wiring in a conduit separate from AC power or output wiring and avoid long wiring runs. The “supervisory” inputs are on the left side of the ACX 780/781. Input wires should enter from the left side. Notice that the inputs are labeled RET, IN1, IN2, RET, IN3, IN4, RET, IN5, IN6, and so on, for up to 32 inputs. - Page 25 • Be careful when stripping wire not to drop small pieces of wire inside the cabinet. If you violate any of these rules, the controller could malfunction. ACX 780/781 Installation Guide Technical Manuals Online! - http://www.tech-man.com firealarmresources.com...
-
Page 26: Supervisory Input Circuits
Door Closed SW Closed Door Open SW Open SW Shorted Zero K Wire Cut Infinite This configuration is the best choice; the parallel and series resistors provide a redundant security feature. Andover Controls Corporation Technical Manuals Online! - http://www.tech-man.com firealarmresources.com... -
Page 27: Figure 7. Normally Open Supervisory Inputs
We recommend NO Parallel and NO Series and Parallel types for access control installations. The next sections explain how to wire these types of inputs for door switches and motion detectors. ACX 780/781 Installation Guide Technical Manuals Online! - http://www.tech-man.com firealarmresources.com... -
Page 28: Wiring Door Switches
This switch can detect either the switch position, or tampering where the switch is shorted or grounded. We recommend this switch for situations requiring the greatest security. Andover Controls Corporation Technical Manuals Online! - http://www.tech-man.com firealarmresources.com... -
Page 29: Figure 9. Wiring Switch With Built-In Resistor To Doorswitch Input
(normally open). The switch remains open while the door is in a normal state (closed or not tampered with). If the switch detects the door is open or has been tampered with, it appears closed. ACX 780/781 Installation Guide Technical Manuals Online! - http://www.tech-man.com firealarmresources.com... -
Page 30: Wiring Motion Sensors/Exit Push Buttons
VDC (UL listed under APHV). The maximum length wire you may use is 500 ft of #18 gauge wire (152 m of 1.0 mm wire) or 200 ft of #22 gauge wire (60 m of 0.35 mm wire). Andover Controls Corporation Technical Manuals Online! - http://www.tech-man.com firealarmresources.com... -
Page 31: Figure 11. Functioning Of Passive Infrared (Pir) Motion Detector Switch Wired To Supervisory Input
Figure 11. Functioning of Passive Infrared (PIR) Motion Detector Switch Wired to Supervisory Input Normally Open PIR Motion Detector Access Controller No Motion Detected Ω 10 K Normally Open PIR Motion Detector Access Controller Ω 10 K Motion Detected!!! ACX 780/781 Installation Guide Technical Manuals Online! - http://www.tech-man.com firealarmresources.com... -
Page 32: Wiring The Other Two-Wire Inputs
Refer to the earlier sections in this manual. In the case of Proximity card readers, you may connect the required ± VDC power supply at the ACX 780/781 or at the card reader. Andover Controls Corporation Technical Manuals Online! - http://www.tech-man.com firealarmresources.com... -
Page 33: Figure 13. Connections Between Card Reader And Controller
Wiring Wiegand Card Reader (Sensor Engineering) Wire the Sensor Engineering Wiegand card reader to the READER 1 and READER 2 inputs on the lower left side of the ACX 780/781 as follows: 1. Look at the wire connection on your Wiegand card reader. Notice that you have five connection points: •... -
Page 34: Figure 14. Wiring Wiegand Card Reader (Sensor Engineering) To Controller
6. Slip the other end of the brown wire under the LED screw and tighten the screw down on it. Figure 14 illustrates where you connect the various wires. Figure 14. Wiring Wiegand Card Reader (Sensor Engineering) to Controller ACX 780/781 Card Reader +5VDC DATA1... -
Page 35: Figure 15. Connections Between Card Reader And Controller
2. Wire the first end of five wires to the appropriate connection point Figure 15 shows where to connect the various wires on the card reader and the ACX 780/781. Figure 15. Connections Between Card Reader and Controller ACX 780/781 Controller... -
Page 36: Figure 16. Wiring Proximity Wiegand Card Reader To Controller, With 12 Vdc Power Supply
Power Supply 1/DATA 0/CLK SHIELD +12 wire from reader Card Reader ACX 780/781 extension wire (Two wires and shield go to GND) +12 +/-2 VDC Power Supply ± 7. Wire the other end of the +12 wire to the positive terminal of a 12 VDC power supply. -
Page 37: Figure 17. Connections Between Card Reader And Controller
2. Wire the first end of each wire to the appropriate connection point on the card reader. Figure 17 shows where to connect the various wires on the card reader and the ACX 780/781. Figure 17. Connections Between Card Reader and Controller Card Reader... -
Page 38: Figure 18. Wiring Dorado Aba Card Reader To Controller
1/DATA 0/CLK COMMON Card Reader ACX 780/781 8. Tie back the shield as well as any wires you do not use. If you would like to connect a different card reader, contact your An- dover Controls representative. For information on how to assign and program the inputs and outputs, see the Infinity CX or SX 8000 Programmer’s Guide. -
Page 39: Wiring The Keypad Inputs
The remaining two wires for the Essex Keypad are connected as follows: 1. Connect the wire labeled 5VDC POWER (red) to the appropriate +5V Reader terminal. 2. Connect the wire labeled LED (white) to the appropriate LED Read- er terminal. ACX 780/781 Installation Guide Technical Manuals Online! - http://www.tech-man.com firealarmresources.com... -
Page 40: Wiring Outputs
Hardware Installation Wiring Outputs The outputs are on the right side of the ACX 780/781, labeled OUTPUT1, OUTPUT2, OUTPUT3, OUTPUT4, OUTPUT5, OUTPUT6, OUTPUT7, OUTPUT8, and OUTPUT9. All output wires should enter from the right. Wiring the Door Outputs Wire the door and auxiliary outputs as follows: You wire the door outputs like any other Form C output, as follows: 1. -
Page 41: Figure 19. Wiring Diagram For Door And Aux Form C Outputs If Normally Open
This configuration shows a normally deenergized lock (when secured) in a fail secure mode. Always be sure to use “panic” hardware that al- lows emergency exit from the secured area. ACX 780/781 Installation Guide Technical Manuals Online! - http://www.tech-man.com firealarmresources.com... -
Page 42: Figure 20. Wiring Diagram For Door And Aux Form C Outputs If Normally Closed
(UL listed power supply (APHV) for UL listed systems) This configuration shows a normally deenergized lock (when secured) in a fail secure mode. If power loss occurs, the lock circuit opens. Andover Controls Corporation Technical Manuals Online! - http://www.tech-man.com firealarmresources.com... -
Page 43: Powering Up The Acx 780/781
Hardware Installation Powering Up the ACX 780/781 Warning Before powering up the controller, be sure the board is jumpered for the correct input voltage. Before you proceed, be sure the following are correct: 1. Be sure the battery is connected. -
Page 44: Figure 21. Power Supply Status Display
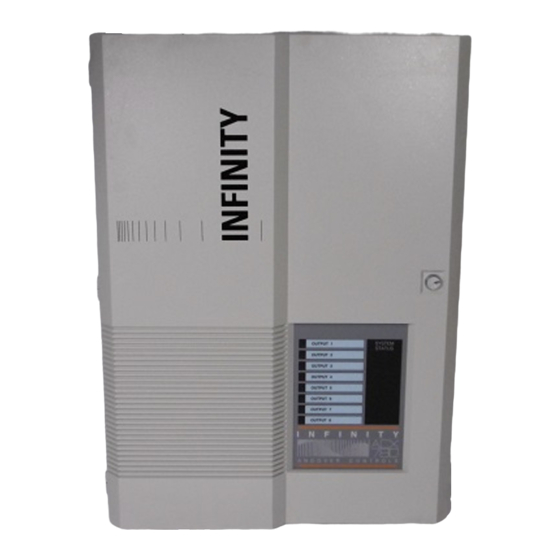
Figure 22. Status Lights on Front Door of Cabinet Provided Status Lights on Cabinet Door That Correspond to Doors Wired to Outputs 1 through 8 ACX780 SCAN ERROR NO SRV Status AC ON OUTPUT9 Andover Controls Corporation Technical Manuals Online! - http://www.tech-man.com firealarmresources.com... -
Page 45: Reset Button
The RESET button is the small button just to the left of the logo on the board (near the top). You press it to restart the controller without eras- ing memory. The same events occur as described above. ACX 780/781 Installation Guide Technical Manuals Online! - http://www.tech-man.com firealarmresources.com... -
Page 46: Connecting Main Batteries
1. Connect the wire to the battery terminal. It is a solderless connection. 2. Be sure to connect the red wire to the positive terminal, the black to the negative. Andover Controls Corporation Technical Manuals Online! - http://www.tech-man.com firealarmresources.com... -
Page 47: Connecting The Andover Controls Service Tool
The SERVICE PORT is on the far left side of the controller just below the Infinet connection. This port is to connect the Andover Controls Service Tool to an ACX 780/781. The service tool accesses all ACX 780/ 781s and other Infinet controllers on the same network. For information on availability of the Andover Controls Service Tool, contact your An- dover Controls representative. - Page 48 Hardware Installation Andover Controls Corporation Technical Manuals Online! - http://www.tech-man.com firealarmresources.com...
- Page 49 Appendix Underwriters Laboratories Requirements This appendix explains all requirements for installing the ACX 780/781 in a UL listed system. ACX 780/781 Installation Guide Technical Manuals Online! - http://www.tech-man.com firealarmresources.com...
- Page 50 UL has not examined the operation of the door switch input, lightning arrestors, keypad input, or the Andover Controls metal oxide varistor with the ACX 780. (For varistors you should use in UL listed systems, consult the UL listings.) UL has not examined connection and operation with the Infinet.
- Page 51 30-3001-392 ACX 780/781 Installation Guide Rev F Technical Manuals Online! - http://www.tech-man.com firealarmresources.com...
Need help?
Do you have a question about the ACX 780 and is the answer not in the manual?
Questions and answers