
Related Manuals for Logicube ZXi-10G


Summary of Contents for Logicube ZXi-10G
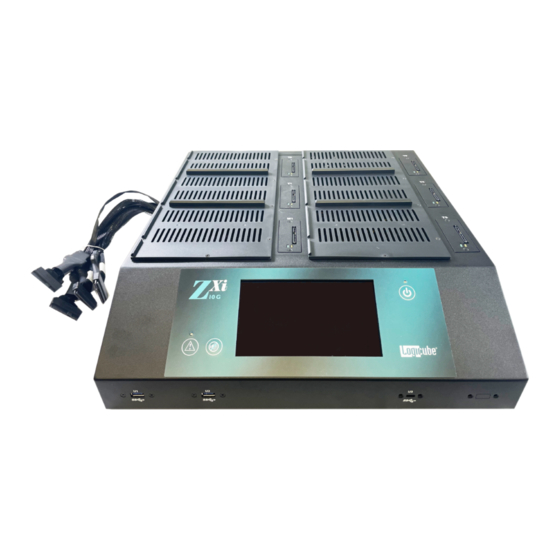
- Page 1 ZXi™-10G User’s Manual Logicube, Inc. Chatsworth, CA 91311 Phone: 818 700 8488 Fax: 818 700 8466 Version: 2.0a Date: 01/27/2022 MAN-ZXi-10G Logicube ZXi-10G™ User Manual...
-
Page 2: Limitation Of Liability And Warranty Information
DELAYS OF BUSINESS, LOSS OF TIME, COSTS OF PROCUREMENT OF SUBSTITUTE GOODS, SERVICES, OR TECHNOLOGY, PROPERTY DAMAGE, OR INDIRECT, CONSEQUENTIAL, OR PUNITIVE DAMAGES OF A PURCHASER OR USER OF LOGICUBE PRODUCTS OR ANY THIRD PARTY. LOGICUBE’S AGGREGATE LIABILITY IN CONTRACT, TORT, OR OTHERWISE... - Page 3 EITHER BE REPAIRED OR REPLACED USING NEW OR REFURBISHED COMPONENTS AT NO COST. THIS WARRANTY IS THE SOLE AND EXCLUSIVE REMEDY FOR DEFECTIVE PRODUCTS. IF A PRODUCT IS HAS BECOME OBSOLETE OR IS NO LONGER SUPPORTED BY LOGICUBE THE PRODUCT MAY BE REPLACED WITH AN EQUIVALENT OR SUCCESSOR PRODUCT AT LOGICUBE’S DISCRETION.
-
Page 4: Rohs Certificate Of Compliance
WARRANTY GIVES YOU SPECIFIC LEGAL RIGHTS, AND YOU MAY HAVE OTHER RIGHTS WHICH VARY FROM JURISDICTION TO JURISDICTION. RoHS Certificate of Compliance LOGICUBE PRODUCTS COMPLY WITH THE EUROPEAN UNION RESTRICTION OF THE USE OF CERTAIN HAZ7ARDOUS SUBSTANCES IN ELECTRONIC EQUIPMENT, ROHS DIRECTIVE (2002/95/EC). -
Page 5: Table Of Contents
ACROS 3.5.1 Step-By-Step Instructions – Task Macro ......................19 3.6 L ......................................21 3.6.1 Step-By-Step Instructions – Viewing or Exporting Logs................21 3.6.2 Viewing and Downloading Log Files from the Web Interface ..............23 3.6.3 Deleting Log Files ..............................23 Logicube ZXi-10G™ User’s Manual... - Page 6 5.3.3 Job Info ..................................44 5.4 W ..................................44 ORMAT 5.4.1 Target ....................................45 5.4.2 Settings ..................................45 5.4.2.1 Secure Erase ................................45 5.4.2.2 Wipe Patterns ..............................46 5.4.2.2.1 Mode ....................................46 5.4.2.2.2 HPA/DCO .................................... 47 5.4.2.2.3 LBA......................................47 5.4.2.2.4 PASSES ....................................47 Logicube ZXi-10G™ User’s Manual...
- Page 7 ..................................72 EQUIREMENTS 6.2 S ..................................72 YSTEM ESTORE 6.2.1 WARNING: Log files will be deleted ........................73 6.2.1.1 Requirements for backing up the log files....................73 6.2.1.2 Backing up the log files ..........................73 6.2.2 System Restore Requirements ..........................75 Logicube ZXi-10G™ User’s Manual...
- Page 8 8.0 H ....................87 ARDWARE AND OFTWARE PTIONS NTRODUCTION 8.1 4-P .............................. 87 RIVE XPANSION 8.1.1 Attaching the Removable ZXi-10G Drive Station ..................87 8.2 PCI ..............................88 XPANSION ODULE 8.2.1 Instructions ...................................89 8.3 H ..............................89 ERIFICATION PTION 8.4 SAS O .....................................
-
Page 9: 1: Introduction
The ZXi™-10G provides the ability, with an optional PCIe Expansion Module to clone up to 16 M.2 NVMe SSDs. The ZXi-10G is the first hard drive duplicator on the market to include two 10 GbE network connections, allowing you to streamline your workflow and clone directly to or from a network repository or a NAS device. - Page 10 Two Thunderbolt™ 4/USB 3.2 Gen 2x2 ports allow users to connect Thunderbolt external • storage enclosures to the available port on the ZXi-10G and clone to/from these solutions Optional 4-Port Drive Expansion Kit provides an additional 2 SAS/SATA and 2 SATA targets for •...
-
Page 11: In The Box
CD-ROM with user’s manual • 1.3 Options The following options are available with the ZXi-10G: • 4-Port Drive Expansion Kit: Provides an additional 2 SATA/SAS and 2 SATA-only drive stations. Includes 4 drive stations, 4 cables, and a drive tray. -
Page 12: Specifications
Avoid dropping the Logicube ZXi-10G or subjecting it to sharp jolts. • When in use, place it on a flat surface. Keep the unit dry. If the ZXi-10G needs to be cleaned, use a lightly • damp, lint free cloth. Avoid using soap or other cleaning agents particularly those containing bleach, ammonia, alcohol or other harsh chemicals. -
Page 13: 2: Getting Started
2: Getting Started 2.0 Overview of the ZXi-10G Special Icons – Throughout this manual, two icons can be seen. Please pay close attention when any of these two icons are found. These icons highlight additional information or important warnings on specific topics. -
Page 14: Turning The Zxi-10G On And Off
ZXi-10G. To turn the ZXi-10G on, turn the power supply switch (located near to the power connector in the back of the ZXi-10G) to the ON position. Press and release the power button on the front of the ZXi-10G. -
Page 15: Connecting Various Drive Types
2.2 Connecting various drive types The ZXi-10G comes standard with SAS/SATA cables. One end of the cable has a male connector that connects to the ZXi-10G. On the other end is a female connector that connects to a drive or Logicube qualified drive adapter. -
Page 16: Drive Bay Leds
Each bay has a drive station that has the following LEDs: • Green LED OFF – The ZXi-10G is not detecting a connection and is not supplying power to that • bay. ON (Solid) – The ZXi-10G is detecting a connection (drive or adapter) and is supplying •... -
Page 17: Touch Screen
H – Start icon 2.5 Touch Screen The ZXi-10G features a 7” color LCD capacitive touch screen that allows the user to quickly input commands. The screen is bright and easy to read. 2.6 Operating System and ZXi-10G Application Software The ZXi-10G has an SSD storage drive that contains the operating system and ZXi-10G software. -
Page 18: 3: Quick Start
Chapter 4: Cloning Chapter 5: Types of Operation. The ZXi-10G can perform up to five (5) tasks for each mode of operation (specifically Image, Hash, and/or Wipe). It is highly recommended to change the passwords for built- in accounts. Instructions on how to change the passwords to... -
Page 19: Ata Security Locked Drives
QUICK START 3.1.1 ATA Security Locked Drives With ZXi-10G software version 2.0 (and newer), drives that are locked with the ATA security standard can be temporarily unlocked. The password used to lock the drive is required to unlock the drive. -
Page 20: Blank Disk Check
3.1.2 Blank Disk Check A blank disk check can be performed to see if a drive has been wiped by the ZXi-10G. This check may not be accurate if Secure Erase was used to wipe the drive. To perform a blank disk check: 1. -
Page 21: Step-By-Step Instructions - Clone
• Master drive. This is also known as a native copy or mirror copy. Image to Drive – Restores an image created by the ZXi-10G to one or more Target drives. • Drive to Image – Creates a Logicube ZXi-10G image file to a Target drive or Repository. This •... -
Page 22: Hash
3.3 Hash A hash or operation can be performed on any connected drive. Performing a hash task will instruct the ZXi-10G to calculate the hash for the specified drive or validate the hash value for that drive. Logicube ZXi-10G™ User’s Manual... -
Page 23: Step-By-Step Instructions - Hash
Address (LBA) based and will hash drives based on the number of LBAs. If multiple drives are selected to be hashed, the ZXi-10G will hash up to the LBA value of the smallest capacity drive. If drives with different capacities need to be hashed, it is recommended to start one task per drive. -
Page 24: Wipe / Format
Drives connected to bays that are configured as Target (or both Master and Target) can be wiped or formatted. Drives to be used as Targets for the “Drive to Image” method must be formatted by the ZXi-10G. The following methods are available in the Wipe/Format menu:... -
Page 25: Step-By-Step Instructions - Wipe / Format
5. Tap the Passes icon to edit the number of passes and what gets written on each pass. 6. If the drive needs to be formatted, tap the Settings icon to change the Format settings then tap the OK icon. Logicube ZXi-10G™ User’s Manual... -
Page 26: Task Macros
Macro that will perform a wipe, then clone, users must first set up both the wipe and clone tasks. Once the wipe (for example, Wipe 1) and clone (for example, Image 1) have been set up, the Task Macro can be set. Logicube ZXi-10G™ User’s Manual... -
Page 27: Step-By-Step Instructions - Task Macro
Choose a task then tap the OK icon to continue. Continue adding operations desired. Each operation added will appear on the list. To delete an operation, tap the X to the right of the operation. Logicube ZXi-10G™ User’s Manual... - Page 28 QUICK START When finished, tap the OK icon. A summary of the macro will be seen: To start the macro and have the ZXi-10G perform all the operations on the task list, tap the Start icon in the Task Macro screen.
-
Page 29: Logs
Audit logs of all clone, hash, and wipe operations are stored and saved on the ZXi- 10G. Logs can be viewed directly on the ZXi-10G or from a computer’s browser (if the ZXi-10G is connected to a network). Logs can be exported to a USB flash drive in PDF, HTML, and XML format. - Page 30 3. The log files will be exported to a USB flash drive. The USB flash drive will need to be connected to one of the USB ports located in the rear panel of the ZXi-10G. The specific USB port is dependent on the I/O ports located in the rear panel of the ZXi-...
-
Page 31: Viewing And Downloading Log Files From The Web Interface
To delete all the log files, tap the Delete All icon. • A log file deletion password can be set to add a layer of security when deleting log files. If a password was set, log files cannot be deleted without entering the correct password. Logicube ZXi-10G™ User’s Manual... -
Page 32: Accessing The Logs Over A Network
5.9.2. 3.6.4 Accessing the Logs Over a Network The log files can also be accessed through a network on a computer if the ZXi-10G is connected to the same network. 1. Open Windows Explorer or a similar window and browse to the hostname or the IP address found in the Statistics screen. -
Page 33: Statistics
Additionally, a QR code can be found on this page. When the QR code is scanned on a device connected to the same network the ZXi-10G is connected to, it will open a web browser to the ZXi-10G’s IP address to access the web interface. -
Page 34: Manage Repositories
Network Interface Stats – Displays the Network Interface statistics (Receive and Transfer • bytes, packets, drops, and errors, and the link status). Debug Logs – Allows the export of debug logs for Logicube technical support purposes. • Help – Contains a QR code linking to the user’s manual. -
Page 35: Software Updates
POWER OFF – The ZXi-10G can be remotely turned off or restarted by going to this tab. Additionally, the ZXi-10G’s screen can be refreshed. DRIVE POWER – Inactive drives connected to the ZXi-10G can be set to go to standby mode in this tab. The default is set to 0 minutes (OFF). -
Page 36: 4: Cloning
Mirror copy of the drive to make sure there is an exact duplicate backup of the Master drive. Logicube cannot provide support on how to re-size, shrink, or move partitions. There are several articles and software/utilities/tools available on the internet on how to re-size, shrink, or move partitions. -
Page 37: Bios, Uefi, Partitioning Schemes, And Sector Sizes
4.0.2 BIOS, UEFI, Partitioning Schemes, and Sector Sizes The ZXi-10G supports the following: BIOS & UEFI – Drives that come from devices that use BIOS or UEFI are supported. -
Page 38: Mirror Copy Limitations
If one of the partitions (file systems) is not supported by Clever Copy, the Logicube device will automatically use Mirror Copy for that partition. Here are some limitations when using the... -
Page 39: Mode
Drive to Drive – Clones one Master drive to one or more Target drives. • Image to Drive – Restores a ZXi-10G created image file to one or more drives. • Drive to Image – Creates an image file from the Master drive. The image file can be written to a •... -
Page 40: Settings
CLONING When Image to Drive mode is selected, the Image File window will list all available drives that may contain ZXi-10G image files. (More Info) icon displays more information on the drive. The drive details window will appear showing information about the drive. -
Page 41: Hpa/Dco
4096 Bytes. As an example, if 4096 Bytes is chosen, and one of the 8 sectors in that cluster size contains a bad sector, the unit will skip the entire cluster (or 4096 bytes or 8 sectors). Logicube ZXi-10G™ User’s Manual... -
Page 42: Hash/Verification Method
Statistics icon from the navigation menu on the left and select the Options tab. To purchase the SAS option, contact our sales team at sales@logicube.com. 4.3.5 File Image Method Settings The File Image Method Settings screen allows the user to select a file image output mode. The output modes available are: Mirror –... -
Page 43: Clone Method Settings
When Drive to Drive or Image to Drive is chosen from the Mode settings, this will show the different drives connected to the ZXi-10G. When Drive to Image is chosen from the Mode settings, this will show the repository screen which contains the different images located on the ZXi-10G’s repository drive. -
Page 44: Selecting Target Drives Or Images
An unformatted drive on T2, T6, and T9 that can be formatted to be used as a • repository to store images (the ZXi-10G can format a drive using EXT4, NTFS, exFAT, or FAT32 for repository purposes) A formatted drive on T1 and U1 that can be used as a repository •... -
Page 45: Starting The Cloning Operation
When finished, the status will show “COMPLETED”. At this point, it is recommended to tap Reset Task to reset the task, so the drive bays properly reset and do not show as being used or assigned for other tasks. Logicube ZXi-10G™ User’s Manual... -
Page 46: 5: Types Of Operations
Drive to Drive – Performs a bit-for-bit copy of the Master producing an exact duplicate • of the Master drive. Image to Drive – Restores an image created by the ZXi-10G to one or more Target • drives. Drive to Image – Creates a Logicube ZXi-10G image file to a Target or Repository. This •... - Page 47 For example, a macro can be set to perform these tasks in order: Wipe then Clone. LOGS – View. Export, or delete logs of each cloning, hash, or wipe/format task that has been performed on the ZXi-10G. STATISTICS – This will display tabs that include: About –...
-
Page 48: Drives
Interfaces – Edit TCP/IP and enable or disable certain network services. • HTTP Proxy – Set proxy settings (if required by the user’s network). • Network Configurations - Change the ZXi-10G’s hostname or NTP servers. • HTTPS – View, select, upload, or generate HTTPS certificates for secure remote •... -
Page 49: Clone
SHA-1, SHA-256, or MD5 5.3.1 Target Tap this icon to select which drive(s) will be hashed. The unit will show all connected Master and Target drives. Tap the drive(s) to be hashed then tap OK. Logicube ZXi-10G™ User’s Manual... -
Page 50: Settings
LBA value of the smallest capacity drive. 5.3.2.1.1 Hash Method Select one of the following hash methods: SHA-1 • SHA-256 • • Logicube ZXi-10G™ User’s Manual... -
Page 51: Hash Values
By default, the length is set to 100% (whole drive), and the starting percentage is set to 0% (start of the drive). Logicube ZXi-10G™ User’s Manual... -
Page 52: Job Info
(up to 7 passes) along with the type of data written for each pass. In addition, a 7-pass DoD wipe can be set with pre-selected pass values. The ZXi-10G can verify each pass value through a setting. Any HPA, DCO, or ACS3 can be unlocked and wiped in these settings. -
Page 53: Target
Secure Erase will send a command to the drive instructing it to reset itself to the specifications the drive manufacturer has set. Additional Information on Secure Erase: For SAS (Serial Attached SCSI) drives, Secure Erase sends a ‘Format’ • command. Logicube ZXi-10G™ User’s Manual... -
Page 54: Wipe Patterns
5.4.2.2.1 Mode Selecting Mode will open the Wipe Mode screen showing the following options: NONE – Choosing this will instruct the unit not to perform a wipe using • Wipe Mode. Logicube ZXi-10G™ User’s Manual... -
Page 55: Hpa/Dco
The default value for a custom pass is 00. Editing one or more of the passes in DOD or CUSTOM mode will bring up this screen: SKIP – Instructs the unit to skip the pass. • Logicube ZXi-10G™ User’s Manual... -
Page 56: Format
When set to OFF, the Target drive will not be formatted. File System – Select the file system to be used to format the Target drive. • Users can select from NTFS, EXT4, exFAT, or FAT32. Logicube ZXi-10G™ User’s Manual... -
Page 57: Job Info
To set a macro to perform a Wipe using Secure Erase on T1, immediately followed by performing a Drive to Drive Clone from M1 to the newly wiped (secure erased) T1, the Wipe and Imaging Tasks first need to be set up. Logicube ZXi-10G™ User’s Manual... -
Page 58: Logs
Two files will be exported, “pre” and “post”, capturing S.M.A.R.T. data at the beginning of the task and the end of the task. S.M.A.R.T. logs are located in the smartlogs subfolder and can be retrieved by following the instructions in Section 3.6.4. Logicube ZXi-10G™ User’s Manual... -
Page 59: Statistics
IP address. There is a QR code that can be scanned on a phone or tablet. If the phone or tablet is connected to the same network the ZXi-10G is connected to, it will open a web browser and connect to the IP address or hostname of the ZXi-10G. -
Page 60: Adv. Drive Statistics
The information shown is the raw value tracked by the drive and is not translated. 5.7.3 I/O Ports The I/O Ports tab displays a diagram of the input and output ports located in the back of the ZXi-10G. Logicube ZXi-10G™ User’s Manual... -
Page 61: Options
5.7.4 Options The Options tab displays available software options and which options are installed on the unit. To purchase an option, please contact Logicube Sales: sales@logicube.com. If an option has been purchased but is not showing as installed, please contact Logicube Technical Support: support@logicube.com. -
Page 62: Debug Logs
1. The debug log files will be exported to a USB flash drive. The USB flash drive will need to be connected to one of the USB ports located in the rear panel of the ZXi-10G. The specific USB port is dependent on the I/O ports located in the rear panel of the ZXi- 10G: a. -
Page 63: Help
Scan the QR code from a mobile phone or tablet that has internet access. • To access the Help tab in the System Settings screen, tap the right navigation arrow below the ZXi-10G logo (located on the top-right of the screen): 5.8 Manage Repositories Networked repositories can be added using this operation. -
Page 64: Add/Remove
Tap Add Repository to add a repository. The Add Repository window will appear. Tap Name to set the name of the repository. Tap the OK icon when finished. Logicube ZXi-10G™ User’s Manual... - Page 65 TYPES OF OPERATIONS Tap Drive to select network share to set as a repository. Tap the OK icon when finished. OPTIONAL: Tap Network Source to specify which network interface to use. By default, it is set to “Any”. Logicube ZXi-10G™ User’s Manual...
-
Page 66: Editing Or Deleting/Removing A Repository
To add a repository using the iSCSI protocol, an iSCSI Target must be set up on the remote system. Since networks are configured differently, a Systems Administrator or Network Administrator may be needed to set up the iSCSI protocol. Logicube ZXi-10G™ User’s Manual... - Page 67 4. Optional: Tap Role and input the role for this repository. 5. Tap OK when finished. The screen will go back to the Portals screen. 6. In the Portals screen, tap the iSCSI portal to highlight it, then tap Connect. Logicube ZXi-10G™ User’s Manual...
-
Page 68: System Settings
TYPES OF OPERATIONS 7. The ZXi-10G will attempt to connect to the iSCSI target. If successful, a “connected” screen will appear. Tap OK to continue. Multiple iSCSI connections can be added. To disconnect an iSCSI connection, highlight the portal to disconnect, then tap Disconnect. To edit or delete an iSCSI connection, tap Edit or Delete. -
Page 69: Passwords
Key: Local HTTP – A key can be set to lock the local touch screen on the unit. If this • key is set, a key prompt will appear, and the correct key must be entered before allowing access to the local touch screen. Logicube ZXi-10G™ User’s Manual... -
Page 70: Setting Key Passwords
Drive cloning, the user will be unable to change the mode to Drive to Image but can start the Drive to Drive task. User Account: LOGICUBE – Allows the user to change the logicube local account. • User Account: IT – Allows the user to change the it local account. -
Page 71: Config Lock Notes
Task Macro – A task macro can be started, but no settings can be • changed. Additionally, no new macro can be set or edited without the Config Lock unlock key. Logs – Logs are not affected by Config Lock. • Logicube ZXi-10G™ User’s Manual... -
Page 72: Forgotten Password For Any Keys
Any profiles added by users will appear in this list. The example below shows two databases (the default initial.db and lock.db). The db that shows an asterisk (*) before the name is the current database or configuration loaded each time the unit is turned on. Logicube ZXi-10G™ User’s Manual... -
Page 73: User Account Passwords
• All user account passwords can be changed on this screen. To change the password for either account, tap either the LOGICUBE, IT, or iSCSI button. A screen will appear: 1. Enter the current password. The default password for each account is:... -
Page 74: Language/Time Zone
5.9.3.2 Time Zone The ZXi-10G utilizes NTP (Network Time Protocol). Each time it is connected to a network with internet access, it will automatically check for the correct time using NTP and adjust the time as needed. To set the time zone, tap Time Zone to select the time zone region. -
Page 75: Bay Roles
This tab also allows and enabling or disabling certain network services. To edit the network interface configuration, tap the Ethernet adapter name then tap the Edit Configuration button. There is a PXE button for future use. Logicube ZXi-10G™ User’s Manual... -
Page 76: Configuring A Static Ip Address
LAN3) then tap Edit Configuration. The Edit Network Interface Configuration screen should appear. 2. From the Edit Network Interface Configuration screen, tap the Type box and select STATIC then tap the OK icon. The IP SETTINGS box should now be selectable. Logicube ZXi-10G™ User’s Manual... -
Page 77: Mtu
Tap each network service to be enabled or disabled then tap the Enable or Disable icon. The following services can be disabled (enabled by default): SSH – Disabling this will block Secure Shell (SSH) traffic. • Logicube ZXi-10G™ User’s Manual... -
Page 78: Http Proxy
Username/Password icon to set this information. 5.10.3 Network Configurations The ZXi-10G’s hostname and NTP Server list can be configured in this tab. Changes on this screen take effect immediately. Multiple NTP server entries are separated by a space. For example: ntp-b.nist.gov time.google.com us.pool.ntp.org... -
Page 79: Https
For the latest step-by-step instructions on how to update the software, please read the ZXi-10G Software readme file located on the ZXi-10G Support page on the Logicube website at https://www.logicube.com/knowledgebase/zxi-10g. In-depth information on updating the ZXi-10G software can be found in... -
Page 80: 6: Updating/Loading/Re-Loading Software
To perform the software update/reinstall, one of the following is required: The ZXi-10G connected to a network with Internet access (for updating “FROM NETWORK”), or • The ZXi-10G with your own USB flash drive. The USB flash drive must be formatted FAT32 or • NTFS (for updating “FROM USB DRIVE”) 6.2 System Restore... -
Page 81: Warning: Log Files Will Be Deleted
ZXi-10G boots up properly. If the ZXi-10G does not boot up properly, there is a possibility the log files may be backed up by following the steps in this section. - Page 82 6. On the right side (Remote site), the /var/log/ong_audit directory has all of the log files. Highlight all the files and folders. There are two ways to download the files: a. Right-click the mouse button and select Download, or Logicube ZXi-10G™ User’s Manual...
-
Page 83: System Restore Requirements
Chromium-based Edge web browser to download the files. Internet Explorer does not download *.img files properly. 1. Go to http://updates.logicube.com/ZXi-10G-recovery/. Look for the following two files: The ZXi-10G image file (a file with a *.img extension) • win32diskimager-v1.0.0-binary.zip – An open-source tool used for writing •... - Page 84 6. Click the folder icon to select a disk image. 7. In the folder where the files were downloaded (in step 2), select the restore file and click the Open icon. Note the screenshot below shows a different file name. Logicube ZXi-10G™ User’s Manual...
- Page 85 If it is the correct drive letter, click Yes to continue. If it is showing the wrong drive letter, click No. This will take you back to the previous screen where you can select the correct drive letter (back to step 9). Logicube ZXi-10G™ User’s Manual...
-
Page 86: Using The System Restore Usb Flash Drive
4. Determine which ZXi-10G version you have. a. If the back of the ZXi looks like the following picture, turn the ZXi-10G on and immediately press and hold the F11 key on the keyboard. Keep holding the F11 key down until a boot menu appears. - Page 87 UPDATING THE SOFTWARE AND FIRMWARE b. If the back of the ZXi looks like the following picture, turn the ZXi-10G on and immediately press and hold the F12 key on the keyboard. Keep holding the F12 key down until a boot menu appears.
- Page 88 10. The main System Restore screen will appear. Tap Power Off. 11. A confirmation screen will appear. Tap Yes. 12. The ZXi-10G should gracefully shut down and will turn itself off. The System Restore process should now be complete. Disconnect the USB keyboard and USB System Restore flash drive and turn the ZXi-10G on to make sure it boots properly.
-
Page 89: Updating/Reinstalling The Software
Connect the ZXi-10G to a network with Internet access and turn the ZXi-10G on. 2. From the main menu on the ZXi-10G, tap/click Software Updates on the left side. 3. Select From Network. The ZXi-10G will check for software on Logicube’s server. After a few seconds, one of the following messages will appear: NEWER VERSION AVAILABLE –... -
Page 90: From Usb Drive (Through A Software File Download)
4. From the main menu on the ZXi-10G, tap/click Software Updates on the left side. 5. Select From USB Drive. The ZXi-10G will check for the version of the software on the USB drive. After a few seconds, one of the following messages should appear: SOFTWARE FOUND –... -
Page 91: Firmware Update
UPDATING THE SOFTWARE AND FIRMWARE 6.4 Firmware Update ZXi-10G software releases may contain a firmware update. This section provides instructions on how to check if a firmware update is required, and how to perform the firmware update. After the software is updated/re-installed on the ZXi-10G, tap/click Software Updates on the left side. -
Page 92: 7: Remote Operation
7.2 Command Line Interface (CLI) A CLI or Command Line Interface is also available. This interface has no graphical content and is all command line (text) based and is for advanced users who know command-line functions. This type of Logicube ZXi-10G™ User’s Manual... -
Page 93: Connecting Using Ssh
5. Log in with the username “it” (without the quotes) and the password “it” (without the quotes). A command prompt should appear on the Telnet window. The unit can now be configured or managed through the command-line interface. Logicube ZXi-10G™ User’s Manual... -
Page 94: Zero Configuration Networking (Zeroconf)
(connected through a network cable) directly to a Windows-based computer that is DHCP enabled, both the unit and the Windows-based computer will automatically configure themselves to be seen by each other using TCP/IP with a 169.254.x.x IP address configuration. Logicube ZXi-10G™ User’s Manual... -
Page 95: Hardware And Software Options - Introduction
2. Connect the ZXi-10G drive station to the open port from step 1. When inserted properly, the ZXi-10G drive station should not be protruding or sticking out. 3. Use the two screws set aside from step 1 to tighten and set the ZXi-10G drive station in place. -
Page 96: Pcie Expansion Module
The Logicube PCIe Expansion Module is a hardware option that provides support for up to 8 M.2 NVMe SSDs on the ZXi-10G. Up to two modules can be connected to the ZXi-10G supporting a total of up to 16 M.2 NVMe SSDs This expansion module is only compatible with the ZXi-10G. -
Page 97: Instructions
8.3 Hash Verification Option This option, when activated, allows the ZXi-10G to verify a clone’s hash in one task (during the cloning task) and works with both Mirror or Clever. When this option is purchased, an updated license file will need to be installed/re-installed along with the ZXi-10G software. -
Page 98: 9: Usb Boot Client
9.2 Creating the USB Boot Client Here are the steps to create the USB Boot Client with the software necessary to be bootable, and when used to boot a computer, will allow the ZXi-10G to use the computer’s drive as a Master or Target drive. - Page 99 USB flash drive or use another USB flash drive for this procedure. 5. In the win32diskimager-v1.0.0-binary folder where the files were extracted, run the file Win32DiskImager.exe. The Win32 Disk Imager window will appear. 6. Click the folder icon to select a disk image. Logicube ZXi-10G™ User’s Manual...
- Page 100 8. The Image file should now be seen in the Win32 Disk Imager screen under ‘Image File’. 9. Under ‘Device’, select the drive letter for the USB flash drive that was connected during step 4 then click the Write icon. Logicube ZXi-10G™ User’s Manual...
-
Page 101: Allowing Drives To Be Used As Destination/Target
1. With the USB Boot Client connected to a Windows computer, open File Explorer or Windows Explorer. For these steps, it is helpful to set File Explorer or Windows Explorer to show file extensions. 2. Browse to the ISCS_LIVE flash drive that was just created. Logicube ZXi-10G™ User’s Manual... - Page 102 5. Open the file using a text editor like Notepad or Wordpad. If Windows asks how the file should be opened, select Notepad or Wordpad. 6. Notepad or Wordpad should open and you will see something similar to one of the two images below: Logicube ZXi-10G™ User’s Manual...
-
Page 103: Using The Usb Boot Client
USB flash drive with the Boot Client may not be seen/displayed as a boot option. 2. Connect the ZXi-10G to the same network the computer with the USB Boot Client will be used on (or directly connected to the computer using a network cable). - Page 104 USB BOOT CLIENT 3. Connect the computer (with the USB Boot Client) to the same network the ZXi-10G is connected to. 4. Boot the computer with the USB Boot Client. Please contact the computer manufacturer if you do not know how to change the boot sequence to boot from a USB drive or to find out if the computer supports this function.
-
Page 105: Using The Usb Boot Client Over Different Subnets
SDB, SDC, etc. For example, if there is one drive connected, it will show as I:2.65/SDA. From here you can clone using the ZXi-10G using the normal cloning steps. When using the USB Boot Client, cloning speeds may vary depending on network performance. - Page 106 “Connecting” screen for up to 60 seconds (or longer) depending on network speeds. 7. Once connected, you will see a “CONNECTED” screen appear. The remote device should now be seen on the Logicube device. Logicube ZXi-10G™ User’s Manual...
-
Page 107: 10: Frequently Asked Questions
A. Yes. ZXi-10G can clone Linux partitions using both Mirror mode and Clever Clone mode. Q. Can the ZXi-10G clone a Hierarchical File System (HFS) or the new Apple File System (APFS)? A. Yes, ZXi-10G can clone HFS or APFS using Mirror mode. - Page 108 Q. Can I schedule or automate tasks? A. ZXi-10G features the ability to create up to 5 Tasks Macros. Each macro allows you to set up to 9 operations to be performed sequentially. You can add these operations to a Macro and from the ZXi-10G GUI select the Macro and the ZXi-10G will perform the specified tasks/operations in the sequence you have defined.
-
Page 109: 11: Index
System Settings, 60 Hash/Verification Method, 34 Task Macro, 49 Host Protected Area (HPA), 33 Task Macros, 18 Image, 40 Technical Support, Logicube, III, 101 Imaging, 10, 12, 28 Time Zone, 66 IP Settings Touch Screen, 9 Proxy settings, 67 Types of Operation, 38... -
Page 110: Technical Support Information
The ZXi-10G has been designed to minimize the effects of ESD and if an ESD event occurs the unit may experience a temporary loss of functionality. If this occurs, please power down the ZXi-10G and power it back up, this should clear any temporary loss of functionality.
Need help?
Do you have a question about the ZXi-10G and is the answer not in the manual?
Questions and answers