Table of Contents
Advertisement
Quick Links
Advertisement
Table of Contents

Related Manuals for 360 Systems ImageServer 2000

Summary of Contents for 360 Systems ImageServer 2000
- Page 1 All manuals and user guides at all-guides.com...
- Page 2 For use with Software Version 4.05.370 Image Server 2000 120 Image Server 2000 250 Image Server 2000 400 April 2008 Copyright 2008, 360 Systems All rights reserved Printed in the United States of America 900-105-0007-07 Image Server 2000 UM Page 2...
-
Page 3: Table Of Contents
Product Improvements and Upgrades ........10 Trademarks ................10 Software Copyrights ..............10 Video and Audio Copyright Reminder ........10 Introduction _________________________________________________________ 11 Key Features and Benefits ............14 Applications for 360 Systems Image Servers ......15 Available Models ..............16 Installation___________________________________________________________ 17 Unpacking ................17 Rack Mounting................18 Important Installation Notes.............18 System Cooling ...............18... - Page 4 All manuals and user guides at all-guides.com LTC Time Code Output ............26 Keyboard ................26 Mouse ..................26 Monitor...................26 Power ..................26 Basic Operations______________________________________________________ 27 The Image Server Desktop ............27 Launching the Graphic User Interface ........27 Shutting Down Image Server ...........27 On-Screen Main Menu Bar ............28 System Menu Bar ..............29 The Status Bar .................30 The Transport Channel View ...........31...
- Page 5 All manuals and user guides at all-guides.com Finding Clips Using Wildcards..........53 Finding Clips Using Regular Expressions ........54 USING PLAYLISTS ..............55 The Playlist view ..............56 Creating and Running a Playlist ..........57 Loading a Playlist (FILE>LOAD)..........58 Saving a new Playlist (FILE>SAVE AS)........58 Saving an existing Playlist (FILE>SAVE) ........58 Setting a Start Time for a Playlist ..........58 Stopping a Playlist (STOP) ............58...
- Page 6 All manuals and user guides at all-guides.com Automation Control ___________________________________________________ 79 Remote Serial Control .............79 Configuring the automation interface ........80 Other Automation Options ............81 Tested Automation Controllers..........83 Tested Remote Control Panels and Switchers ......83 Remote Workstation Interface __________________________________________ 84 System Requirements ..............85 About the Remote Workstation Interface ........85 Operations................85 Installation ................86...
- Page 7 All manuals and user guides at all-guides.com Appendix A _________________________________________________________ 111 Connector Specifications ............111 Audio XLR-3 Connector Pinout..........111 Serial Control Connector Pinout ..........111 BNC Connectors ..............112 GPI Connector Pinout ............112 System Board Ports..............114 Appendix B _________________________________________________________ 115 Serial Command Protocols.............115 VDCP Command Table ............115 BVW Serial Command Table ..........117 Odetics®...
-
Page 8: Preface
Operations Manuals for the latest revision may be obtained from 360 Systems Customer Service, or from 360 Systems’ web site. Your comments are welcome. If anything in this manual seems unclear, please let us know by sending an email to support@360systems.com. -
Page 9: Safety Notices
Only qualified personnel should perform installation and service. Refer to appropriate sections • of this product manual for instruction. Contact 360 Systems Customer Support for further explanation, or to clarify any uncertainty. Disconnect the power cord before removing the cover. -
Page 10: Product Registration
360 Systems. Send in your Warranty Card so 360 Systems can remain in contact with you. Mail or fax it to 360 Systems offices in the USA at the address given on page 105. -
Page 11: Introduction
All manuals and user guides at all-guides.com Introduction 360 Systems’ Image Server™ 2000 is a multi-channel video recorder/server designed for television broadcast and production applications. It can play three independent video streams at once, and store up to 170 hours of MPEG-2 video, with four audio channels per video stream. It occupies just 3½”... - Page 12 Hardware accessories are available from third-party manufacturers to perform transport control, trimming, clip replay and playlisting (automation). A table of approved controllers is provided elsewhere in this manual. Contact 360 Systems Sales Support team for assistance with a specific application.
- Page 13 GUI. Input circuits provide excellent hum and RF rejection, and 20 dB of headroom. 360 Systems’ Bit-for-Bit® design strategy assures that Dolby®-E, Dolby AC3, or other forms of encoded audio will be stored and played correctly.
-
Page 14: Key Features And Benefits
All manuals and user guides at all-guides.com Key Features and Benefits Image Server 2000 is designed from the ground up to deliver outstanding performance and value in a multi-channel MPEG-2 and DV-format server. Three video outputs with analog, digital, and Gigabit Ethernet interfaces make it an excellent choice for the next-generation plant. -
Page 15: Applications For 360 Systems Image Servers
All manuals and user guides at all-guides.com Applications for 360 Systems Image Servers Image Servers add value to many applications in broadcasting, cable distribution, video production, Pro A/V, entertainment and sports venues. Many of these tasks are impractical with videotape. In contrast, an Image Server provides immediate record and playback of any source, and lends a spontaneous appearance to broadcasts, presentations and live events. -
Page 16: Available Models
• Maintenance Spares 360 Systems is committed to keeping your Image Server on air. The server contains hard disk drives and other fragile electronic devices; and while it is designed to be very reliable, having spare parts on hand in the event of a fault is a good practice. Hard disk spares are particularly important. -
Page 17: Installation
There must be at least two inches (50mm) of space between the product and outer container. • The corners of the product must be protected. • Package Contents Confirm that all items on the packing list have been received. Contact 360 Systems if any item is missing. Image Server 2000 Keyboard 2-Button Scroll Mouse. -
Page 18: Rack Mounting
All manuals and user guides at all-guides.com Rack Mounting Note: If you plan to use digital audio, be sure to change the configuration of the Analog/Digital Audio Jumpers inside the unit before mounting the Image Server in a rack. The jumpers are factory set to the Analog audio position. -
Page 19: Power Conditioning
A video server is the most critical element in a broadcast operation. Its installation should safeguard it from every external event that can interfere with it doing the task expected of it. 360 Systems’ engineers have experience with thousands of installations, and have become aware of a number of environmental factors that can adversely affect performance. -
Page 20: About Image Server Software
All manuals and user guides at all-guides.com Important Installation Notes RF Interference by Cel Phones Many people are not aware that cel phones can attain a very substantial power output, even when no conversation is taking place. You may have experienced the effect of a cel phone interfering with a common desk phone placed nearby. -
Page 21: Image Server Hardware Interface
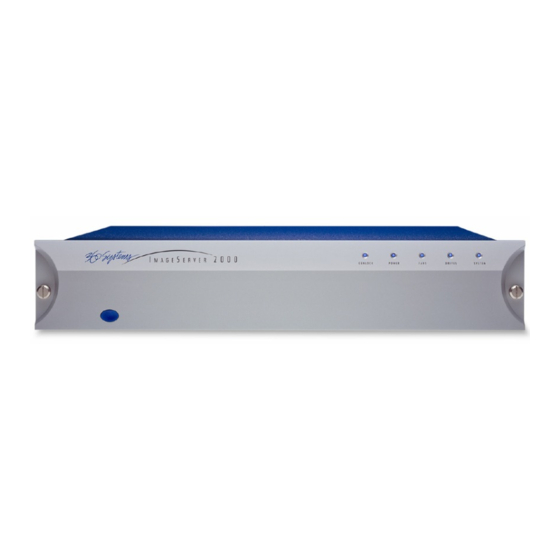
All manuals and user guides at all-guides.com Image Server Hardware Interface Front Panel Features Power ON/OFF button The blue front panel button initiates start-up and shut-down of the Image Server. Press it momentarily to start the server. A sequence of start-up screens will appear, ending with the 3- channel graphic user interface. - Page 22 All manuals and user guides at all-guides.com CH 1 REC/PLAY CH 2 PLAY CH 3 PLAY...
-
Page 23: Rear Panel Features
All manuals and user guides at all-guides.com Rear Panel Features Video Inputs The Image Server records video on channel #1. It has separate BNC inputs for SDI (serial digital per SMPTE 259M) and analog video (CVBS) signals. Both video inputs have a fixed 75- ohm termination. -
Page 24: Analog/Digital Audio Selection
All manuals and user guides at all-guides.com Audio Word Size and Sample Rate The Image Server employs 24-bit audio A/D and D/A converters, and records audio into a 24- bit frame, regardless of the word size received. The sample rate is fixed at 48K. When using the AES/EBU digital input, the 48K sample rate of the incoming digital audio must be derived from the video genlock reference. -
Page 25: Gigabit Ethernet Port
All manuals and user guides at all-guides.com Gigabit Ethernet Port Gigabit Ethernet ports are provided on the Image Server. The NET 1 port is intended for external transfer of program content between video servers. The server supports MXF file transfer (MPEG-2, Op 1a and 1b), which allows content interchange between products from different manufacturers, as well as file import in various formats from desktop editors. -
Page 26: Ltc Time Code Output
Image Server resolution is fixed at 1024 x 768 pixels, with a refresh rate of 72 Hz. This is best- viewed on 17-inch or larger monitors. 360 Systems does not provide monitors for the server. Note: Do not use older monitors that are not VESA compliant. The server may not start properly if an unsuitable monitor is connected. -
Page 27: Basic Operations
All manuals and user guides at all-guides.com Basic Operations This section introduces the Graphic User Interface (GUI), its menus and operating controls. If you want to skip ahead to learn how to record a clip, go to page 35. Skip to page 41 to read about playing a clip. -
Page 28: On-Screen Main Menu Bar
All manuals and user guides at all-guides.com On-Screen Main Menu Bar Once Image Server 2000 has successfully powered up, the VGA monitor will display the GUI of Figure 2. This view provides A main System Menu bar for configuration operations •... -
Page 29: System Menu Bar
All manuals and user guides at all-guides.com System Menu Bar The System Menu bar contains four menus: Show, Edit, Windows and Help. Show Menu Contains selections for the three Channels and the clip management windows. Channel 1 Channel 2 Channel 3 Opens the specified window if it is closed, brings it to the top and activates it. -
Page 30: The Status Bar
All manuals and user guides at all-guides.com Windows Menu Choices in this menu change the way the windows are displayed. Use the CTRL+TAB key combination to change the active window in rotation, or use the mouse to activate the desired window. -
Page 31: The Transport Channel View
All manuals and user guides at all-guides.com The Transport Channel View The Transport Channel View is shown in Figure 3. This is the default view of each channel. Basic transport operations such as play, stop, record, and head/tail trimming appear in the Clip Transport window for each channel. - Page 32 All manuals and user guides at all-guides.com Save Saves an edited clip using its existing file name. Key Command – Ctrl+S. Save As Opens the Clip Navigator to allow saving an edited version of the clip with a new name. This allows making alternate versions of a clip or making multiple segments of a master clip.
-
Page 33: Playlist Menu Bar
All manuals and user guides at all-guides.com The Playlist Channel View The Playlist Channel View is shown in Figure 4. This view allows multiple clips to be loaded in a “playlist” and played in sequence. Figure 4 - Playlist Channel View Playlist Menu Bar There are two menus, File and Options. - Page 34 All manuals and user guides at all-guides.com Save As Opens the Clip Navigator to allow saving an edited version of the clip with a new name. This allows making alternate versions of a clip or making multiple segments of a master clip. Key Command –...
-
Page 35: Making A Recording From The Gui
All manuals and user guides at all-guides.com MAKING A RECORDING FROM THE GUI Video recordings are made using the Transport View of Channel 1. Channel 1 can record or play back clips but cannot do both at the same time. Channels 2 and 3 are playback only. Follow these steps to record a clip on Image Server. -
Page 36: Setting The Video Input Source
All manuals and user guides at all-guides.com Figure 5 - Timing Configuration Screen Setting the Video Input Source The Image Server 2000 can accept a video signal at either its composite video input (CVBS), or its serial digital (SDI) input. Verify that the input to be used is currently active. For a discussion of the SDI –... -
Page 37: Arming The Audio Tracks
All manuals and user guides at all-guides.com Arming the Audio tracks The Image Server can record either two or four audio tracks according to a selection made in the Channel 1 Configuration window. When a selection is made it will be saved for future recordings. Select OPTIONS->CONFIGURE from the Channel 1 Transport Window. -
Page 38: Setting The Time Code Source
All manuals and user guides at all-guides.com Setting the Time Code Source This function selects the time code source for newly recorded clips. A time code value is obtained from the selected input source at the start of a new recording. Refer to Figure 6. Choose VITC, LTC or Manual input source. - Page 39 All manuals and user guides at all-guides.com Figure 8 - Channel 1 Ready to Record You may now click the RECORD button at any time to begin recording. The yellow time display counters will update the clip duration continually. To stop recording, click STOP. Note: An in-progress recording must be at least 10 seconds long before it will appear in the clip list.
-
Page 40: Using E-E Mode To Monitor The Recording Source
All manuals and user guides at all-guides.com USING E-E Mode to Monitor the Recording Source The E-E button appears in the Channel 1 Record/Play window. It allows the input signal to be monitored from the server output. E-E Mode toggles automatically as described below, but can also be switched manually at any time. -
Page 41: Playing A Clip From The Gui
All manuals and user guides at all-guides.com PLAYING A CLIP FROM THE GUI Video Playback can be done on all three channels, individually or simultaneously. Channel 1 cannot Record and Playback at the same time. Follow these steps to play back a clip. Beginning Playback A. -
Page 42: Ejecting A Clip
All manuals and user guides at all-guides.com Ejecting a Clip Ejecting a clip effectively removes it from the transport. The channel will output Black. Press EJECT to eject a clip. Using Jog The JOG + command will move to the next frame and go to Still. The JOG - command will move to the previous frame and go to Still. -
Page 43: Editing A Clip
All manuals and user guides at all-guides.com EDITING A CLIP Edit controls are activated with the Edit check box. Several buttons are available to define the beginning and end of a region within a clip; associated time code displays are also present. These non-destructive Mark In and Mark Out trim points can be set to define a portion of a clip to be played. - Page 44 All manuals and user guides at all-guides.com The values in this display window may be set by two methods: Enter Mark In point from the keyboard: Use the mouse or Tab key to move between In • and Out fields. When a field is highlighted, enter a numeric value from the keyboard. Whether a clip is still or playing, press Mark In to capture a time code value from the clip’s •...
-
Page 45: System Configuration
All manuals and user guides at all-guides.com SYSTEM CONFIGURATION The following configuration options apply to the System as a whole and not to individual channel transports. Assigning Names to the Server and Transport Channels The Image Server can be assigned a name that will be displayed along the top of the Main GUI Window. -
Page 46: Programming Gpio Outputs
All manuals and user guides at all-guides.com Programming GPIO Outputs The Image Server has six General Purpose Outputs, referred to as GPO 1 through GPO 6. Each GPO can be programmed to go active on the selected channel when one of the following events occurs. IDLE - Activate when the transport returns to idle PAUSED... -
Page 47: Programming Gpio Inputs
All manuals and user guides at all-guides.com Programming GPIO Inputs The Image Server has six General Purpose Inputs, referred to as GPI 1 through GPI 6. Each GPI can be programmed to trigger one of the following events on a channel. Cue a clip JUMP Cue selected clip for immediate playback (Playlist Mode only) -
Page 48: Configuring Linear Time Code (Ltc)
All manuals and user guides at all-guides.com Configuring Linear Time Code (LTC) The Image Server supports only drop-frame time code for NTSC operations. It may not be used with non-drop-frame time code. LTC Out Source chooses which channel will control the LTC Timecode output. - Page 49 All manuals and user guides at all-guides.com Each Image Server is shipped with a default network Host Name and IP Address. Qualified network engineers may change these configurations to suit your specific network environment. Factory defaults for networking are: Network Disabled •...
-
Page 50: Setting The Date And Time
All manuals and user guides at all-guides.com Setting the Date and Time Click EDIT->CONFIGURE->DATE/TIME. The dialog below appears. Figure 14 - Time/Date Configuration Screen Select the REGION and ZONE according to your geographical location and time zone by scrolling with the scroll-bar as necessary and then clicking on the selected value. Set the TIME and DATE by clicking on the Time/Date field and navigating the clock and calendar. -
Page 51: Calibrating Channels
All manuals and user guides at all-guides.com Calibrating Channels Setting the SC/H Phase Refer to Figure 15. This parameter adjusts the Sub-Carrier/Horizontal phase relationship. Use a vector scope to view the phase relationship and adjust the setting. Changes to the setting are effective immediately without clicking Apply or OK. -
Page 52: Clip Navigator
All manuals and user guides at all-guides.com CLIP NAVIGATOR Image Server provides a powerful Clip Navigator for finding and selecting clips. Clip Navigator allows the user to delete, name and rename clips. Rename and Delete Clips • Clips can be dragged and dropped anywhere on a Transport for immediate playback. •... -
Page 53: Finding Clips
All manuals and user guides at all-guides.com Finding Clips Clips can be easily found using the Clip Locator. To locate a clip: A. Click SHOW>FIND CLIPS. The Clip Locator screen of Figure 17 appears. B. Check Case Sensitive to make the search case-sensitive. C. -
Page 54: Finding Clips Using Regular Expressions
All manuals and user guides at all-guides.com Finding Clips Using Regular Expressions A regular expression (or RE) specifies a pattern to be matched in a clip name. Regular expressions can contain both special and ordinary characters. Ordinary characters just match themselves. Thus, the RE “ ”... -
Page 55: Using Playlists
All manuals and user guides at all-guides.com USING PLAYLISTS Image Server’s Playlisting software provides an extensive set of capabilities for building, editing and playing complex sequences of program content. Advanced Playlisting appears as on-screen windows, with a clean Graphic User Interface that makes it easy to run with no extra equipment. It’s invaluable for building commercial breaks, news rundowns, still-store and clip lists. -
Page 56: The Playlist View
All manuals and user guides at all-guides.com The Playlist view The Playlist View for channel 1 is shown in Figure 18. Its functions are briefly described here. Table 1 provides an overview of Playlist control functions and their associated hot-keys. Figure 18 - Channel 1 Playlist View FUNCTION DESCRIPTION / REFERENCE... -
Page 57: Creating And Running A Playlist
All manuals and user guides at all-guides.com Creating and Running a Playlist To Create a Playlist (Using channel 1 in the example): A. Change the transport for Channel 1 to the Playlist View. Click FILE->PLAYLIST in the Channel 1 transport pulldown menu. The window of Figure 19 appears. B. -
Page 58: Loading A Playlist (File>Load)
All manuals and user guides at all-guides.com Figure 20 – Active Playlist G. To SAVE the Playlist select FILE->SAVE-AS. Enter a file name. Click SAVE. H. To SAVE an existing playlist without changing the name, use FILE->SAVE. Loading a Playlist (FILE>LOAD) Click FILE->LOAD from the Playlist View to bring up the list of available Playlists. -
Page 59: Pausing A Playlist (Play/Pause)
All manuals and user guides at all-guides.com Pausing a Playlist (PLAY/PAUSE) When a Playlist is running, the PLAY key will change to indicate PAUSE. Pressing PAUSE stops the Playlist immediately, on the current frame of a clip. Pressing it again will resume playback. Cueing a Clip (CUE) When the Playlist is running, click CUE to immediately prepare a selected clip for playback. -
Page 60: Setting The Maximum Number Of Played Items To Keep
All manuals and user guides at all-guides.com Setting the Maximum Number of Played Items to Keep To set the number of played items to be retained in a playlist: Click OPTIONS>CONFIGURE from the Playlist View of the channel pulldown. Use the thumbwheel UP and DOWN scroll button to increase or decrease the number of clips to retain. -
Page 61: Editing Playlists
All manuals and user guides at all-guides.com EDITING PLAYLISTS Removing a Clip from a Playlist To remove a Clip from a Playlist: A. Make sure the clip to be removed is not PLAYING or CUED B. Position the cursor over the Clip and right-click. Select REMOVE from the pulldown menu. Removing All Clips Above or Below the Selected Clip All clips above or below the selected clip can be removed unless a CUED or PLAYING clip is affected. -
Page 62: Changing The Duration Of Clips In A Playlist
All manuals and user guides at all-guides.com Changing the duration of Clips in a Playlist Make sure the EDIT checkbox is checked in the Playlist View window. Position the cursor over a clip and right-click. Select EDIT DURATION from the pulldown menu. Enter a duration in the Duration window. -
Page 63: Mapping Gpo To Playlist Events
All manuals and user guides at all-guides.com Mapping GPO to Playlist events The Image Server has six General Purpose Outputs, referred to as GPO 1 through GPO 6. Any of these can be programmed to go active at a pre-determined time, or offset, after the beginning of a Playlist clip. -
Page 64: Mapping Gpi To Control A Playlist
All manuals and user guides at all-guides.com Figure 23 - GPO Editor Mapping GPI to Control a Playlist Playlists can be controlled with the Six GPI Inputs as described in Programming GPIO Inputs on page 47. Page 64 Image Server 2000 Owner’s Manual... -
Page 65: Advanced Topics
All manuals and user guides at all-guides.com Advanced Topics System Timing The Image Server is capable of using an external genlock signal as a timing reference. This allows the outputs to be timed the same as other video signals in a facility. There are three adjustments to fine tune this synchronization to compensate for differences in equipment and wiring. -
Page 66: Using Embedded Audio
All manuals and user guides at all-guides.com Using Embedded Audio Embedded Audio is an available option on Image Server 2000. It is based on SMPTE standard 272M-A. Key features include: Synchronous 20-bit audio at a 48K sample rate. Non-synchronous audio and other sampling •... -
Page 67: Using Audio Sample Rate Conversion
All manuals and user guides at all-guides.com Setting the Input Source Three buttons select the input source for video and audio. These are: CVBS/Discrete Audio (composite video with AES/EBU or analog audio inputs) • SDI/Discrete Audio (serial digital video with AES/EBU or analog audio inputs) •... -
Page 68: Using Channel Ganging
All manuals and user guides at all-guides.com Using Channel Ganging Transport operations on Video Channels can be locked or “ganged” together to allow frame- accurate key and fill material (either stills or clips) to be implemented. Channel Ganging might also be used to create certain types of presentations, such as synchronized matte backdrops on News Broadcasts. -
Page 69: Using The Dv Video And Graphics Option
All manuals and user guides at all-guides.com Using Ganging for Key and Fill operations Channel Ganging is most commonly used to support and Key and Fill operations. Ganging allows generation of frame-accurate key and fill material (either stills or clips). This in turn is used with a downstream keyer or video effects generator to be externally combined with a third video source. -
Page 70: Importing Targa Graphics Files
All manuals and user guides at all-guides.com Importing TARGA Graphics Files The Image Server will recognize and ingest single-frame TARGA files via FTP from most network- attached graphics workstations. TARGA files have a .tga extension, and may contain an alpha (or key) channel. -
Page 71: Ftp File Transfers
All manuals and user guides at all-guides.com FTP File Transfers Image Server features Gigabit Ethernet connectivity using an RFC-1359 compliant FTP server. File transfers to and from the Image Server are managed from an FTP client file transfer program running on a Windows® or Macintosh® computer. This provides a rapid way to execute drag-and- drop file transfers;... - Page 72 All manuals and user guides at all-guides.com If you will be connecting directly to a PC or Laptop, configure the Image Server as IP address 192.168.1.3, net mask 255.255.255.0 and disable DHCP. In the PC, double click on the Local Area Connection Icon in the system tray or in the Network and Dial-Up Connections in the Control Panel.
- Page 73 All manuals and user guides at all-guides.com Transfer of Edited Segments The Image Server sets MARK-IN and MARK-OUT points in a clip as “edit pointers.” For all edit operations within a given Image Server, these pointers produce “virtual edits” that save disk space, and the time it would take to re-write the marked region as a new file.
- Page 74 All manuals and user guides at all-guides.com PES – Packetized MPEG-2 Elementary Stream (.mp2, .m2v) The Image Server will accept MPEG-2 standard-definition elementary stream files. These contain video-only, no audio. Playlists (.lst, .txt) An Image Server play list is a text-based file residing in the /lists directory. Play lists can be created off-line and transferred to the Image Server using FTP.
-
Page 75: Network Time Protocol
All manuals and user guides at all-guides.com Network Time Protocol Automatic Date/Time Updates When using Image Server play-lists in broadcast applications, an accurate record is often needed of what was played and when. The Image Server’s As-Run logging feature creates such a record, time stamping each played clip using the machine’s internal date/time clock. -
Page 76: Configuring Ntp
All manuals and user guides at all-guides.com Configuring NTP The Image Server GUI is used to set the time zone and to enter the networking parameters. The local GUI must be used, as these configuration screens are not available on the Remote Workstation Interface. -
Page 77: Entering Network Parameters
All manuals and user guides at all-guides.com Entering Network Parameters From the GUI’s main menu bar, Click EDIT>CONFIGURE>NETWORK. The screen of below appears. Make sure the basic network parameters have been entered. Figure 29 - Network Configuration Screen Disable Network: uncheck Host Name: (Any name will suffice, but since this name appears on each line of the Image Server’s diagnostic logs, it is a good idea to keep this short.) The name should also be unique from other devices on the network. - Page 78 All manuals and user guides at all-guides.com The nonprofit Internet Systems Consortium, Inc. (ISC) maintains sites that automatically return lists of public time servers to an NTP client such as the Image Server. Hence, the NTP Servers field is initially filled in with the URL’s for these sites (0.pool.ntp.org, for example). Of course you can overwrite this list with the addresses of specific time servers you may want to use.
-
Page 79: Automation Control
All manuals and user guides at all-guides.com Automation Control Image Server provides standard RS-422 serial control ports that allow operation with many broadcast automation systems, instant replay panels, video switchers, and remote control devices. For compatibility with simple controllers and push buttons, the server also provides six GPI (contact closure) inputs, and six programmable-command outputs. -
Page 80: Configuring The Automation Interface
All manuals and user guides at all-guides.com Controller Priority Only one serial controller can control a given video channel at a time. In general, the first controller to gain control of a video channel will have exclusive command. This prevents conflicting instructions that would cause unexpected behavior. -
Page 81: Other Automation Options
All manuals and user guides at all-guides.com Figure 31 - Serial Port Configuration Screen Other Automation Options As illustrated in Figure 31, a number of check boxes are provided that control how the Image Server will respond to certain VDCP commands. Once set, these options remain selected when the server is turned off, and until changed by the user. - Page 82 All manuals and user guides at all-guides.com Vari-Play 0 Equals Pause The Image Server will interpret a Vari-play 0x command as a Pause command. (This also applies to Odetics protocol.) Report Play (vs. Still) At End When the end of a clip is reached, the Image Server will report Play to the automation controller, instead of Still.
-
Page 83: Tested Automation Controllers
HOMSON ARKERVISION LL CR SERIES Tested Remote Control Panels and Switchers The Image Server has been tested by 360 Systems and manufacturers of the remote control devices and video switchers listed below, and found to operate correctly. Manufacturer Controller Protocol Notes ®... -
Page 84: Remote Workstation Interface
All manuals and user guides at all-guides.com Remote Workstation Interface The Image Server Remote Workstation Interface Option is a software application that provides IP control of the server from PC workstations located within a facility. A remote workstation can access one or more video channels of an Image Server to perform ingest, playback, trimming, playlisting, traffic operations or monitoring of server activities. -
Page 85: System Requirements
All manuals and user guides at all-guides.com Figure 32 - Remote Workstation Deployments System Requirements PC with Windows XP or Windows 2000 installed. Other operating systems have not been • tested and as of this writing are not supported. 6 MB free space on the computer hard disk, plus 64 MB RAM. •... -
Page 86: Installation
C:\Program Files\ImageServerRWIVersion025. After Installation A 360 Systems Remote Workstation icon will appear on your desktop. Double click the icon to open a remote session on the Image Server. To change the target Image Server you wish to access, right click on the Remote Workstation icon. - Page 87 All manuals and user guides at all-guides.com Figure 33 – Remote Workstation Properties Page Because multiple simultaneous sessions of Remote Workstation may be run on a single computer, it is possible to make copies of the Remote Workstation icon and change the IP address of each to allow one-click access to any number of Image Servers.
-
Page 88: Hard Disk Management
All manuals and user guides at all-guides.com Hard Disk Management This Image Servers employ an advanced Serial-ATA controller that manages four high-capacity hard disks operating in a RAID-5 configuration. This design increases system performance, and by storing parity data, helps prevent data loss should a drive fail. The Image Server brings a high level of reliability to Serial-ATA RAID through a new, switched architecture that exceeds the reliability of SCSI shared-bus storage systems. -
Page 89: Improved Write Performance
All manuals and user guides at all-guides.com RAID Level 5: “Independent Access Array with Rotating Parity” High Data Reliability & Transfer Capacity DATA Disk Array Controller Array Management Software Provides Logical to Physical Mapping Physical Disk 0 Disk 1 Disk 2 Disk 3 Figure 21: RAID 5 Array Schematic Improved Write Performance... - Page 90 A hard disk array must be repaired using exactly the same drive model and capacity as other drives in the array. Because specific drive models become unavailable as time goes on, 360 Systems recommends that maintenance spares be purchased at the same time as the Image Server.
-
Page 91: Log-In To The Raid Utilities
All manuals and user guides at all-guides.com Log-In to the RAID Utilities Figure 22: Log-In to RAID Utilities To log in to the RAID utilities, perform the following steps. The above drawing will appear. Open the RAID utilities by selecting START>SYSTEM>RAID STATUS •... -
Page 92: Determining The Condition Of The Raid Array
All manuals and user guides at all-guides.com Determining the Condition of the RAID Array Figure 23: Report of RAID Array Condition To replace a failed drive in the RAID control utility, perform the following steps. The above drawing should appear. Login as ADMINISTRATOR. -
Page 93: Displaying The Alarm Log Of The Raid Array
All manuals and user guides at all-guides.com Displaying the Alarm Log of the Raid Array Figure 24: Checking Status of RAID Array The RAID controller keeps track of any condition that would adversely affect its reliability. In the event that an error should occur, the alarm log will be helpful in diagnosing the problem. The above drawing will appear. -
Page 94: Checking Status Of The Drives
All manuals and user guides at all-guides.com Checking Status of the Drives Figure 25: RAID Maintenance Display To check the status of the RAID drive array, perform the following steps. The above drawing should appear. Select MANAGEMENT>MAINTENANCE. • Note the status of each drive in the array. •... -
Page 95: Removing The Degraded Drive From The Raid Unit
All manuals and user guides at all-guides.com Removing the Degraded Drive from the RAID Unit Figure 26: Removing Failed Drive from RAID Controller The UNIT MAINTENANCE SCREEN above will appear. Remove the degraded drive from the menu by clicking Remove Drive. •... -
Page 96: Rebuilding The Raid Array
All manuals and user guides at all-guides.com Rebuilding the RAID Array Figure 27: Selecting a Drive to Use in Rebuilding the Array Select Rebuild Unit. The REBUILD SCREEN above will appear. • Select the available drive by clicking the check box. •... -
Page 97: Maintenance
POWER FLASHING indicates that there is a Shut down the Image Server and fault in the system power supply. contact 360 Systems Customer Support for further hardware diagnosis. FANS FLASHING indicates that there is a Check the chassis fan operation. -
Page 98: Gigabit Ethernet Indicators
All manuals and user guides at all-guides.com Gigabit Ethernet Indicators The Gigabit Server Adapter card has the following indicator lights: Label Indication Meaning Green on The port is connected to a valid link partner ACT/LNK Green flashing Data activity (Left) No link 10=OFF 10 MBps... -
Page 99: General Handling Precautions
All manuals and user guides at all-guides.com To re-install the top cover, set the cover on top of the chassis and slide the cover forward until its front pins engage the front panel. Secure the cover to the rear of the chassis with the three 6-32 screws. -
Page 100: Installing/Removing I/O Cards
Accessing the Motherboard There are no user-configurable options to set on the main system board. If you suspect that the system board is not operating properly, consult with 360 Systems before proceeding. DO NOT undertake any repairs on the motherboard. -
Page 101: Analog/Digital Audio Selection
All manuals and user guides at all-guides.com... -
Page 102: Audio Level Calibration
All manuals and user guides at all-guides.com Audio Level Calibration The input gain and output gain of the analog audio circuits are factory calibrated to a +4 dBu standard. Each circuit includes a trim pot with a range of approximately ±2.5 dB. The following procedures may be used to calibrate these for unity gain. - Page 103 All manuals and user guides at all-guides.com Alternate Calibration Procedure If the calibration test clip titled zTONE is not found on the Image Server’s disk, it is still possible to accurately calibrate the audio channels. 1. Position the jumper block J5 and J6 for Channel 1 output to obtain a digital output. 2.
-
Page 104: Program Updates Via Cd-Rom
All manuals and user guides at all-guides.com Program Updates via CD-ROM Program updates are issued by 360 Systems from time to time. The Image Server’s operating system and application programs can be updated by the user from new CD-ROMs, using the internal CD-ROM drive. -
Page 105: Replacing A Hard Drive
NOTE: All drives in the RAID array should be identical. Factory Repair Policy A video server being returned under warranty shall be sent to 360 Systems, freight prepaid, in the original or equivalent packaging. Call 360 Systems for a return authorization number before returning a product. -
Page 106: Regulatory Certifications
All manuals and user guides at all-guides.com Regulatory Certifications Safety The Image Server was tested by Underwriters Laboratories and found to comply with the following safety standards: EN 60950, 3rd Edition, dated December 1, 2000, Standard for Safety of Information Technology Equipment, Including Electrical Business Equipment. - Page 107 All manuals and user guides at all-guides.com FCC Emission Limits This device complies with Part 15 of the FCC Rules. Operation is subject to the following two conditions: (1) This device may not cause harmful interference, and (2) this device must accept any interference received, including interference that may cause undesirable operation.
-
Page 108: Product Warranty
31355 Agoura Road, Westlake Village, California 91361. Upon receipt, its condition will be verified, and if the product qualifies for warranty coverage, 360 Systems will, at its option, repair or replace the product without charge. In the case of replacement, if the replacement for a defective product is no longer available, 360 Systems will replace it with a similar product or, if not available, a product of equal value. -
Page 109: End User License Agreement
For Image Server Software IMPORTANT THIS IS A LEGAL AGREEMENT BETWEEN YOU (“YOU”) AND 360 SYSTEMS® (“COMPANY”). COMPANY IS WILLING TO LICENSE THE IMAGE SERVER SOFTWARE TO YOU ONLY UPON THE CONDITION THAT YOU ACCEPT ALL OF THE TERMS CONTAINED IN THIS SOFTWARE LICENSE AGREEMENT (“AGREEMENT”). - Page 110 All manuals and user guides at all-guides.com restrictions will result in automatic termination of this license and will make available to Company other legal remedies. You may not disclose any of Company’s proprietary or trade secret information relating to the Software to any third party. 4.
-
Page 111: Connector Specifications
All manuals and user guides at all-guides.com Appendix A Connector Specifications Audio XLR-3 Connector Pinout Signals appearing on the XLR connectors are determined by the setting of the internal Analog/Digital Audio Selection jumpers. BALANCED ANALOG AES/EBU DIGITAL SHIELD ( SHIELD ( FRAME GROUND FRAME GROUND "... -
Page 112: Bnc Connectors
All manuals and user guides at all-guides.com BNC Connectors The following note applies to all video, LTC, and Genlock connectors: A BNC connector used as an output will have 75-ohm source impedance. • A BNC connector used as an input will have a fixed 75-ohm termination. •... - Page 113 All manuals and user guides at all-guides.com GPI/O (DB25-F) INTERNAL CIRCUITS GPI 1 GPI 1 RTN GPI 2 GPI 2 RTN GPI 3 GPI 3 RTN INPUTS GPI 4 GPI 4 RTN GPI 5 GPI 5 RTN GPI 6 GPI 6 RTN GPO 1 GPO 2 GPO 3...
-
Page 114: System Board Ports
The refresh rate will auto-negotiate with the attached monitor to achieve the best available value. This resolution is best viewed on 17-inch or larger monitors. Use only VESA compliant monitors. 360 Systems does not provide monitors for the server. SVGA Connector Pinout... -
Page 115: Serial Command Protocols
All manuals and user guides at all-guides.com Appendix B Serial Command Protocols VDCP Command Table The Image Server responds to the following VDCP commands. Shaded areas indicate commands slated for future implementation. COMMAND FROM CONTROLLER RETURN FROM CONTROLLED DISK CMD-1 CMD-2 NAME CMD-1... - Page 116 All manuals and user guides at all-guides.com Open Port Grant/Denied 3X / BX Next List of ID's Port Status Request State Status Position Request Position 3X / BX Active ID Request Active ID Device Type Req. Device Type Syst. Status Request System Status 3X / BX ID List...
-
Page 117: Bvw Serial Command Table
All manuals and user guides at all-guides.com BVW Serial Command Table The Image Server command set includes most commands used in BVW tape machines. Commands not implemented include those for DMC operations, audio split and in/out points, and those specifically related to tape as a medium. The server will return Device Type response 20.25 for BVW-75 (NTSC);... -
Page 118: Odetics® Protocol
All manuals and user guides at all-guides.com Odetics® Protocol Odetics serial protocol is an extension of Sony P2 tape machine control protocol. Among its most significant features is the selection of a file by name rather than by time-code location, as with P2. - Page 119 All manuals and user guides at all-guides.com 2061 EE O COMMAND DESCRIPTION RETURN COMMENT 4X00 IMER RESET 4X04 RESET 4008 IMER ESET 4010 NTRY 4011 NTRY 4X14 RESET 4X15 RESET 4018 HIFT 4019 HIFT INUS 401A HIFT 401B HIFT INUS 4020 ESET 4021...
- Page 120 All manuals and user guides at all-guides.com 0X7408 COMMAND DESCRIPTION RETURN COMMENT UB D 0X7409 TC D 0X7809 URRENT ENSE LTC T 0X7414 ORRECTED VITC T 0X7406 0X7400 IMER LTC D 0X7415 VITC D 0X7416 6010 0X7410 6011 0X7411 6012 6013 6020 0X7420...
-
Page 121: Technical Specifications
All manuals and user guides at all-guides.com Appendix C Technical Specifications Video Input Channels (baseband) Output Channels Three (3 playback or 1 record (E-E) and 2 playback) Analog video I/O Composite, 75 Ω, BNC Digital video I/O SDI, SMPTE 259M, 75 Ω BNC Video standards 525/60 NTSC;... - Page 122 All manuals and user guides at all-guides.com Closed Captions Closed Captions Records and plays CC data per EIA-608B Control Inputs Automation control, RS-422 VDCP; 3 ports, 9-pin female “D” connector Other serial control, RS-422 P2, Odetics GPI control inputs/outputs 6 optically isolated inputs, 6 open-collector outputs, 25-pin female “D”...
-
Page 123: Keyboard Shortcuts
All manuals and user guides at all-guides.com Keyboard Shortcuts Transport Control Edit Operations Forward at 4x, 16x, 64x, 128x Enter/Exit Edit Mode Capture Mark In Pause (Stop) Capture Mark Out Reverse at 4x, 16x, 64x, 128x Space Bar Shift+R Review Edit Play/Pause (toggle) Shift+T Review Tail... -
Page 124: Appendix D - Playlist Management Detail
All manuals and user guides at all-guides.com APPENDIX D – PLAYLIST MANAGEMENT DETAIL Playlists can be accessed via the Image Server’s FTP feature, allowing several capabilities: Lists can be backed up on a PC, and sent to another Image Server. •... - Page 125 All manuals and user guides at all-guides.com Each line of the example appears with its explanation below: #360PLAYLIST 2.0 Header line, this must always be present exactly as shown. #StartTime 13000100 This is the Start Time in military format, hours, minutes, seconds and frames, without leading zeros.
- Page 126 All manuals and user guides at all-guides.com Some text editors, such as Notepad, do not display each line separately. Word and Wordpad work correctly. This is because the files have only Line Feeds (LF) at the ends of lines. The Image Server will accept modified or externally created files with only LF or with both LF and Carriage Return (CR) at line endings.
-
Page 127: Appendix E - As-Run Logging Detail
All manuals and user guides at all-guides.com APPENDIX E – AS-RUN LOGGING DETAIL To enable As-Run logs, open a Playlist window, select Options, then click on As-Run Logs. When enabled, a check mark will appear next to the As-Run log label, and files played by a playlist will be written to an As-Run log. -
Page 128: As-Run Log Body
All manuals and user guides at all-guides.com As-Run Log Body This section describes the format of the body of an As-Run log: 2 10:54:45 00:00:30:00 Cellular One – Talk Time PLAYED OK 2: The line number (order) of the clip as it appears in the playlist. The same clip could have multiple numbers as files are added or deleted. -
Page 129: Appendix M - Importing Mpeg Program Stream Files
APPENDIX M – IMPORTING MPEG PROGRAM STREAM FILES Encoding MPEG-2 Files Compatible with Image Server 360 Systems recommends the use of the Main Concept MPEG Encoder. It is available as a stand alone product as well as integrated into codecs bundled with various video editing programs. -
Page 130: General Requirements
All manuals and user guides at all-guides.com General Requirements FILE NAMES 31 characters or less followed by the “.mpg” extension. Upper/Lower case alpha, 0-9, #%&()-_ STREAM TYPE: PROGRAM (VIDEO + AUDIO) VIDEO RESOLUTION: 720x480 (NTSC) or 720x576 (PAL) 4:3 DISPLAY FRAME RATE: 29.97 (NTSC) or 25 (PAL) (Pulldown is not supported.) -
Page 131: Mechanical Drawing
All manuals and user guides at all-guides.com Appendix O Mechanical Drawing 17.00 [432 mm] 19.00 [483 mm] 3.47 00:00:00;00 Figure 32: Dimensional Drawing Image Server 2000 Owner’s Manual Page 131... -
Page 132: Index
Website ............105 GoTo ............42 4:2:0 ..............37 Jog - .............. 42 4:2:2 ..............37 Jog +............42 Address, 360 Systems........105 Mark In Point..........43 AES/EBU......12, 14, 23, 24, 111, 121 Mark Out Point..........44 Analog Audio ............23 Review Clip..........44 Analog Video ............23 Review Out Point ......... - Page 133 All manuals and user guides at all-guides.com Cue Shows 1st Frame ........81 Sync Reference ..........25 Cue with Offset (vs. Timestamp)......81 GOP ............... 130 Customer Service ..........105 setting............37 CVBS............23, 25 GoTo Buttons............ 42 Date and Time GPI ..............25 Setting............50 GPO ..............
- Page 134 All manuals and user guides at all-guides.com Maintenance .............97 Editing Clip Duration........62 Maintenance Spares ..........16 Hold ............. 61 MAKING A RECORDING .........35 Home ............59 Mark In Point Button .........43 Jumping ............59 Mark Out Point Button ........44 Loading ............58 Mechanical Concerns........99 Looping ............
- Page 135 All manuals and user guides at all-guides.com Schematic TARGA (.tga) files ..........74 GPIO ............113 TARGA File Ingest..........70 SDI..........11, 14, 23, 121 tested remotes,panels,switches......83 Serial Control Ports..........24 Tile Windows ........... 30 on Motherboard..........26 Time Code Serial Protocol LTC............25, 26 Command Table .........115 VITC .............
Need help?
Do you have a question about the ImageServer 2000 and is the answer not in the manual?
Questions and answers