
Related Manuals for Grindex SENIOR


Summary of Contents for Grindex SENIOR
- Page 1 No: 89 75 77 Revision 02 2008.04 Installation, care and maintenance www.grindex.com SENIOR...
-
Page 2: Table Of Contents
— that the fault is due to defects in design, ma normal wear and tear. terials or workmanship; — that the fault is reported to Grindex or Grin Grindex assumes no liability for either bodily dex’s rep resentative during the guarantee injuries, material damages or economic losses period;... -
Page 3: Safety Precautions
If there are no laws or For all other warnings. regulations, or the product is not accepted by an authorized recycling company, the product or it’s parts can be returned to the nearest Grindex sales company or service workshop. -
Page 4: Product Description
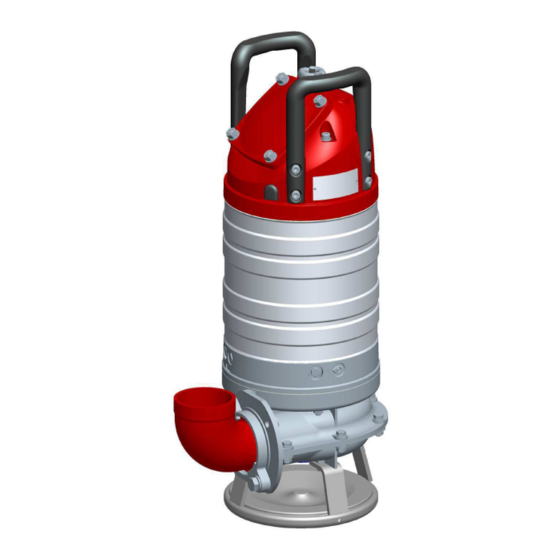
Installation, care and maintenance Senior Product description Applications WARNING! Senior are intended to be used for: The pump may not be used in an explosive or lammable — pumping of liquids which may contain solid particles up to a zise of Ø 80mm. -
Page 5: Motor Data
Installation, care and maintenance Senior Motor data Motor type: Squirrel-cage 3-phase induction motor for 50 Hz and 60 Hz 3~ 60 Hz, 1700 r/min markets. 3~ 50 Hz, 1400 r/min Rated output: 4.5 kW (6.0 hp) Rated output: 3.8 kW (5.1 hp). -
Page 6: Dimensions And Weights
Installation, care and maintenance Senior Dimensions and weights... -
Page 7: Performance Curves
Installation, care and maintenance Senior Performance curves Each pump is tested in accordance with ISO 9906. Senior 50 Hz Senior 60 Hz [hp] / [kW] [hp] / [kW] H [ft] / [m] H [ft] / [m] 50 100 150 200 250 300 350 400 450... -
Page 8: Transportation And Storage
Installation, care and maintenance Senior Transportation and storage The pump may be transported and stored in a The pump is frostproof as long as it is operating vertical or horizontal position. Make sure that it or is immersed in the liquid. If the pump is taken cannot roll or fall over. -
Page 9: Electrical Connections
Installation, care and maintenance Senior Electrical connections All electrical work shall be carried out under the WARNING! supervision of an authorized electrician. All electrical equipment must Local codes and regulations shall be complied be earthed (grounded). This applies to both pump equip- with. - Page 10 Installation, care and maintenance Senior ® ® SUBCAB 4GX/SUBCAB AWG, 6-leads, Y or D ® ® SUBCAB 4GX/SUBCAB AWG, 9-leads, Y// or Yser...
- Page 11 Installation, care and maintenance Senior Connection of motor protector NOTE! The thermal contacts in the winding are CSA approved only for 250 V and below. For other voltages when CSA approval is required a transformer is used to reduce the voltage over the thermal contacts.
-
Page 12: Operation
Installation, care and maintenance Senior Operation Before starting Cleaning Check the oil level in the oil casing. ter, let it run for a while in clean water, or lush If the pump has been running in very dirty wa Remove the fuses or open the circuit breaker and check that the impeller can be rotated by it through the discharge connection. - Page 13 Installation, care and maintenance Senior VARNING! Never put your hand into the pump housing! The pumps are equipped with SMART ROTASENSE™ (rotation control). Note the following at start: Connect the pump to power. If the pump fails to start and the fuses are correct, shift two phases in the CEE plug or turn the knob on phase shifter to start the pump.
-
Page 14: Care And Maintenance
Installation, care and maintenance Senior Care and maintenance Safety precautions Inspection Regular inspection and preventive maintenance WARNING! ensure more reliable operation. The pump should be inspected at least twice a Before starting to work on the year, more frequently under severe operating pump or moving the pump, conditions. -
Page 15: Recommended Inspections
— that an Oring is damaged. — that the cable entry is leaking. If there is oil in the inspections chamber, the cause may be: — that the inner mechanical seal is damaged. Contact a Grindex serv ice shop. - Page 16 Installation, care and maintenance Senior Recommended inspections: Inspection of Action Cable entry — check that the entry is irmly tightened into its bottom-most position. Make sure that the cable clamps are tight. If the cable entry leaks: — cut a piece of the cable off so that the seal sleeve closes around a new position on the cable.
-
Page 17: Changing The Oil
Installation, care and maintenance Senior Explanation of symbols = Oil screw = Inspection plug Changing the oil Lift the pump horizontally with an overhead crane and place on relief table. Turn the pump so that one of the oil screws faces downwards. -
Page 18: Removing The Impeller
Installation, care and maintenance Senior Removing the impeller Remove the stand and the pump housing. (L= min. 200 mm/7.9 inch), see ig. to prevent Lock the impeller with a screw driver or similar rotation of the impeller. Loosen and remove the impeller screw and washer. -
Page 19: Installning The Impeller
Installation, care and maintenance Senior Installing the impeller free from burrs. Polish off any laws with ine Make sure that the end of the shaft is clean and emery cloth. Grease end of shaft, conical sleeve and the threads of the adjustment screw. The proper lubrication is grease for bearings e.g. - Page 20 Installation, care and maintenance Senior (L= min. 200 mm/7.9 inch), see ig. to prevent Lock the impeller with a screw driver or similar rotation of the impeller. Fit the washer and the greased impeller screw and tighten, torque to 22 Nm (16.2 lbfft).
-
Page 21: Tools
Installation, care and maintenance Senior Tools Tools Most of the tools needed for servicing the pump are tools normally included in every serviceman’s Part No. Denomination Remarks tool kit. However, there are some special tools 51 085 00 Mounting sleeve... - Page 22 Installation, care and maintenance Senior Service log Pump No. Hours of operation Remarks Sign. Most recent service date...
- Page 23 Installation, care and maintenance Senior Service log Pump No. Hours of operation Remarks Sign. Most recent service date...
- Page 24 Grindex AB • Box 7025 • 174 07 Sundbyberg • Sweden • Tel +468 606 66 00 • Fax +468 745 53 28 • marketing@grindex.com...
Need help?
Do you have a question about the SENIOR and is the answer not in the manual?
Questions and answers