Table of Contents
Advertisement
Quick Links
Advertisement
Table of Contents

Related Manuals for Asko OCS8637S


Summary of Contents for Asko OCS8637S
- Page 1 Instructions for use OVEN OCS8637S / BO6SA2I3-42 OCS8437S / BO4CS2I3-42...
- Page 2 User manual EN 3 - EN 34 Pictograms used Important information...
-
Page 3: Table Of Contents
CONTENTS Your oven Introduction Description of the appliance Guide rails/Telescopic guide rails Accessories Door Cooling fan Control panel First use Before using the appliance for the first time Switching on and settings Choosing the cooking system Description of the main functions Choosing the settings Selecting additional functions Starting the cooking process... -
Page 4: Your Oven
YOUR OVEN Introduction Congratulations on choosing this oven. This product is designed with simple operation and optimum comfort in mind. This manual shows how you can best use this oven. In addition to information about operating the appliance, you will also find background information that may be useful when using the appliance. -
Page 5: Description Of The Appliance
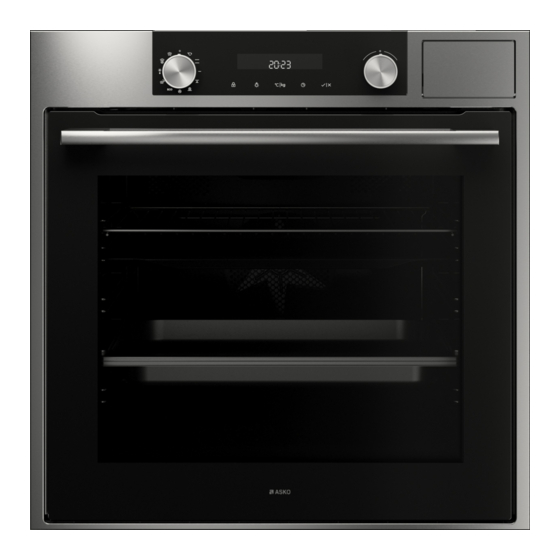
YOUR OVEN Description of the appliance 1. Control panel 2. Water reservoir cover Push to open! 3. Oven levels 4. Oven door 5. Door handle Guide rails/Telescopic guide rails • The oven has four or five guide rails (Level 1 to 4/5), depending on the model. Level 1 is mainly used in combination with bottom heat. -
Page 6: Accessories
YOUR OVEN Accessories Your appliance is accompanied by a range of accessories, depending on the model. Only use original accessories; they are specially suited to your appliance. Be sure that all the accessories that are being used are able to withstand the temperature settings of the chosen oven function. Note: not all accessories are suitable/available for every appliance (it may also differ by country). -
Page 7: Door
YOUR OVEN Accessories that can be supplied with your appliance (depending on the model) Perforated steam dish; 1/3GN. Perforated steam dish; 1/2GN. • Note: discolouration may occur at temperatures above 180 °C! This will not influence the proper function of the oven. •... -
Page 8: Control Panel
YOUR OVEN Control panel 1. Function knob (in ‘Off’ position) 2. Fast preheat 3. Upper and bottom heater 4. Grill 5. Grill with fan 6. Hot air and bottom heater 7. Hot air 8. Eco cooking 9. Cleaning 10. Defrosting 11. -
Page 9: First Use
FIRST USE Before using the appliance for the first time • Upon receiving the appliance, remove all parts, including any transport equipment, from the oven. Clean all accessories and utensils with warm water and regular detergent. Do not use any abrasive cleaners. -
Page 10: Use
Switching on and settings After connecting your appliance or after an extended power outage, 12:00 will flash on the display and the symbol will light up. All the settings as follows: SETTING THE CLOCK Rotate the SETTINGS KNOB (-/+) and first set the minutes; then, the cursor will switch to hours. After three seconds, the settings will be saved. - Page 11 SETTINGS To change the settings, rotate the setting knob to the right and hold it for three seconds. Press the start/sop icon to scroll through respective settings or parameters. To change a parameter, rotate the setting knob to the right or to the left. BRIGHTNESS LEVEL Select between three different options of brightness levels.
- Page 12 4 green stripes Soft Hrd 1 1 red stripe Slightly hard Hrd 2 2 red stripes Medium hard Hrd 3 3 red stripes Hard Hrd 4 4 red stripes Very hard Hrd 5 You can selected between five different options of water hardness levels. Water hardness level 5 is pre-set,text is visible.
- Page 13 STEP3/End - Rinsing process complete. Clean the tank and wipe the oven. Also clean the filter foam (see chapter CLEANING THE FILTER FOAM) By pressing the start/stop icon, user can go out of settings menu back to standby mode. You can go out of settings manu also if you hold selection knob on the left for 3 sec, or it you turn the system knob.
-
Page 14: Choosing The Cooking System
Choosing the cooking system Rotate the knob (left and right) to select 0 COOKING SYSTEM (see program table). The selected icon will appear on the display. Settings can also be changed during operation. Description of the main functions Consult the tables to select the preferred function. Also consult the instructions for preparation on the dish packaging. - Page 15 Function/ Description Recommended temp. °C Combi steam • Heating by means of hot air in combination with steam. 160 °C • The steam is sprayed into the oven cavity at regular intervals. • This mode can be used for baking types of pastry such as puff pastry, brioche pastry, yeast dough buns, French bread, gratins and roasting meat.
- Page 16 Function/ Description Recommended temp. °C Hot Air + Bottom Heat • Heating by means of hot air from the back of the oven and the bottom heating 200 °C element. • This mode can be used to bake pizza, moist pastry, fruitcakes, leavened dough and short crust.
- Page 17 Function/ Description Recommended temp. °C Large grill + Fan • Heating by means of the top heating elements. The heat is distributed by the 170 °C fan. • This mode can be used for grilling meat, fish and vegetables. • Place the oven rack in the upper part of the oven and the baking tray in the middle of the oven.
-
Page 18: Choosing The Settings
Choosing the settings Each cooking system features basic or default settings which can be adjusted. Adjust the settings by pressing the relevant key (before pressing the START/STOP key). Some settings are not available with some programs; an acoustic signal will remind you of such cases. CHANGING THE COOKING TEMPERATURE AND STEAM FUNCTION Select the COOKING SYSTEM. - Page 19 When selecting the combi steam program, first select the desired temperature and time. After confirming with START key, »int« and level bars will appear on the display to indicate the steam intensity setting (default setting is »mid«). Use the right knob to choose between three different steam intensity levels. Press the START key again to confirm the selected intensity level and start the combi steam program.
- Page 20 Setting the cooking time In this mode, you can define the duration of oven operation (cooking time). Set the desired cooking time. First set the minutes, then the hours. Icon and cooking time are displayed on the display unit. Setting the delayed start In this mode, you may specify the duration of the cooking process (cooking time) and the time when you wish the cooking process to stop (end time).
-
Page 21: Selecting Additional Functions
Selecting additional functions Activate/deactivate the functions by pressing the desired key or a combination of keys. Some functions are not available with some systems; an acoustic signal will indicate of such cases. Child lock Activate it by touching the CHILD LOCK key. The »key« icon will light up on the display. -
Page 22: Starting The Cooking Process
Starting the cooking process Start the cooking process by pressing the START/STOP key. Switching off the oven Turn the COOKING SYSTEM SELECTOR KNOB to position »0«. After the end of the cooking process and after the oven has been switched off, declining temperature is displayed down to 50 °C. -
Page 23: Operation
OPERATION Steam function Warning – Risk of scalding! Leave the door closed during steam functions, hot steam can escape in case of opening. Condensation in the oven will increase when opening the door. Note: Let the oven cool down after every steam function and dry the inside of the oven with a soft cloth. - Page 24 OPERATION Filling the water reservoir • Always fill the reservoir prior to using a steam function. • Use clean and cold tap water, bottled water without added minerals or distilled water suitable for consumption. 1. Press the ‘water reservoir’ cover to access the water reservoir. 2.
-
Page 25: Using The Appliance Cooking Functions
OPERATION Using the appliance cooking functions Consult ‘Control panel general use’ to get information about the general operation of the appliance. 1. Touch the ‘On/off key to switch on the appliance. 2. Turn the function knob to select a main function. ▷... -
Page 26: Culisensor (When Available)
OPERATION Changing settings during the progress • During progress, touching the navigation keys will show the active area. The selected setting can now be changed. After confirmation with the confirm key the progress screen will be shown with the changed settings. •... -
Page 27: Maintenance
MAINTENANCE Cleaning the appliance Clean the oven regularly to prevent fat and food particles from accumulating, especially on the surfaces of the interior and the exterior, the door and the seal. • Activate the child lock (to prevent that the appliance is switched on accidentally). •... -
Page 28: Cleaning The Water Tank Filter
MAINTENANCE Cleaning the Water Tank Filter If the water tank filter is dirty, you can clean it under the tap. 1. Remove the suction tube with the filter. 2. Clean it out under the tap and put it back into position. Ensure that the filter touches the base of the water tank. -
Page 29: Replacing The Oven Lamp
MAINTENANCE Replacing the oven lamp The lamp in this household appliance is only suitable for illumination of this appliance. The lamp is not suitable for household room illumination. The lamp is a consumer item and therefore not covered by warranty. Replace the defective lamp with a lamp of the same type. -
Page 30: Removal And Installation Of The Oven Door
MAINTENANCE Removal and installation of the oven door Keep your fingers away from the hinges of the oven door. The hinges are spring loaded and can cause injury if they spring back. Make sure that the hinge latches are applied correctly to lock the hinges. - Page 31 MAINTENANCE 1. Slightly lift (1) and shift (2) the clamps at the lower left and right of the door to release the glass (A). 2. Grab the glass (A) at the bottom and gently lift (3) and shift (4) it to remove it from the upper support.
-
Page 32: Malfunctions
MALFUNCTIONS General If you have problems with your oven, consult the error overview below. Should the problems persist, please contact the Customer Services Department. The food stays raw • Check whether the timer has been set and you have touched the confirm key. •... - Page 33 Storing and repairing the oven • Repairs should only be performed by a qualified service technician. If maintenance is required, take the plug from the socket and contact the ASKO customer service. Have the following information to hand when you call: •...
-
Page 34: Environmental Aspects
ENVIRONMENTAL ASPECTS Disposal of the appliance and packaging This product is made from sustainable materials. However, the appliance must be disposed of responsibly at the end of its useful life. The government can provide you with information about this. The appliance packaging can be recycled. The following materials have been used: •... - Page 36 When contacting the service department, have the complete type number to hand. You will find the addresses and phone numbers of the service organisation on the guarantee card. The instructions for use can also be found on our website: www.asko.com...
Need help?
Do you have a question about the OCS8637S and is the answer not in the manual?
Questions and answers