Table of Contents

Related Manuals for FALMEC FNLUM36I5SS


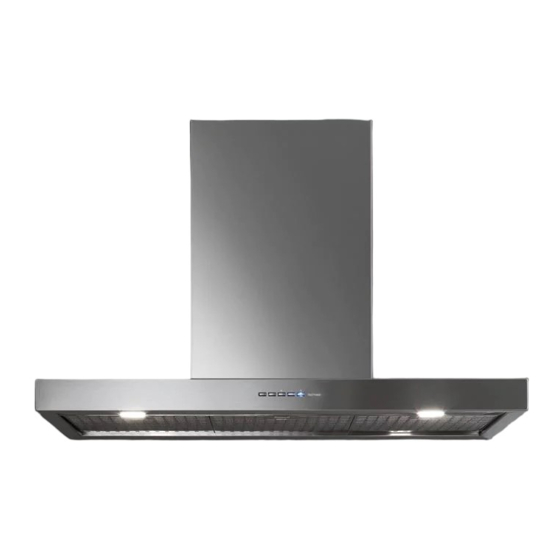
Summary of Contents for FALMEC FNLUM36I5SS
- Page 1 Silence NRS Lumina / Plane island/isola FN LU M 3 6 I 5 S S FN PLS 3 6 I 5 S S- R / FN PLS 4 8 I 5 S S- R INSTRUCTIONS BOOKLET MODE D'EMPLOI MANUAL DE INSTRUCCIONES LIBRETTO ISTRUZIONI...
- Page 2 Lumina NRS 36" Cod.: FNLUM36I5SS 120VAC 60Hz 280W 99 lb 45 kg 15 1/4” - 387 mm 35 3/8” - 900 mm...
- Page 3 Plane NRS 36" Cod.: FNPLS36I5SS-R 120VAC 60Hz 280W 92 lb 42 kg 15 1/4” - 387mm 12 1/4” 310mm 35 3/8” - 900 mm...
- Page 4 Plane NRS 48" Cod.: FNPLS48I5SS-R 120VAC 60Hz 280W 97 lb 44 kg 15 1/4” - 387mm 12 1/4” 310mm 47 1/4” - 1200 mm...
- Page 5 EN- cable length 5,0ft (1,5m) FR- longueur de câble 5,0ft (1,5m) 13 7/8” - 353 mm ES- longueur de câble 5,0ft (1,5m) IT- lunghezza cavo 5,0ft (1,5m) Ø 1/4” - 6 mm 15” - 382 mm CEILING FALSE CEILING EN - Side outlet which can only be used with false ceiling. FR - Sortie latérale utilisable uniquement avec faux-plafond.
- Page 6 EN - False ceiling (1), ceiling (2) and low ceiling (3) installation. FR - Installation sur faux-plafond (1), sur plafond (2) et plafond bas (3). ES - Instalación en falso techo (1), en techo (2) y en techo bajo (3). CEILING IT - Installazione su controsoffitto (1), a soffitto (2) e soffitto basso (3).
- Page 7 EN - Measurements for FR - Mesures pour ES - Medidas para la IT - Misure per l’installazione. installation. l'installation. instalacion. EN - INSTALLATION ON CEILING EN - INSTALLATION WITH FALSE CEILING FR - INSTALLATION AU PLAFOND FR - INSTALLATION AVEC FAUX-PLAFOND ES - INSTALACIÓN EN TECHO ES - INSTALACIÓN CON CIELO RASO IT - INSTALLAZIONE A SOFFITTO...
- Page 8 ES - Medidas instalación - Misure per l'installazione La altura de montaje recomendada desde la superficie de cocción hasta L’altezza di montaggio consigliata tra il piano cottura e la parte inferiore el fondo de la campana se indica con una "A" en el dibujo siguiente. della cappa è...
- Page 9 EN - Preliminary operations: disconnect the connector (2), disconnect the Lumina connector (3). FR - Opérations préliminaires: débrancher connecteur (2), débrancher connecteur Lumina (3). ES - Operaciones preliminares: desconectar el conector (2), desconectar el conector Lumina (3). IT - Operazioni preliminari: scollegare connettore (2), scollegare connettore Lumina (3). Lumina NRS...
- Page 10 EN - Preliminary operations: motor chamber disassembly (4), motor chamber bottom trestle assembly (5). FR - Opérations préliminaires : démontage chambre mo- teur (4), fixation support inférieur sur chambre mo- teur (5). ES - Operaciones preliminares: desmontaje de la cámara del motor (4), montaje de la estructura inferior a la cámara del motor (5).
- Page 11 EN - Check valve (6) and NRS pipe (7) installation. FR - Installation clapet anti-retour (6) et tube NRS (7). ES - Instalación de la válvula de no retorno (6) y tubo NRS (7). IT - Installazione valvola di non ritorno (6) e tubo NRS (7).
- Page 12 EN - Ceiling and false ceiling installation. Securing of the upper trestle to the ceiling (8). Securing of the bottom trestle and the motor chamber (9). Ø 3/8” Ø8 FR - Installation sur plafond et faux-plafond. Fixation support supérieur au plafond (8). Fixation support inférieur et chambre moteur (9).
- Page 13 EN - Low ceiling installation. Securing of the bottom trestle and the motor chamber to the ceiling(10) NRS pipe installation (11). FR - Installation sur plafonds bas. Fixation support inférieur et chambre moteur au plafond (10). Installation tube NRS (11). ES - Instalación del techos bajos.
- Page 14 EN - Chimney installation: ceiling (12), false ceiling (13), low ceil- ing (14). FR - Installation conduit d’évacuation: sur plafond (12), faux-pla- fond (13) et plafond bas (14). ES - Instalación chimenea: en techo (12), en falso techo (13), en techo bajo (14).
- Page 15 EN - Securing of the shelf (15). Lumina electric connection (16). Assembly of filters and panel (17). FR - Fixation panneau inférieur (15). Branchement électrique Lu- mina (16). Montage filtres et panneau (17). ES - Fijación del estante (15). Conexión eléctrica Lumina (16). Montaje de filtros y panel (17).
- Page 16 LUMINA NRS EN - Installing the carbon-zeolite filter (optional) OPTIONAL FR - Installation du iltre charbon-zeolite (en option) KACL.961 ES - Instalacion de iltro de carbon-zeolita (opcional) IT - Installazione filtro carbone-zeolite (opzionale) CEILING SOFFITTO...
- Page 17 PLANE NRS EN - Installing the carbon-zeolite filter (optional) OPTIONAL FR - Installation du iltre charbon-zeolite (en option) KACL.961 ES - Instalacion de iltro de carbon-zeolita (opcional) IT - Installazione filtro carbone-zeolite (opzionale) CEILING SOFFITTO...
-
Page 18: Technical Safety
SAFETY INSTRUCTIONS comply with local standards regarding radio anti- AND WARNINGS static properties. Installation operations are to be carried Before installing the hood, check that the electrical out by skilled and qualified installers in ac- mains power supply corresponds with what is report- cordance with the instructions in this book- ed on the identification plate located inside the hood. -
Page 19: Intended Use
will need to be cleaned to remove any residues re- Accessible parts of the hood can be hot when used at maining from the protective coating as well as any the same time as the cooking appliances. grease and oil stains which, if not removed, can cause Do not carry out any cleaning operations when parts irreversible damage to the hood surface. - Page 20 The cable must not be cut off by the switch. SRS SYSTEM SETTING (only for Plane NRS) The Manufacturer declines all responsibility for failure to comply with the safety regulations. The SRS system reduces the maximum air flow rate that can be set in the hood.
-
Page 21: Operation
MAX SPEED LEVEL 2 OPERATION WHEN TO TURN ON THE HOOD? Switch on the hood at least one minute before starting to cook to direct fumes and vapours towards the suction surface. After cooking, leave the hood operating until complete extraction of all vapours and odours. -
Page 22: Maintenance
TOUCH PUSHBUTTON PANEL (LUMINA NRS) MAINTENANCE Before cleaning or carrying out maintenance operations, discon- nect the equipment by removing the plug or switching off the main switch. Do not use detergents containing abrasive, acidic or corrosive substances or abrasive cloths. ON/OFF (Blue led steady on) Regular maintenance guarantees proper operation and performance over time. - Page 23 LIGHTING (PLANE NRS) DISPOSAL AFTER END OF USEFUL LIFE The range hood is equipped with high efficiency, low consumption LED spot- lights with an extremely long life-span under normal use conditions. Should the LED spotlight need to be replaced, proceed as shown in the figure. The crossed-out trash or refuse bin symbol on the appliance means that the product is WEEE, i.e.
-
Page 24: Sécurité Technique
CONSIGNES DE SÉCURITÉ SÉCURITÉ ÉLECTRIQUE ET MISES EN GARDE Le circuit électrique, auquel est reliée la Le travail d'installation doit être effectué hotte, doit être aux normes et muni d’un par des installateurs compétents et quali- raccordement à la terre, conformément aux fiés, conformément aux indications du pré- normes de sécurité... -
Page 25: Destination D'utilisation
soit conservé avec l'appareil pour toute consulta- Ne pas utiliser la hotte avec les mains mouillées ou les tion future. pieds nus. Si l'appareil devait être vendu ou transféré à une autre Contrôler toujours que toutes les parties électriques personne, s'assurer que le manuel soit remis avec ce- (lumières, aspirateur) soient éteintes lorsque l'appa- lui-ci, de manière à... - Page 26 Le raccordement doit être effectué conformément aux dispositions de lois Paramètre SRS SYSTEM (uniquement pour Plane NRS) en vigueur. Avant de raccorder la hotte au réseau électrique, contrôler que : Le système SRS réduit le débit d’air maximum configurable sur la •...
- Page 27 MAX SPEED LEVEL 2 COMMANDE ÉLECTRONIQUE (PLANE NRS) Moteur ON/OFF Augmentation de la vitesse de Les vitesses sont signalées par 1 à MAX les lampes LED présentes sur les Vitesse maximum avec le sys- touches : tème SRS désactivé: Vitesse 1 Vitesse 4, elle n’...
-
Page 28: Entretien
ENTRETIEN ÉCLAIRAGE (LUMINA NRS) La hotte est dotée d'éclairage à travers une lampe fluorescente. Si son remplacement s'avérait nécessaire, procéder comme sur la figure. Avant de procéder à toute opération de nettoyage ou d'entre- tien, désactiver l'appareil en enlevant la fiche ou en agissant sur l'interrupteur général. -
Page 29: Seguridad Técnica
INSTRUCCIONES DE SEGURIDAD dad del país de uso; además debe respetar las Y ADVERTENCIAS normativas europeas sobre la protección contra interferencias radio. Las operaciones de instalación deben efec- tuarlas instaladores competentes y cualifi- Antes de instalar la campana, controle que la tensión cados, siguiendo cuanto se indica en este de red coincida con la indicada en la placa colocada manual y respetando las normas en vigor. -
Page 30: Destino De Uso
cionamiento de la campana y sobre las advertencias aceite recalentado podría inflamarse. correspondientes. No encienda llamas libres debajo de la campana. Después de instalar las campanas de acero inoxida- No cocine con llamas "libres" debajo de la campana. ble es necesario limpiarlas para eliminar los residuos No use nunca la campana sin los filtros metálicos an- de cola del protector y las posibles manchas de grasa tigrasa;... - Page 31 para la puesta a tierra, azul para el neutro y el hilo marrón para la fase. El Configuración del SISTEMA SRS (solo para Plane NRS) enchufe ha de conectarse a una adecuada toma de seguridad. • aparato fijo sin cable de alimentación ni enchufe, ni de otro dispositivo que El sistema SRS reduce la capacidad máxima de aire que se puede asegure la desconexión de la red, con una distancia de apertura de los contac- programar en la campana.
- Page 32 MAX SPEED LEVEL 2 PANEL DE MANDOS ELECTRÓNICO (PLANE NRS) Motor ON/OFF Aumento de la Los led presentes en los botones velocidad de 1 a MAX indican las velocidades: Velocidad máxima con SRS desactivado: Velocidad 1 Velocidad 4, solo está activa durante pocos minutos, a Velocidad 2 continuación vuelve a la...
-
Page 33: Mantenimiento
MANTENIMIENTO ILUMINACIÓN (LUMINA NRS) La campana cuenta con iluminación gracias a lámpara fluorescente. Si es preciso sustituir esta última, siga los pasos ilustrados en la figura. Antes de realizar cualquier tipo de limpieza o de mantenimiento, desconecte el equipo desenchufándolo o usando el interruptor general. -
Page 34: Sicurezza Tecnica
ISTRUZIONI DI SICUREZZA Prima di installare la cappa verificare che la tensione E AVVERTENZE di rete corrisponda a quella riportata dalla targhetta posta all’interno della cappa. Il lavoro d’installazione deve essere esegui- to da installatori competenti e qualificati, La presa usata per il collegamento elettrico deve es- secondo quanto indicato nel presente li- sere facilmente raggiungibile con l’apparecchiatura bretto e rispettando le norme in vigore. -
Page 35: Installazione
Dopo l’installazione delle cappe in acciaio inox è ne- Non preparare cibi alla fiamma sotto la cappa. cessario eseguire la pulizia della stessa per rimuove- Non utilizzare mai la cappa senza i filtri metallici anti- re i residui di collante del protettivo e le eventuali grasso;... - Page 36 la messa a terra, blu per il neutro e il filo marrone per la fase. La spina deve Impostazione SRS SYSTEM (solo per PLANE NRS) essere collegata ad un'adeguata presa di sicurezza. • apparecchio fisso non provvisto di cavo di alimentazione e di spina, o di altro Il sistema SRS riduce la massima portata d’aria impostabile nella dispositivo che assicuri la disconnessione dalla rete, con una distanza di aper- cappa.
-
Page 37: Funzionamento
MAX SPEED LEVEL 2 PULSANTIERA ELETTRONICA (PLANE NRS) Motore ON/OFF Incremento velocità Le velocità sono segnalate dai da 1 a MAX led presenti nei tasti: Velocità massima con SRS Velocità 1 disabilitato: Velocità 4, è attiva solo per pochi Velocità 2 minuti, poi si ritorna a velocità... -
Page 38: Manutenzione
MANUTENZIONE ILLUMINAZIONE (PLANE NRS) La cappa è dotata di illuminazione tramite faretti led ad alta efficienza, basso consumo e durata molto elevata in condizioni di normale utilizzo. Prima di procedere a qualsiasi operazione di pulizia o di manu- Nel caso si rendesse necessaria la sostituzione del faretto procedere come in tenzione, disinserire l’apparecchio togliendo la spina o agendo figura. - Page 39 SMALTIMENTO A FINE VITA Il simbolo del cestino barrato riportato sull’apparecchiatura in suo pos- sesso indica che il prodotto è un RAEE, cioè un “Rifiuto derivante dalle Apparecchiature Elettriche ed Elettroniche” e pertanto non deve essere gettato nella spazzatura indifferenziata (cioè insieme ai “rifiuti urbani misti”), ma deve essere gestito separatamente così...
- Page 40 Falmec S.p.A via dell’Artigianato, 42 z.i. 31029 Vittorio Veneto Treviso — Italy info@falmec.com falmec.com Codice / Code Matricola / Serial Number...
Need help?
Do you have a question about the FNLUM36I5SS and is the answer not in the manual?
Questions and answers