Advertisement
Table of Contents
- 1 Table of Contents
- 2 Tools Required
- 3 Parts List-Right Arm Loveseat
- 4 Step-By-Step Guide
- 5 Parts List-Left Arm Loveseat
- 6 Step-By-Step Guide
- 7 Parts List-Corner Chair
- 8 Step-By-Step Guide
- 9 Instruction for Use
- 10 Parts List-Side Table
- 11 Step-By-Step Guide
- 12 Caring for Your Item
- 13 Warranty
- Download this manual
Advertisement
Table of Contents

Related Manuals for Canvas MORAINE 088-0542-2


Summary of Contents for Canvas MORAINE 088-0542-2
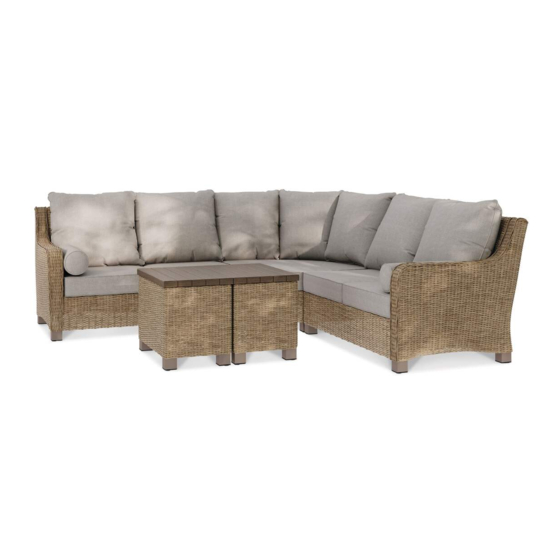
- Page 1 MORAINE SECTIONAL SET PRODUCT NO. 088-0542-2 ASSEMBLY INSTRUCTIONS HAVING TROUBLE? TOLL-FREE: 1-888-670-6684 IMPORTANT: Please read this manual carefully before beginning assembly of this product. Keep this manual for future reference.
- Page 2 From on-trend furniture pieces to holiday décor and all your outdoor living essentials, CANVAS® makes it easy to refresh your space your unique style and the way you live every day. We would love to hear from you and welcome your thoughtful feedback.
-
Page 3: Table Of Contents
TABLE OF CONTENTS Tools Required Parts List—Right Arm Loveseat Step-by-step Guide Parts List—Left Arm Loveseat Step-by-step Guide Parts List—Corner Chair Step-by-step Guide Instruction for Use Parts List—Side table Step-by-step Guide Caring for Your Item Warranty WARNING! TO REDUCE THE RISK OF SERIOUS INJURY, READ THE FOLLOWING SAFETY INSTRUCTIONS BEFORE ASSEMBLING AND USING THE PRODUCT. -
Page 4: Tools Required
TOOLS REQUIRED Hex Key (included) Wrench (included) 2 people Before beginning assembly of this product, be sure all parts are present. Compare parts with package contents list and hardware contents list. If any part appears to be missing or damaged, do not begin assembly of this product and call customer service immediately. -
Page 5: Parts List-Right Arm Loveseat
PARTS LIST—RIGHT ARM LOVESEAT ITEM DESCRIPTION THUMBNAIL QUANTITY Loveseat back—right Loveseat base—right Right arm Seat cushion Back cushion Plastic foot Bolster cushion MORAINE SECTIONAL SET... - Page 6 EXPLODED PARTS HARDWARE LIST ITEM DESCRIPTION THUMBNAIL QUANTITY Screw M6*18 Screw M6*40 Screw M6*45 Washer M6 Hex key Spring washer Washer M8 Wrench MORAINE SECTIONAL SET...
-
Page 7: Step-By-Step Guide
STEP-BY-STEP GUIDE STEP 1 Place the right arm onto a non-abrasive surface, such as a carpet, with its inside facing upwards. Attach two plastic feet to right arm panel with nuts , spring washers and washers using wrench , aligning the holes. - Page 8 STEP 2 Place the loveseat back—right onto a non-abrasive surface, such as a carpet, with its inside facing upwards. Attach the loveseat base—right to loveseat back—right , with screws and washers using hex key aligning the holes. NOTE: Do not fully tighten screws until you have assembled the loveseat.
- Page 9 STEP-BY-STEP GUIDE STEP 3 Place the right arm onto a non-abrasive surface, such as a carpet, with its inside facing upwards. Attach the loveseat base—right and back—right to the right with screws , butterfly bolt and washers using hex key , aligning the holes.
- Page 10 STEP 4 Put seat cushions , back cushions and bolster cushion on the seat. MORAINE SECTIONAL SET...
-
Page 11: Parts List-Left Arm Loveseat
PARTS LIST—LEFT ARM LOVESEAT ITEM DESCRIPTION THUMBNAIL QUANTITY Loveseat back—left Loveseat base—left Left arm Seat cushion Back cushion Plastic foot Bolster cushion MORAINE SECTIONAL SET... - Page 12 EXPLODED PARTS HARDWARE LIST ITEM DESCRIPTION THUMBNAIL QUANTITY Screw M6*18 Screw M6*40 Screw M6*45 Washer M6 Hex key Spring washer Washer M8 Wrench MORAINE SECTIONAL SET...
-
Page 13: Step-By-Step Guide
STEP-BY-STEP GUIDE STEP 1 Place the left arm onto a non-abrasive surface, such as a carpet, with its inside facing upwards. Attach two plastic feet to left arm panel with nuts , spring washers and washers using wrench , aligning the holes. Repeat step to attach plastic foot to loveseat back—left , and... - Page 14 STEP 2 STEP 2 Place the loveseat back—left onto a non-abrasive surface, such as a carpet, with its inside facing upwards. Attach the loveseat base—left to loveseat back—left with screws and washers using hex key aligning the holes. NOTE: Do not fully tighten screws until you have assembled the loveseat.
- Page 15 STEP-BY-STEP GUIDE STEP 3 Place the left arm onto a non-abrasive surface, such as a carpet, with its inside facing upwards. Attach the loveseat back—left to the loveseat base—left with screws , butterfly bolt and washers using hex key , aligning the holes. When assembled, tighten all screws with hex key NOTE: Do not fully tighten screws...
- Page 16 STEP 4 Put seat cushions , back cushions and bolster cushion on the seat. MORAINE SECTIONAL SET...
-
Page 17: Parts List-Corner Chair
PARTS LIST—CORNER CHAIR ITEM DESCRIPTION THUMBNAIL QUANTITY Chair back Chair base Seat cushion Back cushion Plastic foot MORAINE SECTIONAL SET... - Page 18 EXPLODED PARTS HARDWARE LIST ITEM DESCRIPTION THUMBNAIL QUANTITY Screw M6*18 Screw M6*45 Washer M6 Hex key Spring washer Washer M8 Wrench Plastic connector MORAINE SECTIONAL SET...
-
Page 19: Step-By-Step Guide
STEP-BY-STEP GUIDE STEP 1 Place the chair base onto a non-abrasive surface, such as a carpet, with its bottom facing upwards. Attach two plastic feet to the chair base with nuts , spring washers and washers using wrench , aligning the holes. - Page 20 STEP 2 Place the chair back onto a non-abrasive surface, such as a carpet, with its inside facing upwards. Attach the chair base to chair back with screws and washers using hex hey aligning the holes. NOTE: Do not fully tighten screws until you have assembled the chair.
- Page 21 STEP-BY-STEP GUIDE STEP 3 Attach the chair base to chair back with screws and washers using hex hey , aligning the holes. When assembled, tighten all screws with hex key NOTE: Do not fully tighten screws until you have assembled the chair.
- Page 22 STEP 4 Put seat cushion and back cushions on the chair. MORAINE SECTIONAL SET...
-
Page 23: Instruction For Use
INSTRUCTIONS FOR USE When in use, the loveseats and corner chair can be connected using plastic connectors on each side. MORAINE SECTIONAL SET... -
Page 24: Parts List-Side Table
PARTS LIST—SIDE TABLE ITEM DESCRIPTION THUMBNAIL QUANTITY Table top per table Table base side panel A per table Table base side panel B per table Bottom panel per table MORAINE SECTIONAL SET... - Page 25 EXPLODED PARTS HARDWARE LIST ITEM DESCRIPTION THUMBNAIL QUANTITY Washer M6 per table Hex key per table Screw M6*35 per table MORAINE SECTIONAL SET...
-
Page 26: Step-By-Step Guide
STEP-BY-STEP GUIDE STEP 1 Attach the side panel to the side panels with screws and washers using hex key , aligning the holes. When assembled, tighten all screws with hex key NOTE: Do not fully tighten screws until you have assembled the table. - Page 27 STEP 2 Repeat Step 2 to attach other side panel to side panels NOTE: Do not fully tighten screws until you have assembled the table. Once assembly is complete, then fully tighten each screw. MORAINE SECTIONAL SET...
- Page 28 STEP-BY-STEP GUIDE STEP 3 Place the side panel onto a non-abrasive surface, such as a carpet. Attach the bottom panel to table side panels with screws and washers using hex . aligning the holes. When assembled, tighten all screws with hex key NOTE: Do not fully tighten screws until you have assembled...
- Page 29 STEP 4 Set table upright and put table feet on the floor, then place the table top on the top. STEP 6 Repeat Steps 1-5 to assemble the other side table. MORAINE SECTIONAL SET...
-
Page 30: Caring For Your Item
OFF SEASON: Clean and dry before storing in a dry, sheltered area. WARRANTY INFORMATION This CANVAS® product carries a one (1) year warranty against defects in workmanship and materials. Trileaf Distribution agrees to replace the defective product free of charge within the stated warranty period, when returned by the original purchaser with proof of purchase.
Need help?
Do you have a question about the MORAINE 088-0542-2 and is the answer not in the manual?
Questions and answers
My Canvas 088-0542-2 has a fabrication default. It miss a metal attach. how will you correct it?
Hello I am missing 2 “B” butterfly bolts and 2 “D” washers for my moraine sectional patio sofa. Can you ship them to me? I’m in Toronto ontatio