
Subscribe to Our Youtube Channel
Related Manuals for Canvas 088-1682-2


Summary of Contents for Canvas 088-1682-2
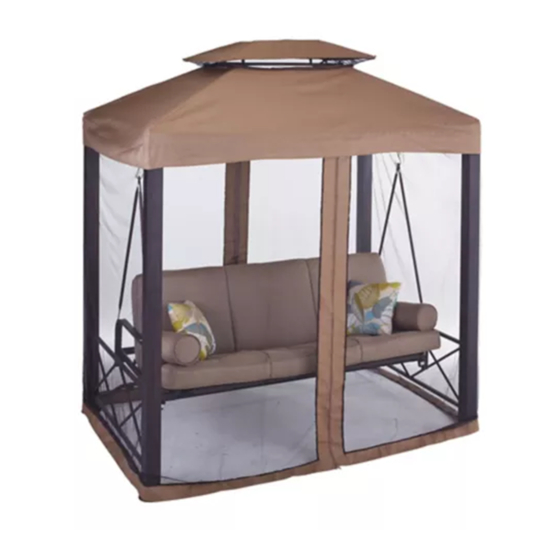
- Page 1 VALENCIA COLLECTION Day Bed and Swing MODEL NO. 088-1682-2 ASSEMBLY INSTRUCTIONS Toll-free: 1-888-670-6684 IMPORTANT: Please read this manual carefully before beginning assembly of this product. Keep this manual for future reference.
- Page 2 MODEL NO. 088-1682-2 TABLE OF CONTENTS Important Safety Instructions Parts List Assembly Cleaning and Maintenance Technical Specifications Warranty • SET UP YOUR FURNITURE PROPERLY Ensure that all parts are assembled properly and fully tightened as per the instructions. When placing in the desired location, ensure that all legs are resting on the same surface.
-
Page 3: Table Of Contents
Leg post - 2 Small canopy frame - 2 Leg post - 2 Small canopy frame bar - 1 Side panel - 2 Cushion - 1 Long top crossbar - 2 Pillow - 2 Short top crossbar - 2 Large canopy - 1 Rear leg crossbar - 1 Small canopy - 1 Right arm - 1... - Page 4 MODEL NO. 088-1682-2 M8*60 bolt - 4 M8*80 bolt - 2 M6 nut - 4 M8 nut - 6 M6 metal washer - 4 M8 metal washer - 22 Plastic washer - 2 S-hook - 2 U-bracket - 4 Open wrench - 1...
-
Page 5: Warranty
Let us help you! DO NOT RETURN YOUR PRODUCT TO THE STORE. CALL US FIRST! 1-888-670-6684 If you have questions regarding your product, require warranty assistance, or have damaged or missing parts, please call our customer service toll-free helpline. Contact us for assistance; we’re here to help. IMPORTANT: Please read and understand this manual before any assembly. -
Page 6: Side Panel
MODEL NO. 088-1682-2 Step 1 Requires 1, 2, A, O. Insert a bolt A through the U-shaped bracket O, and secure into the leg top 1 or 2. Do not tighten. Repeat for the remaining 3 legs. Not actual size. -
Page 7: Long Top Crossbar
Step 3 Requires 1, 2, 4, E, L. Insert two long top crossbars into the holes at the top of each leg. Line up the holes. For each hole insert a bolt through a metal washer L, through the leg, and secure into the long top crossbar 4. -
Page 8: Rear Leg Crossbar
MODEL NO. 088-1682-2 Step 5 Requires 3, 6, D, K, P, Q, R. Place the rear leg crossbar between the side panels 3. Line up the holes. Insert a bolt through a metal washer K, through the side panel 3, and secure into the rear leg crossbar 6. -
Page 9: Rear Seat Support Bar
Step 7 Requires 7, 8, 11, H, J, L, M, P, R. Unfold the seat and back 11 and lay it on top of the frame. Line up the holes in the arms 7 and 8 with the holes in the side tubes of the seat and back 11. Insert a bolt (from outside to inside) through the bracket of the arm, through a plastic washer M, through the side bar on the seat and back, through a metal... -
Page 10: Hanging Bar
MODEL NO. 088-1682-2 Step 9 Requires 5, 7, 8, 12, N. Attach the hanging bars to the arms by sliding the bottom hole in the bars over the pins on the outside of the arms 7 and 8. Position the bars so that the end labelled “TOP”... -
Page 11: Canopy Frame Bar
Step 11 Requires 13, 15. Insert the small canopy frame into the large canopy frame as per drawing. Step 12 Requires 15, 16, 20, B, K. Insert a bolt through the metal washer K, through the small canopy frame 15, and into the small canopy frame bar 16. -
Page 12: Cushion
MODEL NO. 088-1682-2 Step 13 Requires 14, 19, 20, C, I, O, P, Q, R. Place the assembled canopy top frame on the assembled swing frame. Insert a bolt through one side of the U shaped bracket at the top of the leg, through the canopy frame bar 14, through the other side of the U shaped bracket, and secure with a nut I. - Page 13 Step 15 Requires 6, 10, 11 To convert the swing into a hanging bed, push down the spring ring-pull on rear seat support bar first.Then release the back support tube from the rear seat support bar and fasten it to the U-shaped bracket on the rear leg crossbar 6. When used as a bed, the seat assembly should be secured by these holders and not allowed to swing.
- Page 14 600 lb WARRANTY This CANVAS product carries a one (1) year warranty against defects in workmanship and materials. Trileaf Distribution agrees to replace the defective product free of charge within the stated warranty period, when returned by the original purchaser with proof of purchase.
Need help?
Do you have a question about the 088-1682-2 and is the answer not in the manual?
Questions and answers