
Subscribe to Our Youtube Channel
Related Manuals for PTZOptics PT30X-NDI-GY


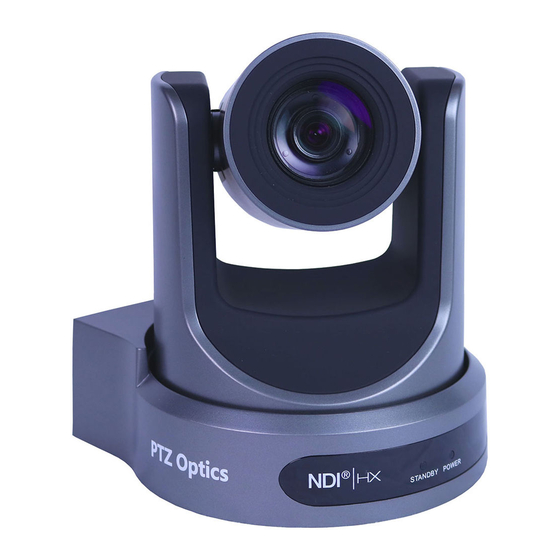
Summary of Contents for PTZOptics PT30X-NDI-GY
- Page 1 PTZOptics 30x NDI®|HX User Manual Model Nos: PT30X-NDI-GY & PT30X-NDI-WH V1.6 (English) Please check PTZOPTICS.com for the most up to date version of this document...
- Page 2 Warranty lengths are shown below. The warranty is valid only if PTZOptics receives proper notice of such defects during the warranty period. PTZOptics, at its option, will repair or replace products that prove to be defective. PTZOptics manufactures its hardware products from parts and components that are new or equivalent to new in accordance with industry standard practices.
-
Page 3: Table Of Contents
Table of Contents Supplied Accessories………………………………………………………………………………………………………... Notes………………………………………………………………………………………………………………………… Quick Start…………………………………………………………………………………………………………………... Features……………………………………………………………………………………………………………………... Product Specification………………………………………………………………………………………………………... Back of the Camera………………………………………………………………………………………………………….. IR Remote Controller……………………………………………………………………………………………………….. Using the IR Remote Controller…………………………………………………………………………………………….. Dimensional Drawings……………………………………………………………………………………………………… RS-232 Interface…………………………………………………………………………………………………………….. VISCA Command List………………………………………………………………………………………………………. Menu Settings……………………………………………………………………………………………………………….. Exposure……………………………………………………………………………………………………………….. Color…………………………………………………………………………………………………………………… Image…………………………………………………………………………………………………………………... P/T/Z…………………………………………………………………………………………………………………… Noise Reduction……………………………………………………………………………………………………….. Setup…………………………………………………………………………………………………………………… Communication Setup…………………………………………………………………………………………………. -
Page 4: Supplied Accessories
Supplied Accessories When you unpack your camera, check that all the supplied accessories are included: • Camera • AC Power Supply • RS-232C Cable • IR Remote Control • Quick Start Guide • AAA Batteries Notes ⚫ Electrical Safety Installation and operation must be in accordance with national and local electric safety standards. Do not use any power supply other than the one originally supplied with this camera. -
Page 5: Quick Start
Quick Start Step1. Please check that all connections are correct before powering on the camera. Rev 1.6 8/20... - Page 6 Step2. Set the system select switch for your desired video output resolution and frame rate. For many applications, setting 0 (1080p-60) will provide the best overall performance. For highest possible resolution, use setting 0 (1080p-60) or 6 (1080p-30), however your actual realized frame rate may be limited to a lower value than 60 fps by your software and/or network connection.
-
Page 7: Features
Support for ultra-high FPS mode 1280x720p @ 120 frames per second over NDI | HX / IP network stream. Supports non-simultaneous CVBS (composite video) output via 3.5mm connector (480i or 576i) • Control and Settings PTZOptics VISCA over IP ® ® | HX control through NDI approved platforms that offer control. - Page 8 Technical Specifications Model PT30X-NDI-GY and PT30X-NDI-WH Type PTZOptics NDI®|HX HD 1080p Color Video Camera Camera 1080p-60/50/30/25/59.94*/29.97*, 1080i-60/50/59.94*, 720p-60/50/59.94* CVBS: 576i, 480i Video System *Broadcast frame rates are considered BETA features and may not be supported by all platforms Please note: The camera is unable to perform 1080p60 over IP stream & SDI/HDMI simultaneously Sensor 1/2.7", CMOS, Effective Pixel: 2.07M...
- Page 9 Input/Output Interface 1 x HDMI: Version 1.3 HD Output 1 x 3G-SDI: BNC type, 800mVp-p, 75Ω, Along to SMPTE 424M standard 1 x RJ45 NDI ® | HX / IP Network streaming 10/100/1000 Ethernet port SD Output 1 x CVBS: RCA jack, 1Vp-p, 75Ω Network Interface 1 x RJ45: 10/100/1000M Adaptive Ethernet ports Audio Input...
-
Page 10: Back Of The Camera
Back of the Camera 1. Audio LINE IN Interface (NDI®|HX, HDMI, IP) 7. Network (NDI®|HX, IP streaming, and control) 2. CVBS (composite video SD) Interface 8. HDMI (Digital Video Output) 3. System select dial (resolution) 9. 3G-SDI (Serial Digital Video Output) 4. -
Page 11: Ir Remote Controller
IR Remote Controller 1. Standby Button Press this button to enter standby mode. Press it again to enter normal mode. NOTE: Power consumption in standby mode is approximately half of the normal mode. 2. Position Buttons To set preset or call preset. 3. - Page 12 12. Multiple Function Buttons Function 1. Set camera IR address Press 3 keys contiguously can set camera IR address as follow: [*] + [#] + [F1]: Address 1 [*] + [#] + [F2]: Address 2 [*] + [#] + [F3]: Address 3 [*] + [#] + [F4]: Address 4 Function 2.
- Page 13 IR Remote Controller Guide To perform a command on the IR remote, press and Auto Focus Mode: Press [AUTO] Manual Focus Mode: Press [MANUAL] release the button. A special note will be given when [FAR] you can press and hold the button. Focus Far: Press [NEAR]...
- Page 14 Note: Ensure that only one camera is ‘listening’ to the Set Preset: Press [PRESET] > preset number Call Preset: Press preset number IR Address shortcut at a time. If multiple cameras {RESET} Clear Preset: Press > preset number receive the command, they will all change their IR Clear ALL Presets: Press >...
-
Page 15: Dimensional Drawings
Dimensional Drawings (mm) Rev 1.6 8/20... -
Page 16: Rs-232 Interface
RS-232 Interface Camera PC/Controller DB-9 1.DTR 1.CD 2.DSR 2.RXD 3.TXD 3.TXD 4.GND 4.DTR 5.RXD 5.GND 6.GND 6.DSR 7.IR OUT 7.RTS 8.NC 8.CTS 9.RI For Control Daisy Chain Camera Camera Mini DIN Function 1.DTR 1.DTR 2.DSR 2.DSR 3.TXD 3.TXD 4.GND 4.GND 5.RXD 5.RXD 6.GND... - Page 17 Serial Communication Control In default working mode, the camera is able to connect to a VISCA controller with an RS232C serial interface. ➢ RS232 Communication Control The camera can be controlled via RS232. The parameters of RS232C are as follows: Baud rate: 2400, 4800, 9600 or 38400 bps.
-
Page 18: Visca Command List
PTZOptics VISCA Command List Part 1: Camera-Issued Messages ACK/Completion Message Command Function Command Packet Comments z0 4y FF Returned when the command is accepted. (y: Socket No.) ACK/Completion z0 5y FF Messages Completion Returned when the command has been executed. - Page 19 Part 2: PTZOptics VISCA Command List Command Function Command Packet Comments 8x 01 04 00 02 FF CAM_Power Power ON/OFF 8x 01 04 00 03 FF Stop 8x 01 04 07 00 FF Tele (Standard) 8x 01 04 07 02 FF...
- Page 20 Shutter priority 8x 01 04 39 0A FF Shutter Priority Automatic Exposure mode Iris priority 8x 01 04 39 0B FF Iris Priority Automatic Exposure mode Bright 8x 01 04 39 0D FF Bright Mode(Manual control) Reset 8x 01 04 0B 00 FF 8x 01 04 0B 02 FF Iris Setting CAM_Iris...
- Page 21 0Z 0Z 0Z 0Z FF 8x 01 06 03 VV WW 0Y 0Y 0Y 0Y RelativePosition 0Z 0Z 0Z 0Z FF Home 8x 01 06 04 FF Reset 8x 01 06 05 FF 8x 01 06 07 00 0W 0Y 0Y 0Y 0Y LimitSet W: 1 UpRight 0: DownLeft 0Z 0Z 0Z 0Z FF...
- Page 22 Part 3: PTZOptics VISCA Query Command List Inquiry Command List Command Command packed Inquiry Packet Comments y0 50 02 FF y0 50 03 FF CAM_PowerInq 8x 09 04 00 FF Off (Standby) y0 50 04 FF Internal power circuit error...
- Page 23 y0 50 03 FF y0 50 02 FF CAM_PictureEffectModeI 8x 09 04 63 FF y0 50 04 FF B&W y0 50 02 FF CAM_LR_ReverseInq 8x 09 04 61 FF y0 50 03 FF y0 50 02 FF CAM_PictureFlipInq 8x 09 04 66 FF y0 50 03 FF y0 50 00 00 00 0p FF CAM_ColorGainInq...
- Page 24 pp: R_Gain qq: B_Gain r: WB Mode s: Aperture tt: AE Mode y0 50 0p 0p 0q 0q 0r 0s CAM_CameraBlockInq 8x 09 7E 7E 01 FF u.bit2: Back Light tt 0u vv ww 00 xx 0z FF u.bit1: Exposure Comp. vv: Shutter Position ww: Iris Position xx: Bright Position...
- Page 25 Part 4: PTZOptics VISCA over IP Command List Command Function Command Packet Comments 81 01 04 00 02 FF CAM_Power Power ON/OFF 81 01 04 00 03 FF Stop 81 01 04 07 00 FF Tele (Standard) 81 01 04 07 02 FF...
- Page 26 Iris priority 81 01 04 39 0B FF Iris Priority Automatic Exposure mode Bright 81 01 04 39 0D FF Bright Mode(Manual control) Reset 81 01 04 0B 00 FF 81 01 04 0B 02 FF Iris Setting CAM_Iris Down 81 01 04 0B 03 FF Direct 81 01 04 4B 00 00 0p 0q FF...
- Page 27 81 0A 11 14 pq FF MS Lower Speed Limit pq: speed stage CAM_UACStatus Toggle USB Audio 81 0A 11 14 pq FF p=2: On, p=3: Off Part 5: PTZOptics VISCA over IP Query Command List Inquiry Command List Command Command Inquiry Packet Comments packed...
- Page 28 90 50 03 FF Off (Standby) 90 50 04 FF Internal power circuit error 81 09 04 47 FF 90 50 0p 0q 0r 0s FF CAM_ZoomPosInq pqrs: Zoom Position 90 50 02 FF Auto Focus 81 09 04 38 FF CAM_FocusAFModeInq 90 50 03 FF Manual Focus...
- Page 29 90 50 03 FF 81 09 04 49 FF 90 50 00 00 00 0p FF CAM_ColorGainInq p: Color Gain setting 0h (60%) to Eh (200%) 90 50 0w 0w 0w 0w wwww: Pan Position 81 09 06 12 FF Pan-tiltPosInq 0z 0z 0z 0z FF zzzz: Tilt Position...
- Page 30 0xFF Address 0x00 0x59 Value High Byte Value Low Byte Query Pan Position Response 0xFF Address 0x00 0x53 0x00 0x00 Query Tilt Position 0xFF Address 0x00 0x5B Value High Byte Value Low Byte Query Tilt Position Response 0xFF Address 0x00 0x55 0x00 0x00...
-
Page 31: Exposure
On Screen Display Menu Exposure Mode: Modes include: Auto, Manual, SAE, AAE, Bright Main Menu ExpCompMode: Exposure Compensation mode Options include: On, Off There are many ways to adjust the camera’s On (Only available in Auto mode) Screen Display (OSD) Menu. The following instructions ExpComp: Exposure Compensation value. - Page 32 COLOR IMAGE WB Mode Auto Luminance 7 RG Tuning Contrast BG Tuning Sharpness 3 Saturation 100% Flip-H Flip-V AWB Sens High B&W-Mode Gamma Default Select Item Style Clarity Change Value [Menu] Back Select Item Change Value [Menu] Back WB Mode: Modes include: Auto, Indoor, Outdoor, OnePush, Manual, VAR Luminance: Brightness adjustment, optional items: 0 ~ 14.
-
Page 33: Noise Reduction
AF-Sense: Automatic focusing sensitivity options, optional SETUP items: Low, Normal, High Language L/R Set: Optional items: STD, REV DVIMode HDMI Display Info: Displays camera information upon startup, Lens Type2 Auto Scan Shoot optional items: On, Off Auto Focus L Image Freeze: Temporarily freeze image during preset call, MotionSync optional items: On, Off Digital Zoom: Increase zoom level with electronic zoom,... -
Page 34: Restore Default
Restore Default COMMUNICATION SETUP V_Address 1 V-AddrFix Move the cursor to the “Restore Default” option and Net Mode Serial press the [HOME] button to enter the Restore Default Baudrate 9600 page, as shown in the figure below. Select Item RESTORE DEFAULT Change Value Restore? [Menu] Back... -
Page 35: Network Connection
Network Connection Operating Environment Operating System: Windows 2000/2003/XP/Vista/7/8.1/10 Network Protocol: TCP/IP Client PC: P4 / 128M RAM / 40GHD / support for scaled graphics card, support for DirectX8.0 or more advanced version. 2. Equipment Installation 1) Connect camera to your network via a CAT5 or CAT6 patch cable or directly to your PC via a CAT5 or CAT6 cross over cable. -
Page 36: Setting Up A Network Video Stream
2. Next, go online and download the IP Address Settings Tool. It’s available for Windows & Mac OS at ptzoptics.com/firmware. 3. Once you complete the download, launch the “Upgrade v2.8C” tool. Select your network connection type from the “Interface”... - Page 37 Set the secondary stream to MJPEG. b. Install the PTZOptics ActiveX Plugin and use Internet Explorder. i. For more detail, go to help.ptzoptics.com. 7. From the Web Interface, you can control the camera using the arrows on the left side. You can also adjust many of your camera’s settings via this IP interface.
- Page 38 Discovering your Network Info You can discover the IP range of your network by using the Command Prompt for Windows, or the Terminal app for Macs and following the steps below. Windows 1. Type “CMD” into the search bar in the start menu. 2.
-
Page 39: Camera Web Interface
Camera Web Interface The Web Interface allows you to control the camera, view the video feed, and adjust many of the camera’s settings. Menu The Menu allows you to traverse the Web Interface. By default, the “Live” option is selected. Live This tab allows you to view the video feed of the camera. -
Page 40: Video
Video 720p120: Allows camera to output 720p at 120 FPS via the IP Network Stream. Set to ‘On’ or ‘Off’. (Note: Setting to ‘On’ will override and lockout other video settings). Video Format: Supports 50Hz (PAL), 60Hz (NTSC), & Dial Priority formats. -
Page 41: Image
Image Brightness: Brightness slider. Default: 7 Saturation: Saturation slider. Default: 4 Contrast: Contrast slider. Default 10 Sharpness: Sharpness slider. Default: 3 Hue: Hue slider. Default: 7 Flip & Mirror: Check the Flip and/or Mirror buttons to rotate the image accordingly. Audio Audio Switch: Enable / Disable audio embedding Audio Type: AAC... -
Page 42: Network
Network LAN Settings: The Lan Settings section allows you to adjust the IP parameters of the camera. The default IP address of the camera is 192.168.100.99. You cannot change the MAC address. IP Configuration Type: Fixed IP Address (Static) & Dynamic IP Address (DHCP). IP Address: Camera’s IP address. - Page 43 RTSP Port: This port is used for the RTSP streaming protocol. Default 554. PTZ Port: This port is used for the TCP/IP control protocol. Default: 5678. UDP Port: This port is used for the UDP control protocol. Default: 1259 Sony VISCA: This port is used for the Sony VISCA protocol. You cannot change this port number. SRT Settings: The Secure Reliable Transport protocol settings section allows you to adjust the SRT settings of the camera.
-
Page 44: Information
Information The Information section displays the device information, firmware version, & device friendly name. You can adjust the device friendly name as needed to designate the camera. Language The Language selection dropdown allows you to change the language of the Web Interface. Select either “English”, “Chinese”... - Page 45 Home Position http://[camera ip]/cgi-bin/ptzctrl.cgi?ptzcmd&home PT Reset http://[camera ip]/cgi-bin/param.cgi?pan_tiltdrive_reset Preset http://[camera ip]/cgi-bin/ptzctrl.cgi?ptzcmd&[action]&[position number] posset poscall [Action]: [Position Number]: Direct Position Recall http://[camera ip]/cgi-bin/ptzctrl.cgi?ptzcmd&[mode]&[pan speed]&[tilt speed]&[pan position]&[tilt position] [Mode]: (Absolute position), (Relative position) [Pan Speed]: (Slowest) ~ (Fastest) [Tilt Speed]: (Slowest) ~ (Fastest) 0001 0990...
- Page 46 http://[camera ip]/cgi-bin/param.cgi?post_image_value&[mode]&[state] flip mirror [Mode]: [State]: (flip / mirror), (default) Default Image Settings http://[camera ip]/cgi-bin/param.cgi?get_image_default_conf HTTP-CGI – Inquiries Video http://[camera ip]/cgi-bin/param.cgi?get_media_video Network Video Configuration Audio http://[camera ip]/cgi-bin/param.cgi?get_media_audio Network Audio Configuration Network http://[camera ip]/cgi-bin/param.cgi?get_network_conf Network Configuration Information http://[camera ip]/cgi-bin/param.cgi?get_device_conf Camera Information Serial Number http://[camera ip]/cgi-bin/param.cgi?get_serial_number Serial Number...
-
Page 47: Photobooth Functionality
Photobooth Functionality Your PTZOptics camera can quickly and easily take a series of four (4) still image or video files that are stored on the camera and made accessible with a standard web browser on the same network. Photos You have two (2) options to initiate a series of four (4) still images to be captured…... -
Page 48: Ndi | Hx Connection
Upgrading to NDI | HX ® If you have a PTZOptics non-NDI camera, you can upgrade it by following the four (4) steps below. 1. Purchase a PTZOptics NDI License. Visit https://ptzoptics.com/where-to-buy/ for more information 2. -
Page 49: Maintenance And Troubleshooting
Maintenance and Troubleshooting Camera Maintenance ⚫ If the camera will not be used for a long time, please turn off the power switch. ⚫ Use a soft cloth or lotion-free tissue to clean the camera body. Use a soft dry lint-free cloth to clean the lens. If the camera is very dirty, clean it with a diluted neutral ⚫... - Page 50 (e.g. VISCA address). Copyright Notice The entire contents of this manual, whose copyright belongs to PTZOptics, may not be cloned, copied or translated in any way without the explicit permission of the company. Product specifications and information referred to in this document are for reference only and as such are subject to updating at any time without prior notice.
Need help?
Do you have a question about the PT30X-NDI-GY and is the answer not in the manual?
Questions and answers