Sequoia LISST-200X User Manual
Particle size analyzer
Hide thumbs
Also See for LISST-200X:
- User manual (126 pages) ,
- User manual (115 pages) ,
- User manual (12 pages)

Related Manuals for Sequoia LISST-200X


Summary of Contents for Sequoia LISST-200X
- Page 1 LISST-200X Particle Size Analyzer Including LISST-HAB & LISST-Black User’s Manual Version 2.2 December, 2021 Store Software USB Card Here 2700 Richards Road, Suite 107 Bellevue, WA 98005 Telephone: (+1) 855-753-3313...
- Page 2 Intentionally blank...
- Page 3 © This document is copyrighted by Sequoia Scientific, Inc. LISST-200X User’s Manual Page iii...
- Page 4 Intentionally blank...
- Page 5 Welcome to the LISST-200X Particle Size Analyzer Using this manual I. LISST-200X Introduction & Quick Start provides an overview of the LISST-200X’s operating principles and basic functions. II. LISST-200X Operation Details provides details and step-by- step instructions for using and caring for the instrument.
- Page 6 Intentionally blank...
-
Page 7: Table Of Contents
Data Quality Control ....................48 Real-Time Data Processing with LISST-200X Software .......... 50 Autonomous Real-time Data Processing ..............52 Collecting Data from an External Analog Sensor ............. 55 Configuring the LISST-200X as a Sensor for a CTD ..........56 ..................... 57 TART AND ONDITIONS ..................... - Page 8 Intentionally blank LISST-200X User’s Manual Page viii...
-
Page 9: Lisst-200X Introduction & Quick Start
36 size classes of particles. This is called the particle size distribution (PSD). To measure scattering at multiple angles, the LISST-200X sends a collimated beam of light into the water. Laser light scattering at an angle from the beam arrives, through a daylight rejection filter, at the focal plane of a receive lens at the same angle from lens axis (see figure). - Page 10 (Note that real-time interface to a CTD requires proper configuration of the LISST-200X’s auxiliary connector; see Configuring the LISST-200X as a Sensor for a CTD on page 56.) LISST-200X User’s Manual LISST-200X Introduction & Quick Start...
- Page 11 Mean Size Observations; Agrawal, Y.C. and O.A. Mikkelsen, (2009), Optics Express, v 17, n 25, pp 23066-23077]. Newer LISST-200X’s, starting with serial number 2131 (and older units Calculating the full PSD in real with upgraded circuitry), contain more powerful processors that can do time full PSD processing in real time.
-
Page 12: Lisst-200X General Description
Windows software. For MATLAB users, inversion scripts are available for download from Sequoia’s website: www.SequoiaSci.com. The LISST-200X instrument is a laser diffraction device. It consists of optics for producing a collimated laser beam, a specially constructed detector array, electronics for signal pre-amplification and processing, data storage and scheduling computer, and an external battery system. - Page 13 Connector end cap. Both values are stored automatically in the LISST-200X data file. External I/O Port The LISST-200X also has an auxiliary 6-pin connector for interfacing to other devices This port can be configured to produce analog outputs, or to receive analog inputs.
- Page 14 The LISST-200X software contains a battery life calculator on the Configuration page. This feature provides rough estimates of the battery run time for a given sampling program. USB Power and For laboratory or tethered usage, power can be supplied through the Data connection communications connector on the endcap.
-
Page 15: Lisst-200X Quick Start Tutorial
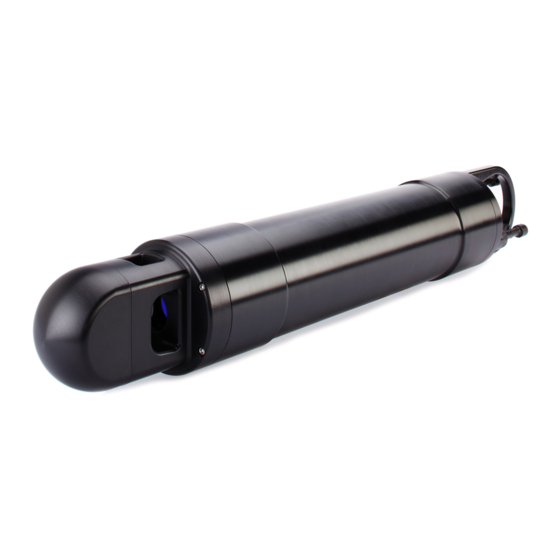
Remove the LISST-200X from the case and set Shipping Case. it on the stands. The LISST-200X has two distinct ends that we will refer to as the Optics endcap and the Connector endcap. LISST-200X User’s Manual... - Page 16 The stainless steel fitting with small tube is the port for the depth sensor. This fitting can be removed to allow the port to be cleaned should sediment or salt deposit build up. LISST-200X User’s Manual LISST-200X Introduction & Quick Start...
- Page 17 This magnet can be used to trigger a digital switch inside the instrument which can be programmed to start and stop the LISST-200X sampling. The final item on the endcap is the zinc anode. The sacrificial zinc anode protects the instrument from corrosion during long periods of time in salt water.
- Page 18 We can now fill the chamber with clean, particle-free water. Sequoia uses steam-distilled bottled water filtered through a 0.2 micron filter. Tap water may contain too many particles and may also contain dissolved gas that can release and form small bubbles on the optical surfaces.
- Page 19 LISST-200X placed on your desktop. Application Step 7: The LISST-200X does not have an internal battery. Power is supplied Establish to the instrument via a battery housing or USB cable. Please note that Communication the LISST-200X USB cable has a USB-to-serial convertor and special...
- Page 20 ‘No Instrument Connected’ message to see list of options. Click on the ‘Communication Help’ button for troubleshooting help. Step 8: Open The LISST-200X software has a terminal window that allows the user Terminal to communicate directly with the instrument using a set of commands. window...
- Page 21 If the water or windows are not clean or if there is a problem with the instrument, error messages and suggested actions will be displayed. LISST-200X User’s Manual LISST-200X Introduction & Quick Start...
- Page 22 If the values are acceptable the values can be saved both onboard the instrument and to a file on your computer. The LISST-200X handles the background files differently than the LISST-100X. The background file is stored on the instrument and is saved as part of every data file that is recorded.
- Page 23 For example, when a ‘Sample to be Average of’ value is entered, the minimum sample interval is computed. If this value is LISST-200X User’s Manual LISST-200X Introduction & Quick Start...
- Page 24 For this example let’s select the External Mechanical Switch Start Condition. AutoStart If the AutoStart check box is selected, the LISST-200X will start the sampling program when power is applied to the instrument. NOTE: for AutoStart to detect the application of power, all power sources (including the USB cable) must first be disconnected for at least 6 seconds.
- Page 25 For this example, choose the External Mechanical Switch as the Stop condition. Step 14: The accessories tab allows you to select which LISST-200X Configure accessories are connected to the instrument. The accessories must be Accessories selected here for them to function properly. If there are no accessories, select ‘None’.
- Page 26 Click on the ‘Upload to Instrument’ button to load the configuration onto the LISST-200X. A confirmation message will be displayed when the upload is finished. Step 16: Start The instrument is now configured for deployment, however, it is not Instrument yet running.
- Page 27 If you plug in an instrument that is already executing a sampling program, you will need to manually wake the instrument by selecting the ‘Wake Instrument…’ button and selecting the COM port the instrument is connected to. LISST-200X User’s Manual LISST-200X Introduction & Quick Start...
- Page 28 115K baud. Step 19: We now have the data transferred from the instrument to the PC. To Processing Raw process the data file choose Process Data Files from the home page. Data LISST-200X User’s Manual LISST-200X Introduction & Quick Start...
- Page 29 ASCII .BGT Background File ASCII Every LISST-200X data file contains all the necessary information to process the file. Therefore, the software will automatically determine the instrument serial number, factory background, current background and other instrument specific parameters. A raw data file display will be generated for your selected data file.
- Page 30 .CSV file is displayed automatically. You can Results also open any LISST-200X .CSV file by selecting the View Process File button from the home page. A display similar to the one below will open. A list of available parameters is displayed on the left.
- Page 31 A list of available parameters is displayed on the left. Clicking one of the parameters will open a new window where the parameter will be displayed. The parameter windows can be reorganized by dragging and dropping. LISST-200X User’s Manual LISST-200X Introduction & Quick Start...
- Page 32 The above steps should have given you a good understanding on the LISST-200X in how to operate the LISST-200X. More details on all of the steps can be found in the User’s Manual following this tutorial. The following the Field steps go into deploying the instrument in the field.
- Page 33 When the LISST-200X is powered up a message will be displayed to the Terminal window (or via the RS232 interface) that will prompt the user that the instrument will auto start in 5 seconds. Pressing the stop key or sending two CTRL-C characters will stop the instrument from starting and return to the 200X>...
-
Page 34: Lisst-200X Operation Details
WARNING-Class 3R laser – AVOID DIRECT EYE EXPOSURE The LISST-200X uses a laser diode emitting a maximum of 1 mW of visible (red) light at a wavelength of 670nm. Under normal circumstances the laser travels only within the 2.5 cm sample volume. -
Page 35: Step By Step Procedures
A. Step by Step Procedures Installing LISST-200X Software Software for the PC is used to configure the LISST-200X and for downloading and processing the size distributions. STEP ACTION RESULT • The LISST-200X comes with a USB memory card. Installer was found on... -
Page 36: Establishing Communication With The Lisst-200X
Establishing Communication with the LISST-200X Establish communication with LISST-200X using the supplied software and USB cable. Communicating with the LISST-200X via the software should be automatic. Should there be a problem you can use these step-by-step instructions to troubleshoot the problem. -
Page 37: Saving And Evaluating Clean Water Backgrounds
STEP ACTION RESULT • Connect the instrument to the computer and establish Software open, communicating with communication in the LISST-200X program (page 28) LISST-200X. • Clean instrument and install Clean Water Background Optics submerged in water Test chamber. • Fill with clean filtered water and make sure no bubbles are in the water or on the windows. - Page 38 However, as the instrument is used the background may increase due to small scratches and slight alignment changes. It may not be possible to get the background down to the original factory values. LISST-200X User’s Manual LISST-200X Operation Details...
- Page 39 After the background is saved, select the ‘Save as .BGT File’ button. The LISST-200X handles the background files differently than the LISST-100X. The background file is stored on the instrument and is saved as part of every data file that is recorded.
-
Page 40: Configuring Data Collection
Configuring Data Collection The LISST-200X software can be used to configure the Start and Stop Conditions, Fixed Rate or Burst sampling and sample rates. STEP ACTION RESULT • Connect the instrument to the computer and establish Software open, communicating communication in the LISST-200X program (page 28). - Page 41 Select the correct parameters as required. • If the AutoStart check box is selected, the LISST-200X will start the sampling program when power is applied to the instrument. If this is not selected the user must send the LISST-200X User’s Manual...
- Page 42 This is useful when doing profiles. It eliminates the need to communicate with the instrument between profiles. • Choose the Accessories tab to configure LISST-200X accessories. The accessories must be selected here in order for them to function properly.
- Page 43 Click on the ‘Upload to Instrument’ button to load the configuration onto the LISST-200X. A confirmation message will be displayed when the upload is finished. • The instrument is now configured for deployment, however, Run Sampling the sampling program is not yet running.
-
Page 44: Using The Small External Battery Housing
Using the Small External Battery Housing The LISST-200X comes with a Small External Battery Housing that can be used for short term deployments. The instructions in this section describe how to use the Small Battery including installing and charging the NiMH rechargeable batteries. NOTE: the Small Battery Housing cannot be used to power the LISST-HAB or LISST-Black (see page 90) or BioBlock (page 93). - Page 45 Align the thumbscrews with the holes in the main housing and push the endcap on until it is flush with the housing. • Tighten the thumbscrews by hand (DO NOT USE ANY TOOL). DO NOT OVERTIGHTEN. LISST-200X User’s Manual LISST-200X Operation Details...
- Page 46 Bulkhead connector on the housing. • Connect the other end of the cable to the 5-pin Male bulkhead on the LISST-200X. • Power is now going to the LISST-200X. If AutoStart is enabled the instrument may be active and waiting for the start condition.
-
Page 47: Using The Large External Battery Housing
Using the Large External Battery Housing The Large External Battery Housing is used to provide power to the LISST-200X for long term deployments or extended profiling operations. STEP ACTION RESULT • The LISST-200X Large External Battery is shipped Battery ready to use when shipped. - Page 48 200X using the provided 5-pin Male to 5-pin Female data cable. • Connect the Male end of the cable to the Female Bulkhead connector on the Battery Housing. The connector will be labeled with “TO LISST”. LISST-200X User’s Manual LISST-200X Operation Details...
- Page 49 • Connect the other end of the cable to the 5-pin Male bulkhead on the LISST-200X. • Power is now going to the LISST-200X. If AutoStart is enabled, the instrument may be active and waiting for the start condition. • If desired, connect the Communications cable to the male 5-pin bulkhead connector on the Large Battery Housing which is labeled “TO PC”.
-
Page 50: Offloading And Deleting Data Files From Internal Memory
Offloading and Deleting Data Files from Internal Memory Data collected using the LISST-200X is stored on the internal data logger. This section describes how to offload and delete files from the internal data logger. STEP ACTION RESULT • Software open,... -
Page 51: Processing A Single Raw Data File
Processing a Single Raw Data File Data that has been downloaded from the datalogger is in a raw binary file (.RBN extension). It must be processed into particle size by the LISST-200X program. STEP ACTION RESULT • Start the LISST-200X program Program started. - Page 52 Excel etc. • The RTX file is a space delimited ASCII file containing the raw data from the LISST-200X data logger. This is useful for looking at the raw data in a spreadsheet such as Excel etc.
-
Page 53: Batch Processing Multiple Raw Data Files
Data that has been downloaded from the datalogger is in a raw binary file (.RBN extension). It must be processed into particle size by the LISST-200X program. If you have multiple raw data files to process (e.g. from a series of profiling deployments), follow these processing steps that allows you to process all files in one operation. - Page 54 • The CSV file is a space delimited ASCII file containing all the processed data. • The RTX file is a space delimited ASCII file containing the raw data from the LISST-200X data logger. • Press the “Process Files” button.
-
Page 55: View Processed Data File
STEP ACTION RESULT • Start LISST-200X program Program started. • Select View Processed File from the home page • Select the processed data file (.CSV) from the file Processed data file selected. -
Page 56: Data Quality Control
0.98-0.995 range, your measurements are taken in noisy data. very clear water. • This means that the signal-to-noise ratio will be low, and the data may have a lot of noise in them, but can most likely still be used. LISST-200X User’s Manual LISST-200X Operation Details... - Page 57 • Be wary of data collected at transmission values between 0.98 and 0.995 – low signal-to-noise ratio. • Be wary of data collected at transmission values between 0.30 and 0.10 – generally decreasing data quality as the transmission decreases below 0.30 (30%). LISST-200X User’s Manual LISST-200X Operation Details...
-
Page 58: Real-Time Data Processing With Lisst-200X Software
12. Real-Time Data Processing with LISST-200X Software This procedure covers the acquisition, display and storage of processed data in real time, using the LISST-200X software. For on-board processing by the LISST-200X firmware, see Autonomous Real-time Data Processing on page 52. - Page 59 Select output • The RTX file is a space delimited ASCII file containing the directory and file raw data from the LISST-200X data logger. name • Data will not be saved until the ‘Start Logging Data’ button is pressed.
-
Page 60: Autonomous Real-Time Data Processing
PSD processing autonomously, without requiring a connection to a Windows computer. You may choose to save the processed data files (.CSV) in the LISST-200X memory, or transmit them in real time through the serial port, or both. Note that processing slows the maximum sampling rate. - Page 61 F: Particle Shape Models on page 89) • IMPORTANT: after you have selected the desired Configuration configuration, press the ‘Send Config. To Instrument’ uploaded to instrument. button to load the configuration onto the instrument. LISST-200X User’s Manual LISST-200X Operation Details...
- Page 62 Configuration complete. • A message box will confirm the upload has been completed. LISST-200X User’s Manual LISST-200X Operation Details...
-
Page 63: Collecting Data From An External Analog Sensor
If using the 12V output, you can specify how long it should turn on before sampling, as a warmup time for the sensor. To provide these functions, the auxiliary connector on the LISST-200X must be in one of three configurations: Analog & Digital Input (which provides a single analog input), Dual Analog Input configuration (which provides two), or Triple Analog Input configuration (which provides three). -
Page 64: Configuring The Lisst-200X As A Sensor For A Ctd
For highest-quality data you will still need to offload and process the detailed data from the LISST-200X after deployment. The LISST-200X updates its analog outputs each time it collects a sample, at a maximum of 1 Hz. -
Page 65: Start And Stop Conditions
While waiting, it will quickly flash the LED once every 30 seconds. External The LISST-200X will wait until the white plastic lever on its endcap is moved to the “1” position. (If it is already in that position, it will start Mechanical Switch Start immediately.) While waiting, it will quickly flash the LED twice every few... - Page 66 Burst mode the Stop conditions are only checked after a full Burst has been completed. The Start and Stop conditions have no effect on the real-time sampling mode (Real-Time Data Processing with LISST-200X Software on page 50). The details of each condition are described below. Depth Stop If the depth is less than the threshold, sampling will stop.
-
Page 67: Instrument Communication
LISST-200X software. A slower speed may be required when downloading data over cables longer than a few meters. Using the LISST- In the LISST-200X software, you can open a terminal window to directly 200X Terminal view communications with the LISST-200X, and enter commands. -
Page 68: Lisst-200X Command Summary
D. LISST-200X Command Summary Display Commands CONFIG Display instrument hardware configuration information DD, DIR Display current disk directory DEPTH Display current depth DS, DS 1 Display current instrument status information Display current time and date HELP, ? Display general help messages and command list... -
Page 69: Lisst-200X Command Details
LISST-200X Command Details NOTE: Command are shown in upper case for clarity, but are not case-sensitive. Display Commands CONFIG Display instrument hardware configuration Syntax: CONFIG Description: The current hardware configuration including Auxiliary I/O connector configuration L200x:> CONFIG Example: Serial Number: 2001 Firmware Version: 1100 (1.100) - Page 70 Syntax: DS 1 Description: Instrument status displayed in simplified format for reading by software L200x:> ds 1 Example: LISST-200X Current Status and Settings SN = 0 OM = 0 ST = 5 TD = 0 SP = 6 PD = 0...
- Page 71 HELP or ? Description: Displays the list of command to the screen. L200x:> HE Example: LISST-200X Commands ------------------------------------- [list of commands] Display current Mechanical Switch position Syntax: Description: The current position of the Mechanical Switch is displayed to the screen.
-
Page 72: Setup Commands
– it will immediately start sampling according to the SD defaults. In order to stop sampling and establish normal communication, the user must issue a stop command, either from the LISST-200X software’s graphical interface, or by pressing CTRL-C in the terminal window. Set Burst Interval... - Page 73 This is only for unusual circumstances. L200x:> SAVEDATA 1 Example: 1: Raw data will be saved during logging. L200x:> SAVEDATA 0 WARNING: Data will NOT be saved during logging! Is this really what you want [N] ? n LISST-200X User’s Manual LISST-200X Operation Details...
- Page 74 1 = Multi-line troubleshooting data 2 = NMEA-format brief data (for glider applications) 3 = Single-line raw (CANNOT be processed by LISST-200X software) 4 = Processed PSD data; activates real-time processing and sends processed data after each sample. For details, see Autonomous Real- time Data Processing on page 52.
- Page 75 Syntax: SENSORWARM x, where x is in seconds Description: If SENSORPOWER is on, SENSORWARM sets the number of seconds the LISST-200X will wait for external sensors to warm up before it proceeds with sampling. L200x:> SENSORWARM 10 Example: Power output, when used, will turn on with 10 second warmup.
- Page 76 L200x:> STARTDATA 2020/12/31 23:59:59 Start condition: Time Start at 2020/12/31 23:59:59 If Start Condition = 5 (Delay Start) L200x:> STARTDATA 2 Start condition: Delay Start with 2 minute delay Reset Depth Sensor Offset Syntax: LISST-200X User’s Manual LISST-200X Operation Details...
-
Page 77: Acquisition/Action Commands
Acquires single averaged sample and displays the result to the screen. Example: Input: GX Output: { …. 36 ring values + 24 Aux parameters Notes: The GX command does not store the sample to a datafile. LISST-200X User’s Manual LISST-200X Operation Details... - Page 78 Go into deep sleep mode (minimum power consumption) Syntax: Description: Sends LISST-200X in to low power sleep mode. Instrument will send a message every 30 seconds to indicate it is sleeping. It can be wakened at any time by sending 2 control-C characters about ½ second apart.
-
Page 79: Performance Optimization
However, a and its certain amount of scattering is also generated by pure water, and by the LISST-200X’s own optics and windows. We call this the Importance background scattering. In order to determine the scattering contributed by particles, the background scattering must be accurately measured and subtracted from the total scattering measured. - Page 80 The background measurement (described step-by-step on page 29) is Alignment the best source of information on the current health of the LISST-200X. It provides information on the current functionality of all of the major systems including laser, ring detector, data collection electronics, and optical alignment.
- Page 81 All of the other possibilities must be eliminated before it can be concluded that the instrument is misaligned. If necessary, the LISST-200X can be aligned by Sequoia Scientific or an authorized service representative. LISST-200X User’s Manual...
-
Page 82: Instrument Mounting, Deployment Orientation, Storage And Maintenance
Any contact with other metal can greatly increase the rate of corrosion. Isolate the instrument with rubber or plastic to keep the LISST-200X from being the sacrificial anode for the mounting hardware. Failure to properly isolate the instrument from all other metal will void the warranty. - Page 83 The diagram below shows the optimum orientation with respect to current flow Storage For full protection, always store the LISST-200X in its foam-lined shipping case. Calibrations and The LISST-200X should not require any adjustment or calibrations.
-
Page 84: Appendix A: Technical Specifications
• Input power: o Operating range: 9 to 24 V o Current during active sampling: ▪ LISST-200X: 100 mA @ 12V ▪ LISST-Black: 220 mA @ 12V ▪ LISST-HAB: 180 mA @ 12V o Current while waiting for user command: < 50 mA @ 12V o Current during sleep: <... - Page 85 LISST-200X User’s Manual Appendix A: Technical Specifications...
-
Page 86: Appendix B: Particle Size Bins
16.3 17.7 20.9 19.2 20.9 24.6 22.7 24.6 29.1 26.7 29.1 34.3 31.6 34.3 40.5 37.2 40.5 47.7 43.9 47.7 56.3 51.9 56.3 66.5 61.2 66.5 78.4 72.2 78.4 92.6 85.2 92.6 LISST-200X User’s Manual Appendix B: Particle Size Bins... -
Page 87: Appendix C: Data File Formats
Appendix C: Data File Formats File Types and Extensions Used by the LISST-200X. Extension Description Format Comments Raw data file produced by the LISST-200X. In addition to raw scattering data, RBN files contain a complete description of the .RBN Raw Data... - Page 88 Raw pressure [least significant 16 bits] Ambient Light [counts – not calibrated] External analog input 3 [V] (fluorometer 3 in LISST-HAB & LISST-Black) Computed optical transmission over path [dimensionless] Beam-attenuation (c) [m LISST-200X User’s Manual Appendix C: Data File Formats...
- Page 89 The values in the raw ASCII data file (.RTX extension) are stored in the Format order shown below. Each sample is stored in one row. RTX files are only useful for troubleshooting or special applications. Sequoia does not supply software for processing them. Column # Parameter 1:36...
-
Page 90: Appendix D: Matlab Data Processing
Two Matlab functions for processing data are provided on the instrument USB card. They are also available from the ‘Software and Downloads’ tab on the LISST-200X webpage. The processing is split into two steps: (1) reading in and applying corrections to raw data files (.RBN) and (2) inverting the corrected scattering to a particle size distribution. - Page 91 ShowProgressBar – If set to 1, a progress bar will display the processing status. The function will return the volume distribution in µL/L (vd) and the midpoint of each size bin in microns (dias). LISST-200X User’s Manual Appendix D: MATLAB Data Processing...
-
Page 92: Appendix E: Connectors
Appendix E: Connectors IMPORTANT NOTE In September 2019, starting with serial number 2116, LISST-200X instruments and cables use connectors manufactured by SubConn. Previous instruments have connectors from Teledyne Impulse. Connectors from the two manufacturers are very similar, but are not guaranteed to be compatible. - Page 93 The LISST-200X has 3 separate underwater connectors: A 5-pin, a 6-pin, and a 3-pin connector. The photograph shows the placement of each connector. The following text describes the detailed wiring for each connector. Note that in new instruments starting in September 2019, these are SubConn connectors with brass bodies.
- Page 94 Serial In (to DB-9 Pin 3) BioBlock Connector (3 pin connector) (see page 93 for BioBlock details) Bulkhead connector: SubConn MCBH3M Mating Cable Part Number: SubConn MCIL3F Connector Pin # Ground Signal Out +6V Power Out LISST-200X User’s Manual Appendix E: Connectors...
- Page 95 In earlier versions, this pin is not connected. Analog Output Configuration Connector Pin # Ground (Power) Analog Output: Mean Size Ground (signal) Analog Output: Total Concentration Ground (signal) Power In (9 to 24VDC) LISST-200X User’s Manual Appendix E: Connectors...
- Page 96 Serial Out (to DB-9 Pin 2) Serial In (to DB-9 Pin 3) To PC Connector ( 5-pin Male Bulkhead) Connector Pin # No Connection No Connection Ground Serial Out (to DB-9 Pin 2) Serial In (to DB-9 Pin 3) LISST-200X User’s Manual Appendix E: Connectors...
-
Page 97: Appendix F: Particle Shape Models
(i.e. black). This is an obvious fudge with consequences! Which model should you use? Sequoia’s software allows you to use both, then compare the results. But in general, the random model is best for any in-situ application. -
Page 98: Appendix G: Lisst-Black & Lisst-Hab
(LISST-Black), or harmful algal blooms (LISST-HAB). The fluorometers are Turner Designs Cyclops-7F’s, mounted with special brackets and cabling made by Sequoia Scientific. The LISST-200X supplies power to the fluorometers, and digitizes their analog outputs. The digitized fluorometer outputs are included in each data sample produced by the LISST, at rates up to one per second. - Page 99 9/64-inch hex L-key #2 Phillips Screwdriver 1. Attach the Front Support to the LISST-200X with the Clamp Strap, cross nut and clamping screw. Position the tab on the Front Support so it fits flush against the endcap and aligns to the flat surface. Tighten the Clamp Screw.
- Page 100 4. Rotate the Mid Support as needed to make the axis of the sensors parallel to the axis of the LISST-200X. Tighten the Mid Support clamp making sure that the Mid Support is pushed against the tapered part of the pressure case, as in step 2. The sensors should be free to rotate and move forward and backward.
-
Page 101: Appendix H: Bioblock Anti-Fouling Wiper
Firmware Requirement If connecting a BioBlock for the first time, check that your LISST-200X has an appropriate firmware version. In the LISST-200X software, connect to the instrument, then click on the blue tab at the bottom of the main window to open the instrument information pane, which shows the firmware version: If the firmware version starts with the digit 1, it must be at least 1.461 to support the... - Page 102 2. Using 9/64” L-key, remove the screw on bracket B. Slide the bracket over the connector end of the 200X. Place it approximately 4 inches/10 cm away from the large bracket. LISST-200X User’s Manual Appendix H: BioBlock Anti-fouling Wiper...
- Page 103 Connect the Bio-Block to the 200X endcap with the 20” long cable. Use a cable tie or tape to secure the cable on the 200X handle. b. Power up the 200X and connect to it with LISST-200X software. Open the terminal window.
-
Page 104: Appendix I: Path Reduction Module
Therefore, reducing the path by a factor of 2 increases the measurable concentration by a factor of 2. Sequoia’s Path Reduction Module (PRM) for the LISST-200X reduces the path from 25 mm to 5 mm, for a factor of 5 increase in maximum concentration. - Page 105 4. Removing the PRM 5. Maintaining and Storing the PRM 1. Installing the PRM • Locate all the components of the LISST-200X Path Reduction Module as shown below. • The parts include quartz cylinder with retaining ring, PRM Plate, two white PRM Plugs and two 4-40 x 7/8 socket head cap screws and an o-ring (size 2-016) that is pre-installed between the quartz cylinder and the PRM Plate.
- Page 106 PRM until an acceptable background is obtained. • Install the two 4-40 x 7/8 socket head cap screws into the PRM Plug using a 3/32” Allen wrench to lock the PRM assembly to the LISST-200X. LISST-200X User’s Manual...
- Page 107 Open the LISST-200X software and connect your instrument. Press the Configure Instrument button to see this screen: Select the Pathlength Reduction Module option. Note that the PRM cannot be used with the BioBlock (described in Appendix H: BioBlock Anti-fouling Wiper).
- Page 108 3. Background Collection with PRM The small test chamber that is supplied with the LISST-200X, described on page 10, cannot be used with the PRM installed. Instead, you must immerse the head of the LISST-200X in a suitable container of water.
- Page 109 The PRM plate may need to be tipped to separate the PRM from the glass window. • After removing the PRM, clean the optics of the LISST-200X and all the PRM parts before storage. • Be sure to protect the quartz cylinder from scratches or impacts that could damage the optical surfaces.
- Page 110 The cylinder should be able to move freely. • Reattach the PRM Plugs using the two screws to keep all parts together. • Wrap the optics with soft tissue and store the assembly in a safe place. LISST-200X User’s Manual Appendix I: Path Reduction Module...
-
Page 111: Appendix J: Troubleshooting & Support
A: In some cases the offload baud rate may need to lowered in order avoid offload errors. The offload baud rate can be reduced in the LISST-200X software selecting a lower baud rate from the drop down box on the file offload page: Select a lower File Offload Baud Rate, then try transfering files again. -
Page 112: Revision History
Wiper and Appendix I: Path Reduction Module; removed warranty statement (www.sequoiasci.com/support/warranty); updated software screenshots for v1.11; general editing. Version 2.0 Updated descriptions and screenshots for new LISST-200X software. Version 1.5A Corrections in Appendix H. Version 1.5 Add LISST-HAB and LISST-Black Version 1.4 Show change from Impulse to SubConn connectors.
Need help?
Do you have a question about the LISST-200X and is the answer not in the manual?
Questions and answers