
Related Manuals for Sequoia LISST-100X


Summary of Contents for Sequoia LISST-100X
- Page 1 LISST-100X Particle Size Analyzer User’s Manual Version 5.0 2700 Richards Road, Suite 107 Bellevue, WA 98005-4200 Tel: (425) 641-0944 Fax: (425) 643-0595...
- Page 3 This document is copyrighted by SEQUOIA SCIENTFIC, INC.
- Page 6 Welcome to the LISST-100X Particle Size Analyzer Using this manual This manual is divided into two sections. Section One contains an introduction to the LISST- 100X instrument and the principles of its operation. Section Two provides a detailed set of instructions for using and caring for the instrument.
- Page 8 Waste Electrical and Electronic Equipment Smaltimento di apparecchiature elettriche ed elettroniche da rottamare...
-
Page 11: Table Of Contents
Table of Contents SECTION 1: INTRODUCTION TO THE LISST-100X ................1 ............................1 NTRODUCTION ..........................4 ENERAL ESCRIPTION SECTION 2: OPERATION .......................... 9 ............................ 10 ETTING TARTED ........................33 TEP BY TEP PROCEDURES Step by Step Procedure: Record and Store Background Scatterfile............ 35 ... -
Page 13: Section 1: Introduction To The Lisst-100X
Laser In-Situ Scattering and Transmissometry. LISST is a Trademark of Sequoia Scientific, Inc. The LISST-100X instrument uses the technique of laser diffraction to obtain particle size-distribution (PSD), also called volume distribution in this manual. This section describes the principle of operation of your instrument. - Page 14 The LISST-100X records the scattering intensity over a range of small angles using a specially constructed multi-ring detector shown in the graphic below. This measurement is also known to optical scientists as the volume scattering function and can be used as such for studies of underwater image propagation and beam spread.
- Page 15 The volume distribution is obtained by inverting the above equation. Included with the LISST-100X instrument, we have provided software that obtains the inverted volume distribution N Agrawal, Y.C., I.N. McCave, and J.B. Riley, 1991: "Laser diffraction size analysis," in Principles, methods and applications of particle size analysis, J.P.M.
-
Page 16: General Description
All these components are inside the black-anodized pressure housing and the user has no access to any of these. The LISST-100X must be configured for one of these options at the factory prior to shipping. LISST-100X User’s Guide... - Page 17 A gauge pressure sensor is calibrated to measure the pressure relative to a given atmospheric pressure, as opposed to an absolute pressure sensor, which measures pressure relative to a vacuum. The pressure sensor on the LISST-100X will read 0 at atmospheric pressure.
- Page 18 Battery Life The primary power source for the LISST-100X is a custom alkaline D-cell battery-pack. The battery pack in NON-rechargeable and outputs +9 V. It has a room-temperature capacity of 42 A-hr. When the instrument is in stand-by mode the current drain is 8.5 mA. In Low Power Sleep mode the current drain drops to 120 µA.
- Page 19 LISST-100X User’s Guide...
- Page 20 LISST-100X User’s Guide...
-
Page 21: Section 2: Operation
Compact Flash Memory Card inside may otherwise come loose. WARNING The LISST-100X uses a laser diode emitting a maximum of 1 mW of visible (red) light at a wavelength of 670nm. The laser beam under normal circumstances is not a threat. -
Page 22: Getting Started
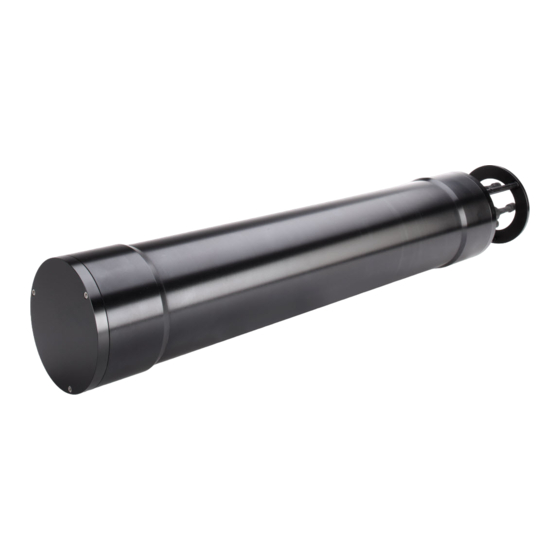
Step 1: Remove Start by removing the white plastic instrument stands and set them Instrument from on a flat working surface. Remove the LISST-100X from the case shipping case. and set it on the stands. The LISST-100X has two distinct ends that we will refer to as the Optics endcap and the Connector endcap. - Page 23 Connector Pinouts for LISST-100X and Appendix G: BioBlock Use) 5-pin connector: Used for serial communication and external power. See Appendix C: Connector Pinouts for LISST-100X. 6-pin connector: Used for analog in and digital in/out signals. See Appendix C: Connector Pinouts for LISST-100X Step 2: Check...
- Page 24 For more information on installing the chamber see Appendix F: Zscat Chamber Installation Procedure on page 114. LISST-100X User’s Guide...
- Page 25 LISST-100 instrument, only a LISST-100X will work with version 5.0 described in the following. If you already have a LISST-100X and have the software version 4.65 installed on your PC, you must manually copy the InstrumentData.txt and LISST.ini file for your instrument from their current locations to the C:\Program Data\Sequoia\LISST100 folder before you can proceed.
- Page 26 1 second to look for a wake up command and then goes back to sleep. Therefore the wait could be as long as 32 seconds for the LISST-100X. Upon wake up the instrument status will be displayed. If the cable connections are not correct or if the battery is not installed a warning message will appear after the time expires.
- Page 27 CTRL-C to stop the sampling and to turn off the main power. A list of the commands that can be sent to the LISST-100X can be found in the section LISST-100X Command Summary on page 79. If the instrument is still in the Low Power Sleep Mode it will print ZZZ to the screen every 30 seconds.
- Page 28 Accept and Save button. NOTE: If you have already saved a background file, then decide to do another one and you click Accept and Save, the background file you just saved will be overwritten without any warning. LISST-100X User’s Guide...
- Page 29 Instrument Status, Operating Mode, Start Condition, and Stop Condition. The Instrument Status page gives information about the instrument. It also allows previously saved instrument configuration files (LOP’s) to be loaded on to the instrument. LISST-100X User’s Guide...
- Page 30 If this value is less than the minimum permitted the value will be changed to the minimum and the text will turn red. The LISST-100X measures internally at ~20 Hz, but the data cannot be stored to the data logger at this rate. The individual...
- Page 31 Similarly the Stop conditions can also be selected. Click on the Stop Conditions Stop Condition Tab to open the Stop Condition window. The available stop conditions are: Depth, Time. External Mechanical Switch, External Digital Input, Fixed number of Samples, and Maximum Memory/Low Battery. LISST-100X User’s Guide...
- Page 32 Step 16: After pressing the OK button to complete the configuration, the Background file window below will appear, prompting you to select the zscat file to selection be used for processing the data when you have obtained them. LISST-100X User’s Guide...
- Page 33 Select from the 3 options (Select a different background file, collect a new background or accept the risk and continue). Step 18: Start The instrument is now configured for deployment, however, it is Instrument not yet running. LISST-100X User’s Guide...
- Page 34 When the start conditions are met the instrument will start Collecting Data sampling. The green LED on the connector endcap will illuminate each time a sample is acquired. For our example we can move the white plastic lever on the LISST-100X User’s Guide...
- Page 35 To offload the data select Offload from the LISST menu or choose the button from the toolbar. A list of files will appear: Choose the files to offload by clicking on them while holding down LISST-100X User’s Guide...
- Page 36 To process the data file choose ‘File | Open Raw Data File’ or Data press the button on the toolbar. Select the instrument serial number in the drop down menu. Only instruments that are listed in the InstrumentData.txt and LISST.ini files are listed. LISST-100X User’s Guide...
- Page 37 The LISST-SOP will do a check of the laser power value in the selected background scatter file. If the laser power is 0 (zero), a warning is displayed and the user must select another background scatter file. LISST-100X User’s Guide...
- Page 38 The software will automatically determine the Instrument Type (B or C) using the Serial Number and the InstrumentData.Txt file. Also the detector calibration file (RingArea file) is being selected automatically based on the serial number. A display similar to the one shown below will appear. LISST-100X User’s Guide...
- Page 39 Last buttons allow you to step through the measurements one frame at a time. When the last frame is reached the movie display will stop. Use the First button to return to the first sample and press the Stop Display button to restart the display. LISST-100X User’s Guide...
- Page 40 To view the value of the auxiliary parameters, such as time and depth, select the View Auxiliary Parameter Frame from the DataFrames menu. A display similar to the one below will appear showing the calibrated values. LISST-100X User’s Guide...
- Page 41 To open the Real-Time session, choose Open Real-Time Session from the File menu or press the button. Choose a background file to use when processing the data. Choose an output PSD file. A display very similar to the View Processed datafile will be displayed. LISST-100X User’s Guide...
- Page 42 The main power and laser will be on until this window is closed or until the Stop button is pressed. Significant loss of battery life can occur if the instrument is left powered up for an extended period of time. LISST-100X User’s Guide...
- Page 43 To get the lowest power consumption the Communications cable must be disconnected from the instrument. The above steps are meant to give a brief introduction to most of the procedures that are required to operate the LISST-100X. Most LISST-100X User’s Guide...
- Page 44 Step-by-Step instructions in the following sections. LISST-100X User’s Guide...
-
Page 45: Step By Step Procedures
(.PSD extension) the data can be viewed to the screen. This step- by-step procedure covers the viewing of data and optional displays. Page 54. Data Quality Basic data quality control is explained. Page 57. Control LISST-100X User’s Guide... - Page 46 Page Configuring The LISST-SOP software allows the user to program the instrument Data Collection with a number of start and stop conditions. This step-by-step procedure lists the available options and the unique features of each. Page 69. LISST-100X User’s Guide...
-
Page 47: Step By Step Procedure: Record And Store Background Scatterfile
After all 20 are collected the average will be displayed. If the values are acceptable the values can be saved to a file. Enter the filename in the box and press the Accept and Save button. LISST-100X User’s Guide... - Page 48 Is this value < 0.85? If so, your instrument may be misaligned Do you see elevated values on ALL of the 4-8 Check for bubbles? inner rings? Most likely bubbles, as misalignment cannot increase the ring value on rings 1-4 at the same time. LISST-100X User’s Guide...
-
Page 49: Step By Step Procedure: Offloading Data Files
Browse button to select a new path. Press OK to begin the offloading. The file names will remain the same as on the compact flash card. The file creation date and time will not be preserved. LISST-100X User’s Guide... - Page 50 NOTE: The change in download baud rate is only supported by LISST-100X firmware versions higher than 1.900. If you do not see the dropdown box, your firmware version does not support change in baud rate.
-
Page 51: Step By Step Procedure: Deleting Files From Memory
STEP BY STEP PROCEDURE: DELETING FILES FROM MEMORY Start the LISST-SOP program and click the button to connect to the LISST-100X. Click button or select the Offload option from the LISST menu. A list of files on the datalogger will appear. -
Page 52: Step By Step Procedure: Processing A Single Raw Data File
Excel etc. The LOG file is a space delimited ASCII file containing the raw data from the LISST-100X data logger. This is useful for looking at the raw data in a spreadsheet such as Excel etc. - Page 53 However, sediment particles in the aquatic environment are never perfect spheres. Consequently Sequoia provides an option to invert the scattering pattern under the assumption that the particles are randomly (or irregularly) shaped particles. The exact details of how this inversion takes place is described in a scientific paper by Agrawal et al.
- Page 54 LISST.INI file in the Windows directory can be used. Select the background scatter data file from the file Background scatterfile selected. selection window. Double click the file or type the file name and press Open. LISST-100X User’s Guide...
- Page 55 The top portion of the display is a graphical representation of the raw data from the 32 rings. The value of the 32 rings is represented as a vertical line, LISST-100X User’s Guide...
- Page 56 They will update as the cursor is moved. Selecting the Show Auxiliary Parameter Frame from the DataFrames menu opens the window. An example of this window is shown below. LISST-100X User’s Guide...
- Page 57 After selecting the range to process press the Process Processing File button. The display will show the processing Completed progress and the Process File button text will change to Finished when the processing is complete. The window can now be closed. Notes LISST-100X User’s Guide...
-
Page 58: Step By Step Procedure: Batch Processing Multiple Raw Data Files
The ASC type is a space delimited ASCII file containing all the processed data. The LOG file is a space delimited ASCII file containing the raw data from the LISST-100X data logger. You must also select the inversion model to be used Select inversion... - Page 59 However, sediment particles in the aquatic environment are never perfect spheres. Consequently Sequoia provides an option to invert the scattering pattern under the assumption that the particles are randomly (or irregularly) shaped particles. The exact details of how this inversion takes place is described in a scientific paper by Agrawal et al.
- Page 60 Select the background scatter file (zscat file) to be Background scatterfile selected. used for processing your data. Click the select button and navigate to the folder where your zscat file is located and select it. LISST-100X User’s Guide...
- Page 61 LISST-100X User’s Guide...
- Page 62 Note: file types other than the default PSD file must have been selected before starting the Open Raw Data file command. See step 2. You can now click the Process Raw Files button and Batch processing.. all raw data files will be processed. The processed LISST-100X User’s Guide...
- Page 63 Note that the files processed using the randomly shaped inversion method have an _rs suffix. Click the close button in the top right when you are Close the batch processing window. done. Notes LISST-100X User’s Guide...
-
Page 64: Step By Step Procedure: Batch Processing Multiple Raw Data Files From The Command Line
The paths and file names are stored in the LISST.INI file, which resides in the C:\Program Data\Sequoia\LISST100 directory. You can examine the LISST.INI file before and after batch processing to gain familiarity with the changes that happens to the INI file. - Page 65 Notes LISST-100X User’s Guide...
-
Page 66: Step By Step Procedure: View Processed Data File
The Timer button will step through the datafile by updating the display at a fixed rate. The rate is set by the slider bar next to the Timer button. LISST-100X User’s Guide... - Page 67 Other options are also available for customizing the display such as changing the header and footer text or adding lines to show the mean and standard deviation. These features are located on the Display tab of the Settings window as shown below. LISST-100X User’s Guide...
- Page 68 The current display can be sent to the printer by Display printed. choosing Print from the File menu. Print Preview and Print Setup are also available. When finished viewing the processed data close the Viewing of data complete. window. Notes LISST-100X User’s Guide...
-
Page 69: Step By Step Procedure: Data Quality Control
In this case only your pressure data and temperature data will be any good. The laser must be replaced. Contact Sequoia or your local distributor for instructions on what to do. Tip: If you selected ‘Create .ASC file’ when processing your data, you can load the .ASC file into Excel or... - Page 70 Quick quide for data Summarizing Disregard data if laser reference is 0 or very close to 0 (laser is dead, contact Sequoia). Disregard data if transmission is > 0.995 (> 99.5%). Disregard data if transmission is < 0.10 (< 10%).
- Page 71 Notes LISST-100X User’s Guide...
-
Page 72: Step By Step Procedure: Simple Real-Time Data Processing
You must also select the inversion model to be used with the real time data processing: Spherical, randomly shaped or both. For details on these selections, see page Select Open Real-Time Session from the File menu or Open Instrument selected. press on the button. LISST-100X User’s Guide... - Page 73 Other options are also available for customizing the display such as changing the header and footer text or adding lines to show the mean and standard deviation. These features are located on the Display tab of the Settings window as shown below. LISST-100X User’s Guide...
- Page 74 View Rings command from the File menu. displayed. An example of this display is shown below. A single sample may be saved to a separate file by Averaged data acquired and pressing the Save Single Sample button stored to an ASCII file. LISST-100X User’s Guide...
- Page 75 When finished, close the main window to stop Finished and shutdown. communication with the LISST-100X. CAUTION: The laser and Main power are on continuously while in the Real-Time Session. The program will stop and the power will be turned off when the window is closed.
-
Page 76: Step By Step Procedure: Advanced Real-Time Data Processing
You must also select the inversion model to be used with the real time data processing: Spherical, randomly shaped or both. For details on these selections see page LISST-100X User’s Guide... - Page 77 Now click the Start Condition tab in order to set the Start Start condition selected. Condition. In this case, a 2 minute delay is being selected. LISST-100X User’s Guide...
- Page 78 It is *very* important that you instrument do NOT start the instrument – click the No Button. You will then see the following warning, click OK. Ignore warning (click OK to proceed). LISST-100X User’s Guide...
- Page 79 OK, and the realtime window will open up. Check the Listen Mode check box. Next, open the terminal window, and place it next to the Open up and select terminal Realtime window. Make sure the terminal window is the window. selected window. LISST-100X User’s Guide...
- Page 80 The terminal window should be closed when the Stopping advanced real instrument has been started. Keeping it open may delay time mode. the updating of the real time display. In order to stop the real time sampling, click the button. LISST-100X User’s Guide...
-
Page 81: Step By Step Procedure: Configuring Data Collection
Status Displayed. When first opening the Operating Modes window the LISST- SOP program will send a Ctrl-C to the LISST-100X. If a program is running it will be stopped. This is required so that Clock set the LISST-SOP program can get the status information from the LISST-100X. - Page 82 Average value is entered, the minimum sample interval is computed. If this value is less than the minimum permitted the value will be changed to the minimum and the text will turn red. A similar test is done on the Burst Interval setting. LISST-100X User’s Guide...
- Page 83 There are five options: Depth, Time, External Mechanical Switch, External Digital Input, and Time Delay. Select the mode by clicking on the button next to the its label. Select the correct parameters as required. LISST-100X User’s Guide...
- Page 84 Select Apply or OK buttons to configure the instrument with the current settings. If the Apply button is pressed the program will return to the current window. Returning to the Instrument Status window will display a summary of the current settings. LISST-100X User’s Guide...
- Page 85 NOTE: The SOP makes no record of which background file was selected. The warning is put in place to make the user aware of the importance of obtaining good and recent zscat measurements. LISST-100X User’s Guide...
- Page 86 Once the program is confirmed to be running and waiting for the correct start conditions, the LISST-SOP program can be closed and the communications cable can be disconnected. Be sure to replace the connector cap before deployment. LISST-100X User’s Guide...
-
Page 87: Instrument Communication
Instrument Communication Serial Port Communication with the LISST-100X is via an RS-232C link. Settings A cable that connects the instrument to a PC has been provided. This cable connects the 5-pin underwater connector on the instrument to a DB-9 serial port connector. - Page 88 Depth Start: The built-in depth sensor of the LISST-100X is used to check the current depth to determine if the desired start depth has been exceeded. The instrument is powered up and 5 measurements of the depth are averaged over a two- second period.
- Page 89 Real-time sampling mode. The details of each condition are described below. Depth Stop: The built-in depth sensor of the LISST-100X is used to check the current depth to determine if it is less than the desired Stop depth. The averaged depth from the last sample acquired is used as the current depth.
- Page 90 Memory or Low Battery: reached or when the battery voltage has dropped to less than 6 volts. The program will continue to sample until one of these conditions is met. It will then return to the L100X:> prompt. LISST-100X User’s Guide...
-
Page 91: Lisst-100X Command Summary
LISST-100X Command Summary Display Commands Display Current Battery Voltage Display current Disk Directory Display current status information Display Current Time and Date Display general help messages and command list Setup Commands OM x Set Operating mode. ST x Set Start Condition. - Page 92 LISST-100X User’s Guide...
-
Page 93: Lisst-100X Command Details
Syntax: DS or ds Description: The instrument settings and status are displayed to the screen. Example: input: DS output: LISST-100X Current Status and Settings Serial number = 1004 Operating Mode: Burst Mode Start Condition: Time Start at 03/10/04 09:22:00 Stop Condition: Fixed Number Stop at 1 samples... - Page 94 Display general help messages and command list Syntax: HE or he Description: Displays the list of command to the screen. Example: input: HE output: LISST-100X Commands (followed by 30 lines of text) Setup Commands Set Operating Mode Syntax: OM x or om x...
- Page 95 New Start Condition data = 12/31/05 23:59:59 Start Condition: Time Start at 12/31/05 23:59:59 Input: TD 2 (if Start Condition = 5 (Delay Start)) Output: New Start Condition data = 2 Start Condition: Delay Start with 2 minute delay Set Stop Condition LISST-100X User’s Guide...
- Page 96 Description: In Fixed Rate Mode (OM = 3) or Burst Rate Mode (OM = 2), the sample interval is the number of seconds between two consecutive samples, each composed as an average of a number of measurements (specified by the MA command). Example: input: SI 5 output: New Seconds between Samples: 5 LISST-100X User’s Guide...
- Page 97 In order to stop sampling and establish normal communication, the user must issue a stop command, by either pressing the STOP button or issuing a CTRL-C command in the terminal window when the instrument is powered up. LISST-100X User’s Guide...
- Page 98 = yes, 0 = no) that these settings should be burned into the EEPROM to be used with the AutoStart setting. Example input: SD output: LISST-100X Current Status and Settings Serial number = 1335 Firmware Version 1.997 Feb 16 2011 14:18:45...
- Page 99 Syntax: DL filename or dl filename where filename is the name of the file to be deleted. Description: DL command is used to delete file from the Compact flash module. Wildcards such as *.* can be used. LISST-100X User’s Guide...
- Page 100 Raw data WILL be transmitted when data is stored Cautions: None YMODEM Offload Syntax: YS filename or ys filename where filename is the name of the file to be offloaded. Description: Offloads file from Compact Flash Module to PC using YMODEM offload at 115 Kbaud LISST-100X User’s Guide...
- Page 101 Output: Deep Sleep… Enter zz to wake up Deep Sleep… Enter zz to wake up Deep Sleep… Enter zz to wake up Cautions: The background scattering data and other settings are not affected by the ZZ command. LISST-100X User’s Guide...
-
Page 102: Performance Optimization
This section contains information on optimizing the performance of the LISST-100X. Background As was discussed in earlier sections, the LISST-100X uses Scatterfile and its a custom detector to measure light scattered at small angles from particles in water. In order to measure only the... - Page 103 The low concentration limit of LISST-100X is very sensitive to the quality of the background scatterfile. For this reason, when working in low concentration water, it is very important that a good background file be obtained with very clean water.
- Page 104 All of the other possibilities must be eliminated before it can be concluded that the instrument is misaligned. The transmit optics on the LISST-100X do allow for the possibility of the user adjusting the alignment. A written procedure can be provided for this procedure. However, it...
-
Page 105: Instrument Mounting, Storage And Maintenance
Instrument Mounting, Storage and Maintenance This section contains information on mounting, storing and maintaining the LISST-100X. Mount the The LISST-100X measures scattered light to obtain particle instrument size distributions. Therefore it is important to keep particles from sticking to the window surface. - Page 106 Sequoia. See Appendix I: LISST Accessories on page 126. Storage notes Again it must be emphasized that the LISST-100X is a sensitive instrument. When not in use, the instrument should be stored in its shipping case. For longer storage (year or so), the communication cable should be disconnected and the battery pack should be removed.
- Page 107 The main battery is mounted to the connector end cap. SEQUOIA supplies the custom 9V battery packs for use Battery Power with the LISST-100X instrument. The use of batteries other and Access than these may void your warranty. The step-by-step procedure for accessing and replacing the battery pack is described below.
-
Page 108: Step By Step Procedure: Changing The Battery
STEP BY STEP PROCEDURE: CHANGING THE BATTERY Step Action Result Place the LISST-100X in a horizontal position. U-blocks have been provided for this purpose. Disconnect all cables from the end cap. Install caps on connectors to protect pins. - Page 109 Do not over tighten. The stainless steel screws can damage the threads of the aluminum case if over tightened. The end cap has a radial O-ring seal and is not dependent on the tightness of the screws for sealing. LISST-100X User’s Guide...
- Page 110 LISST-100X User’s Guide...
-
Page 111: Technical Specifications
Weight in air: 12 kg (25 lb) Weight in water: 4 kg (8.5 lb) Depth rating: 300 m Connector Endcap screws: Socket head cap screws #8-32 3/4” long Endcap O-ring: Parker Part # 2-244 LISST-100X User’s Guide... -
Page 112: Appendix A: Instrument Specific Documentation
These constants are entered at the factory to be resident in the instrument firmware. Parameter Multiplier Offset Battery Volts Depth Temperature Instrument Reference Data: Digital Counts on Ring # Laser Transmitted Power (counts): Laser Reference Power (counts): Verified by:______________________ LISST-100X User’s Guide... -
Page 113: Appendix B: Size Ranges, Observation Angles, Data Storage Format
29.1 26.7 49.2 58.1 53.5 29.1 34.3 31.6 58.1 68.6 63.1 34.3 40.5 37.2 68.6 80.9 74.5 40.5 47.7 43.9 80.9 95.5 87.9 47.7 56.3 51.9 95.5 56.3 66.5 61.2 66.5 78.4 72.2 78.4 92.6 85.2 92.6 LISST-100X User’s Guide... - Page 114 44.2 52.2 48.0 27.4 32.4 29.8 52.2 61.6 56.7 32.4 38.2 35.2 61.6 72.7 66.9 38.2 45.1 41.5 72.7 85.7 78.9 45.1 53.2 49.0 85.7 93.1 53.2 62.8 57.8 62.8 74.1 68.2 74.1 87.4 80.5 87.4 94.9 LISST-100X User’s Guide...
- Page 115 The following lines of code in MATLAB will compute the lower, upper and median size in microns of each bin for both instrument types. See also this article on Sequoia’s homepage: http://www.sequoiasci.com/Articles/ArticlePage.aspx?pageid=150 rho=200^(1/32); x = 1.25; %lower limit for first size range for type B, spherical particles x = 2.50;...
- Page 116 Angles (in Degrees) for the VSF measurement in air are shown in the Angles in air table below. See also Sequoia’s homepage: http://www.sequoiasci.com/Articles/ArticlePage.aspx?pageId=177 Type B Type C Ring # Size bin Lower Upper Median Lower Upper Median 0.100 0.118 0.109 0.050...
- Page 117 Angles (in Degrees) for the VSF measurement in water are shown in Angles in water the table below. See also Sequoia’s homepage: http://www.sequoiasci.com/Articles/ArticlePage.aspx?pageId=178 Type B Type C Ring # Size bin Lower Upper Median Lower Upper Median 0.075 0.089 0.082 0.038...
- Page 118 External Auxiliary input 1 (0 to 5V = 0 to 4096) Laser Reference sensor Pressure in raw counts Temperature in units of 100ths of degrees C (Day*100 + Hour) at which data taken (Minutes*100 + Seconds) at which data taken LISST-100X User’s Guide...
- Page 119 = -ln(optical transmission)*(1/0.005 m) if you are using a 90% PRM (5 mm path length). An alternative option is to multiply the beam attenuation in column 42 with 2, 5 and 10 for data obtained with 50, 80, and 90% PRM’s respectively. LISST-100X User’s Guide...
-
Page 120: Appendix C: Connector Pinouts For Lisst-100X
Appendix C: Connector Pinouts for LISST-100X The LISST-100X has 3 separate underwater connectors: A 5-pin, a 6-pin, and a 3-pin connector. The photograph shows the placement of each connector. The following text describes the detailed wiring for each connector. LISST-100X User’s Guide... - Page 121 Connector Pin # Power/Serial Ground External Power In (+9V nom. 6-15V) Power/Serial Ground Serial Out (to DB-9 Pin 2) Serial In (to DB-9 Pin 3) For instruments shipped after 1 March 2012, 9-24V Max, 0.5 A min LISST-100X User’s Guide...
- Page 122 Analog Ground BioBlock Connector (3 pin connector) Connector Manufacturer: Impulse Enterprise, Inc. San Diego, CA, USA Connector Part Number (Bulkhead): MCBH (WB)-3-MP Stainless Steel Mating Cable Part Number: MCIL-3-FS Connector Pin # Signal Ground Signal (Open/Closed) Battery Sense LISST-100X User’s Guide...
-
Page 123: Appendix D: Lisst-Sop Software Button Description
Open Terminal including Start and Stop buttons. The Program Settings button bring up the general settings windows for setting display parameters and other Program Settings software settings, such as File Output, Com Port settings, and Plot . LISST-100X User’s Guide... - Page 124 Pressing the button will send the current display to the printer. Attempts to wake up instrument from low-power sleep Put LISST to sleep mode. This may take up to 40 seconds. Wake up LISST Puts instrument into low-power sleep mode. LISST-100X User’s Guide...
-
Page 125: Appendix E: Software Upgrade Installation Procedure
Appendix E: Software Upgrade Installation Procedure The following procedure describes the installation of the LISST-SOP Version 5.00 software for users who have previously used Version 4.65 together with their LISST-100X. NOTE THAT VERSION 5.0 DOES NOT SUPPORT COMMUNCATION WITH THE LISST- 100;... -
Page 126: Appendix F: Zscat Chamber Installation Procedure
Step 1) Before installing the Small Volume Zscat Chamber first clean the windows of the LISST- 100X. NOTE: On older versions of the LISST-100X it may also be necessary to remove the endcap ring and standoffs on the optics endcap. Remove the three screws on the endcap ring and then unscrew the standoffs. - Page 127 Step 3) Carefully insert the Chamber into the optical path of the LISST-100X. Be careful not to let the O-rings come into contact with the optical windows of the LISST-100X. Step 4) By reaching in from the top of the chamber push the Slider out until the chamber is up against the optics endcap.
-
Page 128: Appendix G: Bioblock Use
The BioBlock Anti-Biofouling Shutter system is a bolt-on optional accessory that is available for the LISST-25X and LISST-100X. Copper disks are placed very near the optical widows. The copper discourages any biology from growing on the optical windows. The BioBlock is self-contained with its own battery pack. -
Page 129: Bioblock Installation Instructions For The Lisst-100X
BioBlock Installation Instructions for the LISST-100X Step 1) The BioBlock for the LISST-100X is shipped fully assembled and ready to mount onto the LISST-100X. Please note that the main body of the BioBlock can be used on the LISST-25X and LISST-100 in addition to the LISST-100X. - Page 130 Step 3) However, before installing the BioBlock we must first remove one of the screws on the endcap. Rotate the LISST-100X to match the photo. The two endcap screws should be above the Crossbar Standoff on the left. One is threaded into the endcap and the other is longer and threaded into the instrument housing.
- Page 131 Step 5) Use large tie-wraps to secure the BioBlock body to the LISST-100X, as shown in the photo on the right. The tie- wraps should be placed over the bolts extending from the mounting brackets. Trim excess ends of tie-wraps.
-
Page 132: Configuring And Operating The Bioblock On The Lisst-100X
Configuring and Operating the BioBlock on the LISST-100X The LISST-100X comes pre-configured for use with the BioBlock. There is a dedicated 3- pin BioBlock connector on the endcap and the firmware is designed to utilize the BioBlock shutter during sampling. The only thing remaining is to inform the firmware that the BioBlock has been installed. - Page 133 BioBlock to remain open. By monitoring the battery, the BioBlock can be left in the open position before the battery voltage is too low. LISST-100X User’s Guide...
-
Page 134: Bioblock Battery Replacement
Do not over tighten the screws. Step 8) Reattach the cable to the LISST-100X and test the operation using the BB 11 and BB 10 commands. The commands can be issues through the Terminal window of the LISST-SOP software. -
Page 135: Appendix H: Technical Assistance & Troubleshooting
(see the Q&A immediately above this one). 2) Do not use a netbook for connecting to a LISST-100X. It will generally not work. If you are using a netbook, switch to a desktop, a laptop, or a notebook computer (in that preferred order) running the LISST-SOP. - Page 136 (see Appendix C: Connector Pinouts for LISST-100X on page 108). Make sure that the cable is connected to the serial port of the PC and proceed as follows: Check the voltage between pins 1 and 2 on the communication cable. You may need the paperclips to extend the measuring pins of the voltmeter to make a proper contact inside the cable.
- Page 137 Q: When I try to program the instrument I get this error (note: [Instrument1335] will change depending on the serial number of your instrument): A: Go to your C:\ProgramData\Sequoia\LISST100 folder and search for the LISST.INI file. Open it up in Notepad or a similar text editor. Make sure that the section containing your instrument calibration constants are located in the file.
-
Page 138: Appendix I: Lisst Accessories
Custom Power and Communication Cable Integrated Power and Communications cables are available for the LISST-100X/-STX in lengths of 20, 30 and 50 meters. The yellow jacketed cable has a breaking strength of 1000 pounds. The standard underwater connectors for communications and power are molded to the cable. - Page 139 LISST- 100X. Sold as set of 2 complete clamps only. LISST-100X Replacement Batteries Battery packs for the LISST-100X / LISST-STX with 18 alkaline batteries assembled into a custom battery pack to provide the +9 and -9V required.
- Page 140 Replacement Zscat Chamber Used for doing background scatter measurement (zscat) before deployment. One chamber ships as standard with the LISST-100X. LISST-100X User’s Guide...
-
Page 141: Warranty
If, during the twelve months after delivery (the “Warranty Period”), any Product does not comply with the warranties set forth in 1(a) and 1(b) above, SEQUOIA will, at its option, either (a) repair the Product, (b) replace the Product, or (c) refund the purchase price paid by Customer to SEQUOIA for the Product; provided that Customer gives SEQUOIA written notice of the noncompliance within the Warranty Period and ships the Product to SEQUOIA within one month after the end of the Warranty Period. - Page 142 SEQUOIA) will in no event exceed the purchase price paid by Customer to SEQUOIA for such Product. Further, SEQUOIA will not be liable for, or be in breach of or default on account of, any delay or failure to perform as a result of any cause, condition or circumstance beyond SEQUOIA's reasonable control.
-
Page 143: Index
Fixed sample rate ............ 70 real time ................ 70 Error Messages Optics endcap .............. 10 could not find [Instrumentxxxx] ........ 1 25 no valid query response .......... 1 23 P External I/O Ports analog ................ 5 Path Reduction Module ........ See PRM LISST-100X User’s Guide... - Page 144 Start Conditions .............. 7 1 Z depth start ............... 7 6 external digital input ............ 7 6 Zscat Chamber .............. 128 external mechanical switch .......... 7 6 installation.............. 114 time delay ................ 7 6 time start ................. 7 6 Stop Conditions .............. 7 2 LISST-100X User’s Guide...
Need help?
Do you have a question about the LISST-100X and is the answer not in the manual?
Questions and answers