
Related Manuals for Sequoia LISST-100X


Summary of Contents for Sequoia LISST-100X
- Page 1 LISST-100X Particle Size Analyzer User’s Manual Version 4.65 2700 Richards Road, Suite 107 Bellevue, WA 98005-4200 Tel: (425) 641-0944 Fax: (425) 643-0595...
- Page 2 © This document is copyrighted by SEQUOIA SCIENTFIC, INC.
- Page 3 LISST – 100 User’s Guide Welcome to the LISST-100X Particle Size Analyzer Using this manual This manual is divided into two sections. Section One contains an introduction to the LISST- 100 instrument and the principles of its operation. Section Two provides a detailed set of instructions for using and caring for the instrument.
-
Page 5: Table Of Contents
Table of Contents SECTION 1: INTRODUCTION TO THE LISST-100X ................2 ............................2 NTRODUCTION ..........................5 ENERAL ESCRIPTION SECTION 2: OPERATION ........................8 ............................9 ETTING TARTED ........................23 TEP BY TEP PROCEDURES Step by Step Procedure: Record and Store Background Scatterfile ........... 24 Step by Step Procedure: Offloading/Deleting Data Files .............. -
Page 6: Section 1: Introduction To The Lisst-100X
Laser In-Situ Scattering and Transmissometry. LISST is a Trademark of Sequoia Scientific, Inc. The LISST-100X instrument uses the technique of laser diffraction to obtain particle size-distribution (PSD), also called volume distribution in this manual. This section describes the principle of operation of your instrument. - Page 7 The LISST-100X records the scattering intensity over a range of small angles using a specially constructed multi-ring detector shown in the graphic above. This measurement is also known to optical scientists as the volume scattering function and can be used as such for studies of underwater image propagation and beam spread.
- Page 8 If the measurements E are consistent with E , the estimates of N can be considered good. Included with the LISST-100X instrument, we have provided software that obtains the inverted volume distribution N . We have also provided the matrix K for ®...
-
Page 9: General Description
General Description The LISST-100X instrument is a laser diffraction device. It consists of optics for producing a collimated laser beam, a specially constructed detector array, electronics for signal pre- amplification and processing, a data storage and scheduling computer, and a battery system. - Page 10 External I/O Ports The LISST-100X is also equipped with an external ANALOG IN port for recording the output of one other analog instrument. Additionally, 2 DIGITAL I/O ports are provided for communicating with up to two instruments. The I/O ports can be used for synchronization of the LISST-100X with two other instruments;...
- Page 11 For laboratory testing an optional Small Volume Full Path Mixing Chamber is available. This chamber mounts to the optics of the LISST-100X and seals around the windows of the instrument. The sample can then be added to the chamber and the built-in mixer will keep the sample mixed with the measurements are being made.
-
Page 12: Section 2: Operation
WARNING The LISST-100X uses a laser diode emitting a maximum of 1 mW of visible (red) light at a wavelength of 670nm. the laser beam under normal circumstances is not a threat. However, if objects are placed in the path of the laser beam, the light could be reflected into the eye causing permanent damage. -
Page 13: Getting Started
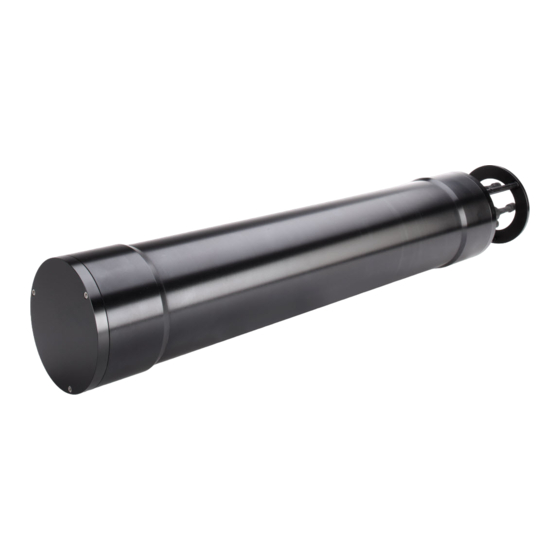
Start by removing the white plastic instrument stands and set them on a flat working surface. Remove the LISST-100X from the case and set it on the stands. The LISST-100X has two distinct ends that we will refer Step 1: Remove to as the Optics endcap and the Connector endcap. - Page 14 30 seconds, wakes up for 1 second to look for a wake up command and then goes back to sleep. Therefore the wait could be as long as 32 seconds for the LISST-100X. Upon wake up the instrument status will be displayed. If the cable connections are not correct or if the battery is not installed a warning message will appear after the time expires.
- Page 15 Step 8: Open The LISST-SOP has a terminal window that allows the user to Terminal window communicate directly with the instrument. To open the Terminal window select Terminal Window from the Communications window or select the button form the tool bar. A window similar to the one shown below will appear.
- Page 16 LISST-100. New instruments new Datalogger using the new datalogger have been given the name LISST-100X. Units using the previous version datalogger will be called LISST-100. The new datalogger of the LISST-100X uses removable Compact Flash cards.
- Page 17 the average will be displayed. If the values are acceptable the values can be saved to a file. Enter the filename in the box and press the Accept and Save button. If there is a problem with the instrument or if the water or windows are not clean, error messages will be displayed.
- Page 18 samples per average and sample rates on this screen. The RealTime mode is used for real-time size distribution displays. This mode sends the raw data to the LISST-SOP software for conversion to Size Distribution and displaying on the screen. No data is saved in the datafile.
- Page 19 There are five options: Depth, Time, External Mechanical Switch, External Digital Input, and Time Delay. Select the mode by clicking on the button next to the its label. Select the correct parameters as required. For this example let’s select the External Mechanical Switch Start Condition.
- Page 20 For this example, choose the External Mechanical Switch as the Stop condition. After selecting the Stop Conditions return to the Instrument Status page by clicking on the Instrument Status Tab. Step 15: Saving Once the settings have been sent to the instrument the Instrument Status the settings for Page will display the summary of the settings that have been selected.
- Page 21 the Start Condition. This will only be true if the Start and Stop conditions match. For example, Depth Start and Depth Stop. For all other Start Conditions the program will terminate and return to the L100X> prompt. To stop a running program use the Stop button on the Terminal window or the button on the tool bar.
- Page 22 The range of samples to process can be selected by entering values in the Select First and Select Last boxes. The default selection is to process the complete file. Press the Process File button to convert the raw file into processed size distributions.
- Page 23 To view the value of the auxiliary parameters, such as time and depth, select the View Auxiliary Parameter Frame from the DataFrames menu. A display similar to the one below will appear showing the calibrated values. LISST – 100X User’s Guide...
- Page 24 Step 21: Opening The LISST-SOP software also supports the ability to acquire data, process RealTime Session it, and display it in Real-time. The Real-time display of the processed data is very similar to the display of processed data. The instrument can be configured for a Real-Time session before data is collected but it is no longer required.
- Page 25 Save Single Sample button records a single sample to an ASCII file. Note: The main power and laser will be on until this window is closed or until the Stop button is pressed. Significant loss of battery life can occur if the instrument is left powered up for an extended period of time.
- Page 26 The above steps are meant to give a brief introduction to most of the procedures that are required to operate the LISST-100X. Most of these steps are covered in detailed Step-by-Step instructions in the following sections.
-
Page 27: Step By Step Procedures
Step by Step procedures The following topics are covered with Step by Step instructions. Recording and Recording a background scatter file is the first step in acquiring storing a data. This step-by-step describes the proper procedure to record Background and download a background scatter file and save it for later Scatterfile processing. -
Page 28: Step By Step Procedure: Record And Store Background Scatterfile
STEP BY STEP PROCEDURE: RECORD AND STORE BACKGROUND SCATTERFILE Step Action Result • Clean instrument and install Horizontal test chamber. Optics submerged in water • Fill with clean filtered water • Connect communications cable and run LISST-SOP Communications program started. software. - Page 29 • If there is a problem with the instrument or if the water or windows are not clean, error messages will be displayed. Dirty water or windows will generally cause higher values across the middle rings. Large bubbles or particles in the water can cause higher values on the inner rings or left hand side of the display.
-
Page 30: Step By Step Procedure: Offloading/Deleting Data Files
STEP BY STEP PROCEDURE: OFFLOADING/DELETING DATA FILES Step Action Result • Start LISST-SOP program Program started. • Select Offload from the LISST menu or press on the Gets current directory of files from memory and displays the Offload button. list. •... - Page 31 • A Status bar will be displayed for each file offloaded. Offloading files from memory to the PC Text in the lower left corner will display the current file being offloaded. Deleting Files from memory • After a file has been offloaded from memory is can be deleted from the compact flash memory.
-
Page 32: Step By Step Procedure: Processing Raw Data
STEP BY STEP PROCEDURE: PROCESSING RAW DATA Step Action Result • Start LISST-SOP program Program started. • Select Settings from the File menu and click on the Output Tab. The window below will appear prompting for the desired output to use for the future data processing. - Page 33 • Select the output data file name. The default file Output data file name selected. name shown is the same as the raw data name but with a different extension. You can change this name if you wish. Provide the file name and press Save. If other output types are selected they will have the same base name with different extensions.
- Page 34 • Additional information is stored in the processed Auxiliary parameter window displayed. datafile. The Auxiliary parameter window displays these values for the current sample pointed to by the vertical cursor. They will update as the cursor is moved. Selecting the Show Auxiliary Parameter Frame from the DataFrames menu opens the window.
- Page 35 To select the range of raw data to process position the Range to process selected. cursor at the desired starting sample. The display at the lower portion of the screen will show the current sample or frame. Pressing the Select First button will set the current cursor position as the starting point for processing.
-
Page 36: Step By Step Procedure: View Processed Datafile
STEP BY STEP PROCEDURE: VIEW PROCESSED DATAFILE Step Action Result • Start LISST-SOP program Program started. • Select Open Particle Distribution File from the File menu. Open Particle Distribution File selected. • Select the processed data file from the file selection window. Processed datafile selected. - Page 37 • Additional information is stored in the processed datafile. The Auxiliary parameter window displays these values for the current sample. They will update as the Volume distribution is changed. The window is opened by selecting Show Auxiliary Parameters Frame from the DataFrames menu.
- Page 38 • The current display can be sent to the printer by choosing Display printed. Print from the File menu. • Print Preview and Print Setup are also available. • When finished viewing the processed data close the window Viewing of data complete.
-
Page 39: Step By Step Procedure: Real-Time Data Processing
STEP BY STEP PROCEDURE: REAL-TIME DATA PROCESSING Step Action Result • Connect the instrument to the PC and start the LISST-SOP program. Instrument • Open the Operating Modes Window and choose the Real-Time configured for Real-Time data Operating Mode. collection. •... - Page 40 • The Timer button function is similar to its use in viewing Timer button pressed and processed data. The timer will automatically acquire data at a samples updating fixed rate. Note that this rate is limited to about 1 Hz due to the automatically.
- Page 41 ASCII file. • When finished, close the main window to stop communication Finished and shutdown. with the LISST-100X. CAUTION: The laser and Main power are on continuously while in the Real-Time Session. The program will stop and the power will be turned off when the window is closed.
-
Page 42: Step By Step Procedure: Configuring Data Collection
Displayed. When first opening the Operating Modes window the LISST-SOP program will send a Ctrl-C to the LISST-100X. If a program is running it will be stopped. This is required so that the LISST-SOP program can get the status information from the LISST-100X. - Page 43 • To load a pre-saved LISST Operating Procedure file (LOP) enter the file name in the file box or click on the Browse button to navigate to the correct file. • After the file is selected the appropriate settings will be made. To apply these settings to the instrument press the Apply or OK buttons.
- Page 44 • Select Start Conditions tab to configure when the instrument will begin sampling. • There are five options: Depth, Time, External Mechanical Switch, External Digital Input, and Time Delay. Select the mode by clicking on the button next to the its label. Select the correct parameters as required.
- Page 45 • Choose the Stop Conditions Tab to select the conditions when sampling should stop. • The available stop conditions are: Depth, Time. External Mechanical Switch, External Digital Input, Fixed number of samples, and Maximum Memory or Low Battery. • If the Stop Condition is either Depth, External Mechanical Switch, or External Digital Input and the Start Condition is also one of these three option the Base Program on the instrument will return to waiting for the Start condition.
- Page 46 • Select Apply or OK buttons to configure the instrument with the current settings. If the Apply button is pressed the program will return to the current window. Returning to the Instrument Status window will display a summary of the current settings. •...
-
Page 47: Instrument Communication
Instrument Communication Serial Port Communication with the LISST-100X is via an RS-232C link. A Settings cable that connects the instrument to a PC has been provided. This cable connects the 4-pin underwater connector on the instrument to a DB-9 serial port connector. If required, DB-9 to DB-25 pin adapters are available. - Page 48 External Mechanical Switch, External Digital Input, and Time Delay. The details of each condition are described below. Depth Start: The built-in depth sensor of the LISST-100X is used to check the current depth to determine if the desired start depth has been exceeded.
- Page 49 Real-time sampling mode. The details of each condition are described below. Depth Stop: The built-in depth sensor of the LISST-100X is used to check the current depth to determine if it is less than the desired Stop depth. The averaged depth from the last sample acquired is used as the current depth.
- Page 50 has been reached the program will stop and return to the L100X> prompt. Maximum Memory or Low Battery: The Maximum Memory or Low Battery Stop condition will continue to sample until the memory capacity has been reached or when the battery voltage has dropped to less than 6 volts.
-
Page 51: Lisst-100X Command Summary
LISST-100X Command Summary Display Commands Display current Disk Directory Display current status information Display Current Battery Voltage Display general help messages and command list Setup Commands OM x Set Operating mode. ST x Set Start Condition. TD x Set Start Condition Data... -
Page 52: Lisst-100X Command Details
Syntax: DS or ds Description: The instrument settings and status are displayed to the screen. Example: input: DS output: LISST-100X Current Status and Settings Serial number = 1004 Operating Mode: Burst Mode Start Condition: Time Start at 03/10/04 09:22:00 Stop Condition: Fixed Number Stop at 1 samples... - Page 53 Display general help messages and command list Syntax: HE or he Description: Displays the list of command to the screen. Example: input: HE output: LISST-100X Commands (followed by 30 lines of text) Setup Commands Set Operating Mode Syntax: OM x or om x...
- Page 54 Set measurements per average Syntax: MA x or ma x Where x = number of samples per average Description: Each recorded or displayed measurement is based on an average of measurements. The number of measurements per average is set using the SA command.
- Page 55 2 = Time/Date Stop 3 = Mechanical Switch Stop 4 = Digital Input Stop 5 = Fixed Number of Samples Stop 6 = Maximum memory or Low Battery Stop If no value follows command, prompts will be displayed for the value. Example: input: SP 5 Set Start Condition Data Syntax: PD x or pd x, where x is the start condition data :...
- Page 56 Example: Input: DL L159*.dat Output: Are you sure (Y/N)… Cautions: WARNING: Make sure that the file being delete has already been offloaded before deleting the file. Once the file is delete it can not be recovered. Start Data Collection using current Settings Syntax: GO or go Description: Starts Fixed Rate or Burst Mode Data collection using current settings.
- Page 57 Notes: The ZS command does not store the sample to a datafile. Go into deep sleep mode (minimum power consumption) Syntax: ZZ or zz Description: Sends LISST-25X in to low power sleep mode. Instrument will wake up every 10 seconds and wait for a response. If there is no response with in 2 seconds, the instrument will return to sleep mode.
-
Page 58: Performance Optimization
This section contains information on optimizing the performance of the LISST-100X. Background As was discussed in earlier sections, the LISST-100X uses a Scatterfile and its custom detector to measure light scattered at small angles from particles in water. In order to measure only the scattered light... - Page 59 The low concentration limit of LISST-100X is very sensitive to the quality of the background scatterfile. For this reason, when working in near-surface or mid-depth water, it is very important that a good background file be obtained with very clean water.
- Page 60 Optical Alignment The background scatterfile is the best source of information on the current health of the LISST-100X. It provides information on the current functionality of all of the major systems including laser, ring detector, data collection electronics, and optical alignment.
-
Page 61: Instrument Mounting
Any contact with other metal can greatly increase the rate of corrosion. Isolate the instrument with rubber or plastic to keep the LISST-100X from being the sacrificial anode for the mounting hardware. LISST – 100X User’s Guide... -
Page 62: Instrument Storage & Maintenance
Instrument Storage & Maintenance Again it must be emphasized that the LISST-100X is a sensitive instrument. When not in use, the instrument should be stored in a well padded case. For longer storage (year or so), the communication cable should be disconnected and the battery pack should be disconnected or removed. - Page 63 Maintenance Notes The main battery is mounted to the connector end cap. SEQUOIA Battery Power and supplies the custom battery packs for use with the LISST-100X Access instrument.
- Page 64 STEP BY STEP PROCEDURE: CHANGING THE BATTERY Step Action Result • Place the LISST-100X in a horizontal position. Caps installed on the connectors. U-blocks have been provided for this purpose. • Disconnect all cables from the end cap. • Install caps on connectors to protect pins.
- Page 65 • To remove the battery, release the Velcro wrap and loosen the nuts Battery removed and replaced. on the threaded rods. Remove the plate. Do not remove the threaded rods. Before removing the battery, make note of its orientation so that the replacement battery can be positioned similarly.
-
Page 66: Technical Specifications
Technical Specifications • Parameters measured/derived Particle Size distribution Total Volume Concentration Optical Transmission Depth Temperature • An external analog input (0-2.5V) • Two external digital I/O ports (5V logic) • Optical path length: 5 cm standard, 2.5 cm optional • Optical transmission: 12 bit resolution •... -
Page 67: Appendix A: Instrument Specific Documentation
Appendix A: Instrument Specific Documentation Instrument Model Number Instrument Serial Number Instrument Manufacture Date Instrument Memory Capacity Instrument Accessories Instrument Owner Auxiliary Parameters The table below lists the auxiliary parameter labels and calibration constants. These values are saved in the LISST.INI file. They can be viewed and/ or edited using the “Edit Calibration Constants” from the DataFrames menu. -
Page 68: Appendix B: Data Storage Format And Size Ranges
Appendix B: Data Storage Format and Size Ranges Size Ranges, Angles of Observation and Data Storage Format There are 32 size ranges logarithmically placed from 1.25 - 250 Size Ranges microns in diameter, or 2.5 – 500 microns (the upper size in each bin is 1.180 times the lower). - Page 69 the table below. Format Elements Parameter 1:32 Light intensity on detectors 1 through 32 Laser transmission Sensor Battery voltage in raw counts External Auxiliary input 1 (0 to 5V = 0 to 4096) Laser Reference sensor Pressure in raw counts Temperature in units of 100ths of degrees C (Day*100 + Hour) at which data taken (Minutes*100 + Seconds) at which data taken...
-
Page 70: Appendix C: Connector Pinouts For Lisst-100X
Appendix C: Connector Pinouts for LISST-100X The LISST-100X has 3 separate underwater connectors. A 5-pin, a 6-pin, and a 3-pin connector. The photograph above shows the placement of each connector. The text below describes detailed wiring for each connector. Communications and Power Connector (5 pin connector) Connector Manufacturer: Impulse Enterprise, Inc. - Page 71 Auxiliary Input Connector (6 pin connector) Connector Manufacturer: Impulse Enterprise, Inc. San Diego, CA, USA Connector Part Number (Bulkhead): MCBH-6-MP Stainless Steel Mating Cable Part Number: MCIL-6-FS Connector Pin # Digital Ground Digital In #1 Digital In #2 No Connection Analog In (0 to 2.50V max) Analog Ground BioBlock Connector (3 pin connector)
-
Page 72: Appendix D: Lisst-Sop Software Button Description
Appendix D: LISST-SOP Software Button Description Button Label Description Runs the instrument for Real-Time operation. Open Real-Time Note: instrument must be already configured for real-time sampling and Session be running (i.e. not hibernating). [ To wake from hibernation, choose Wake Up LISST from LISST menu Open raw or processed file. -
Page 73: Appendix E: Software Upgrade Installation Procedure
Calibration Constants” in the previous versions. The fifth column is an indicator for the LISST-100X type instruments. Place an X in this column for the LISST-100X instruments and leave it blank for the LISST-100 instruments. Save the changes to the InstrumentData.Txt file. - Page 74 OK to finish and exit the setup program. From the Start menu navigate to Programs then Sequoia Scientific then LISST. If a desktop icon is desired, right click on LISST and choose “Send To” and then “Desktop as icon”. This will create an icon on the desktop for later use. Note: the “Start In”...
- Page 75 loaded on to the instrument and select OK. A transfer status display will appear as the program is loaded. To confirm the loading issue a LIST command from the Terminal Window. The software and instrument are now ready to use. LISST –...
-
Page 76: Appendix F: Horzontal Chamber Installation Procedure
Appendix F: Horizontal Chamber Installation Procedure Step 1) Before installing the Small Volume Horizontal Chamber first clean the windows of the LISST-100. It will also be necessary to remove the endcap ring and standoffs on the optics endcap. Remove the three screws on the ring and then unscrew the standoffs. -
Page 77: Appendix G: Bioblock Installation And Use
The BioBlock Anti-Biofouling Shutter system is a bolt-on option that is available for the LISST-25X, LISST- 100, and LISST-100X. Copper disks are placed very near the optical widows. The copper discourages any biology from growing on the optical windows. The BioBlock is self-contained with its own battery pack. It uses a 5V logic signal from the dedicated BioBlock connector on the LISST-100X connector endcap. - Page 78 Step 2. Step 4) Use large tie-wraps to secure the BioBlock body to the LISST-100X, as shown in the photo on the right. The tie-wraps should be placed over the bolts extending from the mounting brackets. Trim excess ends of tie- wraps.
- Page 79 The BioBlock uses two standard alkaline D batteries for power. The electronics inside the BioBlock includes a battery monitor. If the voltage of the battery is too low a signal will be sent to the LISST-100X. If LISST- 100X sees that the BioBlock battery is low it will command the BioBlock to remain open. By monitoring the battery, the BioBlock can be left in the open position before the battery voltage is too low.
- Page 80 Do not over tighten the screws. Step 4) Reattach the cable to the LISST-100X and test the operation using the BB 11 and BB 10 commands. The commands can be issues through the Terminal window of the LISST-SOP software.
-
Page 81: Warranty
Correction of Non-Compliance If any Product does not comply with the warranties set forth in 1(a) and 1(b) above, SEQUOIA will, at its option, either (a) repair the Product, (b) replace the Product, or (c) refund the purchase price paid by Customer to SEQUOIA for the Product; provided that Customer gives SEQUOIA written notice of the noncompliance within one (1) year after SEQUOIA's delivery of the Product (as the same may be extended for repaired or replacement Products as provided for herein, the "Warranty Period"). - Page 82 SEQUOIA's liability (whether in contract, tort, or otherwise; and notwithstanding any fault, negligence, strict liability or product liability) with regard to any Product (including, but not limited to, any breach of or default under the Order by SEQUOIA) will in no event exceed the purchase price paid by Customer to SEQUOIA for such Product.
Need help?
Do you have a question about the LISST-100X and is the answer not in the manual?
Questions and answers