Table of Contents
Advertisement
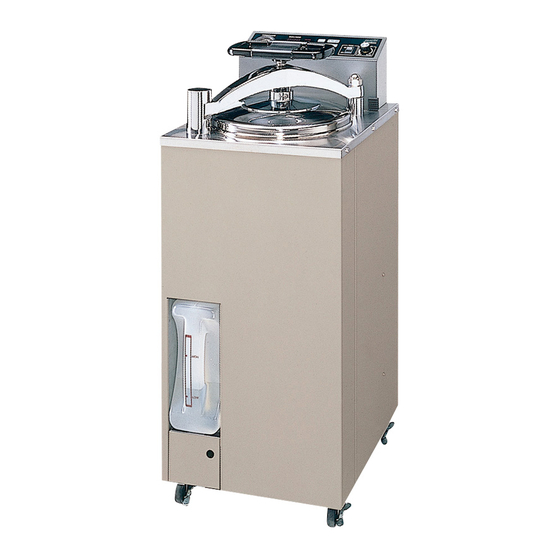
Thank you for purchasing the Labo Autoclave.
・ Please read this Operating Instructions carefully
before using the product.
・ Please pay particular attention to the
"Safety Precautions" section on page 2 to 8.
*
MLS-3020U
Operating Instructions
Labo Autoclave
Contents
Safety Precautions
・・・・・・・・・・ 30~31
・・・・・・・・・ 32~35
MLS - 3020U
MLS-2420U
・・・・・・・・ 2~8
・・・・・・・・・・ 9
・・ 10~15
・・・・・・・・・ 16
・・・・・・ 17~18
・・・・・・ 19~25
・・・・・ 26~27
・・・・・・・・ 28
・・・・・・・・ 29
・・・・ 36
Page
Advertisement
Table of Contents

Related Manuals for Phcbi MLS-3020U


Summary of Contents for Phcbi MLS-3020U
-
Page 1: Table Of Contents
・・・・・・ 17~18 Items to be Sterilized ・・・・・・ 19~25 Operating Instructions ・・・・・ 26~27 Trouble Shooting Guide ・・・・・・・・ 28 Incase of Power Failure ・・・・・・・・ 29 Maintenance and Care ・・・・・・・・・・ 30~31 Specifications ・・・・・・・・・ 32~35 Disposal of Unit ・・・・ 36 Concerning After-sales Service MLS-3020U... - Page 2 Safety Precautions These precautions must be observed without fail. For Your Safety To reduce the risk of injury, loss of life, electric shock, fire, malfunction, and damage to equipment or property, always observe the following safety precautions. Explanation of symbol word panels The following symbol word panels are used to classify and describe the level of hazard, injury, and property damage caused when the denotation is disregarded and improper use is performed.
- Page 3 WARNING Do not put anything that Check the cover packing. corrodes stainless steel. Sterilization of animal oil and fat (e.g.,wastes Do not put anything like culture medium that generated after BSE inspection, etc.)causes premature wear, cracking or breakage of the corrodes stainless steel in the unit.
- Page 4 Safety Precautions ( Continued ) WARNING Do not allow children to use Do not sterilize objects in a or play with the unit. steam- impermeable container or bag. Inobservance of this warning may result in Inobservance of this caution may result in burns, electric shock or injury.
- Page 5 WARNING Do not disassemble, repair or Do not open the drain valve modify the unit. during operation. Drain valve Do not open. Drain the heating water with the cover open. Wait at least 2 hours from the end of operation to drain the heating water. The unit is non-technical services should not Hot water gushes out and can cause burns or be repaired.
- Page 6 Connect the unit’s power heating water. cord to its own dedicated outlet. Connect the power cord to the dedicated plug-in receptacle as shown below. <MLS-3020U>: Single-phase, 230 V AC, 10 A or higher <MLS-2420U>: Single-phase, Never use alcohol and other chemicals, well 230 V AC, 7 A or higher water, saline water, etc.
- Page 7 CAUTION After the exhaust switch is Do not touch the cover and closed, it sterilizes it. the chamber periphery. Do not touch the chamber, cover and arm as they are hot during and immediately after operation. Please start sterilization after checking that the Inobservance of this caution may result in burns.
- Page 8 Safety Precautions ( Continued ) CAUTION Do not pour water on the unit. Do not move the unit with the exhaust tank filled with the water. When moving the unit, drain water from the Inobservance of this caution may result in exhaust tank without fail.
-
Page 9: Precautions In Use
Precautions In Use Use purified or city water as heating water. Use of well water, saline water, etc. may cause trouble. Purified City water water Prohibition of Use for Other than Intended Purposes Do not use the product for anything other than the intended purposes of sterilization, keep warm and melting. -
Page 10: Parts Description And Function ・・ 10~15
Parts Description and Function Explanation of Action Label Label, 1 : This caution label explains burning hazard with touching the chamber, door or arm, if the unit is in operation or immediately afterward. Label, 2 : To avoid the malfunction of the unit in accordance with chamber corrosion, this label explains the ban of contents use which is able to corrode stainless steel, and explains maintenance after use. - Page 11 Label, 1 (See P10) Label, 4 (See P10) Label, 2 (See P10) Label, 3 (See P10) Label, 5 (See P10) Label, 6 (See P10) Label, 7 (See P10) Label, 8 (See P10)
- Page 12 Parts Description and Function ( Continued ) Wire-connector Main unit Magnet-holder and han- dle are connected by this connector. Chamber Items are placed in here Magnet-holder to be sterilized. Permanent magnet is equipped. Magnet-plate Arm stopper If the unit is not used, Magnet-holder is atta- It keeps the arm in the ched to this Magnet-...
- Page 13 Gasket This gasket is fitted to the exhaust tank inlet opening, where the ex- haust hose is connec- ted to the exhaust tank to keep airtight conne- ction. Exhaust hose Conveys steam and air from the chamber to the exhaust tank. Drain valve This manual valve is used to drain sterilizing...
- Page 14 Used for setting and displaying the steriliza- within the chamber. tion temperature and sterilization time, and for displaying the remaining sterilization time. (Refer to pages 21-22 for detailed instructions.) MLS-3020U Stop button Start button Exhaust knob Cancels the operation. Starts sterilization.
- Page 15 Digital indicator lamp Time indicator lamp Heating process indicator lamp Displays the sterilization This lamp lights when This lamp lights to display temperature temperature and sterili- the digital indicator lamp information and heating process of the zation time settings alt- is displaying time infor- chamber.
-
Page 16: Preparation For Use
Preparation for Use Installation ● Make sure to install the unit on a flat, sturdy surface floor. Lock all four casters. Note That the display indications will be difficult to read, if the unit is located under direct sunlight. ● Avoid locations where the unit is exposed to air containing large amounts of moisture, salt or sulfur, as these could adversely affect the unit. -
Page 17: Items To Be Sterilized ・・・・・・ 17~18
Items to be Sterilized Precautions for sterilizing of liquids such as cultures and chemicals ● If large quantities of culture or other liquids are sterilized, the delay of reaching time could be occurred between the chamber reaching time to setting temperature and the liquid in containers reaching time to setting temperature. - Page 18 Items to be Sterilized ( Continued ) Sterilizing of items with using plastic containers ● Only use heat resistance containers and do not overload the stainless baskets. Do not squeeze bottles against each other. ● If large quantities of culture or other liquids are sterilized Made of with using plastic containers, set the sterilization time a little plastic...
-
Page 19: Operating Instructions ・・・・・・ 19~25
The level of water will be lower after each sterilizing cycle, therefore this water must be rep- lenished. Water level Supplementary note Heater cover indicator Pour water for evaporation Water level MLS-3020U units : 2 liters MLS-2420U units : 1.5 liters. Sterilization water... - Page 20 Operating Instructions ( Continued ) Note Distilled water is ideal for using as water for evaporation. If distilled water is unavailable, tap water may be used. Never use well water, saltwater or hard water. If these water are used, they could cause the inside of the cham- ber to corrode or mineral deposits to form.
- Page 21 7. Close the door. ●Turn the door gently clockwise with grasping the handle Handle and until the arm comes to rest against the arm stopper. ●Even if the Door lamp flashes, continue to turn the handle until it becomes tight. ●Connect the wire connector of the handle to the...
- Page 22 Operating Instructions ( Continued ) Supplementary note Lowering the sterilization temperature setting by 4 °C (7.2 °F) or more after the chamber has been heated causes the temperature indication to flash on and off. This is not a malfunction, and the flashing will stop as soon as the temperature in the chamber drops to the new sterilization temperature setting.
- Page 23 9. Start sterilization. ●Press the START button. A short beep sounds and “ °C ” lamp lights to indicate that sterilization is in process. Short beep ●The digital indicator begins to register, when the tempera- ture inside the chamber reaches 80 °C. ●The HIGH PRESSURE lamp starts flashing, when the te-...
- Page 24 Operating Instructions ( Continued ) 11. Finishing of sterilization ●If the sterilization finishes, the buzzer will sound a beep and the Heating Process Indicator lamp will flushes to in- dicate that sterilization is finished. The digital indicator la- mp will display the temperature of inside the chamber. ●When sterilizing instruments (exclude liquid items to be sterilized;) and if you are in a hurry to remove them, turn EXHAUST...
- Page 25 ( Continued ) 13. Completion ●Five long beeps sound in succession and the indicator of completion on the digital indicator lamp lights to show that it is safe to open the door and to remove the conte- (“Completion” indicator) nts of the unit. (A short beep sounds when the door is opened.) ●Disconnect the Magnet-holder...
-
Page 26: Trouble Shooting Guide ・・・・・ 26~27
Trouble Shooting Guide Check the following points if the unit seems to be malfunctioning. Page of Problem Cause Remedy Reference ●Power won’t turn on. ●Is the power supply cord ●Connect the power supply connected? cord. ●Is the circuit breaker that ●Turn on the circuit breaker controls the power supply that controls the power... - Page 27 If an error indication appears If an error indication appears and the buzzer beeps intermittently while the unit is operating, the unit’s safety device could be triggered, halting operation. And consult the table below for points to check and corrective actions. To cancel the error indication : Switch off the power to turn off the error indications and buzzer sound.
-
Page 28: Incase Of Power Failure
In Case of Power Failure ●All indicators go out, if the power, supply is stopped or if the unit power switch is turned off. Also, the sterilization temperature and time settings are erased. ●Reset the sterilization time and the sterilization temperature. (Refer to section 8 on pages 21-22) When power is restored, The unit returns to initial setting status when power is restored. -
Page 29: Maintenance And Care
Clean the bottom of the chamber thoroughly using a brush with a handle or similar implement. (MLS-3020U) Be careful not to rub too fordcefully to avoid damaging the sensor element of the heat sensor mounted on the heater. -
Page 30: Specifications ・・・・・・・・・・ 30~31
Specifications Product designation Labo autoclave MLS-3020U (high-pressure steam sterilizer) Model number MLS-3020U-PE Power supply 230 VAC (50 Hz/60 Hz), 8.7 A CE Marked. Power consumption 2 kW External dimensions 440 mm×550 mm×1050 mm 17-8/25”×21-13/20”×41-17/50” Weight (Mass) Approx. 67 kg (147.7 lbs) Chamber dimensions 300 mm×670 mm... - Page 31 ( Continued ) Product designation Labo autoclave MLS-2420U (high-pressure steam sterilizer) Model number MLS-2420U-PE Power supply 230 VAC (50 Hz/60 Hz), 6.5 A CE Marked. Power consumption 1.5 kW External dimensions 380 mm×490 mm×840 mm 14-15/16”×19-1/5”×33-3/8” Weight (Mass) Approx. 47 kg (103.6 lbs) Chamber dimensions 240 mm×450 mm (dia.x depth)
-
Page 32: Disposal Of Unit ・・・・・・・・・ 32~35
Disposal of Unit (English) Disposal of Old Equipment and Batteries Only for European Union and countries with recycling systems This symbol on the products and/or accompanying documents means that used electrical and electronic products should not be mixed with general household waste. For proper treatment, recovery and recycling, please take these products to designated collec- tion points, where they will be accepted on a free of charge basis. - Page 33 (French) Informations relatives à l’évacuation des déchets, destinées aux utilisateurs d’appareils électriques et électroniques (appareils ménagers domestiques) Lorsque ce symbole figure sur les produits et/ou les documents qui les accompagnent, cela signifie que les appareils électriques et électroniques ne doivent pas être jetés avec les ordures ménagères.
- Page 34 Disposal of Unit ( Continued ) (Portuguese) Informações sobre a eliminação de resíduos para utilizadores de equipamentos eléctricos e electrónicos (utilizadores particulares) Este símbolo nos produtos e/ou documentos anexos significa que os produtos eléctricos e electrónicos usados não devem ser misturados com os resíduos urbanos indiferenciados. Para efectuar um tratamento, recuperação e reciclagem correctos, leve estes produtos para pontos de recolha próprios para o efeito, onde serão aceites gratuitamente.
- Page 35 (Dutch) Informatie over het weggooien van elektrische en elektronische apparatuur (particulieren) Dit symbool betekent in Europa dat gebruikte elektrische en elektronische producten niet bij het normale huishoudelijke afval mogen. Lever deze producten in bij de aangewezen inzamelingspunten, waar ze gratis worden geac- cepteerd en op de juiste manier worden verwerkt, teruggewonnen en hergebruikt.
-
Page 36: Concerning After-Sales Service
Concerning After-sales Service 1. After-sales service In the unlikely event that something should appear to go wrong with the unit, first check out whether trouble is indicated by following the instructions in “Trouble shooting Guide” on pages 26 and 27. If the trouble persists, stop using the unit, and contact your dealer with the following details.
Need help?
Do you have a question about the MLS-3020U and is the answer not in the manual?
Questions and answers