Gaggenau KG 291 Operation And Installation Manual
Gaggenau kg 291 gas cooker operation, maintenance and installation manual
Hide thumbs
Also See for KG 291:
- Operation and installation manual (31 pages) ,
- Installation and operation manual (22 pages) ,
- Specifications (1 page)
Table of Contents
Advertisement
Quick Links
Advertisement
Table of Contents

Related Manuals for Gaggenau KG 291


Summary of Contents for Gaggenau KG 291
- Page 1 Operation, Maintenance and Installation Manual KG 291 Gas Cooker...
-
Page 3: Table Of Contents
10. Trouble shooting 11. Technical Data / Nozzle Table 12. Installation Instructions Important Notes Gas Connection / Electrical Connection Nozzle Replacement Installing the Appliance KG 291 Page 3-4 Page 3 Page 3 Page 4 Page 5 Page 5 Page 5... -
Page 5: Important Notes
1. Important Notes For Your Safety You must not operate the appliance if it is damaged. When connecting electrical appliances in the proxi- mity of the appliance, make sure that connecting leads do not come into contact with hot cooking surfaces! As the user, you yourself are responsible for maintenance and proper use in the household. -
Page 6: About Use
Ensure an adequate supply of air when using an extractor hood operating in the extraction mode The appliance cannot be used during a power failure. In the event of malfunctions, please inform your specialist dealer or your nearest Gaggenau after- sales service. -
Page 7: Features
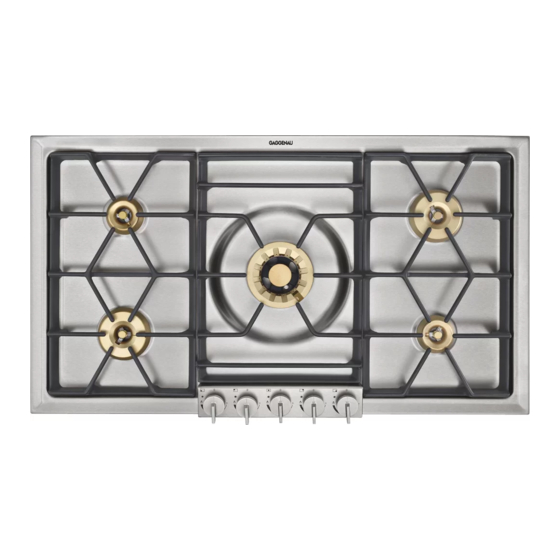
2. Features Features of the Appliance Control Knob Burner Parts 1 Pot grids (3 parts, the left and right part are identical) 2 Large (Wok) burner 5 kW 3 Large burner 4 kW 4 Normal burner 2 kW 5 Ventilation openings 6 Symbol for corresponding cooking position 7 Indicator light 8 Flame setting:... -
Page 8: Operating Principle
3. Operating Principle The gas hob features two normal burners, two large burners and a Wok burner. The appliance features one-hand operation, flame detection and automatic re-ignition. The ignition is activated when the control knob is turned. Should the flame go out during operation, the appliance will automatically re-ignite the burner. -
Page 9: Operation
4. Operation Only light a burner if all burner parts are dry, and assembled correctly. Otherwise, malfunctions may occur or the appliance may switch off. Switching on • Place a suitable pot or a pan on the corresponding cooking position. •... - Page 10 appliance has cooled down sufficiently, check this burner to see if all the burner parts have been assembled correctly. Check if the burner or the electrode has been soiled (see trouble shooting guide on page 16). Note: if a malfunction occurs on one burner, you can continue using the remaining burners, however, you must turn all control knobs to the off-position first, before recommencing.
-
Page 11: Settings Table
Due to the high performance of the cooktop, fat and oil will heat up quickly. Never leave the cooktop unattended, fat can ignite, food can burn. -
Page 12: Cookware Recommendations
6. Cookware Recommendations KG 291 Recommended Minimum pot diameter Normal Burner 200 - 240 mm Large Burner 240 - 280 mm Large Burner (Wok) 240 - 320 mm Pots with a diameter of less than 90 mm or more than 280 mm / 320 mm for the large (WOK) pot diameter burner should not be used. -
Page 13: Wok Cookware Recommendations
7. Wok Cookware Recommendations The Wok and Accessories (not included in the scope of delivery) – The round-bottom wok is the ideal wok for your gas cooker. – The wok looks like a hollow semisphere with a long handle or wooden handle. It has a rounded base and slanted sides. -
Page 14: Cleaning And Care
– risk of short circuits! Caution, risk of burns! Before cleaning, please wait until the cooktop has cooled to hand-warm. Never switch on the cooktop while cleaning. burner assembly wok burner Keep the ventilation openings on the rear of the appliance clean. - Page 15 This loosens even the most stubborn of soiling. Do not use any abrasive agents and abrasive sponges. • Only use very little water to clean your cooktop. Be careful that no water enters the burner base. • As the result of heat development, slight dis- coloration can appear on the stainless steel surface.
- Page 16 For heavy soiling, you can order our stainless steel cleaner (Order No. 310631) from your Gaggenau dealer. Caution: no liquid should enter the housing of the cooktop through the burner base.
-
Page 17: Maintenance
16 to see, if you can rectify the problem yourself. If your appliance still does not work, please contact your dealer or your local Gaggenau customer service agency. Specify the appliance type (see rating plate). Repairs may only be carried out by authorised technicians, in order to guarantee the safety of the appliance. -
Page 18: Trouble Shooting
• LP (propane) gas: is the gas tank empty? Switch the appliance on again. Should the appliance still not work, contact your Gaggenau after-sales service. Burners go off during operation Turn all control knobs to 0 Indicator lights go off, only... -
Page 19: Technical Data / Nozzle Table
11. Technical Data / Nozzle Table Technical data (gas) Burners: Normal burner Full burning Low burning Large burner Full burning Low burning Wok burner Full burning Low burning Total output Countries Gas family Gas type Pressure Nozzle, full burn, outer Nozzle, low burn, outer Nozzle, full burn, inner Nozzle, low burn, inner... - Page 20 Countries Gas family Gas type Pressure Nozzle, full burn, outer Nozzle, low burn, outer Nozzle, full burn, inner Nozzle, low burn, inner Air gap adjustm. outer [mm] Air gap adjustm. inner [mm] Total output Total consumption * open, fixed Nozzle table normal burner AT BE CH CZ DE DK ES FI FR GB GR HU...
- Page 21 Countries Gas family Gas type Pressure Nozzle, full burn, outer Nozzle, low burn, outer Nozzle, full burn, inner Nozzle, low burn, inner Air gap adjustm. outer [mm] Air gap adjustm. inner [mm] Total output Total consumption * open, fixed Nozzle table large burner AT BE CH CZ DE DK ES FI FR GB GR HU...
-
Page 22: Installation Instructions
12. Installation Instructions Important Notes Please observe the general safety notes and the important information in chapter 1. The installing technician is responsible for perfect functioning of the appliance at its installa- tion location. He must show the user how to switch off the electricity and gas supply whenever required. - Page 23 Note on ventilation: this household gas cooker has a total rated thermal load of 17 kW (Hs). Simultaneous use of all cooking positions of the cooker generates heat and humidity in the room where it is installed. This is why attention must be paid to good kitchen ventilation.
-
Page 24: Gas Connection / Electrical Connection
Connecting the appliance Electrical connection Electrical connection (AC 220-240 V) is established by means of a connecting cable with an earthing contact plug connected to an earthed socket, which must also be accessible after installation of the gas hob. If, after installation of the gas hob, not all poles can be isolated from the mains by removing the plug, an isolating device with a contact gap of at least 3 mm must be permanently installed. -
Page 25: Nozzle Replacement
Nozzle Replacement outer low setting nozzle See table on page 17-19 for details of nozzle settings. Changing over to a different gas type Only authorised specialists are permitted to change over to a different gas type. The nozzles needed for the gas type to be set are available as a conversion kit. - Page 26 outer main nozzle See table on page 17-19 for details of nozzle settings. Replacing the main burner nozzles of the normal burner and large burner • Detach the safety spring on the supply lines. Leave the electrode connected. Unscrew the burners from the trough (Torx T20) and pull off the inner main nozzle burner from both supply lines.
- Page 27 outer main nozzle inner main nozzle See table on page 17-19 for details of nozzle settings. Replacing the main burner nozzles of the wok-burner • Unscrew the Wok burner from the trough (Torx T20). Loosen locking screw from the air regulation bush.
-
Page 28: Installing The Appliance
Do not install the appliance above a drawer. • Produce the recess for the cooktop in your countertop. Proceed as indicated on the installation sketch. - Page 32 GAGGENAU HAUSGERÄTE GMBH CARL-WERY-STR. 34 · D - 81739 MÜNCHEN Y (0 89) 45 90 - 03 FAX (0 89) 45 90 - 23 47 www.gaggenau.com...
Need help?
Do you have a question about the KG 291 and is the answer not in the manual?
Questions and answers