Advertisement
Available languages
Available languages
Quick Links
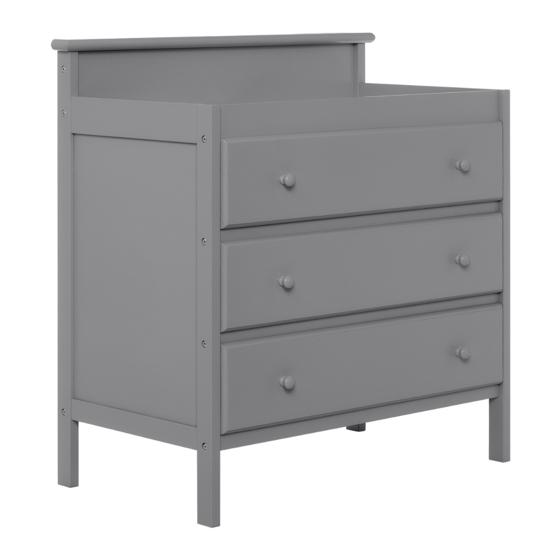
Read all instructions before use of the changing table.
KEEP INSTRUCTIONS FOR FUTURE USE.
Use only the pad provided by manufacturer. Do not use changing table, add-on changing
unit, or countered changing pad if it is damaged or broken.
Fail Hazard-To prevent death or serious injury , always keep child within arm's reach.
Never leave your child unattended in this dressing table.To insure the safety of your
child, the restraint system must be used. Check regularly to see that all bolts are tight.
Clean by wiping with damp clean cloth. DO NOT use abrasives.
Please note that the warning sticker is placed on the changer to keep parents and
caregivers informed it is a requirement by law under CPSC and ASTM. We do apologize
for any inconvenience this may cause you.
prevent improper use of the units .
1.Attach one of the mounting brackets securely to the back top edge of the furniture using
the short screw .
2.Find the stud in the wall and mark the location on the wall for mounting the second
bracket, with a 2" wood screw , approximately 2" below the bracket mounted to the edge
of the furniture .
3.If a stud cannot be found , purchase a "Hollow-Wall Anchor Bolt" and attach the second
bracket to the wall using that bolt .Make sure to follow all instructions by the manufacturer.
4.Place the furniture so the bracket on the back edge is in line with the bracket on the wall .
5.Lace an end of the nylon restraint strap down through each bracket . Bring both ends
together and slide the beaded end of the strap through the key hole shaped slot in the
other end unit snug . Pull down on the beaded end until it snap locks into the keyhole .
6.Check to make sure the strap is securely laced and locked to the brackets.When child
reaches a maximum weight of 30lbs,the dressing/changing table shall no longer be used.
Dream On Me Inc.
1532 S WASHINGTON AVE
PISCATAWAY TWP NJ 08854
For Customer Care: +1 (732) 366-1788
WARNING
1
ASSEMBLY INSTRUCTIONS
D
STYLE NO: 606
606
Advertisement

Summary of Contents for Dream On Me 606
- Page 1 Dream On Me Inc. ASSEMBLY INSTRUCTIONS 1532 S WASHINGTON AVE STYLE NO: 606 PISCATAWAY TWP NJ 08854 For Customer Care: +1 (732) 366-1788 WARNING Read all instructions before use of the changing table. KEEP INSTRUCTIONS FOR FUTURE USE. Use only the pad provided by manufacturer. Do not use changing table, add-on changing unit, or countered changing pad if it is damaged or broken.
- Page 2 MISE EN GARDE Lisez toutes les instructions dans ce guide avant d'utiliser la table à langer. CONSERVEZ CES INSTRUCTIONS POUR RÉFÉRENCE ULTÉRIEURE. Ne pas utiliser de matelas autre que celui fourni par le manufacturier. Ne pas utiliser la table, l'unité additionnelle à langer ou le matelas à langer incurvé s'ils sont brisés ou endommagés.
- Page 3 DR2.1 DR2.2 A: Left head board(1pc) F: Back stabilizer bar(1pc) DR1: Front panel(3pcs) B: Right head board(1pc) G: Central back rail (1pc) DR2: Side panel(6pcs) C: Back rail(1pc) H: Back panel(2pcs) DR3: Back panel(3pcs) D: Front rail(1pc) J: Platform(1pc) DR4: Bottom panel(3pcs) E: Front K: Pad(1pc) stabilizer bar(3pcs)
-
Page 4: Connection Hardware
CONNECTION HARDWARE b. Wood dowel (12pcs) c. Allen wrench (1PC) 2-3/16” Allen head bolt (14pcs) Goujon en bois (12pcs) a. Vis à six pans 2-3/16" (14pcs) d. Barrel nu t (14PCS) Cam bolts(24pcs) e. Knob (6pcs) f.Pênes battants (24pcs) (14PCS) e . - Page 5 STEP 2 Back rail (C) and Front stabilizer bar(E) to Connect Left head board (A) by using barrel nut (d) and 1-1/2 ”bolt (a). DO NOT fully tighten the bolts. ÉTAPE 2 Attachez le goujon supérieur (C), et le rail arrière (E) à la tête de lit gauche (A) en utilisant les écrou manchon(d) et les boulons (a).
- Page 6 STEP 4 Barrel nut (d) with wood dowel (b) using the Attach the Right Side (B) to the assembly from step 3 with Bolts (a) and M4 Allen Wrench as shown. STEP 5 1: Thread cam bolts (f) into the pre-drilled holes on the front panel (DR1), side panel (DR2), back panel (DR3).
- Page 7 STEP 6 1: Attach side panel (DR2) to the back panel (DR3) by inserting the cam bolts (f) to the end holes of back panel (DR3). MAKE SURE the grooves line up and face inside. LOCK the cams (g) in the back panel (DR3) by turning them. 2: Slide the bottom panel (DR4) painted side up,into grooves of side panel (DR2).
-
Page 8: Dispositif Antibasculement
STEP 8 1: Slide the drawers into rails on head board (A&B). NOTE :PLEASE PUT THE DRAWER WITH CLEAN STICKER AS THE TOP ONE. 2:Add the pad (K). 3.Put the child on the pad,then insert safty restraint system of the tape across child's waist. The tightness can be adjusted by increasing the tension of the tape. -
Page 9: Limited Warranty
WARNING Serious or fatal crushing injuries can occur from furniture tip-over. To help prevent tip-over: • Install tipover restraint provided. • Place heaviest items in the lower drawers. • Do not set TV’s or other heavy objects on the top of this product. unless the product is specifically designed to accommodate them.


Need help?
Do you have a question about the 606 and is the answer not in the manual?
Questions and answers