Advertisement
Quick Links
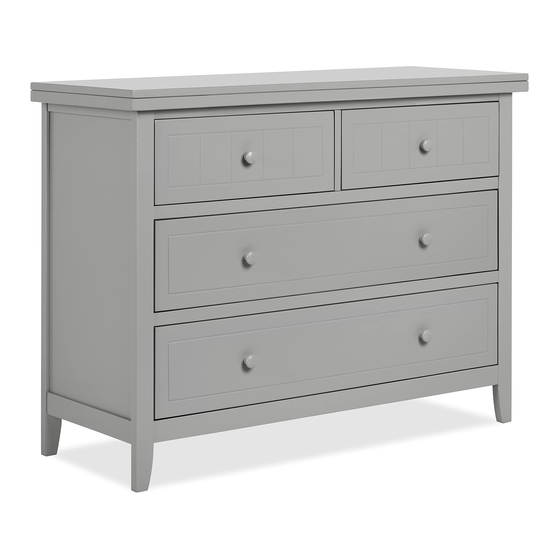
UNIVERSAL DRESSER
Scan the QR code to register your product
Scannez le code QR pour enregistrer votre produit
Escanee el código QR para registrar su producto
https://dreamonme.com/customercare/registration/
Read all instructions before assembling and using product.
IMPORTANT - Keep Instructions for future use.
Lisez toutes les instructions avant avant
d'assembler et d'utiliser le produit.
IMPORTANT - Conservez les instructions
pour pour une utilisation ultérieure.
Manuel du propriétaire
Lea todas las instrucciones antes de
montar y utilizar el producto.
IMPORTANTE - Guarde las
instrucciones para uso futuro.
Owner's Manual
Manual del usuario
1122R1-598CA
Advertisement

Related Manuals for Dream On Me 598CA


Summary of Contents for Dream On Me 598CA
- Page 1 Lisez toutes les instructions avant avant Lea todas las instrucciones antes de d'assembler et d'utiliser le produit. montar y utilizar el producto. IMPORTANT - Conservez les instructions IMPORTANTE - Guarde las 1122R1-598CA pour pour une utilisation ultérieure. instrucciones para uso futuro.
-
Page 2: Safety Tips
SAFETY TIPS Small parts may Adult Assembly present choking Required. hazard prior to assembly. DO NOT use the Please read the product if it is instructions damaged, broken, thoroughly. Identify all and/or components are parts & hardware. missing or broken. To protect your parts Do Not Use Power during assembly,... -
Page 3: Conseils De Sécurité
CONSEILS DE SÉCURITÉ Les petites pièces L'assemblage par un peuvent présenter un adulte est risque d'étouffement nécessaire. avant l'assemblage. N'utilisez PAS le produit Veuillez lire s'il est endommagé, attentivement les cassé, et/ou si des instructions. Identifiez composants sont toutes les pièces et le manquants ou cassés. -
Page 4: Consejos De Seguridad
CONSEJOS DE SEGURIDAD Las piezas pequeñas Se requiere el pueden presentar montaje por parte de peligro de asfixia un adulto. antes del montaje. NO utilice el producto si Lea detenidamente las está dañado, roto y/o instrucciones. faltan componentes o Identifique todas las están rotos. -
Page 5: Limited Warranty
LIMITED WARRANTY: • Dream On Me warrants its product to be free from defects in material and workmanship and agrees to remedy any such defect. • This warranty covers 1 year from the date of original purchase. -
Page 6: Garantie Limitée
GARANTIE LIMITÉE : • Dream On Me garantit que son produit est exempt de tout défaut de matériel et de fabrication et s'engage à remédier à tout défaut de ce type. • Cette garantie couvre 1 an à partir de la date d'achat originale. - Page 7 GRACIAS..por elegir a Dream On Me y enhorabuena por unirse a nuestra familia; ¡una familia que lleva más de 30 años transformando vidas! Apreciamos sus comentarios y le deseamos lo mejor en los próximos años con su nueva incorporación.
- Page 8 • DO NOT USE THIS DRESSER IF ANY PARTS ARE MISSING, DAMAGED, OR BROKEN CONTACT DREAM ON ME, 5375 BOUL DES GRANDES-PRAIRIES, SAINT-LEONARD, QC H1R 1B1, OR DREAM ON ME - 45 VERONICA AVENUE SOMERSET, NEW JERSEY 08873 FOR REPLACEMENT PARTS.
- Page 9 WARNINGS (cont.) WARNING Children have died from furniture tipover. To reduce the risk of furniture tipover: • ALWAYS install tipover restraint provided. • NEVER put a TV on this product. • NEVER allow children to stand,climb or hang on drawers, doors, or shelves. •...
- Page 10 DESSERRÉS, QU'IL NE MANQUE PAS DE PIÈCES OU QUE LES BORDS NE SONT PAS COUPANTS. • N'UTILISEZ PAS CETTE COMMODE SI DES PIÈCES SONT MANQUANTES, ENDOMMAGÉES OU CASSÉES CONTACTEZ DREAM ON ME, 5375 BOUL DES GRANDES-PRAIRIES, SAINT-LEONARD, QC H1R 1B1, OU DREAM ON ME - VERONICA AVENUE SOMERSET, NEW JERSEY 08873 POUR OBTENIR DES PIÈCES...
- Page 11 AVERTISSEMENTS (suite) AVERTISSEMENT Des enfants sont morts à cause du basculement de meubles. Pour réduire le risque de basculement des meubles : • Installez TOUJOURS le dispositif de retenue anti-basculement fourni. • NE JAMAIS mettre un téléviseur sur ce produit. •...
- Page 12 FRECUENCIA DURANTE EL USO. • NO UTILICE ESTA CÓMODA SI FALTA ALGUNA PIEZA, ESTÁ DAÑADA O ROTA PÓNGASE EN CONTACTO CON DREAM ON ME, 5375 BOUL DES GRANDES-PRAIRIES, 45 VERONICA AVENUE SAINT-LEONARD, QC H1R 1B1, O CON DREAM ON ME - SOMERSET, NEW JERSEY 08873 PARA OBTENER PIEZAS DE REPUESTO.
- Page 13 ADVERTENCIAS (continuación) ADVERTENCIAS Los niños han muerto por el vuelco de los muebles. Para reducir el riesgo de vuelco de los muebles : • Coloque SIEMPRE la retención antivuelco suministrada. • NUNCA ponga un televisor en este producto. • NUNCA permita que los niños se pongan de pie, se suban o se cuelguen de cajones, puertas o estantes.
- Page 14 If there are any missing parts, please contact Dream On Me before using the product. S'il y a des pièces manquantes, veuillez contacter Dream On Me avant d'utiliser le produit. Si falta alguna pieza, póngase en contacto con Dream On Me antes de utilizar el producto. Dresser Top Panel...
- Page 15 If there are any missing parts, please contact Dream On Me before using the product. S'il y a des pièces manquantes, veuillez contacter Dream On Me avant d'utiliser le produit. Si falta alguna pieza, póngase en contacto con Dream On Me antes de utilizar el producto. Dresser Rear Panel (x2)
- Page 16 If there are any missing parts, please contact Dream On Me before using the product. S'il y a des pièces manquantes, veuillez contacter Dream On Me avant d'utiliser le produit. Si falta alguna pieza, póngase en contacto con Dream On Me antes de utilizar el producto. Bolt 2-3/16” (x14)
- Page 17 DRESSER ASSEMBLY - REAR RAILS ASSEMBLY ASSEMBLAGE DE LA COMMODE - ASSEMBLAGE DES RAILS ARRIÈRE MONTAJE DE LA CÓMODA - MONTAJE DE LOS RIELES TRASEROS 1a. Place the parts on a soft surface prior to assembly. 1b. Place the Dresser Middle Rail (5) on a flat surface and align the Dresser Top Rail (4) and Dresser Bottom Rail (6) to the middle rail as shown in the illustration.
- Page 18 DRESSER ASSEMBLY - REAR PANEL ASSEMBLY ASSEMBLAGE DE LA COMMODE - ASSEMBLAGE DU PANNEAU ARRIÈRE MONTAJE DE LA CÓMODA: MONTAJE DEL PANEL TRASERO 2a. Align and insert the Dresser Rear Panel (10) to the assembled rails as shown in the illustration. 2a.
- Page 19 DRESSER ASSEMBLY - CAM BOLT ASSEMBLY ASSEMBLAGE DU DRESSEUR - ASSEMBLAGE DES BOULONS DE CAME ENSAMBLAJE DEL VESTIDOR - ENSAMBLAJE DEL PERNO DE LA LEVA 3a. Lay the Drawer Front Panel 2 (17), Drawer Front Panel 1 (11), Drawer Left Panel (12), and Drawer Right Panel (13) flat on a soft surface as shown in the illustration.
- Page 20 DRESSER ASSEMBLY - CAM BOLT ASSEMBLY (Contd.) ASSEMBLAGE DU DRESSEUR - ASSEMBLAGE DE LA BOULIE DU CAM (suite) CONJUNTO DE VASOS - CONJUNTO DE PERNOS DE LA CAM (Cont.) 4a. Lay the Dresser Top Panel (1) flat on a soft surface as shown in the illustration. 4b.
- Page 21 DRESSER ASSEMBLY - BOTTOM DRAWERS ASSEMBLY ASSEMBLAGE DE LA COMMODE - ASSEMBLAGE DES T T TIROIRS INFÉRIEURS MONTAJE DE LA CÓMODA - MONTAJE DE LOS CAJONES INFERIORES 5a. Align and fix the cam bolts on the Drawer Left Panel (12) and the Drawer Right Panel (13) to the insertions provided on the sides of the Drawer Rear Panel (15) as shown in the illustration.
- Page 22 DRESSER ASSEMBLY - BOTTOM DRAWERS ASSEMBLY (Contd.) ASSEMBLAGE DE LA COMMODE - ASSEMBLAGE DES T T TIROIRS INFÉRIEURS (suite) MONTAJE DE LA CÓMODA - MONTAJE DE LOS CAJONES INFERIORES (Cont.) 5e. Align and fix the cam bolts on the Drawer Front Panel (11) to insertions provided on the left and right panels of the drawer.
- Page 23 DRESSER ASSEMBLY - TOP DRAWERS ASSEMBLY ASSEMBLAGE DE LA COMMODE - ASSEMBLAGE DES PETITS TIROIRS MONTAJE DE LA CÓMODA - MONTAJE DEL CAJÓN PEQUEÑO 6a. Align and fix the cam bolts on the Drawer Left Panel (12) and the Drawer Right Panel (13) to the insertions provided on the sides of the Drawer Rear Panel 2 (19) as shown in the illustration.
- Page 24 DRESSER ASSEMBLY - TOP DRAWERS ASSEMBLY (Contd.) ASSEMBLAGE DE LA DRESSER - ASSEMBLAGE DES TIROIRS SUPÉRIEURS (suite) MONTAJE DEL VESTUARIO - MONTAJE DE LOS CAJONES SUPERIORES (Cont.) 6e. Align and fix the cam bolts on the Drawer Front Panel 2 (17) to insertions provided on the left and right panels of the drawer.
- Page 25 DRESSER ASSEMBLY - LEFT SIDE PANEL AND FRONT RAILS ASSEMBLY ASSEMBLAGE DE LA COMMODE - ASSEMBLAGE DU PANNEAU LATÉRAL GAUCHE ET DES RAILS AVANT MONTAJE DE LA CÓMODA: MONTAJE DEL PANEL LATERAL IZQUIERDO Y DE LOS RIELES FRONTALES 7a. Place the Left Side Panel (2) upside-down on the surface.
- Page 26 DRESSER ASSEMBLY - RIGHT SIDE PANEL ASSEMBLY ASSEMBLAGE DE LA COMMODE - ASSEMBLAGE DU PANNEAU LATÉRAL DROIT MONTAJE DE LA CÓMODA - MONTAJE DEL PANEL LATERAL DERECHO 8a. Align the Right Side Panel (3) to the pre-assembled left side panel and rails as shown in the illustration.
- Page 27 DRESSER ASSEMBLY - DRESSER CENTER PANEL ASSEMBLY ASSEMBLAGE DE LA COMMODE - ASSEMBLAGE DU PANNEAU CENTRAL DE LA COMMODE MONTAJE DE LA CÓMODA - MONTAJE DEL PANEL CENTRAL DE LA CÓMODA 9a. Place the pre-assembled dresser on its legs as shown in the illustration. Align the Dresser Center Panel (18) to the center of the dresser between the dresser middle rear rail and front rails.
- Page 28 DRESSER ASSEMBLY - TOP PANEL ASSEMBLY ASSEMBLAGE DE LA COMMODE - ASSEMBLAGE DU PANNEAU SUPÉRIEUR MONTAJE DE LA CÓMODA - MONTAJE DEL PANEL SUPERIOR 10a. Align the Dresser Top Panel (1) on the top of the dresser as shown in the illustration. 10b.
- Page 29 DRESSER ASSEMBLY - DRAWERS ASSEMBLY ASSEMBLAGE DE LA COMMODE - ASSEMBLAGE DES TIROIRS MONTAJE DE LA CÓMODA - MONTAJE DE LOS CAJONES 11a. Insert the assembled drawers in their respective slots as shown in the illustration. 11a. Insérez les tiroirs assemblés dans leurs fentes respectives comme indiqué...
- Page 30 ANTI-TIP SAFETY HARDWARE INSTALLATION WARNING • Serious or fatal crushing injuries can occur from furniture tip-over. To help prevent tip-over: - Place heaviest items in the lower drawers. - Do not set TV’s or other heavy objects on the top of this product unless the product is specifically designed to accommodate them.
- Page 31 ANTI-TIP SAFETY HARDWARE INSTALLATION (cont.) 3) MOUNTING THE WALL-SIDE BRACKET: Position the wall-side bracket along the selected stud mark so that it will be adjacent to the furniture-side bracket when FURNITURE the furniture item is moved to its final WALL position.
- Page 32 INSTALLATION DU MATÉRIEL DE SÉCURITÉ ANTI-BASCULEMENT AVERTISSEMENT • Le basculement d'un meuble peut entraîner des blessures graves ou mortelles par écrasement. Pour aider à prévenir basculement : - Placez les articles les plus lourds dans les tiroirs inférieurs. - Ne posez pas de téléviseur ou d'autres objets lourds sur le dessus de ce produit, à moins qu'il ne soit spécifiquement conçu pour les accueillir.
- Page 33 INSTALLATION DU MATÉRIEL DE SÉCURITÉ ANTI-BASCULEMENT 3) MONTAGE DU SUPPORT MURAL : Positionnez le support mural le long du repère de l'axe choisi de façon à ce qu'il soit adjacent au support de meuble lorsque le meuble sera MEUBLES déplacé dans sa position finale. Le support mural doit être environ un pouce plus bas que le support de meuble (voir l'illustration agrandie).
- Page 34 INSTALACIÓN DE LOS HERRAJES DE SEGURIDAD ANTIVUELCO ADVERTENCIA • Pueden producirse lesiones graves o mortales por aplastamiento debido al vuelco de los muebles. Para ayudar a prevenir el vuelco: - Coloque los objetos más pesados en los cajones inferiores. - No coloque televisores u otros objetos pesados en la parte superior de este producto a menos que el producto esté...
- Page 35 INSTALACIÓN DE LOS HERRAJES DE SEGURIDAD ANTIVUELCO 3) MONTAJE DEL SOPORTE DEL LADO DE LA PARED: Coloque el soporte del lado de la pared a lo largo de la marca de los tornillos MOBILIARIO seleccionada, de manera que quede PARED adyacente al soporte del lado del mueble cuando éste se mueva a su posición final.
- Page 36 FURNITURE CARE INSTRUCTIONS ROOM CLIMATE CONTROL: • Wood, when first cut contains more than 50 percent water. When it is prepared for furniture construction it is placed in a Kiln and the moisture content is brought down to 8 to 10 percent. Wood is porous and responds to its environment. If the room has high humidity it will absorb it and expand and if the humidity is low it will lose moisture and shrink.
- Page 37 • Clean with a damp, not wet, cloth. Use only a mild soap. Do not use the abrasive cleaners. • Do not scratch or chip the finish. • Inspect the product periodically, contact Dream On Me Inc for replacement parts or questions. • Do not store the product or any parts in extreme temperatures and conditions such as a hot attic or a damp, cold basement.
- Page 38 INSTRUCTIONS D'ENTRETIEN DU MOBILIER CONTRÔLE DU CLIMAT DE LA PIÈCE: • Le bois, lorsqu'il est coupé pour la première fois, contient plus de 50 % d'eau. Lorsqu'il est préparé pour la construction de meubles, il est placé dans un four et son taux d'humidité...
- Page 39 • Ne rayez pas et n'écrasez pas la finition. • Inspectez le produit périodiquement, contactez Dream On Me Inc pour des pièces de rechange ou des questions. • Ne stockez pas le produit ou des pièces dans des températures et des conditions extrêmes telles qu'un grenier chaud ou un sous-sol humide et froid.
-
Page 40: Almacenamiento Adecuado
INSTRUCCIONES PARA EL CUIDADO DE LOS MUEBLES CLIMATIZACIÓN DE HABITACIONES: • La madera, cuando se corta por primera vez, contiene más del 50% de agua. Cuando se prepara para la construcción de muebles, se introduce en un horno y su contenido de humedad se reduce al 8-10%. - Page 41 • No raye ni aplaste el acabado. • Inspeccione el producto periódicamente, póngase en contacto con Dream On Me Inc para obtener piezas de repuesto o hacer preguntas. • No almacene el producto o las piezas en temperaturas y condiciones extremas, como un ático caliente o un sótano húmedo y frío.
- Page 42 45 VERONICA AVENUE 5375 BOUL DES GRANDES-PRAIRIES SOMERSET NEW JERSEY 08873 SAINT-LEONARD, QC H1R 1B1 E-mail: info@dreamonme.com www.dreamonme.com Follow Us @dreamonmeinc to get your nursery featured on our social media. Enter our monthly giveaway! Chat with us! Scan the QR code to register. Scan the QR code to Live Chat.
- Page 43 45 VERONICA AVENUE 5375 BOUL DES GRANDES-PRAIRIES SOMERSET NEW JERSEY 08873 SAINT-LEONARD, QC H1R 1B1 Courriel : info@dreamonme.com www.dreamonme.com Suivez-nous @dreamonmeinc pour que votre crèche soit présentée sur nos médias sociaux. Chattez avec nous ! Participez à notre concours mensuel ! Scannez le code QR pour accéder au Scannez le code QR pour vous inscrire.
- Page 44 45 VERONICA AVENUE 5375 BOUL DES GRANDES-PRAIRIES SOMERSET NEW JERSEY 08873 SAINT-LEONARD, QC H1R 1B1 Correo electrónico: info@dreamonme.com www.dreamonme.com Siga con nosotros @dreamonmeinc para que su guardería aparezca en nuestras redes sociales. Participa en nuestro sorteo mensual. Chatea con nosotros. Escanee el código QR para registrarse.
Need help?
Do you have a question about the 598CA and is the answer not in the manual?
Questions and answers