Bacharach Fyrite Tech 50 Instructions Manual
Combustion gas analyzer
Hide thumbs
Also See for Fyrite Tech 50:
- Operating and maintenance instructions manual (48 pages) ,
- Instruction, operation & maintenance (48 pages) ,
- Product catalog (52 pages)

Related Manuals for Bacharach Fyrite Tech 50


Summary of Contents for Bacharach Fyrite Tech 50
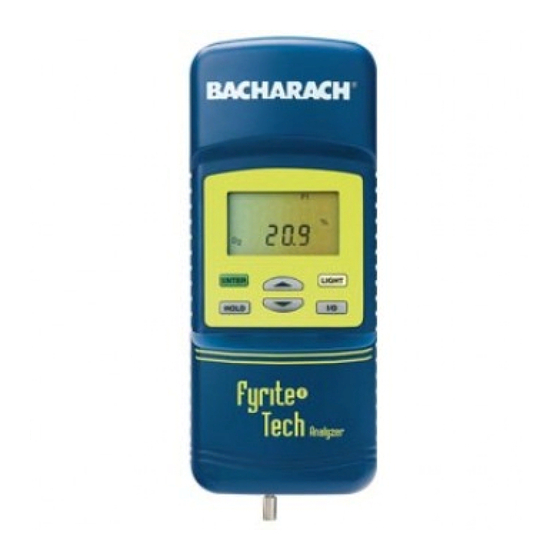
- Page 1 Fyrite Tech ® Model 50 & 60 Combustion Gas Analyzer Instruction 24-9435 Operation & Maintenance Rev. 1 – August 2009 °C LIGHT ENTER HOLD Fyrite ® Tech Analyzer Product Leadership • Training • Service • Reliability...
- Page 2 WARRANTY Bacharach, Inc. warrants to Buyer that at the time of delivery this Product will be free from defects in mater ial and manufac ture and will conform substan tially to Bach arach Inc.’s ap plicable spec i fi ca tions. Bacharach’s li a bil i ty and Buyer’s remedy under this warranty are lim it ed to the repair or replacement, at Ba charach’s option,...
-
Page 3: Table Of Contents
Fyrite Tech Contents 1.0 INTRODUCTION ..................1 1.1 The Fyrite Tech ................1 1.2 Operation Overview ................. 2 2.0 TECHNICAL CHARACTERISTICS...........3 3.0 SETTING UP THE ANALYZER ............5 3.1 Scope ....................5 3.2 Checking & Replacing the Batteries ..........5 3.3 Connecting the Probe ............... 6 3.4 Front Panel Pushbuttons .............. - Page 4 Fyrite Tech 5.0 CALIBRATION & MAINTENANCE ..........21 5.1 Entering the Calibration Mode and Testing the Display Seg- ments .....................21 5.2 Ambient Temperature Calibration ..........22 5.3 TA (Stack Temperature) Thermocouple Channel Calibration ..22 5.4 Oxygen Sensor Zero ..............23 5.5 CO Sensor Zero & Calibration (Model 60 only) ......24 5.6 Particulate Filter Replacement .............
- Page 5 Fyrite Tech Ordering Information Model No. Fyrite Tech 50 Fyrite Tech 60 Part No. 24-7233P 24-7234P Measurements: Oxygen Stack Temperature Ambient Temperature Carbon Monoxide Calculations: Stack Loss (qA) Effi ciency & ETa Excess Air (Lambda) Carbon Dioxide CO air free...
- Page 6 Fyrite Tech Notes: Instruction 24-9435...
-
Page 7: Introduction
1.0 INTRODUCTION 1.1 The Fyrite Tech Available in two models, the Fyrite Tech 50 and 60 are hand-held an a - lyz ers that are designed to calculate the ef fi cien cy of res i den tial furnaces and com bus tion appliances by measuring the stack temperature and the percent oxygen level in the fl... -
Page 8: Operation Overview
Fyrite Tech 1.2 Operation Overview Pressing the I/O button turns the analyzer ON and OFF. Note that there is a 60 second warm-up period and a 5 second delay before the analyzer turns OFF, during which time the unit can be kept ON by pressing the ENTER button. -
Page 9: Technical Characteristics
Fyrite Tech 2.0 TECHNICAL CHARACTERISTICS The Analyzer Directly Measures and Displays: • Flue Gas O content ........0.0 to 20.9% O • Stack Temperature ........–18 to 537 °C (0 to 999 °F) • Ambient Temperature ........0 to 40 °C (32 to 104 °F) •... -
Page 10: Stack Temperature
Fyrite Tech Power Requirements ........Four ‘AA’ Alkaline batteries Operating Time ........24 hours con tin u ous (pump run ning and backlight off) Warm Up Time ..........60 seconds Display ............4 Digit, 2 Line, 7-segment Liquid Crystal Dis play Front Panel Controls ......Six pushbutton switches (Refer to Section 3.4) Accuracy: •... -
Page 11: Setting Up The Analyzer
Fyrite Tech 3.0 SETTING UP THE ANALYZER 3.1 Scope Before using the analyzer. . . • Check batteries (Section 3.2) • Connect probe to analyzer (Section 3.3) • Check setup (Section 3.5) 3.2 Checking & Replacing the Bat ter ies Install fresh batteries as described below. -
Page 12: Connecting The Probe
Fyrite Tech 3.3 Connecting the Probe Connect the probe assembly’s fl ue-gas hose and thermocouple con nec tor to the analyzer as follows (see Figure 3-2): 1. Push the fl ue gas hose onto the an a lyz er’s GAS inlet fi tting. 2. - Page 13 Fyrite Tech T-STACK FLUE-GAS THERMOCOUPLE HOSE WATER TRAP / FILTER ASSEMBLY PROBE TUBE FLUE GAS & THERMOCOUPLE HOSE ADJUSTABLE PROBE STOP PROBE HANDLE Figure 3-2. Connecting the Probe Instruction 24-9435...
-
Page 14: Front Panel Pushbuttons
Fyrite Tech 3.4 Front Panel Pushbuttons Note that a pushbutton may perform several functions, depending on what screen is being displayed at the time. • Turns analyzer ON/OFF. There is a 60 second warm-up and a 5 second turn-off-delay period. •... -
Page 15: Setup Mode
Fyrite Tech 3.5 Setup Mode The analyzer is preset at the factory for the parameters shown below, but can be changed as described in their associated sec tions. Function Parameter To Change Fuel Natural Gas (F1) Section 4.3 Temperature Unit °C Section 3.5.2 CO Channel... -
Page 16: Co Channel Setup (Model 60 Only)
Fyrite Tech 3.5.3 CO Channel Setup (Model 60 only) The CO Channel Setup Screen is labeled “CO.” 1. Enter the Setup Mode per Section 3.5.1. If necessary, repeatedly press the ENTER button until “CO” is displayed. 2. Press the L or M button until the desired parameter is dis played. - no Sensor disabled. -
Page 17: Operation
Fyrite Tech 4.0 OPERATION 4.1 Starting a Combustion Test 4.1.1 Analyzer Turn On and Warm Up Important: The probe must be at room tem per a ture before performing the fol low ing steps. 1. Make sure that the analyzer is properly set up per Sec tion 3.0. 2. -
Page 18: Sampling Point
Fyrite Tech 4.1.4 Sampling Point Forced Air Furnace – When testing atmospheric burner or gravity vented, forced air heating equip ment with a clamshell or sectional heat exchanger design, test each of the exhaust ports at the top of the heat ex- changer. - Page 19 Fyrite Tech 80% Eff. Fan Assist or Power Vented Furnace/Boiler 90% Eff. Condensing Furnace/Boiler Atmospheric or Gravity Vented Boiler Instruction 24-9435...
-
Page 20: Performing A Combustion Effi Ciency Test
Fyrite Tech 4.1.5 Performing a Com bus tion Effi ciency Test 1. After turning ON the analyzer and selecting the appropriate fuel, the TA Screen should be displayed (refer to Section 4.4). 2. Position the probe in the fl ue-gas stream to obtain the highest temperature reading. -
Page 21: Warm-Up Screens
Fyrite Tech 4.2 Warm-Up Screens As soon as the analyzer is turned ON, a series of Warm-Up Screens are dis played. These screens show the analyzer’s model number (Tech E050 or Tech E060), the unit’s software revision, and fi nally the remaining warm- up time counted down from 60 seconds. -
Page 22: Ta Screen
Fyrite Tech 4.4 TA Screen This screen displays the fl ue gas temperature in either °C or °F as mea- sured at the tip of the probe. Front Panel Button Functions: – Displays next screen (refer to Section 4.13) – Displays previous screen (refer to Section 4.13) ENTER –... -
Page 23: Co & Air Free Screen (Model 60 Only)
Fyrite Tech 4.6 CO & Air Free Screen (Model 60 only) The CO reading is the measured amount of ppm carbon monoxide that is present in the fl ue gas stream. The CO AIR FREE reading is a calculation of the exact ppm con cen tra tion of car bon mon ox ide at the fl... -
Page 24: Qa & Excess Air Screen
Fyrite Tech 4.8 qA & Excess Air Screen The qA reading is the calculated stack loss value in percent. Excess air (or Lambda) is a calculated air factor that represents an amount of air that is in excess of the theoretical amount needed for perfect combustion. -
Page 25: Stack & Eff Screen
Fyrite Tech 4.10 Stack & EFF Screen The STACK reading is the fl ue gas temperature in either °C or °F as mea- sured at the tip of the probe. The EFF (Effi ciency) reading is a calculation (non Seigert) of what percent- age of energy present in the fuel was converted into usable heat. -
Page 26: Resetting The Microprocessor
5 sec onds. 4.13 Run Mode Screens The following diagrams show the order in which the screens are displayed by press ing the L and M buttons while in the Run Mode. Fyrite Tech 50 Fyrite Tech 60 Fuel Codes: Fuel Codes:... -
Page 27: Calibration & Maintenance
Fyrite Tech 5.0 CALIBRATION & MAINTENANCE Important: Fresh batteries should be installed, and the unit allowed to sta bi lize at room temperature for at least two hours before proceeding with calibration. To main tain ac- cu ra cy as listed in the Technical Characteristics Sec tion of this manual, the standards used must be at least four times as accurate as stated accuracy of the Fyrite Tech. -
Page 28: Ambient Temperature Calibration
Fyrite Tech 5.2 Ambient Temperature Calibration Material Required: Calibrated Thermometer Procedure: 1. Enter the Calibration Mode as described in Section 5.1. Then re- peatedly press the ENTER button until “AMBIENT” appears at the top of the display. 2. Use the L and M buttons to set the displayed value to match the reading of a calibrated thermometer at room temperature. -
Page 29: Oxygen Sensor Zero
Fyrite Tech 3. Set the simulator to 0 °C (32 °F); then use the L and M buttons to set the dis played value to match the simulator’s value. 4. Set the simulator to 300 °C (572 °F); then use the L and M buttons to set the dis played value to match simulator’s value. -
Page 30: Co Sensor Zero & Calibration (Model 60 Only)
Fyrite Tech 6. After the analyzer has stabilized (2 to 3 minutes), use the L and M buttons to set the displayed value to 0.0%. 7. Disconnect tubing from analyzer and turn off gas fl ow. 8. Allow the pump to run until the O reading returns to 20.9%. - Page 31 Fyrite Tech 4. Do one of the following: a. End this procedure and save the new zero value by holding down the ENTER button for 2 seconds; after which, the analyzer enters the Run Mode. b. Continue with Step 5 to span the CO sensor to a known concen- tration of carbon monoxide.
-
Page 32: Particulate Filter Replacement
Fyrite Tech 5.6 Particulate Filter Replacement The particulate fi lter (found inside the case, between the gas inlet and pump, see Figure 5-3) may clog up with soot depending on the clean li ness of the areas being sampled. If re place ment is need ed: Material Required: •... -
Page 33: Water Trap / Filter Maintenance
Fyrite Tech 5.7 Water Trap / Filter Maintenance The Water Trap / Filter Assembly removes water con den sate from the gas sam ple, and also prevents soot from con tam i nat ing the internal com po - nents of the analyzer. Drain the water condensate after every test. -
Page 34: O2 Sensor Replacement
Fyrite Tech 5.8 O Sensor Replacement Be sure to perform all of the checks listed in Sec tion 4.11 to ensure that the oxygen sensor needs to be replaced. Material Required: • Oxygen Sensor with Gasket, P/N 24-8106G • #1 Phillips Screwdriver Procedure: 1. -
Page 35: Co Sensor Replacement (Model 60 Only)
Fyrite Tech 5.9 CO Sensor Replacement (Model 60 only) Be sure to perform all of the checks listed in Sec tion 4.11 to ensure that the CO sensor needs to be replaced. Material Required: • CO Sensor, P/N 54-0164 • CO Sensor Gasket, P/N 24-1112 •... - Page 36 Fyrite Tech CO SENSOR GASKET OXYGEN SENSOR PARTICULATE FILTER ELEMENT PUMP PARTICULATE FILTER INLET CONNECTOR HOLD DOWN CLAMP Figure 5-3. Back Case Component Locations Instruction 24-9435...
- Page 37 Fyrite Tech B A T T E R Y S E N S O R O X Y G E N S E N S O R P U M P T - S T A C K Figure 5-4. CO Sensor Location Instruction 24-9435...
-
Page 38: Pump Assembly Replacement
Fyrite Tech 5.10 Pump Assembly Replacement Material Required: • Pump, P/N 24-3048 • #1 Phillips Screwdriver Procedure: 1. Disassemble the analyzer as follows: a. Remove the battery cover and the batteries, uncovering one of the cover hold-down screws. b. Remove and set aside all four cover hold-down screws. c. -
Page 39: Parts & Service
Fyrite Tech 6.0 PARTS & SERVICE 6.1 Replacement Parts Description Part No. Carbon Monoxide Sensor (Model 60 only) .......... 54-0164 Carbon Monoxide Sensor Gasket (Model 60 only) ......24-1112 Oxygen Sensor w/ Gasket ..............24-8106G Oxygen Sensor Gasket ................. 24-1111 Pump Assembly ................... 24-3048 Particulate Filter Element, for inside-case fi... -
Page 40: Service Centers
Fyrite Tech 6.3 Service Centers Replacement parts and service can be obtained by con tact ing one of the fol- low ing Bacharach Service Centers: United States México Bacharach Inc. Bacharach de México 621 Hunt Valley Circle Playa Regatas No. 473 Tercer Piso New Kensington, PA 15068 Col. -
Page 41: Appendix A - Formulas And Tables
Fyrite Tech Appendix A - Formulas and Tables MAX (20.9 – O -Wert: 20.9 Abgasverlust: qA = [(TA – TL){ + B}] 20.9 – O 20.9 Luftüberschuß- λ = (20.9 – O zahl λ : Eta = (100% – qA) + [K , If T <... - Page 42 Fyrite Tech Notes: Instruction 24-9435...
- Page 43 Fyrite Tech Notes: Instruction 24-9435...
- Page 44 World Headquarters 621 Hunt Valley Circle, New Kensington, PA 15068 Ph: 724-334-5000 • Fax: 724-334-5001 • Toll Free: 800-736-4666 Website: www.mybacharach.com • E-mail: help@mybacharach.com Printed in U.S.A.
Need help?
Do you have a question about the Fyrite Tech 50 and is the answer not in the manual?
Questions and answers