
Related Manuals for Beurer medical GL 48


Summary of Contents for Beurer medical GL 48
- Page 1 GL 48 Instructions for use Blood glucose monitor Codefree Step by step GL 48 Lancet needles / Lanzetten / lancettes / lancetas / lancette LD 04...
-
Page 3: Table Of Contents
Contents 1. Getting to know your device ....................4 .................... 5 1.1 Scope of delivery and accessories .......................... 6 1.2 Replacements ......................6 1.3 Functions of the device ........................7 1.4 Signs and symbols 2. Warnings and safety notes .....................8 3. -
Page 4: Getting To Know Your Device
1. G ettinG to know your device Dear customer, Thank you for choosing a product from our range. Our name stands for high-quality, thoroughly tested products for applications in the areas of heat, weight, blood pressure, blood glucose, body tempe- rature, pulse, gentle therapy, massage and air. -
Page 5: Scope Of Delivery And Accessories
1.1 Scope of delivery and accessories Check that the set packaging has not been tampered with and make sure that all components are present. Before use, ensure that there is no visible damage to the device or accessories and that all packaging material has been removed. -
Page 6: Replacements
1.2 Replacements You can also obtain test strips, control solution and lancets without a prescription. Item 100 test strips REF 463.72 50 test strips REF 463.70 Control solution LEVEL 7 and 8 REF 463.64 100 soft touch lancets 33G REF 457.24 100 lancet needles 28G REF 457.01 100 safety lancets... -
Page 7: Signs And Symbols
1.4 Signs and symbols The following symbols are used on the device, in these instructions for use, on the packaging and on the type plate for the device: Important Warning Safety note indicating possible Warning instruction indicating a damage to the device/accessory risk of injury or damage to your Note health/your patient’s health... -
Page 8: Warnings And Safety Notes
2. w arninGs and safety notes Risk of infection All components of the measuring device and its accessories may come into contact with human blood and are therefore a possible source of infection. Warning 09.03. 12:38 09.03. 12:38 • Blood glucose values are displayed in mg/dL or mmol/L. - Page 9 • This device may be used by people with reduced mental capabilities provided that they are super- vised or have been instructed on how to use the device safely and are fully aware of the consequent risks of use. • This device is not suitable for use by people (including children) with restricted physical, sensory or mental abilities, or lack of experience and/or lack of knowledge, unless they are supervised by someone who is responsible for their safety, or have received instructions from this person on how to use the device.
- Page 10 Batteries/Saving measured values Notes on handling batteries • If your skin or eyes come into contact with battery fluid, rinse the affected area with water and seek medical assistance. • Choking hazard! Small children may swallow and choke on batteries. Store batteries out of the reach of small children.
-
Page 11: Description Of Device And Accessories
Note Empty, completely flat batteries must be disposed of through specially designated collection boxes, recycling points or electronics retailers. You are legally required to dispose of the batteries. The codes below are printed on batteries containing harmful substances: Pb = Battery contains lead Cd = Battery contains cadmium Hg = Battery contains mercury. -
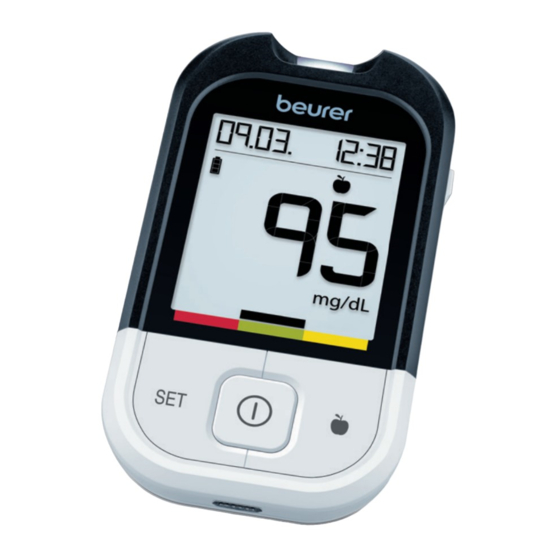
Page 12: Display Symbols
3.2 Display symbols 1 Date, Err 2 Battery status 88.88. 88:88 3 Test strip symbol 4 Measured value display, HI, LO display, average blood glucose value 5 Control solution measurement 6 Temperature symbol 1 B 1 B 1 B 7 Target scale 8 Blood glucose unit mmol/L 9 Blood glucose unit mg/dL 10 Symbols for labelling measurements... -
Page 13: Test Strips
3.3 Test strips Front Rear 1 Gap for blood input 2 Grip area 3 Contacts You can identify the rear by the contact tracks. Insert the test strip into the device so that the contacts are pointing inside the slot. Make sure that the front of the test strip is facing you. -
Page 14: Initial Use And Basic Settings
Storing test strips Note • Keep the test strips in a cool, dry place above +2°C and below +30°C. Do not expose the test strips to direct sunlight or heat. Do not store in your vehicle, in the bathroom or in a cooling appliance. •... -
Page 15: Taking The Blood Glucose Measurement
Setting the date and time Note You must set the date and time. Otherwise, you will not be able to save your measured values correctly with a date and time and access them again later. The time is displayed in the 24-hour format. Set the year (calendar to 2099) by pressing the “+”... -
Page 16: Preparing To Take A Blood Sample
Important • Use the lancing device only with lancet needles from the same manufacturer. Using other lancet needles may prevent the lancing device from working properly. The instructions for use for the lan- cing device can be found in section 12. •... - Page 17 Firmly insert a test strip into the device with the contacts first. Please make sure that the front is facing you. You can touch any part of the test strip with clean, dry hands. Use the test strip within three minutes of removal. 88.88.
-
Page 18: Reading The Result And Labelling Measurements
• The device switches itself off if the test strip has already been inserted into the device but no blood is added to the test strip within two minutes. Briefly remove the test strip and reinsert it so that the device automatically switches itself back on. -
Page 19: Evaluating Measured Blood Glucose Values
5.4 Evaluating measured blood glucose values Your blood glucose monitor can process measured values between 20 and 630 mg/dL (1.1 and 35.0 mmol/L). The “ ” warning is displayed for measured values below 20 mg/dL (1.1 mmol/L). For measured values above 250 mg/dL (13.9 mmol/L), a ketone warning is also displayed. The “ ” war- ning is displayed for measured values above 630 mg/dL (35.0 mmol/L). -
Page 20: Functional Check Using Control Solution
Evaluating critical measured values Display Blood glucose Action Very low blood glucose Seek medical attention immediately. level below 20 mg/dL (below 1.1 mmol/L) Low blood glucose level Have a suitable snack. Follow your GP's instructions. below 70 mg/dL (below 3.9 mmol/L) mg/dL mmol/L High blood glucose level... - Page 21 Important • Do not use control solutions by a different manufacturer. Correct functioning of your measuring de- vice can only be tested using Beurer control solutions (LEVEL 7 + LEVEL 8). • Control solution measurements: When using the device, specialist personnel must follow statutory guidelines.
- Page 22 Hold the input gap (at the tip of the test strip) to the drop of control solution until the gap is completely filled and the display of the measuring device starts counting backwards. When the gap is sufficiently filled with solution, the device performs a measurement. The de- vice counts down for approx.
-
Page 23: Measurement Memory
Cause Action There is a problem with the measuring Contact Customer Services. device. Functional test was incorrectly perfor- Repeat the test and follow the instructions. med. Warning Do not use the system to measure your blood glucose level if you are repeatedly provided with measurements outside the specified range when using control solution. -
Page 24: Displaying Average Blood Glucose Values
0026 12:38 0026 12:38 186 10 3 mg/dL mmol/L Image 1 09.03. 12:38 09.03. 12:38 10 3 mg/dL mmol/L Image 2 Pressing the rocker switch “–” [6] will display the previous measured value each time. You can display a maximum of 900 previous measurements. You can cancel the process at any time. -
Page 25: Displaying Average Blood Glucose Values For Labelled Values
Explanation Average value 0008 0008 Number of days, e.g. 7 Number of saved values used to calcu- late the average mg/dL mmol/L 6.3 Displaying average blood glucose values for labelled values You can display the average measured blood glucose value for labelled values from the last 7, 14, 30 and 90 days. - Page 26 After displaying the average value for 90 days “before meals” • the 7-day average for values measured “after meals” • the symbol 0025 0025 • the unit of measurement for blood glucose values and • “ ” are shown on the display. mg/dL mmol/L Press “+”...
-
Page 27: Transferring Measurements To A Pc
Note: Speed function You are in the measurements memory. By pressing the label button [3], you can switch to the different 7-day average values. In this way, you can get to the desired average value more quickly. For example: 0009 0014 0025 0009... -
Page 28: Storing, Maintaining And Disinfecting The Device
Preparation • Position the blood glucose monitor near to your PC. • Connect the GL48 monitor to your PC using the USB cable provided. • Install the blood glucose diary software on your PC as described in the instructions for use of the software. -
Page 29: Disinfection
7.2 Disinfection Device Please comply with the generally applicable guidelines on disinfection when using the device on dif- ferent persons. Do not submerge the device in disinfection solutions or any other fluids and make sure that no fluids can enter the device. Note The measuring device is made of precision components. - Page 30 Cause Solution 88.88. 88:88 Used or contaminated test strip in- • Insert an unused test strip that has not expired. serted. • Repeat the blood glucose measurement. 1 B 1 B 1 B Err001 System error. Remove batteries, reinsert batteries. Should the problem persist any longer, contact Customer Ser- vices.
-
Page 31: Technical Specifications
Cause Solution The basic settings of the device were chan- Remove the test strip and press the “ON/OFF” but- ged and the changes were not completed ton until OFF is displayed. (see “Making and changing basic settings” on Repeat test. page 14). -
Page 32: Comparison Of Measured Values With Laboratory Values
Test strip functionality Test strips enable a quantitative measurement of the glucose level in fresh whole blood. When the gap for taking blood comes into contact with a drop of blood, it is automatically filled by simple ca- pillary action. The blood is sucked into the absorbing gap on the test strip and the measuring device measures the blood glucose level in the blood. - Page 33 blood samples ranges from 42.7 to 418.0 mg/dL (2.4 to 23.2 mmol/L) and control material from three concentrations is used. Results of the repeat precision measurements Sample Venous blood Grand mean value Pooled standard Pooled coeffici- deviation ent of variation mg/dL mmol/L mg/dL...
-
Page 34: Usage Limits For Specialist Personnel From The Healthcare Sector
Results of the system accuracy for combined glucose concentrations between 36.3 mg/dL (2.0 mmol/L) and 597.0 mg/dL (33.1 mmol/L). Within ±15 mg/dL or ±15% (Within ±0.83 mmol/L or ±15%) 949/960 (98.9%) In comparison to the Cobas, the GL48 met the EN ISO 15197:2015 standard, whereby 95% of the blood glucose values measured have to fall within the following zones: either ±15 mg/dL (±... - Page 35 Blood glucose Influence value 50-100 mg/dL 250-350 mg/dL (2.8-5.6 mmol/L) (13.9-19.4 mmol/L) Concentration of tested substances Acetaminophen 6.25 mg/dL (0.35 mmol/L) 5.3 mg/dL 6.6% (0.29 mmol/L) Ascorbic acid 5 mg/dL (0.28 mmol/L) 6.0 mg/dL 8.4% (0.33 mmol/L) Bilirubin 20 mg/dL (1.11 mmol/L) 5.9 mg/dL 5.7%...
- Page 36 Blood glucose Influence value 50-100 mg/dL 250-350 mg/dL (2.8-5.6 mmol/L) (13.9-19.4 mmol/L) Concentration of tested substances Icodextrin 2000 mg/dL (111 mmol/L) -3.7 mg/dL -6.1% (-0.20 mmol/L) L-Dopa 0.7 mg/dL (0.04 mmol/L) 5.6 mg/dL 6.6% (0.31 mmol/L) Maltose 1000 mg/dL (55.53 mmol/L) 2.5 mg/dL 4.5% (0.14 mmol/L)
-
Page 37: Instructions For Use For The Lancing Device Ld 04
12. i ld 04 nstructions for use for the lancinG device 12.1 Proper use Indication/clinical benefits The lancing device, in combination with a lancet needle, is intended for taking a blood sample for measuring glucose levels in human blood. Use the lancing device only on the skin areas intended for taking the glucose measurement (fingertips). -
Page 38: Device Description
• Change the puncture area each time you take a measurement, e.g. use a different finger or the other hand. Repeatedly using the same area may cause inflammation, numbness or scarring. • Make sure the puncture area is hygienically clean. Risks to the device •... - Page 39 Remove the protective disc of the lancet by rotating it while holding the shaft of the lancet. Retain the protective disc for the safe disposal of the used lancet needle after taking a blood sample. Place the cap onto the lancing device. Setting the penetration depth You can set seven different penetration depths on the lancing de- vice.
-
Page 40: Post-Processing And Disposal
12.6 Post-processing and disposal Carefully remove the cap from the lancing device. Place the retained protective disc flat on a hard surface. Stick the tip of the needle into the protective disc so the needle is covered. Take care not to touch the used lancet. Use the sliding switch on the side. -
Page 41: Warranty/Service
13. w arranty service Beurer GmbH, Söflinger Straße 218, 89077 Ulm, Germany (hereinafter referred to as “Beurer”) provides a warranty for this product, subject to the requirements below and to the extent described as follows. The warranty conditions below shall not affect the seller’s statutory warranty obligations which ensue from the sales agreement with the buyer. - Page 42 The product complies with the EU Medical Device Directive (MDD) 93/42/EC and the Regulation (EU) 2017/745 of the European Parliament and of the Council on medical devices, as well as the respec- tive national provisions. For users/patients in the European Union and identical regulation systems (EU Medical Device Regu- lation (MDR) 2017/745), the following applies: If during or through use of the product a major incident occurs, notify the manufacturer and/or their representative of this as well as the respective national authority of the member state in which the user/patient is located.
- Page 44 GL 48 Beurer GmbH Söflinger Straße 218 89077 Ulm, Germany • • www.beurer.com www.beurer-healthguide.com • Lancet needles / Lanzetten / lancettes / lancetas / lancette: Emergo Europe SteriLance Medical (Suzhou) Inc. No. 168, PuTuoShan Road, Prinsessegracht 20, New District, Suzhou 215153, China...
Need help?
Do you have a question about the GL 48 and is the answer not in the manual?
Questions and answers