
Subscribe to Our Youtube Channel
Related Manuals for Beurer medical GL 44


Summary of Contents for Beurer medical GL 44
- Page 1 GL 44 Instructions for use Blood glucose monitor Step by step GL 44 Lancet needles / Lanzetten / lancettes / lancetas / lancette LD 03...
-
Page 3: Table Of Contents
Contents 1 Getting to know your device ....................4 .................... 5 1.1 Scope of delivery and accessories .......................... 6 1.2 Replacements ......................6 1.3 Functions of the device ........................6 1.4 Signs and symbols 2 Warnings and safety notes .....................8 3 Description of device and accessories ................ -
Page 4: Getting To Know Your Device
ettinG to know your device Dear customer, Thank you for choosing a product from our range. Our name stands for high-quality, thoroughly tested products for applications in the areas of heat, weight, blood pressure, blood glucose, body temper- ature, pulse, gentle therapy, massage and air. Please read these instructions for use carefully and keep them for later use. -
Page 5: Scope Of Delivery And Accessories
1.1 Scope of delivery and accessories Check that the set packaging has not been tampered with and make sure that all contents are present. Before use, ensure that there is no visible damage to the device or accessories and that all packaging material has been removed. -
Page 6: Replacements
1.2 Replacements You can also obtain test strips, control solution and lancets without a prescription. Item 50 test strips REF 464.15 50 test strips, individually film packed REF 464.17 100 test strips REF 464.13 Control solution LEVEL 3 and 4 REF 464.16 100 soft touch lancets 33G REF 457.24... - Page 7 Temperature limit Not for re-use/for single use +2 °C to +30 °C only Green dot (Der Grüne Punkt): Use by German dual waste collection system Maximum shelf life after initial Contents sufficient for <n> tests opening in months 18 M L OT Batch designation Order number...
-
Page 8: Warnings And Safety Notes
arninGs and safety notes Risk of infection All components of the monitor and its accessories may come into contact with human blood and are therefore a possible source of infection. Warning • Blood glucose values are displayed in mg/dL or mmol/L. You risk damaging your health if you meas- ure your blood glucose value using a unit of measurement with which you are not famil-... - Page 9 sional (for example, your GP, chemist or diabetes consultant). Only proper use will guarantee exact measurements. • This device may be used by people with reduced mental capabilities provided that they are super- vised or have been instructed on how to use the device safely and are fully aware of the consequent risks of use.
- Page 10 Batteries/Saving measured values Notes on handling batteries • If your skin or eyes come into contact with battery fluid, rinse the affected area with water and seek medical assistance. • Choking hazard! Small children may swallow and choke on batteries. Store batteries out of the reach of small children.
-
Page 11: Description Of Device And Accessories
The codes below are printed on batteries containing harmful substances: Pb = Battery contains lead Cd = Battery contains cadmium Hg = Battery contains mercury. For environmental reasons, do not dispose of the device in the household waste at the end of its service life. -
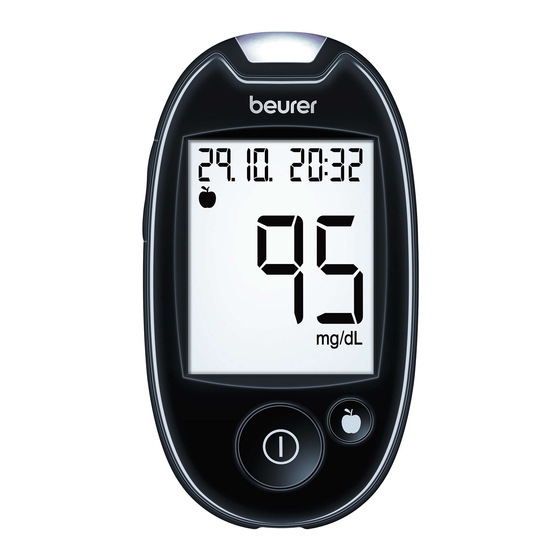
Page 12: Display Symbols
3.2 Display symbols 1 Date 2 Symbols for highlighting measurements 3 Measured value display, HI, LO display, average blood glucose value, Err 4 Blood droplet symbol 5 Speaker symbol 6 Hand symbol 7 Test strip symbol 8 Blood glucose unit mmol/L 9 Blood glucose unit mg/dL 10 Battery replacement symbol 11 Memory symbol... - Page 13 Insert the test strip into the de- vice so that the contacts are pointing inside the slot. Make sure that the front of the test strip is facing you. Note Read carefully the following information on handling and storing your test strips. The test strips will only provide accurate measurements if all information is followed.
-
Page 14: Initial Use And Basic Settings
nitial use and basic settinGs 4.1 Removing the battery insulation strip, replacing the batteries Note • Two batteries are included in delivery of the blood glucose monitor. These have already been inserted into the battery compartment. • Remove the insulation strip before initial use. -
Page 15: Taking The Blood Glucose Measurement
Set the year (calendar to 2099) by pressing the “+” or “–” button. Confirm by pressing the On/ Off button [4]. The day display flashes. Proceed as described above for the day, month, hour and minute. “ ” and “ ”... -
Page 16: Taking A Blood Sample
Wash your hands with soap and warm water before taking a blood sample. This not only en- sures optimal hygiene but also encourages good blood circulation at the puncture area on the finger. Dry your hands carefully. Warning If you have used alcohol for cleaning, ensure that the area has fully dried prior to measuring. 5.2 Taking a blood sample Warning •... -
Page 17: Reading The Result And Highlighting Measurements
Note • Do not apply blood to the sides of the test strips. • Do not add blood later if the device does not start the measurement. Remove the test strip and end this test. Use a new test strip. •... -
Page 18: Evaluating Measured Blood Glucose Values
5.5 Evaluating measured blood glucose values Your blood glucose monitor can process measured values between 20 and 630 mg/dL (1.1 and 35.0 mmol/L). The “ ” warning is displayed for measured values below 20 mg/dL (1.1 mmol/L). The “ ” warning is displayed for measured values above 630 mg/dL (35.0 mmol/L). -
Page 19: Functional Check Using Control Solution
Evaluating critical measured values Display Blood glucose Action Very low blood glucose Seek medical attention level immediately. under 20 mg/dL (under 1.1 mmol/L) Low blood glucose level Have a suitable snack. Follow your GP's instructions. under 70 mg/dL (under 3.9 mmol/L) High blood glucose level If this high value persists 2 hours on an empty stom- after your last meal, this may in-... - Page 20 • Control solution measurements: When using the device, specialist personnel must follow statutory guidelines. • Do not apply any blood samples or control solutions to the test strip before inserting it in the mon- itor. Performing a functional test using control solution Warning To obtain correct results, the monitor, the test strip and the control solution must be the same tem- perature.
- Page 21 Check whether the result is within the specified range of results for the control solution. This range of results is printed on the test strip box or the test strip packaging or on the informa- tion sheet included. Expected results At room temperature, the measurements from the test using the control solution should be within the range printed on the test strip box or on the information sheet included with the test strips in film packaging in approx.
-
Page 22: Measurement Memory
Warning Do not use the system to measure your blood glucose level if you are repeatedly provided with measurements outside the specified range when using control solution. Contact Customer Services. easurement memory For each measurement, your blood glucose value is automatically saved with the date and time unless “... -
Page 23: Displaying Average Blood Glucose Values
Image 2 Pressing the rocker switch “–” [6] will display the previous measured value each time. You can display a maximum of 480 previous measurements. You can cancel the process at any time. To do so, press the On/Off button or wait until the device switches itself off automatically after 2 minutes. -
Page 24: Displaying Average Blood Glucose Values For Labelled Values
6.3 Displaying average blood glucose values for labelled values You can display the average measured blood glucose value for labelled values from the last 7, 14, 30 and 90 days. Switch the monitor on using the On/Off button [4]. The initial display is shown briefly. Press the “+”... -
Page 25: Reset To Basic Settings
After displaying the average value for 90 days “after meals” • the average for the last 7 days of val- ues labelled as “general” • the symbol • the unit of measurement for blood glu- cose values and • “ ”... -
Page 26: Transferring Measurements To A Pc
6.5 Transferring measurements to a PC The GL44 blood glucose monitor includes a PC interface [5] that enables you to transfer measured values saved on the device to a PC (for the position of the connection port, see page 11). Beurer blood glucose diary software is available to download for free at www.beurer.com. -
Page 27: Storing, Maintaining And Disinfecting The Device
torinG maintaininG and disinfectinG the device Storing Keep the Beurer GL44 blood glucose monitor in the case supplied after each measurement and do not expose it to direct sunlight. Note • Do not store the device, test strips and control solution in your vehicle, in the bathroom or in a cool- ing appliance! •... -
Page 28: What If There Are Problems
hat if there are problems Display messages on batteries and blood glucose measurement Cause Solution Batteries empty. Replace all batteries. Temperature of the measuring envi- Repeat the test using a new test strip as soon as ronment, monitor or test strip above the measuring environment, monitor and test strip the permitted range. -
Page 29: Technical Specifications
Problem: device does not switch on Cause Solution Batteries empty. Replace batteries. Incorrectly inserted or missing batteries. Check whether the batteries have been inserted correctly (see “Inserting and replacing the batter- ies” on page 14). Test strip inserted incorrectly or not completely. Firmly insert the test strip into the slot on the de- vice with the contacts first. - Page 30 Automatic switch-off 2 minutes after last actuation Temperature: +2 °C – +30 °C Storage/transport temperature Relative humidity: < 90% Operating ranges Temperature: +10 °C – +40 °C Relative humidity: < 90% non-condensing Measurement range, glucose Glucose: 20 – 630 mg/dL (1.1 - 35.0 mmol/L) Blood sample Capillary whole blood Amount of blood...
-
Page 31: Comparison Of Measured Values With Laboratory Values
99.63% Standards For the device (including test strips and control solution), the Beurer GL 44 measuring system complies with the European directive IVD (98/79/EC). The lancet needles comply with the Europe- an directive MDD (93/42/EC). The lancing device complies with the regulation (EU) MDR (2017/745) on medical devices. - Page 32 Results of the intermediate precision measurement Sample Control material Grand mean value Pooled standard Pooled coefficient deviation of variation (%) mg/dL mmol/L mg/dL mmol/L mg/dL mmol/L 70.0 71.3 135.6 136.3 351.5 19.5 350.8 19.5 System accuracy The GL44 blood glucose monitor in comparison to the YSI. Three lots of GL44 blood glucose test strips have been tested to assess the system accuracy of the GL44 blood glucose measuring system and to compare it with the reference method in which capillary whole blood concentrations of 36.0 mg/dL (2.0 mmol/L) to 442.5 mg/dL (24.6 mmol/L) have been used.
-
Page 33: Usage Limits For Specialist Personnel From The Healthcare Sector
You will find further details and information regarding blood glucose results and various technologies in generally relevant specialist medical literature. 11 u saGe limits for specialist personnel from the healthcare sector 1. If the patient exhibits the following symptoms, it may be the case that no correct values can be ob- tained: •... - Page 34 Blood glucose Influence value 50-100 mg/dL 250-350 mg/dL (2.8-5.6 mmol/L) (13.9-19.4 mmol/L) Concentration of tested substances Ephedrine 40 mg/dL (2.42 mmol/L) -3.9 mg/dL 2.4% (-0.22 mmol/L) Galactose 20 mg/dL (1.11 mmol/L) -3.1 mg/dL 0.5% (-0.17 mmol/L) Gentisic acid 7 mg/dL (0.45 mmol/L) 7.2 mg/dL 2.9%...
-
Page 35: Proper Use
Blood glucose Influence value 50-100 mg/dL 250-350 mg/dL (2.8-5.6 mmol/L) (13.9-19.4 mmol/L) Concentration of tested substances Tolazamide 2.5 mg/dL (0.08 mmol/L) -2.3 mg/dL 1.8% (-0.13 mmol/L) Triglyceride 800 mg/dL (9.37 mmol/L) -7.50 mg/dL -4.0% (-0.42 mmol/L) Uric acid 16.5 mg/dL (0.98 mmol/L) 6.6 mg/dL 1.8%... -
Page 36: Warnings And Safety Notes
12.2 Warnings and safety notes Risks to the user • The lancing device is suitable for self-testing. Never share the lancing device or lancet with others (risk of infection!). • Supervise children when using the device to ensure they do not play with it. •... - Page 37 Place a sterile lancet needle into the lancing device and secure the lancet. Note Your starter set contains lancet needles in 2 different sizes. If you are unable to take an adequate blood sample using the smaller nee- dles (purple, 33G), please use the slightly larger needles (blue, 28G). Remove the protective disc of the lancet by rotating it while holding the shaft of the lancet.
-
Page 38: Post-Processing And Disposal
The device automatically switches on and shows the start display. As soon as the hand and the droplet symbol start to flash, the device is ready for meas- urement. You may now use the lancing device to take a blood sample. Make sure that the blood remains as a droplet and is not spread. -
Page 39: Cleaning And Maintenance
Place the cap back onto the lancing device. 12.7 Cleaning and maintenance Clean the lancing device after each use. Remove and dispose of the lancet as described in points 7.15. to 7.16. in these instructions for use. For cleaning, use a soft cloth or cotton bud that can be moistened with disinfectant or 70% alcohol. To clean the entire device, please use a soft cloth slightly moistened with a mild soapy solution. - Page 40 The buyer will then receive further information about the processing of the warranty claim, e.g. where they can send the product and what documentation is required. A warranty claim shall only be considered if the buyer can provide Beurer, or an authorised Beurer partner, with – ...
- Page 41 Beurer GL44...
- Page 42 Beurer GL44...
- Page 44 GL 44 Beurer GmbH Söflinger Straße 218 89077 Ulm, Germany • • www.beurer.com www.beurer-healthguide.com • Lancet needles / Lanzetten / lancettes / lancetas / lancette: Emergo Europe SteriLance Medical (Suzhou) Inc. No. 168, PuTuoShan Road, Prinsessegracht 20, New District, Suzhou 215153, China...
Need help?
Do you have a question about the GL 44 and is the answer not in the manual?
Questions and answers