Table of Contents
Advertisement
Quick Links
Advertisement
Table of Contents

Subscribe to Our Youtube Channel
Related Manuals for Beurer medical GL 50 evo


Summary of Contents for Beurer medical GL 50 evo
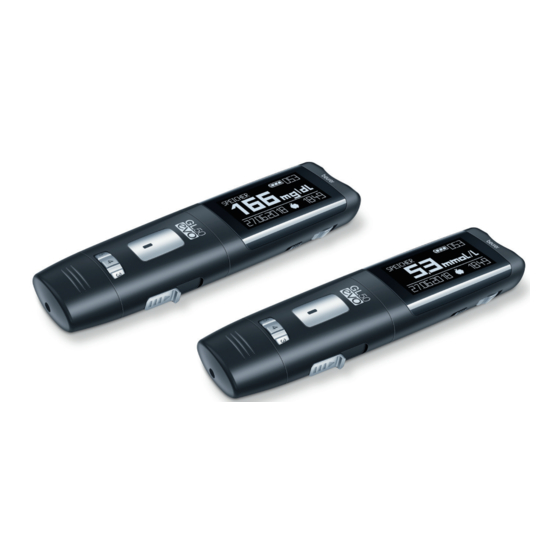
- Page 1 GL 50 evo 3-IN-1 BLOOD GLUCOSE MONITOR Step by step...
-
Page 3: Table Of Contents
Contents 1 Getting to know your device ..................4 1.1 Included in the delivery and accessories ................5 1.2 Replacements ........................6 1.3 Functions of the device ......................6 1.4 Signs and symbols ........................7 2 Warnings and safety notes ....................8 3 Description of device and accessories ..............11 3.1 Blood glucose monitor ...................... -
Page 4: Getting To Know Your Device
ettinG to know your device Dear customer, Thank you for choosing a product from our range. Our name stands for high-quality, thoroughly tested products for applications in the areas of heat, weight, blood pressure, blood glucose, body temperature, pulse, gentle therapy, massage and air. Please read these instructions for use carefully and keep them for later use. -
Page 5: Included In The Delivery And Accessories
1.1 Included in the delivery and accessories Check that the set packaging has not been tampered with and make sure that all contents are present. Before use, ensure that there is no visible damage to the device or accessories and that all packaging material has been removed. -
Page 6: Replacements
1.2 Replacements You can also obtain test strips, control solution and lancets without a prescription. Item 50 test strips REF 464.15 50 test strips, individually film packed REF 464.17 100 test strips REF 464.13 Control solution LEVEL 3 and 4 REF 464.16 100 soft touch lancets 33G REF 457.24... -
Page 7: Signs And Symbols
1.4 Signs and symbols The symbols on the packaging and type plate of the monitor and accessories represent the following: In vitro diagnostic device Manufacturer Serial number Observe the instructions for use Temperature limit Not for re-use/for single use +2°C to +30°C only Green dot (Der Grüne Punkt): Use by... -
Page 8: Warnings And Safety Notes
arninGs and safety notes Risk of infection All components of the blood glucose monitor and its accessories may come into contact with human blood and are therefore a possible source of infections. Warning • Blood glucose values are displayed in mg/dL or mmol/L. You risk damaging your health if you measure your blood glucose value using a unit of measurement with which you are not familiar, misinterpret the values and therefore take incorrect measures. - Page 9 • A haematocrit value (proportion of red blood cells) between 20% and 60% has no significant influence on the measurement results. • A very high or low haematocrit value (proportion of red blood cells) may lead to incorrect measurements. In the event of a very high haematocrit value (above 60%), the displayed blood glucose value may be too low;...
- Page 10 Disposal Warning • It is essential to comply with the generally applicable safety precautions for handling blood when disposing of materials from the blood glucose monitor. Dispose of all blood samples and materials with which you or your patients come into contact correctly in order to prevent injury and infection of other persons.
-
Page 11: Description Of Device And Accessories
escription of device and accessories 3.1 Blood glucose monitor An overview of the monitor 1 Lancing device 2 Plug-in USB 3 Monitor Front Side 1 Display 1 Scroll wheel 2 Slot for test strips 2 ON/OFF switch 3 Tensioning slider 3.2 Lancing device and lancet needles 1 Cap 2 Protective lancet disc... -
Page 12: Usb Cover
3.3 USB cover If you would like to use the blood glucose monitor without the integrated lancing device, you can use the supplied USB cover in place of the lancing device. 3.4 Display symbols 1 State of charge 2 Memory space number memory 3 Blood sugar unit mg/dL or mmol/L 4 Time... -
Page 13: Test Strips
3.5 Test strips Front Rear 1 Gap for blood input You can identify the rear by the contact tracks. 2 Grip area 3 Contacts Insert the test strip into the device so that the contacts are pointing inside the slot. Make sure that the front of the test strip is facing you. -
Page 14: Initial Use And Basic Settings
date next to the hourglass symbol ). This does not apply for individual test strips, which are to be used immediately after opening the film packaging. • Discontinue use of the test strips if one of the two expiry dates ( / ) has passed. -
Page 15: Making And Changing Basic Settings
4.2 Making and changing basic settings Setting the date and time Note You must set the date and time. Otherwise, you will not be able to save your measured values correctly with a date and time and access them again later. The time can be displayed in 12-hour format or 24-hour format. - Page 16 Setting the timer You can set a timer on the blood glucose monitor. A beep sounds when the timer elapses. To set a timer, proceed as follows: 1. Switch on the blood glucose monitor by briefly pressing and holding the scroll wheel. 2.
- Page 17 6. In order to start the alarm, rotate the scroll wheel to “On” and alarm press the scroll wheel. 7. In order to turn off the alarm, rotate the scroll wheel to “Off” and press the scroll wheel. Switching Bluetooth or NFC on/off ®...
- Page 18 Switching the beep on/off On the blood glucose monitor, you can switch on the beep, switch off the beep or set a result beep. 1. Switch on the blood glucose monitor by briefly pressing and holding the scroll wheel. 2. Rotate the scroll wheel until the arrow is pointing towards •...
- Page 19 4. Use the scroll wheel to select your desired setting (warning on • Ketone or warning off) and confirm by pressing the scroll wheel. • Warning on ✔ • Warning off Back Turning the display You can turn the display on the blood glucose monitor. 1.
-
Page 20: Taking Measurements
akinG MeasureMents Warning • If the protective disc on a lancet needle has already been removed, do not use the lancet needle. • If you drop the lancing device with an inserted lancet needle, carefully pick it up and dispose of the lancet. -
Page 21: Preparing The Lancing Device For Taking A Sample
5.2 Preparing the lancing device for taking a sample Remove the cap Securely hold the monitor with one hand on the lancing device cover. With your other hand, remove the cap from the monitor’s lancing device. Insert the lancet needle Insert a sterile lancet needle into the lancing device. -
Page 22: Taking A Blood Sample And Measuring The Glucose Level
5.3 Taking a blood sample and measuring the glucose level Warning • Change the puncture area each time you take a measurement, e.g. use a different finger or the other hand. Repeatedly using the same area may cause inflammation or scarring. •... - Page 23 Lancing to take a blood sample The lancing device can now be used to take a blood sample. Make sure that the blood remains as a droplet and is not spread. Blood sample from the fingertip Firmly position the lancing device slightly to the side of the centre of the fingertip.
-
Page 24: Reading The Result And Marking Measurements
Note • Do not apply blood to the sides of the test strips • Do not add blood later if the device does not start measurement. Remove the test strip and end this test. Use a new test strip. • If the test strip has already been inserted into the device but no blood is added to the test strip within two minutes, the device switches itself off. -
Page 25: Post-Processing And Disposal
To do this, proceed as follows: Following the measurement, the display will briefly show the measured value and then the menu in which you can mark the measured value. It is not possible to change the marking afterwards. Select the desired marking using the scroll wheel. •... -
Page 26: Evaluating Measured Blood Glucose Values
Remove and dispose of lancet needle Press the trigger again so that you can grip the shaft. Carefully remove the lancet needle from the lancing device and dispose of the lancet in a puncture-proof container. Carefully dispose of all blood samples and materials that came into contact with you or your patients. - Page 27 Overview of glycaemic recommendations for non-pregnant adults with diabetes < 7.0%* < 53 mmol/mol* Preprandial capillary plasma glucose 80 – 130 mg/dL* 4.4 – 7.2 mmol/L* Peak value of postprandial capillary plasma < 180 mg/dL* glucose** 10.0 mmol/L* * For individual patients, more or less strict glycaemic targets may be appropriate. The target values should be adjusted depending on the length of time the person has had diabetes, age/life expectancy, accompanying diseases, known cardiovascular diseases or advanced microvascular complications, hypoglycaemia unawareness, as well as individual patient considerations.
-
Page 28: Functional Check Using Control Solution
Display Blood glucose Actions Very high blood Take another measure- glucose level ment using a new test strip. If the display is Above 630 mg/dL the same as before: (over 35.0 mmol/L) seek medical assistance immediately. 5.7 Functional check using control solution The control solution is used to test the entire blood glucose monitoring system. - Page 29 Activate control mode Once you have inserted the test strip, the blood glucose monitor switches on automatically and briefly shows the initial display. Once the initial display has disappeared, quickly rotate the scroll wheel all the way from the left to the right until “CONTROL” appears at the top of the animation display.
-
Page 30: Easurement Memory
If measurements are outside the specified range, check the following possible causes: Cause Action • The first drop of control solution was not Rectify the cause and repeat the test. disposed of. • The tip of the bottle was not cleaned correctly. •... -
Page 31: Displaying Individual Values
Note • If you have already saved measured values and you reset the date, the average values are calculated as from the new period. • “No saved values” indicates an empty memory for measured values. Press the ON/OFF button to switch off the device. -
Page 32: Evaluating Measured Values On A Pc
6.3 Evaluating measured values on a PC The GL50 evo monitor features an integrated plug-in USB stick. The blood glucose evaluation software GlucoMemory is installed on the USB stick (for position of the USB connection, see page 11). The GL50 evo is compatible with Diabass and SiDiary. The blood glucose evaluation software GlucoMemory is pre-installed on the monitor's USB stick. -
Page 33: Maintenance
Note • Do not store the device, test strips and control solution in your vehicle, in the bathroom or in a cooling appliance. • Retain these instructions for use. • Only clean the device when it is switched off. • The device needs to be in the location in which the measurement will be taken for at least 30 minutes before use so that the device can adapt to the ambient temperature. -
Page 34: What If There Are Problems
hat if there are probleMs Display messages on batteries and blood glucose measurement Cause Solution Empty Batteries discharged. Charge the blood glucose monitor via the USB battery interface. High Temperature of the measuring Repeat the test using a new test strip as soon temper- environment, blood glucose monitor as the measuring environment, monitor and... - Page 35 Problem: device does not switch on Cause Solution ON/OFF switch set to off. Move the ON/OFF switch to the right. Battery dead. Charge the blood glucose monitor via the USB port on a computer. Test strip inserted incorrectly or not completely. Firmly insert the test strip into the slot on the device with the contacts first.
-
Page 36: Technical Specifications
echnical specifications Dimensions (L x W x H) 123 x 29 x 16 mm Weight 36 g Power supply Li-ion rechargeable battery, 160 mAh 150 measurements with fully charged rechargeable Battery life battery Measured value memory 480 measured values with date/time Data retained when batteries are changed Average values For 7, 14, 30, 90 days... -
Page 37: Comparison Of Measured Values With Laboratory Values
During the reaction, a mediator transports electrons through the electrode surface and so generates a current. The monitor analyses this current. The current flow is proportional to the glucose content in the blood sample. The results are shown on the blood glucose monitor display. Only a small amount of blood is required (0.6 microlitres) and measurement takes approx. - Page 38 Results of the repeat precision measurements Sample Venous blood Overall average Pooled standard Pooled coefficient value deviation of variation (%) mg/dL mmol/L mg/dL mmol/L mg/dL mmol/L 42.7 36.0 62.0 59.2 120.5 127.1 201.0 11.2 213.8 11.9 316.5 17.6 329.9 18.3 10.1 418.0 23.2...
-
Page 39: Usage Limits For Specialist Personnel From The Healthcare Sector
Results of the system accuracy for combined glucose concentrations between 36.0 mg/dL (2.0 mmol/L) and 442.5 mg/dL (24.6 mmol/L). Within ±15 mg/dL or ±15% (within ±0.83 mmol/L or ±15%) 592/600 (98.67%) In comparison to the YSI, the GL50 evo met the EN ISO 15197:2015 standard, whereby 95% of the blood glucose values measured have to fall within the following zones: either ±15 mg/dL (±... - Page 40 Blood glucose Influence value 50-100 mg/dL 250-350 mg/dL (2.8-5.6 mmol/L) (13.9-19.4 mmol/L) Concentration of tested substances Acetaminophen 7 mg/dL (0.46 mmol/L) 6.6 mg/dL 4.5% (0.37 mmol/L) Ascorbic acid 4 mg/dL (0.23 mmol/L) 3.3 mg/dL 5.1% (0.18 mmol/L) Bilirubin 3.3 mg/dL (0.06 mmol/L) 0.1 mg/dL -1.4%...
-
Page 41: Warranty/Service
Blood glucose Influence value 50-100 mg/dL 250-350 mg/dL (2.8-5.6 mmol/L) (13.9-19.4 mmol/L) Concentration of tested substances L-Dopa 2 mg/dL (0.10 mmol/L) 9.3 mg/dL 7.9% (0.52 mmol/L) Maltose 278 mg/dL (7.72 mmol/L) -1.53 mg/dL -2.6% (-0.09 mmol/L) Methyldopa 4 mg/dL (0.19 mmol/L) 7.3 mg/dL 0.9% (0.41 mmol/L) - Page 42 Beurer guarantees the perfect functionality and completeness of this product. The worldwide warranty period is 5 years, commencing from the purchase of the new, unused product from the seller. The warranty only applies to products purchased by the buyer as a consumer and used exclusively for personal purposes in the context of domestic use.
- Page 44 GL 50 evo Beurer GmbH Söflinger Straße 218 89077 Ulm, Germany • • www.beurer.com www.beurer-healthguide.com • Lancet needles / Lanzetten / lancettes / lancetas / lancette: Emergo Europe SteriLance Medical (Suzhou) Inc. No. 168, PuTuoShan Road, Prinsessegracht 20, New District, Suzhou 215153, China...
Need help?
Do you have a question about the GL 50 evo and is the answer not in the manual?
Questions and answers