Advertisement
Quick Links
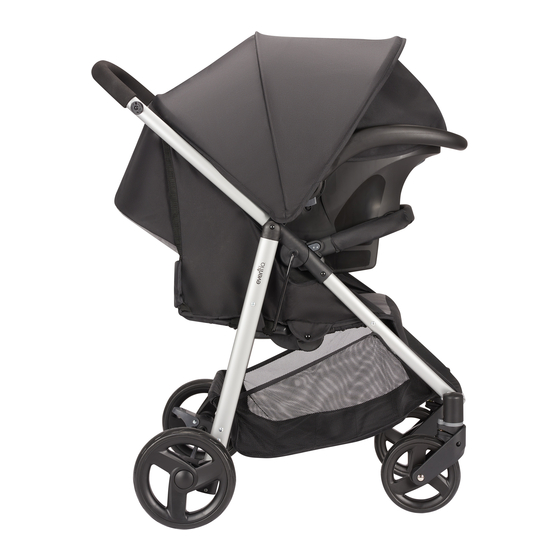
Flip Side
Travel System
Up to 50 lbs. (22.7 kg)
Up to 45 in. (114.3 cm)
Sistema
de viaje
Hasta 50lb. (22.7 kg)
Hasta 45 in. (114.3 cm)
Système de
déplacement
Jusqu'à 22,6 kg (50 lb)
Jusqu'à 96 cm (38 po)
Read all instructions before use and keep
Lire l'intégralité des instructions avant l'utilisation et les
conserver pour référence ultérieure.
them for future reference.
guárdelas como referencia futura.
TM
© 2017 Even o Company, Inc. IM0199 8/2017
Advertisement

Related Manuals for Evenflo Flip Side


Summary of Contents for Evenflo Flip Side
- Page 1 Flip Side Travel System Up to 50 lbs. (22.7 kg) Up to 45 in. (114.3 cm) Sistema de viaje Hasta 50lb. (22.7 kg) Hasta 45 in. (114.3 cm) Système de déplacement Jusqu'à 22,6 kg (50 lb) Jusqu'à 96 cm (38 po) Read all instructions before use and keep them for future reference.
- Page 2 WARNING ADVERTENCIA Failure to follow these warnings and the instructions increases the risk of serious injury or death. AVERTISSEMENT PLEASE FOLLOW ALL TO AVOID STRESS AND TO INSTRUCTIONS AND KEEP PREVENT A HAZARDOUS USER GUIDE FOR FUTURE UNSTABLE, CONDITION ON USE.
- Page 3 WARNING ADVERTENCIA Failure to follow these warnings and the instructions increases the risk of serious injury or death. AVERTISSEMENT DO NOT use storage basket to USING THE LITEMAX INFANT CAR SEAT WITH THIS STROLLER: carry a child. - ONLY USE THE LITEMAX NEVER LET A CHILD stand on INFANT car seat with the any part of the stroller.
- Page 4 WARNING ADVERTENCIA AVERTISSEMENT No observar estas advertencias y las instrucciones aumenta el riesgo de sufrir lesiones serias o la muerte. POR FAVOR, SIGA TODAS LAS PARA PREVENIR QUE EL INSTRUCCIONES Y GUARDE LA COCHECITO ESTÉ EN UNA GUÍA DEL USUARIO PARA USO CONDICIÓN PELIGROSA E FUTURO.
- Page 5 WARNING ADVERTENCIA AVERTISSEMENT No observar estas advertencias y las instrucciones aumenta el riesgo de sufrir lesiones serias o la muerte. EL COCHECITO NO debe USAR EL ASIENTO DE AUTOMÓVIL PARA BEBÉ usarse mientras trota, usa LITEMAX CON ESTE COCHECITO: patines, patina sobre hielo o actividad similar.
- Page 6 WARNING ADVERTENCIA AVERTISSEMENT Risque de blessures graves, voire mortelles, si les instructions et ces avertissements ne sont pas suivis. VEUILLEZ SUIVRE TOUTES LES POUR ÉVITER LE STRESS ET INSTRUCTIONS ET GARDER LE EMPÊCHER UNE SITUATION GUIDE DE L’UTILISATEUR POUR DANGEREUSE ET INSTABLE DE LA RÉFÉRENCE ULTÉRIEURE.
- Page 7 WARNING ADVERTENCIA AVERTISSEMENT Risque de blessures graves, voire mortelles, si les instructions et ces avertissements ne sont pas suivis. NE PAS utiliser le panier de UTILISATION DU SIÈGE D’AUTO POUR NOURRISSON URBINI SONTI rangement pour porter un AVEC CETTE POUSSETTE : enfant.
- Page 8 Parts / Piezas / Pièces de rechange Please check that you Por favor, verifique que Veuillez-vous assurer have all the parts shown tenga todas las piezas d’avoir toutes les pièces below before ilustradas abajo antes illustrées avant de assembling product. de armar el producto.
- Page 9 Assembly / Ensamblaje / Assemblage Unlock the storage latch. Destrabe la trabe de almacenamiento. Débloquer le verrouillage de rangement. CHECK TO MAKE sure the stroller is locked in the fully open position before using it. VERIFIQUE PARA ASEGURARSE de que el cochecito esté trabado en la posición completamente abierta CLICK! antes de usarlo.
- Page 10 Front Wheels / Ruedas delanteras / Roues avant To attach front wheels, push wheel onto front leg tube until it clicks into place. Repeat on other side. Pull on wheels to make sure both of them are attached. Para instalar las ruedas delanteras, CLICK! empuje la rueda en el tubo de la pata ¡CLIC!
- Page 11 Rear Wheels (cont.) / Ruedas traseras (cont.) / Roues arrière (suite) Push straight side of pin through axle hole. Pin will separate around the axle. Empuje el lado recto del pasador por el agujero del eje. El pasador sepa- rará alrededor del eje. Pousser la partie droite de la goupille dans le trou de l’essieu.
- Page 12 Armbar / Barra para los brazos / Repose-bras To attach armbar, push arm bar onto stroll- CLICK! er until it clicks into place. ¡CLIC! Para sujetar la barra para los brazos, empu- je la barra para los brazos hacia el cochecito hasta que se trabe en su lugar.
- Page 13 Brakes / Frenos / Freins Always lock both brakes. Make sure brakes WARNING WARNING are on by trying to push the stroller. WARNING ADVERTENCIA ADVERTENCIA Trabe siempre ambos frenos. Asegúrese que los frenos estén ADVERTENCIA AVERTISSEMENT AVERTISSEMENT activados tratando de empujar el cochecito. AVERTISSEMENT Toujours serrer les deux freins.
- Page 14 Canopy - Forward Facing Use / Uso de la capota orientada hacia adelante / Auvent - Utilisation face vers l’avant To open or close canopy, push to the front or the rear of the stroller as shown. Para abrir o cerrar la capota, empújela hacia el frente o la parte de atrás del cochecito como se indica.
- Page 15 Squeeze handle at top of seat and recline seat to front of stroller for rear facing canopy use. Oprima la manija de arriba del asiento y recline el asiento hasta el frente del cochecito para usarlo con la capota orientada hacia atrás. Appuyer sur la poignée, située sur le haut du siège, et incliner le siège vers l’avant de la poussette pour...
- Page 16 Reclining Seat for Forward-facing Use / Para reclinar el asiento en la posición orientada hacia adelante / Inclinaison du siège pour utilisation face vers l’avant The stroller seat is reversible to allow your child to sit in a forward facing position or rear facing position.
- Page 17 Reclining Rear Seat for Rear Facing Use / Para reclinar el asiento en la posición orientada hacia atrás / Inclinaison du siège pour utilisation face vers l’arrière Armbar MUST be removed to recline seat. Press buttons on sides of arm- bar and remove armbar from stroller.
- Page 18 Reclined Carriage Position / Posición reclinada del cochecito / Position landau inclinée WARNING Child may slip into leg openings and strangle. Never use seat in a reclined carriage position WARNING unless the flaps are fastened to close off the leg opening. ADVERTENCIA El niño podría caerse por las ADVERTENCIA...
- Page 19 Rotate legrest up to access the flaps for the reclined carriage position. Gire el apoyapié hacia arriba para lograr el acceso a las aletas de la posición reclinada del cochecito. Relever le repose-jambes pour avoir accès aux rabats utilisés pour la position landau inclinée.
- Page 20 Adjusting Harness / Ajuste de arnés / Réglage du harnais To attach the harness and waist straps to the crotch buckle, insert the buckles A into the crotch strap as CLICK! shown. ¡CLIC! Para sujetar el arnés y las correas para la cintura a la hebilla de la entrepierna, inserte las hebillas A en la correa de la entrepierna como se indica.
- Page 21 To loosen shoulder straps, push up on the retainer while pulling down on the shoulder strap. Para aflojar las correas para los hombros, empuje el retén mientras jala la correa para los hombros hacia abajo. Pour desserrer les sangles d’épaule, appuyer sur la fixation tout en tirant la sangle d’épaule vers le bas.
- Page 22 Swivel Wheels / Ruedas giratorias / Roulettes Pivotantes Swivel wheels lock for use on rough sur- faces, such as gravel or stones. To lock front wheels, locate the gray ring on the front wheel and move until wheel locks in place. To unlock front wheels, push gray ring back to original position.
- Page 23 Folding Stroller / Cómo plegar el cochecito / Pliage de la poussette DO NOT fold stroller when stroller seat is in the rear-facing position. Make sure the front wheels are facing forward. To fold the stroller, lock the rear brakes, close the canopy, and remove your child.
- Page 24 Attaching the LiteMax Infant Car Seat / Colocación del asiento de seguridad para bebé LiteMax / Fixation du siège d’auto pour nourrisson LiteMax WARNING ADVERTENCIA USING THE LITEMAX INFANT CAR SEAT WITH THIS STROLLER: - ONLY USE THE LITEMAX INFANT CAR SEAT with the FLIPSIDE AVERTISSEMENT STROLLER.
- Page 25 WARNING ADVERTENCIA AVERTISSEMENT UTILISATION DU SIÈGE D’AUTO POUR NOURRISSON URBINI SONTI AVEC CETTE POUSSETTE : - UTILISER UNIQUEMENT LE SIÈGE D’AUTO POUR NOURRISSON URBINI SONTI avec la POUSSETTE URBINI TURNI. - NE JAMAIS utiliser de sièges d’auto d’autres fabricants avec cette pous- sette.
- Page 26 Recline the stroller seat back to its lowest position. Squeeze handle at top of seat and recline seat as shown. Recline el respaldo del asiento del cochecito hasta la posición más baja en la posición. Oprima la manija de arriba del asiento y recline el asiento como se indica.
- Page 27 CHECK to make sure carseat is fully latched into the car seat mounts on each side of the stroller by lifting up on it. VERIFIQUE para tener la seguridad de que el asiento de automóvil esté completamente trabado en los montajes del asiento de automóvil en cada costado del cochecito levántandolo hacia arriba.
-
Page 28: Cuidado Y Limpieza
Care and Cleaning FOR WASHING INSTRUCTIONS, REFER TO YOUR CARE TAG on your seat pad. NEVER use BLEACH. TO CLEAN STROLLER FRAME, use a damp cloth with household soap and warm water. NEVER use BLEACH or detergent. BEFORE USING STROLLER ALWAYS CHECK for any missing parts , torn material or if it is broken or damaged. -
Page 29: Entretien Et Nettoyage
Entretien et nettoyage POUR LES INSTRUCTIONS DE NETTOYAGE, SE RÉFÉRER À L’ÉTIQUETTE D’ENTRETIEN située sur le coussin du siège. NE JAMAIS utiliser D’EAU DE JAVEL. POUR NETTOYER LE CHÂSSIS DE LA POUSSETTE, utiliser un chiffon humecté de savon ménager et d’eau tiède. NE JAMAIS utiliser D’EAU DE JAVEL ou de détergent. -
Page 30: Warranty Information
Warranty Information For a period of 90 days from the original purchase of this Product, Evenflo warrants to the original end user (“Purchaser”) this Product (including any accessories) against defects in material or workmanship. Evenflo’s sole obli- gation under this express limited warranty shall be, at Evenflo’s option, to repair or replace any Product that is determined to be defective by Evenflo and determined to be covered by this warranty. -
Page 31: Información Sobre La Garantía
Producto, Evenflo garantiza al usuario final original (“Comprador”) que este Producto (incluido cualquier accesorio) está libre de defectos de material o mano de obra. La única obligación de Evenflo bajo esta garantía limitada expresa será, a opción de Evenflo, reparar o reemplazar un Producto que Evenflo haya determinado que es defectuoso y que esté... -
Page 32: Renseignements Sur La Garantie
à sa discrétion, tout Produit qui sera jugé être défectueux et qui sera déterminé par Evenflo être couvert sous les ter- de cette garantie. La réparation ou le remplacement sous les termes de cette garantie sont le seul recours de l’Acheteur. - Page 33 REMARQUES...
- Page 34 REMARQUES...
- Page 35 REMARQUES...
- Page 36 ParentLink 1-800-233-5921 or visit us online at www.evenflo.com Información de garantía y piezas de repuesto Para servicio al cliente, información de garantía o piezas de repuesto, por favor llámenos a ParentLink al 1-800-233-5921 o visítenos en línea en...
Need help?
Do you have a question about the Flip Side and is the answer not in the manual?
Questions and answers