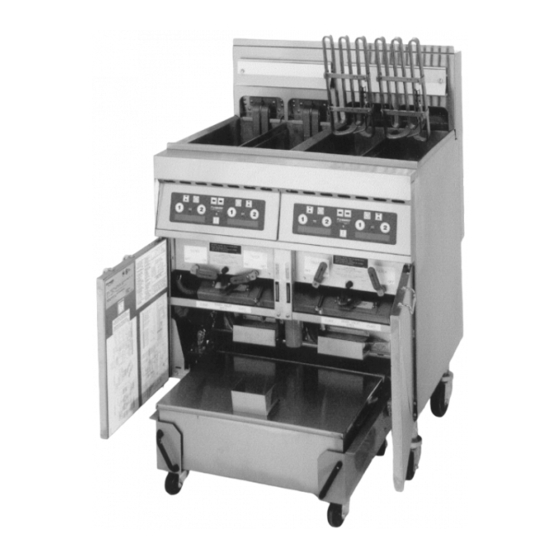
Frymaster H14 Series Service Manual
Frymaster electric fryer service manual
Hide thumbs
Also See for H14 Series:
- Service and owner's manual (106 pages) ,
- Installation & operation manual (49 pages) ,
- Installating and operation manual (33 pages)
Table of Contents
Advertisement
This equipment chapter is to be
installed in the Fryer Section of the
Equipment Manual.
MANUFACTURED
FRYMASTER CORPORATION
P.O. BOX 51000
SHREVEPORT, LOUISIANA 71135-1000
PHONE: 1-318-865-1711
TOLL FREE: 1-800-551-8633
1-800-24 FRYER
FAX: 1-318-862-2394
Warranty Statement ..................................................................................................Page i
Introduction ..................................................................................................................Page 1-1
Installation Instructions .......................................................................................Page 2-1
Operating Fryers With M100B Cooking Computers ........................................Page 3-1
OPERATING FRYERS WITH THERMOSTAT CONTROLLERS ........................................Page 4-1
Operating The Built-In Filtration System ..........................................................Page 5-1
Preventive Maintenance And Troubleshooting..............................................Page 6-1
Service Procedures AND WIRING DIAGRAMS ........................................................Page 7-1
Parts List .........................................................................................................................Page 8-1
The Frymaster Corporation, 8700 Line Avenue 71106, 5489 Campus Drive 71129
PRINTED IN THE UNITED STATES
SERVICE MANUAL
FRYMASTER H14 SERIES
ELECTRIC FRYER
BY
TABLE OF CONTENTS
P.O. Box 51000, Shreveport, Louisiana 71135-1000
PHONE 318-865-1711
SERVICE HOTLINE 1-800-24-FRYER
FOR YOUR SAFETY
Do Not Store or use gasoline or other
flammable vapors and liquids in the
vicinity of this or any other appliance.
FAX 318-219-7135
819-5625 03/2000
Advertisement
Table of Contents
Troubleshooting

Related Manuals for Frymaster H14 Series


Summary of Contents for Frymaster H14 Series
- Page 1 OPERATING THE BUILT-IN FILTRATION SYSTEM ...Page 5-1 PREVENTIVE MAINTENANCE AND TROUBLESHOOTING...Page 6-1 SERVICE PROCEDURES AND WIRING DIAGRAMS ...Page 7-1 PARTS LIST ...Page 8-1 The Frymaster Corporation, 8700 Line Avenue 71106, 5489 Campus Drive 71129 PRINTED IN THE UNITED STATES SERVICE MANUAL FRYMASTER H14 SERIES...
- Page 2 State of California to cause cancer. Inhalation of carbon monoxide is known to the State of California to cause birth defects or other reproductive harm. FRYMASTER ELECTRIC FRYERS ARE MANUFACTURED FOR USE WITH THE TYPE VOLTAGE SPECIFIED ON THE FRYER RATING PLATE LOCATED ON THE FRYER DOOR. FOR PROPER INSTALLATION PROCEDURES IN THE UNITED STATES, REFER TO THE LATEST EDITION OF THE NATIONAL ELECTRIC CODE ANSI/N.F.P.A.
-
Page 3: Warranty Statement
3. If any parts, except fuses, become defective during the first year after installation date, Frymaster will also pay straight-time labor costs to replace the part, plus up to 100 miles/160 km of travel (50 miles/80 km each way). - Page 4 3. For replacement of defective computers under warranty, call your local Frymaster Factory Authorized Service Center. All computers replaced under the Frymaster exchange program are covered by a one-year (parts only) warranty. E. PARTS RETURN All defective in-warranty parts must be returned to a Frymaster Authorized Factory Service Center within 60 days for credit.
-
Page 5: Safety Information
MH14 do not have built-in filtration systems. Models designated BIH14 are equipped with FootPrint III built-in filtration systems. H14 Series fryers feature deep cold-zones and easy to clean, open frypots with tilt-up elements. The fryers are controlled by multi-product cooking computers or optional thermostat controllers. Fryers in this series come in full or split-pot arrangements, and can be purchased as single units or grouped in batteries of up to five fryers. -
Page 6: Computer Information
Fryers in this series are equipped with automatic safety features: 1. Two high temperature detection features shut off power to the elements should the controlling thermostat fail. 2. A safety switch built into the drain valve prevents the elements from heating with the drain valve even partially open. -
Page 7: Shipping Damage Claim Procedure
McDonald’s store personnel perform routine maintenance. For non-routine maintenance or repairs, or for service information, contact your local Frymaster Authorized Service Center (FASC). Service information may also be obtained by calling the Frymaster Technical Services Department (1-800- 24FRYER). The following information will be needed in order to assist you efficiently:... - Page 8 Do not store or use gasoline or other flammable vapors and liquids in the vicinity of In the event of a power failure, the fryer(s) will automatically shut down. If this occurs, turn the power switch OFF. Do not attempt to start the fryer(s) until power is restored.
-
Page 9: Power Requirements
Adjust casters so that fryers are level and at the proper height in the fry station hood. If necessary, level the fryer(s) by loosening the locking screw on the caster leg and screwing the caster in or out. When fryer is level and at proper height, retighten the locking screw on the caster leg. - Page 10 Also, after the fryer has been in use for a period of time, a hard film of caramelized vegetable oil will form on the inside of the frypot. This film should be periodically removed by following the boil-out procedure.
-
Page 11: Equipment Setup And Shutdown Procedures
Do not add vegetable oil to the fryer between the time the computer is turned on and the time it reaches programmed cooking temperature. Doing so is likely to cause RECOVERY LOCKOUT (REC LOC). - Page 12 ITEM Temperature Display Switch Left LED Display Right LED Display Cook Switch #1, Left Cook Switch #2, Left Cook Switch #1, Right Cook Switch #2, Right Recovery/Use Time Recall Switch, Left Recovery/Use Time Recall Switch, Right Light - Left Heating Mode Indicator Light - Right Heating Mode Indicator Switch - Left ON/OFF Switch - Right ON/OFF...
- Page 13 The cooking cycle cannot be started until the cooking oil is within ±15°F (8°C) of the programmed setpoint. When the frypot temperature is within ±15°F (8°C) of the programmed setpoint, the product name will be displayed continuously, indicating that the fryer is ready to cook the displayed product. WARNING to the ON position, ensure that the frypot is .
- Page 14 5. The cooking cycle cannot be started until the cooking oil is within ±15°F (8°C) of the programmed setpoint. When the frypot temperature is within ±15°F (8°C) of the programmed setpoint, the product name will be displayed continuously, indicating that the fryer is ready to cook the displayed product.
- Page 15 OFF* for at least 5 seconds, then turn it back on. If the message reappears, there is a problem in the electrical circuitry of the fryer or the computer; contact your Frymaster Factory Authorized Service Center (FASC).
- Page 16 If oil is not being added while the fryer is heating, and the power cord is fully plugged in, have the fryer checked by a qualified service agent.
- Page 17 • change the computer’s display language • configure the computer for use on electric or gas fryers • configure the computer for use on either a full-vat or a split-vat fryer • specify how the computer displays product names and temperatures •...
- Page 18 GAS Yes or GAS no appears in the LED displays. 2. Press and release the 3. Gas nO indicates the computer is configured for use on an electric fryer; Gas YES indicates the computer is configured for use on a gas fryer. Press the right configuration.
- Page 19 switch until the word DISPLAY appears in the left display. 2. Press and release the 3. Press the right switch to toggle back and forth between constant product display (CONSTANT) or alternating temperature and product display (ALT). 4. Press the switch to save the settings.
- Page 20 3.5.2 M-100B™ Computer Programming Mode How to Enter the Program Mode 1. Press the ON/OFF switches until both displays of cooking computer indicate left product selection switch three switches at the same time. 2. When the program mode has been entered, the display will flash M-100B computer briefly, followed by the software version number.
- Page 21 5. To change the times, use the following switches: Left Left Left Right 6. Press the switch to lock in the new settings, and either ON/OFF switch programming mode. Both displays will show OFF. How to Change the Cooking Temperature Setpoint 1.
- Page 22 6. To EXIT and SAVE the product name entry, press the display, followed by YES or NO, indicating whether the menu item is active or not. Press the right switch to toggle between yes and no. 7. Press the switch to cycle through the Duty Times, Pull Time, QA (hold) Time, and Cooking Temperature Setpoint settings.
- Page 23 switch to show the cooking temperature setpoint, displayed as SET-TEMP in the 7. Press the left display. The current setpoint temperature is in the right display (for example-350F). The temperature will be in Fahrenheit (F) or Celsius (C). Pressing the right computer between Fahrenheit (F) and Celsius (C).
- Page 24 How to Display “Use Time” Information NOTE: This feature is used to determine the total amount of time that a fryer has been cooking. 1. Enter the program mode. See How to Enter the Program Mode on page 3-10. 2. Press the left switch to display use time for the left side of a dual-vat unit.
- Page 25 The analog controller, illustrated on the following page, is used to adjust and maintain vegetable oil at the temperature indicated by the thermostat knob. The fryer has two built-in high-limit protection features. If the temperature in the frypot reaches approximately 410 F (210 C), the computer opens the heat relay circuit, turning the elements off.
- Page 26 Hi-Limit Test Switch, Right Vat - Tests high-limit thermostat for right vat. Second Hi-Limit Test Light, Left or Full-Vat - Indicates fryer is in second high-limit test mode. Second Hi-Limit Test Light, Right Vat - Indicates fryer is in second high-limit test mode.
- Page 27 4. When the vegetable oil temperature reaches the thermostat knob setpoint, the elements will cycle OFF and the heating mode light will go off, indicating that the fryer is ready for the cooking process to begin. Analog Controller High-Limit Check...
- Page 28 Note: You must agitate vegetable oil during the entire high-limit control-check procedure with a maple paddle. If after completing both high-limit tests you find only the second high-limit operates properly, the vat can be used if it is absolutely necessary, but with extreme care. The controller must be replaced immediately after this period of necessity.
- Page 29 Secures filter paper or pad in place. Seals pan suction line. Covers filter pan assembly. Attaches pan cover to filter pan. Means to pull filter assembly from fryer. Fits under filter paper/pad to allow passage of oil when filtering. Collects heavy breading when draining oil into...
- Page 30 8.1 STEP-BY-STEP FILTRATION INSTRUCTIONS Switch computer to OFF. Slide the filter pan from the fryer cabinet. Open the filter-cover, and remove and clean the crumb tray.
- Page 31 Remove and clean the hold-down ring. Remove and discard the dirty paper or pad. Remove and clean the filter screen. Make sure the inside of the pan is free of all food and breading particles that could prevent the screen from sealing against the bottom of the pan.
- Page 32 The filter pad is placed in the pan with the heavily textured side facing up. When filter paper is used, one sheet is placed over the screen and 8-ounces of filter powder is spread evenly on the top of the paper. WARNING: Do Not Use Filter Powder on Filter Pads Place pad evenly on filter screen.
- Page 33 It's imperative that the crumb screen is installed prior to filtering, for optimum filter- system performance. Slide the filter pan back inside fryer cabinet. Important: Filter shortening or oil at operating temperature. Filtering at the end of the day ensures that the shortening or oil is at proper...
- Page 34 Return handle and drain-valve handle location. With fryer off, open drain valve. When frypot empties into filter pan, turn return handle to ON. Filter pump will activate. Turn the computer back ON and use right arrow key to step through selection, stopping on FILTER.
- Page 35 The computer will countdown the process, although it does not control the filtering. The oil moves through the filter, the frypot and out the open frypot-drain during filtering. Polishing is a timed process that cleans the oil and washes small particles from the frypot. When the final seconds of the process tick off, FILTER will flash in the display, indicating the filter time has elapsed.
- Page 36 Close the drain-valve and leave the filter pump on to fill the frypot. With the drain-valve closed, frypot fills with oil. When the filter pan empties, bubbles will form in the frypot. Allow bubbling to continue 15-20 seconds to ensure the oil return lines are clear of shortening.
- Page 37 Turn the filter alarm off by pressing Top up oil level. Some oil may be lost in filtering process. Fill to first mark in frypot.
- Page 38 McD All Purpose Concentrate (APC) Cleaner HSC. Place the baskets into the frypot and bring the solution to a simmer at 195 F (90.5 C) for 1 hour. Turn OFF the fryer, drain the solution and wipe the frypot clean and dry.
- Page 39 d. To clean the filter base assembly, use a sponge or cloth soaked with a water and grease- cutting solution. Be careful not to get water on the pump/motor assembly. e. Wipe filter-base assembly dry with a clean, dry cloth or paper-towel. All water MUST MUST be removed from the suction tube before inserting filter pan.
- Page 40 Handle with extreme caution. When discarding old cooking oil, drain from the fryer into a Vegetable Oil Disposal Unit (MSDU50) - available from your local distributor. The disposal unit should be taken to the disposal site and the old cooking oil pumped into the grease storage container for proper disposal.
-
Page 41: Preventive Maintenance
Although the chapter covers the most common problems reported, you may encounter problems that are not covered. In such instances, the Frymaster Technical Services staff will make every effort to help you identify and resolve the problem. - Page 42 Is the 24V LED on the interface board illuminated? Is the AL LED illuminated? Condition normal. Probable causes are: 1. No power applied to the fryer power cord 2. Defective 12-volt transformer 3. Defective interface board 4. Broken or improper wire connection Probable causes are: 1.
- Page 43 Fryer Heating Oil COMPUTER PANEL OPEN INTERFACE BOARD VISIBLE Initiate HEAT MODE by turning the fyrer on and setting the temperature at least 45° F (24° C) above the temperature of the cooking oil. Is the HEATING MODE indicator lit with LOW TEMP...
- Page 44 CONTINUED FROM PRECEEDING PAGE Is the right HI LED lit (for split vat units, both HI LEDs lit)? Is 24VAC present on the Latching Contactor AND does the contactor close? As HEATING MODE indicator lights, does the right HT LED light (both HT LEDs for split-vat units)? Is 24 VAC present on the Heating Contactor and does the...
- Page 45 Unit stops heating with HEATING MODE indicator lit. Probable causes are: 1. Defective or improperly installed high-limit 2. Defective heating or latching Contactor CONTINUED FROM PRECEEDING PAGE Do elements heat and draw proper amps? Do elements continue to heat and maintain proper temperature (including during warm-up (melt) cycle? What are the...
- Page 46 Is the 24V LED on the interface board illuminated? Is the AL LED illuminated? Condition normal. Probable causes are: 1. No power applied to the fryer power cord 2. Defective 12-volt transformer 3. Defective interface board 4. Broken or improper wire connection Probable causes are: 1.
- Page 47 Fryer Heating Oil CONTROLLER PANEL OPEN INTERFACE BOARD VISIBLE Initiate HEAT MODE by turning the fyrer on and setting the temperature at least 45° F (24° C) above the temperature of the cooking oil. Is the HEATING MODE indicator lit with the POWER indicator on? NOTE: Indicator may cycle on and off.
- Page 48 CONTINUED FROM PRECEEDING PAGE Is the right HI LED lit (for split vat units, both HI LEDs lit)? Is 24VAC present on the Latching Contactor AND does the contactor close? As HEATING MODE indicator lights, does the right HT LED light (both HT LEDs for split-vat units)? Is 24 VAC present on the Heating Contactor and does the...
- Page 49 Unit stops heating with HEATING MODE indicator lit. Probable causes are: 1. Defective or improperly installed high-limit 2. Defective heating or latching contactor CONTINUED FROM PRECEEDING PAGE Do elements heat and draw proper amps? Do elements continue to heat and maintain proper temperature (including during warm-up (melt) cycle? What are the...
- Page 50 6.2.3 Troubleshooting the Built-in Filtration System (BIH14 units only) MOMENTARILY TURN THE FILTER HANDLE TO THE ON POSITION Does the pump start? Condition normal. Filter System Operation No oil is returned. Probable causes are: 1. Oil return lines blocked or kinked 2.
- Page 51 CHAPTER 7: SERVICE PROCEDURES Before performing any maintenance on your Frymaster fryer, you must disconnect the electrical power supply. When electrical wires are disconnected, it is recommended that they be marked in such a way to facilitate re-assembly. 7-1: REPLACE CONTROLLER 1.
- Page 52 7-2: REPLACE INTERFACE BOARD 1. Unplug all power cords. Perform Procedure 7-1, Steps 1-4, Replace Computer/Controller. 2. Unplug wire harness from the interface board. Remove all wiring from the terminals of the interface board, ensuring that each wire is marked for reattachment. 3.
- Page 53 1. Unplug fryer from the electrical source. 2. Drain the cooking oil from the frypot. 3. Remove the fryer from the exhaust hood to gain access to the rear of the fryer. 4. Remove the screws from the top, center and bottom back covers.
- Page 54 7-4: REPLACE TEMPERATURE PROBE (cont.) 6. Disconnect the wire harness containing the probe wiring. It may be necessary to remove the wire ties. 7. Use a pin-pusher to remove the probe wires from the connector. Mark each wire for re- assembly.
- Page 55 7-4: REPLACE TEMPERATURE PROBE (cont.) 11. Place the new temperature probe assembly onto the element and secure with the screws removed earlier. Clip the probe onto the rear of the element. The temperature probe assembly should be oriented in the same manner as the probe being replaced.
- Page 56 7-5: REPLACE HEATING ELEMENT (cont.) 3. Remove the screws securing the temperature probe bracket from the element. Remove the probe clamp (metal Ty-Wrap). temperature probe components aside. 4. Disconnect the element springs. Set the probe-securing Remove probe clamp (metal Ty-Wrap), and screws securing probe bracket to element Disconnect element springs here...
- Page 57 8. Route the element leads (terminals) to the rear of the fryer. 9. When replacing the right element (as viewed from the rear of the fryer), insert pin terminals into the corresponding pin-holes in the 6-pin connector. When all pin terminals...
- Page 58 7-5: REPLACE HEATING ELEMENT (cont.) 10. When replacing the left element (as viewed from the rear of the fryer), use the 9-pin connector, inserting the leads from the replacement element connector, see previous step. 11. Insert the connector(s) into the receptacle(s)
- Page 59 8. Reconnect the wire harness connector. 9. Install and secure the back covers. 10. Position the fryer under the exhaust hood. Use a pin-pusher to remove high-limit wires from connector DO NOT Pin Pusher—...
- Page 60 6. Disconnect the wire-harnesses connected to the contactor box. 7. Remove the screws securing the capping piece from the fryer. Remove the capping piece and set aside. It may be necessary to remove the wiring covers from the front of the contactor box.
- Page 61 4. Disconnect the wire harnesses from the front and rear of the contactor box. 5. Remove the screws securing the contactor box to the bottom frame of the fryer. 6. Pull the contactor box through the access opening in the rear of the fryer.
- Page 62 9. Remove the contactor mounting screws and remove the contactor. 10. Install the new contactor and connect the wiring removed in Step 8. 11. Install the contactor box by following the previous steps in reverse order. Contactor mounting screws Latching Contactor Mercury (Heating) Contactor 7-12...
- Page 63 7-10: BUILT-IN FILTER SYSTEM SERVICE PROCEDURES Filtration Problem Resolution One of the most common errors is placing the filter paper on the bottom of the filter pan rather than over the filter screen. ENSURE THAT FILTER SCREEN IS IN PLACE PRIOR TO FILTER PAPER PLACEMENT AND FILTER PUMP OPERATION.
- Page 64 7-10: BUILT-IN FILTER SYSTEM SERVICE PROCEDURES (cont.) If the motor runs but the pump does not, there is a blockage in the pump. Incorrectly sized or installed paper/pads will allow food particles and sediment to pass through the filter pan and into the pump.
- Page 65 7-10: BUILT-IN FILTER SYSTEM SERVICE PROCEDURES (cont.) FootPrint III Wiring Diagram Operation of the redesigned FP-III system is the same as for the original design. ORIGINAL VS REDESIGNED FP-III FILTRATION SYSTEM Original System Return lines and manifolds wrapped with silicone strip heaters and aluminum tape.
- Page 66 7-11: ELECTRIC INTERFACE BOARD DIAGNOSTIC CHART The following diagram and charts provide ten quick system checks that can be performed using only a multimeter. Meter Setting 12 VAC Power 24 VAC Power *Probe Resistance (RH) *Probe Resistance (LH) Hi-Limit Continuity (RH) Hi-Limit Continuity (LH) Latch Contactor Coil (RH) Latch Contactor Coil (LH)
- Page 67 COMMON ELECTRIC McDONALD'S H14 SERIES— FULL-VAT J4-1 J4-1 J4-1 J4-1 C1-1 J4-3 J4-3 J4-3 J4-3 C1-3 HIGH LIMIT FIRE DRAIN CUT-OFF SAFETY HOOD SWITCH RELAY COMP 12 VDC LATCH RELAY INTERFACE BOARD 1/50 1/50 1/50 1/50 4.7K 4.7K 4.7K 4.7K...
- Page 68 COMMON ELECTRIC McDONALD'S H14 SERIES— DUAL-VAT C1-1 CONTROL CIRCUIT C1-3 TEMP PROBE BURN-OFF RELAY J2-10 J1-5 LATCHING CONTACTOR HEAT RELAY 1/50 1/50 1/50 1/50 C6-14 J1-6 1K 1K 1K A A A A J1-9 HEAT TROUBLE COMPUTER/ CONTROLLER J4-1 J4-3...
- Page 69 COMMON ELECTRIC McDONALD'S H14 SERIES- FULL-VAT— EXPORT WYE J4-1 J4-1 J4-1 J4-1 C1-1 J4-3 J4-3 J4-3 J4-3 C1-3 HIGH LIMIT FIRE DRAIN CUT-OFF SAFETY HOOD SWITCH RELAY COMP 12 VDC LATCH RELAY INTERFACE BOARD 1/50 1/50 1/50 1/50 4.7K 4.7K 4.7K...
- Page 70 COMMON ELECTRIC McDONALD'S H14 SERIES- DUAL-VAT— EXPORT WYE C1-1 CONTROL CIRCUIT C1-3 TEMP PROBE HOOD RELAY J2-10 J1-5 LATCHING CONTACTOR HEAT LATCH RELAY RELAY 1/50 1/50 1/50 1/50 1K 1K 1K J1-6 A A A A J1-9 HEATING CONTACTOR HEAT...
- Page 71 7-13: WIRING DIAGRAMS, MAIN McDonald’s Domestic 7-21...
- Page 72 McDonald’s European Community (CE) 7-22...
- Page 73 McDonald’s European Community (CE) (Prior To 9/98) 7-23...
- Page 74 McDonald’s European Community (CE) XBIH14 7-24...
- Page 75 McDonald’s Domestic Contactor 7-25...
- Page 76 McDonald’s European Community (CE) WYE Contactor 7-26...
- Page 77 McDonald’s European Community (CE) XBIH14 Contactor 7-27...
- Page 78 McDonald’s 440/480V Contactor 7-28...
- Page 79 McDonald’s Delta CSA Contactor 7-29...
- Page 80 McDonald’s Domestic Control Cord 7-30...
- Page 81 McDonald’s English Control Cord 7-31...
- Page 82 7-13: WIRING DIAGRAMS, FILTER UNITS Footprint III, Early Configuration. NOTE: REFER TO ABOVE CHART FOR LINE VOLTAGE CONNECTIONS FILTER WIRING DIAGRAM NON-REVERSING PUMP Footprint III, Late Configuration 108C NOTE: USE TERMINALS 7 AND 8 FOR 24V OUTPUT. USE TERMINALS 11 AND 12 FOR 12V OUTPUT. TO PIN 1 PUMP HEATER...
- Page 83 H14 SERIES ELECTRIC FRYERS 8.1 Accessories ITEM PART # 803-0209 803-0046 803-0197 803-0106 803-0132 803-0002 803-0170 803-0219 806-0486 * Not Illustrated CHAPTER 8: PARTS LIST COMPONENT Brush, FV/DV Frypot Cup, Measuring, Plastic, #1040 Fryer Friend 27" (Clean-out Rod) Rack, Electric Dual-Vat Basket Support...
- Page 84 8.2 Cabinet Assemblies and Component Parts 8.2.1 MH/BIH114 Cabinet Assembly, Single FootPrint...
- Page 85 ITEM PART # 200-0129 Rail, Top Front Single 806-4910SP Rail, Top Front Single (BIH114 prior to 1/99) 200-0130 Brace, Rear Horizontal 201-0137 Upright- rear enclosure 202-0137 Upright- rear enclosure 806-8059 Pad, Leg Assembly 806-8062 Rail, Pan Filter Assembly 806-8935SP Base Assembly, FM 3-PIECE 900-5313 Channel, CE FM Single Rear 901-5316...
- Page 86 8.2.2 MH/BIH214, 314, 414, 514 Cabinet Assemblies ITEM PART # 200-0076 200-0084 200-0085 200-0091 200-0072 200-0081SP 200-0092 200-0126 200-0138 201-0093 201-0137 202-0093 202-0137 806-7005SP 806-6513SP 806-6511SP 806-6997SP 806-6999SP 806-7001SP 826-1376 Detail B See Detail A COMPONENT Divider, Cabinet, Common Electric Brace, Rear Horizontal, 2 Battery (Quad and Double) Brace, Rear Horizontal, 3 Battery (Triple) Rail, Top- Quad Cabinet...
- Page 87 ITEM PART # 826-1374 809-0413 809-0422 809-0538 823-2290 823-2291 900-1957 900-1959 900-2463 900-2464SP 900-2514 900-2653 900-2718 200-0078 200-0075 900-2720 200-0077 200-0074 900-2861SP 900-5988 901-1810 902-1810 901-1948 910-2456SP 900-8452 900-8451 900-8450 900-5145 900-5143 900-2511 900-2465 900-9585 * Not Illustrated COMPONENT Screw, #10 ½-Inch (Qty: 25) Spacer, Door Post (Quad and Triple Only) Screw, Shoulder- 10-32 x .40 Bolt, Shoulder- ¼-20 x 3/8...
- Page 88 8.3 Casters, Legs and Associated Hardware ITEM PART # 810-0005 Caster, Rigid 810-0006 Caster, Swivel-Rokite 810-0327 Caster, Adjustable, Without Brake 810-1565 Caster, Stud, Single FP 3", With Lock 810-0944 Caster, Adjustable 3" With Brake 812-1326 Caster W/A,152-2 Adjustable With Brake 823-2844 Caster W/A, Front Common Electric, Single FootPrint 826-0900...
- Page 89 8.4 Component Box Assemblies/Associated Component Parts ITEM PART # 807-1683 Relay, Burnoff (McDonald’s CE Models Only) 810-1164 Terminal Block Wire Assembly 806-6863SP Wire Assembly, Burnoff, Full-Vat (McDonald’s CE only) 806-6864SP Wire Assembly, Burnoff, Dual-Vat (McDonald’s CE only) 806-8244 Component Box/Stud Assembly 807-2191 12 VAC Transformer, 208-240 V 807-2192...
- Page 90 8.5 Control Panel Assemblies/Top Caps/Door Assemblies/Related Components 8.5.1 Control Panel Assemblies and Top Caps...
- Page 91 Frame, Control Panel Bottom, Quad 911-2730 End, Control Panel (Left) 912-2730 End, Control Panel (Right) 823-2307 Control Panel, with Slot 824-0577 Top Cap, Single Fryer 824-0575 Top Cap, Two-Fryer Battery 824-0576 Top Cap, Three-Fryer Battery 824-0578 Top Cap, Four-Fryer Battery 823-1618 Basket Hanger, McDonald’s...
- Page 92 8.5.1 Door Assembly Components ITEM PART # 806-6545SP Door Assembly, Universal 809-0266 Screw, #10- ½-inch 824-0137SP Panel, Door 806-4487SP Door Pin Assembly 809-0193 Washer, Flat ¼-Inch Nylon (Door Pin Bushing) 826-1343 Spring, Door Hinge (Qty: 10) 900-2485 Liner, Door 810-1422 Handle, Wireform, Door 810-1105 Magnet, Door...
-
Page 93: Controller Assemblies
8.6 Controller Assemblies ITEM PART # 806-7990 Computer, M100B 806-8000 Computer, M100B Standard, Electric 806-8036 Computer, M100B, International 806-8103 Computer, M100B, CE Electric 806-7436 Controller, Full-Vat, MH/BIH14 806-7437 Controller, Dual-Vat, MH/BIH14 * Not Illustrated COMPONENT 8-11... -
Page 94: Drain System Components
8.7 Drain System Components ITEM PART # 823-0718 Drain Tube, Left End, 2.5 x 8.0” 823-0725 Drain Tube, Left End, Dual-Vat, 2.5 x 8.0” 823-1551 Drain Tube, Right End, Dual Vat 823-2636 Drain Tube, Left End, Dual-Vat 823-2637 Drain Tube, Left End, Full-Vat 823-1549 Drain Tube, Right End, Full-Vat 823-1543... - Page 95 8.8 Electrical Components: Contactors, Elements and Related Components 8.8.1 Contactors 1 12 8-13...
- Page 96 ITEM PART # 900-5445 Front Cover, Contactor Box 900-5446 Top Cover, Contactor Box 807-0922 Holder, Buss Fuse 807-2278 Fuse, 20 Amp 807-2515 Relay, 120V SPDT, 10A 816-0217 Paper, Insulating Terminal Block (CE) 810-1164 Terminal Block 807-1973 Terminal Post C1 Wiring Assembly 806-7664SP McDonald’s Domestic, Full-vat 806-7669SP McDonald’s Domestic, Dual-vat 806-8095SP McDonald’s CSA, Full-vat...
-
Page 97: Elements And Related Components
8.8.2 Elements and Related Components Dual-Vat Full-Vat Full-Vat Dual-Vat 8-15... - Page 98 ITEM PART # 826-1339 Bushing, .375 Split (Qty: 10) 809-0567 Ty-Wrap, Metal Heating Element 807-2639 Heating Element, 208V 7 kW 807-2641 Heating Element, 220V 8.5 kW 807-2642 Heating Element, 230V 7 kW 807-2643 Heating Element, 230V 8.5 kW 807-2644 Heating Element, 240V 7 kW 807-2645 Heating Element, 240V 8.5 kW 807-2651...
- Page 99 8.8.3 Hood Relay Box, Power Cords and Hood Cords ITEM PART # 806-9381SP Wire Assembly, CE Mac 806-9389SP Wire Assembly, Non-CE Mac 807-0070 Terminal, Ground Lug 807-1683 Hood Relay, 12VDC 807-1694 Strain Relief, HE 826-1363 Screw, #8- 32 x ½ (Qty: 25) 809-0238 Nut, 4-40 Hex 809-0247...
- Page 100 8.9 Filter Base/Pan Assemblies 8.9.1 Filter Base Assemblies 8-18...
- Page 101 ITEM PART # 806-8648SP Filter Base Assembly, FootPrint III 810-0180 Handle, Filter Base Assembly 826-1360 Screw, #10-24 x 5/16 [Qty: 25 (to attach P/N 810-0180)] 901-8542 Filter Base, Left Side 902-8542 Filter Base, Right Side 823-2289 Filter Pan Support 900-5396 Motor Support 826-1374 Screw, #10-1/2 Hex Head (Qty: 25)
-
Page 102: Filter Pan Assemblies
8.9.2 Filter Pan Assemblies 8-20... - Page 103 ITEM PART # 806-9546SP Filter Pan Assembly, Single FootPrint 806-9547SP Cover Assembly, Filter Pan 809-0045 Nut, 10-32 809-0117 Screw, 10-32 x 3/8 SS 809-0185 Washer, Flat #10 910-1816 Handle, Filter Pan, Single FootPrint 826-1360 Screw, 10-24 x 5/16 (Qty: 25) 810-0005 Caster, Rigid 810-0006...
- Page 104 8.10 Filter Pump and Motor Assemblies Pump orientation required for BIH114 Pump orientation required for BIH214. 314, 414, 514 8-22 Full-Vat Only...
- Page 105 ITEM PART # 806-6118SP Pump and Motor Assembly, 250V 50/60 Hz 826-1269 Motor and Gasket Kit, 230V 50/60 Hz 826-1266 Motor and Gasket Kit, 208V 50/60 Hz 807-1995 Pump, Viking 4 GPM 809-0514 Cap Screw, 5/16-18 Hex Head 809-0194 Washer, Flat 5/16-inch 816-0093 Gasket, Pump/Motor 810-0278...
- Page 106 8.11 Filtration Systems: Oil Return Plumbing and Linkage Assemblies 8.11.1 Oil Return Plumbing Assemblies and Components Manifold assembly for all H214, 314 and 414 fryers manufactured after 9/99. Multiple-battery fryers of five or more require a special one-piece manifold Manifold components for all H214, 314, 414 and 514 fryers manufactured before 9/99.
- Page 107 ITEM PART # 106-0002SP Flex Line Assembly, With Male/Female Ends 813-0062 Elbow, ½-inch 90 813-0469 Cap, Pipe ½-inch 106-0054SP Flex Line Assembly, With Female Ends 813-0165 Elbow, Street, ½ x ½-inch 90 810-0278 Gemini Valve, Without Handle 813-0022 Nipple, ½-inch Close NPT 813-0265 Nipple, ½...
- Page 108 8.11.2 Oil Return Linkage Assemblies and Components ITEM PART # 823-2337 Handle, Oil Return, Left 823-2338 Handle, Oil Return, Right 826-1377 Screw, Set 10-32 x ¼ (Qty: 25) 815-0789 Loctite Threadlocker 242 810-1186 Cam, Microswitch 807-2103 Microswitch 816-0220 Insulation, Microswitch/Bracket 826-1359 Screw, 4-40 x ¾-inch (Qty: 25) 826-1366...
- Page 109 8.12 Frypot Assemblies and Drain Valve Components NOTE: Compression washers, flat washer, plastic washer and #3 (nut) included with #12 (valve). Compression Washers Flat Washer Plastic Washer 8-27...
- Page 110 ITEM PART # 823-2454SP Frypot Assembly, Full-Vat 823-2460SP Frypot Assembly, Dual-Vat Drain Valve Assembly, Dual-Vat 809-0539 Nut, 3/8-16 2-Way Lock 826-1366 Nut, 4-40 Hex (Qty: 25) 901-2348 Cover, Safety Switch, Left DV 902-2348 Cover, Safety Switch, Right DV 807-2104 Microswitch 816-0220 Insulation, Microswitch/Bracket 900-2607...
Need help?
Do you have a question about the H14 Series and is the answer not in the manual?
Questions and answers