
Related Manuals for GreenWorks Pro GPW2200-1


Summary of Contents for GreenWorks Pro GPW2200-1
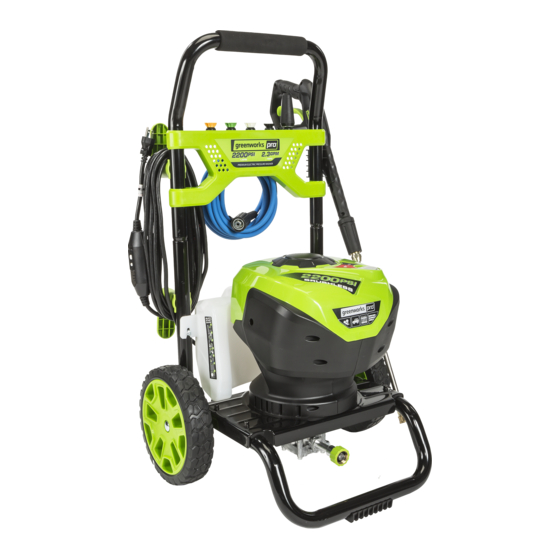
- Page 1 GPW2200-1 PRESSURE WASHER OPERATOR MANUAL LAVEUSE À PRESSION MANUEL DE L’UTILISATEUR PWA203...
-
Page 2: Table Of Contents
English Connect the water supply to the machine..8 Description......... 4 Use the spray gun..........9 Purpose.............. 4 Change the spray tip.......... 9 Overview............4 Add detergent...........10 General power tool safety Start the machine..........11 warnings..........4 Stop the machine..........11 General power tool safety warnings.... -
Page 3: Description
English DESCRIPTION • Learn the machine's applications and limitations as well as the specified potential hazards related to this tool by studying this manual. PURPOSE • Never operate the machine with any guard or cover The machine is used to used to clean vehicles, boats, removed or damaged. -
Page 4: Pressure Washer Safety Warnings
English PRESSURE WASHER SAFETY safety rules in this manual and must be trained and supervised by a parent. WARNINGS • Stay alert, and turn the machine off if a child or any other • Read all the instructions before using the product. person enters the working area. -
Page 5: Risk Levels
English ELECTRICAL CONNECTION Symbol Explanation Keep hands and feet away from the This machine has a precisely built electrical motor. It should cleaning deck while the pressure be connected to a power supply that is 120V, 60 Hz, AC only washer is running. - Page 6 English 3.1.3 INSTALL THE HOSE HOOK 3.1.5 INSTALL THE POWER CORD STORAGE ARM 1. Attach the power cord storage arm (13) onto the fixture. 2. Align the screw (15) with the hole in the power cord storage arm (13). 1. Push the hose hook (16) ends into the clips (17) behind the front panel tightly .
-
Page 7: Operation
English OPERATION 3.1.7 INSTALL THE WHEELS WARNING Make sure that all the connections are tight and have no leakage before operation. CONNECT THE WATER SUPPLY TO THE MACHINE For easy operation, please use a self-coiling garden hose (not provided). WARNING 1. -
Page 8: Use The Spray Gun
English CHANGE THE SPRAY TIP CAUTION There must be a minimum of 3 m of free hose between the water inlet and the water supply. USE THE SPRAY GUN WARNING WARNING Before you change the spray tip: For safe control, keep your hands on the gun at all times. 1. -
Page 9: Add Detergent
English ADD DETERGENT SPRAY TIP APPLICATION Green - Narrow fan tip (25° ) • The green pressure washer tip pro- vides high versatility with its 25 de- gree angle tip. Referred to as the washing tip, because it provides ade- quate pressure to remove dirt from surfaces, but is designed to not dam- age many surfaces. -
Page 10: Start The Machine
English START THE MACHINE WARNING Do not use strong solvents or detergents on the plastic housing or components. WARNING Do not let brake fluids, gasoline, petroleum-based materials touch the plastic parts. Chemicals can cause damage to the plastic, and make the plastic unserviceable. WARNING Replace the power cord by an approved service center. -
Page 11: Transportation And Storage
English TRANSPORTATION AND TROUBLESHOOTING STORAGE PROBLEM POSSIBLE SOLUTION CAUSE WARNING The motor does The power button Set the power Disconnect the power cord and watter supply hose before not start. is in the "OFF" switch to the transportation and storage. (O) position. -
Page 12: Technical Data
English PROBLEM POSSIBLE SOLUTION PROBLEM POSSIBLE SOLUTION CAUSE CAUSE The water supply Open water supply The motor buzzes, The supply volt- Make sure that on- is not sufficient. fully. Check gar- but the machine age is low. ly the pressure den hose for kinks, does not start. -
Page 13: Limited Warranty
English LIMITED WARRANTY YEAR/ANS/AÑOS YEAR/ANS/AÑOS LIMITED WARRANTY MOTOR WARRANTY GARANTIE LIMITÉE GARANTIE MOTEUR GARANTÍA GARANTÍA LIMITADA MOTOR Greenworks hereby warranties this product, to the original purchaser with proof of purchase, for a period of three (3) years against defects in materials, parts or workmanship. Greenworks, at its own discretion will repair or replace any and all parts found to be defective, through normal use, free of charge to the customer. -
Page 14: Exploded View
English EXPLODED VIEW 7 8 910 5.3 5.2 5.1 30.1 30.2 30.4 30.3 17.2 30.5 17.4 17.1 30.6 30.7 17.3 51 50 18 19 20 ITEM NO. PART NO. DESCRIPTION 311201936 Upper handle assy. 349011936 Foam 331031936 Upper handle 33306847 Spring button 322011628 Screw... - Page 15 English ITEM NO. PART NO. DESCRIPTION 342011635 Soap tank cap 341031936 Soap tank 34900365 Pressure hose 364013240 Power cord assy. 311301936 Wheel assy. 17.1 332201936 Axle 17.2 341301936AC 10' wheel assy. 17.3 32908301A Washer 17.4 3320643 R spring pin 331041936 Lower bracket 32222301A M6 Nut...
- Page 16 English ITEM NO. PART NO. DESCRIPTION 322201936 Screw 341421936 Anticreeping protector 341071923 Pressure hose connector 34202368 O-Ring 332031936 Water outlet connector 34125304 Dust cap 312001936 Gun wand 31145363 GW gun assy. 311311635 Pressure hose assy. 33201671 Spray tip cleaner 3411275 Nylon tie 30312301...
Need help?
Do you have a question about the GPW2200-1 and is the answer not in the manual?
Questions and answers