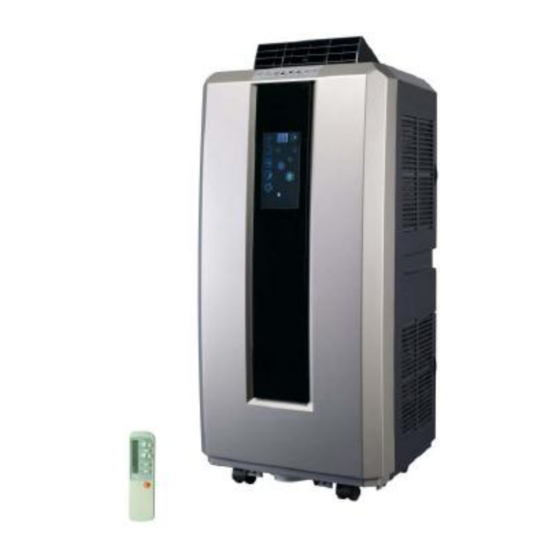
Summary of Contents for Russell Hobbs RHAC12H
- Page 1 INSTRUCTIONS AND WARRANTY PORTABLE AIR CONDITIONER MODEL NO.: RHAC12H DESCRIPTION: Russell Hobbs Portable Aircon 12000 BTU...
-
Page 2: Table Of Contents
Congratulations on purchasing our Russell Hobbs portable aircon. Each unit is manufactured to ensure safety and reliability. Before using this appliance for the first time, please read the instruction manual carefully and keep it for future reference. CONTENTS IMPORTANT SAFEGUARDS…..............3 PLACEMENT AND STALLATION…............5... -
Page 3: Important Safeguards
IMPORTANT SAFEGUARDS Please read following safeguards carefully before using the machine: This machine is designed for domestic use, please do not use it in any other places. ● Please use this machine indoors not outdoors, and place it in a dry environment. ●... - Page 4 Note : ● Place the machine on flat ground, at least 50cm from any objects that may restrict the air flow Make sure the mains socket can be reached from machine’s location. ● Keep the machine upright so that compressor can work well. ●...
-
Page 5: Placement And Stallation
Placement and Installation Placement Place the machine on flat and dry ground, and keep it at least 50cm from other objects. (fig.1) ● (fig.1) Installation Screw the slide bar connector into the exhaust hose first, then fit the exhaust hose ●... - Page 6 Installation Errors The exhaust pipe must contain no sharp bends that may restrict the air flow. Installation errors may ● cause the unit to overheat and shut down. (fig.3) (fig.3) Warning The length of the exhaust pipe is designed to suit the machine. To avoid poor performance or malfunction please do not alter, lengthen or change it with anything except an original replacement part.
-
Page 7: Component Parts
COMPONENT PARTS Front side 1. Air-outlet 2. Control Panel 3. Display Screen 4. Castors Back Side 5. Filter frame upper 6. Power Cord Storage Location 7. Filter frame lower 8. Water outlet Plug cap 9. Exhaust Pipe 10. Carry Handle 11. -
Page 8: Control Panel
Control Panel Timer Sleep Up DOWN Fan Mode Power POWER: press this key to turn on/off machine. After machine turns on, default value is cooling mode with low fan speed. MODE : after machine turns on, press this key to select cooling, dehumidifying, fan and heating mode. -
Page 9: Screen
On –Unit Display Screen 1. Temperature display 2. Cooling mode indicator . Dehumidifying mode indicator 4. Fan only mode indicator 5. Sleeping mode indicator 6. Timer mode indicator 7. Infra red control signal receiver 8. Water full indicator 9. Low fan speed 10. - Page 10 Fan mode Press “ MODE” to select fan mode, fan mode indicator turns on . ● Press “ FAN” to select fan speed (low, medium, high) ● ● Temperature and sleeping function cannot be set. Timer mode Under standby mode, press “TIMER” to setup the power-on time. Timer indicator turns on. ●...
-
Page 11: Remote Control
Remote Control Compressor protection Three minutes later after power on or restart the compressor starts to run. Remote Control with LCD The functions of the remote control work the same as your air conditioner’s touch controls Temperature control set button Sleep mode button LCD screen Timer mode selection button... - Page 12 Installation of the filter (Carbon Filter Optional ) Remove the side filter frame from the unit. Remove the back filter frame from the unit. Separate the filter fixer from the back filter frame. Remove the active carbon filter from its plastic bag.
-
Page 13: Water Dainage
Water Drainage This machine has an auto-water-evaporating system. Condensed water is used to cool down the condenser, which not only improves cooling efficiency, but also saves energy. If inner water tank is full, “ ” will flash on the screen . The machine enters into standby mode; ●... -
Page 14: Maintenance
Maintenance Note: in order to avoid electric shocks, please power-off the machine and pull out the plug from the mains supply before initiating maintenance or repairs. Cleaning Please pull out the mains plug from the socket before cleaning . ● Use soft damp cloth to clean the machine. -
Page 15: Trouble Shooting
Trouble Shooting Please contact a professional serviceman without delay in following situations Trouble Cause Solution Power off Power on Machine Water-full indicator is on Drain water out does not work Direct sunlight Draw the curtains Door and windows are open, so Machine Close the door and windows, remove too much heat is added to the... -
Page 16: Warranty
PLEASE AFFIX YOUR PROOF OF PURCHASE/RECEIPT HERE IN THE EVENT OF A CLAIM UNDER WARRANTY THIS RECEIPT MUST BE PRODUCED. W A R R A N T Y Tedelex Trading (Pty) Limited (“Tedelex”) warrants to the original purchaser of this product (“the customer”) that this product will be free of defects in quality and workmanship which under normal personal, family or household use and purpose may manifest within a period of 1 (one) year from the date of purchase (“warranty period”).


Need help?
Do you have a question about the RHAC12H and is the answer not in the manual?
Questions and answers