Table of Contents
Advertisement
Advertisement
Table of Contents

Related Manuals for Friedrich MR09C1H


Summary of Contents for Friedrich MR09C1H
- Page 1 Models Indoor Unit MW09C1H Outdoor Unit MR09C1H 920-088-01 MW12C1H MR12C1H...
-
Page 3: Table Of Contents
Collection of such waste separately for special treatment is necessary. Image shown in this operating instruction manual here is indicative only. Actual product you receive may differ! ..This symbol stands for the items should be followed Friedrich Air Conditioning , please read this owner's manual... -
Page 4: General Instructions
Congratulations Thank you for your decision to purchase Friedrich. Your new Friedrich has been carefully engineered and manufactured to give you many years of dependable, efficient operation, maintaining a comfortable temperature and humidity level. Many extra features have been built into your unit to assure quiet operation, the greatest circulation of cool, dry air, and the most economic operation. -
Page 5: Notices For Use
Notices for use Working principle and special functions for cooling Principle: Air conditioner absorbs heat in the room and transmit to outdoor and discharged, so that indoor ambient temperature decreased, its cooling capacity will increase or decrease by outdoor ambient temperature. -
Page 6: Working Temperature Range
Notices for use Anti-cool wind function: In "Heat" mode, under the following three kinds of state, if indoor heat exchanger doesn't arrive at certain temp., indoor fan will not 2 mins): 1. Heating starts. 2.After Auto Defrost finished. 3.Heating under the low temperature. Working temperature range Maximum cooling Minimum cooling... -
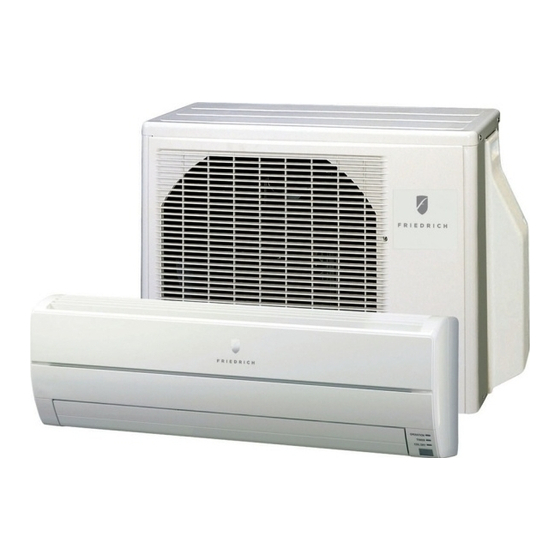
Page 7: Typical Unit Components
Typical Unit Components Indoor unit (Image shown here is indicative only. Actual product you receive may differ) Air inlet Front Panel Display Wrapping Tape Wall Pipe Filter Guide panel Air outlet Wireless remote control Display icon(Only for some Units): Power/Run Receiver Cooling Heating... -
Page 8: Operation Of Remote Controller
Operation of Remote Controller START / STOP Press to start or stop operation. : Press to decrease temperature setting. : Press to increase temperature setting. AUTO Press to set fan speed. MODE Press to select operation mode (AUTO/COOL/DRY/FAN/HEAT). SENSOR CLOCK Press it set clock. -
Page 9: Digital Display
Operation of Remote Controller MODE icon: If MODE button is pressed, current operation mode icon (AUTO), ( COOL), (DRY), (FAN) or only for heat pump models) will show. SLEEP icon : is displayed by pressing the SLEEP button. Press this button again to clear the display. - Page 10 Operation of Remote Controller icon: SENSOR is displayed when pressing the button. Press this button SENSOR again to clear the display. FAN SPEED display: Press FAN button to select the desired fan speed setting (AUTO- Low-Med-High).Your selection will be displayed in the LCD windows, except the AUTO fan speed.
-
Page 11: Remote Control Instructions
Remote Control Instructions START / STOP Press this button to turn on the unit .Press this button again to turn off the unit. Press this button to decrease set rapidly decrease set temperature. In AUTO mode, set temperature is not adjustable. Press this button to increase set temperature. - Page 12 Remote Control Instructions TIMER ON : Press this button to initiate the auto-ON timer. To cancel the auto-timer program, simply press this button again. After pressing this button, setting. Within 5 seconds, press + or - button to adjust the time value. Every press of either button changes the time setting by 1 minute.
- Page 13 Remote Control Instructions SLEEP: Press this button to go into the SLEEP operation mode. Press it again to cancel this function. This function is available in COOL comfortable temperature for you. LIGHT: Press LIGHT button to turn on the display's light and press this button again to turn off the display's light.
-
Page 14: Emergency Operation
Front Panel Illumination On/Off Display indicator light control of indoor unit Display indicator light on: ● Display indicator light off: ● If the wireless remote control is lost or broken, please use the manual switch button. At this time, the unit will run Auto mode, but the temperature and fan speed cannot be changed. -
Page 15: Routine Maintenance
Routine Maintenance Turn power off and pull out the power plug before cleaning air conditioner, or it may cause electric ● ● shock. Never sprinkle water on the indoor unit and the outdoor unit for cleaning because it can cause an ●... -
Page 16: Basic Troubleshooting
Clean air filter. ● Clean air conditioner. ● Please contact an Authorized Friedrich Service Agency When the compressor ● starts or stops running you may here a swoosh or gugle, this isn't a malfunction. - Page 18 Immediately stop all operations and plug out, contact the dealer in following situations There is harsh sound during operation. The terrible odors emitted during operation. Water is leaking in the room. Air switch or protection switch often breaks. splash water or something into unit. Accidently There is an abnormal heat in power supply cord and power plug.
-
Page 19: Service & Assistance
Service & Assistance Troubleshooting" section and still need help, here is a list of available services:... -
Page 20: Installation
Installation The air inlet and outlet vent should be far from the obstruction, make sure that the air can be blown through the whole room. Select a position where the condensing water can be easily drained out, and the place is easily connected for outdoor unit. -
Page 21: Grounding Requirements
● 1. Air conditioner needs to be properly grounded. The yellow-green two-color wire in air conditioner is the grounding wire and cannot be used for any other purpose. Do not cut. requirements Grounding 5 feet. -
Page 22: Typical Unit Dimensions
Typical Unit Dimensions Installation dimension diagram Space to the ceiling 6 in Above Space to the wall 6 in 6 in Above Above Space to the wall 10 ft 8 ft Above Above Air outlet side Space to the floor The dimensions of the space necessary for correct ●... -
Page 23: Install Indoor Unit
Install indoor unit 1.Always mount the rear panel horizontally. Due to the water tray of indoor unit has been adopted the both-way drainage design, the outlet of water tray should be adjusted slightly down when installing, that is taking the outlet of the water tray as the center of a circle, the included angle between the evaporator and level should be 0 or more, that is good for condensing water drainage. -
Page 24: Install The Indoor Unit
Install indoor unit NOTE: When connecting the electric wire if the wire length is not enough, please contact with the authorized service shop to buy a exclusive electric wire that is long enough and the joint on the wire are not allowed. The electric wiring must be correctly connected, wrong connection may cause spare parts ●... -
Page 25: Install Outdoor Unit
Install outdoor unit Disassemble the cable cross plate sub-assy on the outdoor unit right side plate. Take off wire clamp. Connect and fix power connect cord (for cooling and heating unit,connect and fix power connect cord and signal control wire)to terminal of line bank. -
Page 26: Checklist
Checklist Items to be checked Has it been fixed firmly? Have you done the refrigerant leakage test? Is heat insulation sufficient? Is water drainage well? Is the voltage in accordance with the rated voltage marked on the nameplate? Is the electric wiring and piping connection installed correctly and securely? Has the unit been connected to a secure earth connection? - Page 28 Friedrich Air Conditioning Co. 10001 Reunion Place, Suite 500 • San Antonio, Texas 78216 1.800.541.6645 www.friedrich.com 66129907272...
Need help?
Do you have a question about the MR09C1H and is the answer not in the manual?
Questions and answers