Table of Contents
Advertisement
Quick Links
Advertisement
Table of Contents

Related Manuals for Goulds Pumps CWX


Summary of Contents for Goulds Pumps CWX
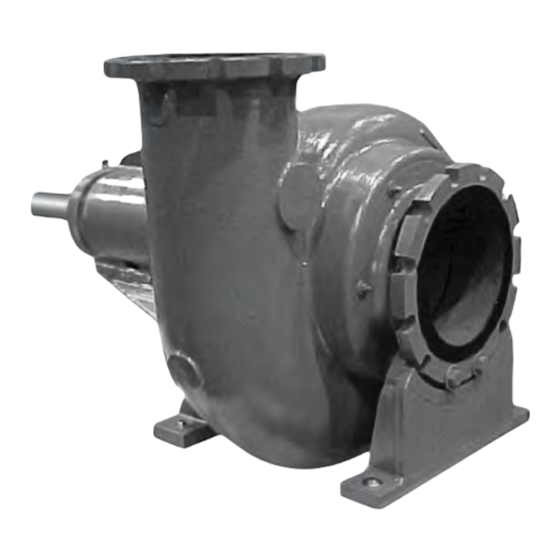
- Page 1 Installation, Operation and Maintenance Instructions...
-
Page 3: Table Of Contents
4.3 Starting ..............................21 4.4 Operating checks ............................ 22 4.5 Shutdown ..............................22 4.6 Freezing protection..........................22 4.7 Field tests ..............................23 4.8 Performance Curve and Guarantee ......................23 4.9 Gage Datum ............................23 CWX Installation, Operation and Maintenance Instructions... - Page 4 5.26 Static Seal Adjustment .......................... 42 5.27 Dynamic Seal Inspection and Maintenance ..................42 5.28 Dynamic Seal Disassembly........................43 5.29 Rotating Element Assembly ........................43 5.30 Assembling to the Pump ........................43 5.31 Replacement parts ..........................43 CWX Installation, Operation and Maintenance Instructions...
- Page 5 6.1 CW and CWR pump-style C-011......................45 7 Parts List C-011 Pump ............................ 46 7.1 Parts list C-011 pump ..........................46 8 CWX Pump - Style C-011..........................47 8.1 CWX pump-style C-011........................... 47 9 Parts List C-011 Pump ............................ 48 9.1 Parts list C-011 pump ..........................
-
Page 6: Introduction And Safety
ITT Goulds pumps will provide safe, trouble-free service when properly installed, maintained, and operat- Safe installation, operation, and maintenance of ITT Goulds Pumps equipment are an essential end user responsibility. This Pump Safety Manual identifies specific safety risks that must be considered at all times during product life. -
Page 7: Safety
Trapped liquid can rapidly expand and result in a violent explosion and injury. ITT Goulds Pumps will not accept responsibility for physical injury, damage, or delays caused by a failure to observe the instructions for installation, operation, and maintenance contained in this Pump Safety Manual or the current IOM available at http://www.gouldspumps.com/literature. - Page 8 Lift equipment only at specifically identified lifting points or as instructed in the current IOM. Current manuals are available at www.gould- spumps.com/literature_ioms.html or from your local ITT Goulds Pumps sales representative. Note: Lifting devices (eyebolts, slings, spreaders, etc.) must be rated, selected, and used for the entire load being lifted.
- Page 9 WARNING Never apply heat to remove an impeller. The use of heat may cause an explo- sion due to trapped fluid, resulting in severe physical injury and property dam- age. CWX Installation, Operation and Maintenance Instructions...
-
Page 10: Parts
1.5 Parts The use of genuine Goulds parts will provide the safest and most reliable operation of your pump. ITT Goulds Pumps ISO certifica- tion and quality control procedures ensure the parts are manufac- tured to the highest quality and safety levels. -
Page 11: Introduction
This design employs a combination static seal and second impeller to eliminate the conven- tional stuffing box. Seal water in the amount of 1/4-1/2 GPM is all that is required. The CW, CWR, and CWX are designated by the pump identification (Nameplate). The Pump Nameplate contains the following information: •... -
Page 12: Installation
Allow enough bolt length for grout, shims, lower baseplate flange, nuts and washers. The foundation should be allowed to cure for several days before the baseplate is shimmed and grouted. CWX Installation, Operation and Maintenance Instructions... -
Page 13: Setting And Aligning Baseplate
3.5 Setting and aligning baseplate Any baseplate may be slightly sprung in shipment or unloading, or be distorted by an uneven sup- port on the foundation or uneven tightening of the foundation bolts. Incorrect piping installation may CWX Installation, Operation and Maintenance Instructions... -
Page 14: Grouting
Approximately 14 days after the grout has been poured or when the grout has thoroughly dried, apply an oil base paint to the exposed edges of the grout to prevent air and moisture from com- ing in contact with the grout. CWX Installation, Operation and Maintenance Instructions... -
Page 15: Universal Joint Spacer Coupling
Replace four cap screws bolting two pieces to- gether. Insert safety wire thru cap screw heads in pairs. CWX Installation, Operation and Maintenance Instructions... -
Page 16: Universal Joint Coupling Lubrication
Mount dial indicators as shown in Figure 4. Scribe index lines to serve as reference points in taking indicator readings. Turn both shafts through a complete revolution, keeping index lines matched with each other. Make several tries, noting the indicator readings. CWX Installation, Operation and Maintenance Instructions... -
Page 17: V-Belt Drive
Bolt torque must not exceed 125 ft. lbs. on flanges. Hard iron is brittle and an over-torque could crack casing. 3.14 Suction Piping When installing the suction piping, observe the following precautions (see Figure 5). CWX Installation, Operation and Maintenance Instructions... -
Page 18: Valves In Suction Piping
(Refer to 3.17 Valves In Discharge Piping on page When foot valves are used, or where there are other possibilities of "liquid hammer", close the discharge valve before shutting down the pump. CWX Installation, Operation and Maintenance Instructions... -
Page 19: Discharge Piping
5-10 psi more than the pump suction pressure. Refer to 3.22 Stuffing Box Operating Pressure on page 18 3.23 Flushing and Lu- brication Water on page CWX Installation, Operation and Maintenance Instructions... -
Page 20: Stuffing Box (C-011)
If this becomes exces- sive, the flow indicator will show it. The gland may be adjusted to a slow drip. The "out" connection from the stuffing box should be closed with this system. CWX Installation, Operation and Maintenance Instructions... - Page 21 The gland may be adjusted to a slow drip. Figure 6: Balanced flush water system Longer packing life and less frequent adjustment are possible with the "Controlled Pressure System" or the "balanced flushing water system" properly installed and operated. CWX Installation, Operation and Maintenance Instructions...
-
Page 22: Packing
The Static Seal portion of the C-022 unit should be checked for proper setting according to "Setting Instruc- tions" in the maintenance section. CWX Installation, Operation and Maintenance Instructions... -
Page 23: Operation
If the pump does not prime properly, or loses prime during start-up, it should be shutdown and the condition corrected before the procedure is repeated. (Pumps moving high temperature liquids.) Open the warm-up valve to circulate liquid for preheating. Close the valve after the pump is warmed up. CWX Installation, Operation and Maintenance Instructions... -
Page 24: Operating Checks
Pumps that are shut down during freezing conditions should be protected by one of the following meth- ods. Drain the pump, remove all liquid from the casing. Keep fluid moving in the pump and insulate or heat the pump to prevent freezing. CWX Installation, Operation and Maintenance Instructions... -
Page 25: Field Tests
Lift Suction lift exists where the total suction head is below atmospheric pressure. Total suction lift is the reading of a liquid manometer at the suction nozzle of the pump, converted to feet of liquid, and referred to the datum minus the velocity head at the point of gage attachment. CWX Installation, Operation and Maintenance Instructions... -
Page 26: Positive Suction Head
Efficiency = Total head x gpm x specific gravity/3960 x Bhp 4.18 Trouble shooting Between regular maintenance inspections, be alert for signs of pump trouble. Common symptoms are listed in the following table. Correct any trouble immediately and avoid costly repair and shut down. CWX Installation, Operation and Maintenance Instructions... - Page 27 See item 5. 22. Air leaks in suction piping. See item 8. 23. Mechanical defects. See items 15 and 17. 24. Obstruction in liquid passages. Dismantle pump and inspect passages of impeller and cas- ing. CWX Installation, Operation and Maintenance Instructions...
- Page 28 If unable to correct troubles with cures outlined above, or if other difficulties develop, contact nearest ITT A·C Pump representative. Describe completely the operation conditions of pump at time of failure along with other pertinent data. CWX Installation, Operation and Maintenance Instructions...
-
Page 29: Lubrication
180ºF. Should the temperature of the bearing frame exceed 180°F (measured by thermometer), shut down pump to determine the cause. 4.21 Oil Reservoir The capacity of the oil reservoir is as follows: CWX Installation, Operation and Maintenance Instructions... -
Page 30: Grease Lubrication
"packed" into the bearings, thus causing the balls to slide rather than roll. If the bearing is pitted, the grease or oil is not preventing corrosion; or dirt and dust may be entering the bearing hous- ing. CWX Installation, Operation and Maintenance Instructions... -
Page 31: Bearing Seal Lubrication
500 hours. NOTICE: If separate instructions are supplied far the coupling, be sure to follow the manufacturer's rec- ommendations. CWX Installation, Operation and Maintenance Instructions... -
Page 32: Maintenance
The servicing of centrifugal pumps after a flooded condition is a comparatively simple matter under nor- mal conditions. Any pump that is properly sealed at all joints and connected to both the suction and CWX Installation, Operation and Maintenance Instructions... -
Page 33: Disassembly
To remove suction wear plate, remove cap screws and washers holding suction wear plate to casing. Take suction wear plate out of cuing. Strip off gasket. 5.6 Rotating Element Remove oil drain cap from nipple on under side of frame and drain oil from bearing housing. CWX Installation, Operation and Maintenance Instructions... -
Page 34: Frame
Remove oil stingers (Item 84) and collar (Item 83) from shaft to prevent its damage while handling the shaft. NOTICE: It is suggested that parts (Item 13) frame linear and (Item 24) frame be kept assembled with (Item 9) adjusting screw unless replacements are needed. CWX Installation, Operation and Maintenance Instructions... -
Page 35: Cleaning
At the frame, check and clean the oil level indicator. Be sure to clean stuffing box cavity and sealing liquid inlet. 5.9 Inspection Inspect all parts for excessive wear or damage. Pay particular attention to the following items: CWX Installation, Operation and Maintenance Instructions... -
Page 36: Repair And Replacement
Fel-Pro No. 35SA - Felt Products Mfg. Co. Durametalllc (alternate rings of gradesB-110 and C-110) - Durametalllc Corp. Garlock No. 644 - Garlock Packing Co. John Crane No. l0lE0 - Crane Packing Co. CWX Installation, Operation and Maintenance Instructions... -
Page 37: Reassembly
Outboard Bearings. Heat bearing in a clean hot-air oven at 200° - 225°F. Install heated bearings on shaft, against shaft shoulder and allow to cool in place. Place inboard bearing cover (22, Figure 13) shaft. Screw shaft into impeller and stand the as- sembly on end. CWX Installation, Operation and Maintenance Instructions... - Page 38 Assemble deflectors on both ends. Remove impeller and place in a horizontal position. Adjust liner to set dimensional A as shown in Figure 9. Replace all plugs and special oil fittings that may have been removed in cleaning. CWX Installation, Operation and Maintenance Instructions...
-
Page 39: Stuffing Box
Apply a thin coat of "white lead" or a similar anti-seize thread compound to threads of shaft. Install impeller on shaft, and tighten securely while holding shaft. CWX Installation, Operation and Maintenance Instructions... -
Page 40: Pump
The following "C", "D" and "Imp. Width" dimensions are nominal for pump shown. If all parts are to nominal size, approximately 1/8" gasket at casingcover joint should be sufficient. As dimensions vary more or fewer gaskets will be necessary, when shimming procedures are followed. (See be- low.) CWX Installation, Operation and Maintenance Instructions... -
Page 41: Impeller Adjustment
Adjust the external flushing liquid to the point where the packing runs only slightly warm, with a slow drip as indicated above. The flushing liquid must be left on, even when the pump is shut down, unless the casing is isolated from the discharge pressure. Pipe away all leakage, CWX Installation, Operation and Maintenance Instructions... -
Page 42: Metallic Packing Adjustment
5.22 Dynamic seal CWR-C-022 Clearance A and B will not affect performance and stuff box pressure appreciably as wear occurs at these points. The ribbed impeller minimizes recirculation through these points keeping wear at a mini- mum. CWX Installation, Operation and Maintenance Instructions... -
Page 43: General
The suction head must be established when the unit is sold. CWX Installation, Operation and Maintenance Instructions... -
Page 44: Construction
Pump and Dynamic Seal are still in good condition, the operating period may be in- creased by a month, By maintaining a time schedule and a record of inspection and replacement parts, an optimum inspection and maintenance program can be established. CWX Installation, Operation and Maintenance Instructions... -
Page 45: Dynamic Seal Disassembly
Quantity of each part Material desired (if different than original material). (Parts will be furnished in original ma- terials unless specified as a material change, All material substitutions should be dis- cussed with the factory.) CWX Installation, Operation and Maintenance Instructions... -
Page 46: Variable Drive Requirements
VARI-PITCH drives can be used also when ratings must fluctuate. Other adjustable speed devices such as liquid couplings, mechanical speed changers may be used effectively to obtain the de- sired output speed. A compact V-belt drive arrangement using an overhead base is also available. CWX Installation, Operation and Maintenance Instructions... -
Page 47: Cw And Cwr Pump-Style C-011
6 CW and CWR Pump-Style C-011 6 CW and CWR Pump-Style C-011 6.1 CW and CWR pump-style C-011 CWX Installation, Operation and Maintenance Instructions... -
Page 48: Parts List C-011 Pump
Screw, Casing - Frame 84 5-486-0 OU Slinger Collar 29 2-909-2 Washer, Casing- Frame 85 2-909-9 Washer, Bevel 30 2-903-1 Nut, Locking *Recommended spare parts - see paragraph 4-31. **2 bearings required on F6F frames. CWX Installation, Operation and Maintenance Instructions... -
Page 49: Cwx Pump - Style C-011
8 CWX Pump - Style C-011 8 CWX Pump - Style C-011 8.1 CWX pump-style C-011 CWX Installation, Operation and Maintenance Instructions... -
Page 50: Parts List C-011 Pump
83 5-485-0 Oil Slinger 28 2-904-2 Screw, Casing - Frame 84 5-486-0 Oil Slinger Collar 29 2-909-2 Washer, Casing Frame 85 2-909-9 Washer, Bevel 30 2-903-1 Nut, Locking *Recommended spare parts- see paragraph 4-31. CWX Installation, Operation and Maintenance Instructions... -
Page 51: Cwr Pump - Style C-022
10 CWR Pump - Style C-022 10 CWR Pump - Style C-022 10.1 CWR pump-style C-022 CWX Installation, Operation and Maintenance Instructions... -
Page 52: Parts List C-022 Pump
Nut, Locking 84 5-486-0 Oil Slinger Collar 31 2-909-0 Washer 85 2-"909-9 Washer, Bevel 39 2-908-1 Stud *Recommended spare parts - see paragraph 4-31. **2 bearings required on F6F frames. Visit our website at http://www.gouldspumps.com CWX Installation, Operation and Maintenance Instructions... - Page 53 Visit our website for the latest version of this document and more information: www.gouldspumps.com ITT Goulds Pumps, Inc. 240 Fall Street Seneca Falls, NY 13148 Form IOM.CWX.en-US.2022-03 ©2022 ITT Corporation The original instruction is in English. All non-English instructions are translations of the original instruction.