Table of Contents
Advertisement
Quick Links
Advertisement
Table of Contents

Subscribe to Our Youtube Channel
Related Manuals for Breezy Exigo 30


Summary of Contents for Breezy Exigo 30
- Page 1 MANUAL WHEELCHAIR USER MANUAL Exigo 30 MB3197-D...
-
Page 2: Introduction
Intended use and the intended user environment Exigo 30 is designed for both indoor and outdoor use. The user This wheelchair has been developed for persons with disabilities and as an aid for those who have problems with walking. - Page 3 INTRODUCTION NOTE: General user advice. Not following these instructions may result in physical injury, damage to the product or damage to the environment! Notice to the user and/or patient: Any serious incident that has occurred in relation to the device should be reported to the manufacturer and the competent authority of the Member State in which the user and/or patient is established.
-
Page 4: Table Of Contents
CONTENTS Introduction .................... 2 Contents ....................4 The wheelchair’s parts ................5 Assembly and transport ................ 6 Area of application ................7 Using the wheelchair................8 Adjusting the chair ................14 Positioning belt ................... 25 Safety ....................26 Safety in cars ..................27 Maintenance .................. -
Page 5: The Wheelchair's Parts
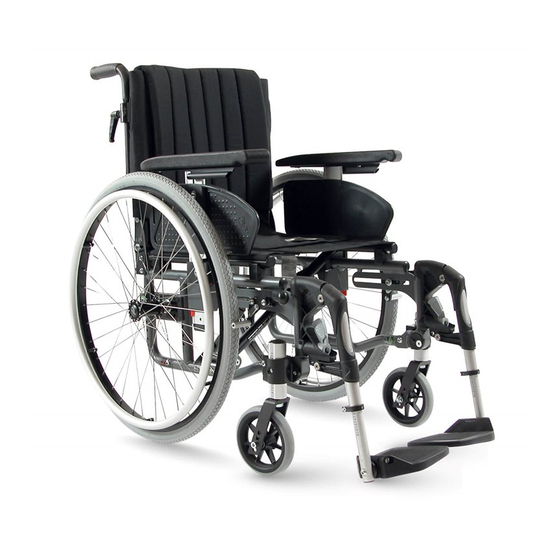
THE WHEELCHAIR’S PARTS In order to be able to read and understand this manual it is important that you familiarise yourself with the most common terms we use for the different parts of the wheelchair. Have a look at the following drawing and note the relevant parts on your wheelchair. The equipment on your wheelchair may vary somewhat from the illustration below. -
Page 6: Assembly And Transport
ASSEMBLY AND TRANSPORT Assembly Figure 2 The standard version is delivered complete. All you need to do is unfold the wheelchair and fit the leg supports where necessary. Unfolding the wheelchair Figure 3 To unfold the wheelchair, press down with the flat of your hand on the cover by the seat tubing. -
Page 7: Area Of Application
AREA OF APPLICATION Indications The varieties of fitting variants, as well as the modular design, mean that it can be used by those who cannot walk or have limited mobility because of: • Paralysis • Loss of extremity (leg amputation) •... -
Page 8: Using The Wheelchair
USING THE WHEELCHAIR Quick-release Figure 5 The wheelchair has a quick-release catch on the driving wheels. Press the button in the middle of the driving wheel in order to remove or attach the wheel. Check that the wheel is properly secured by ensuring that the button pops out approximately 5 mm when the wheel bolt is completely in the casing. - Page 9 USING THE WHEELCHAIR Swing out/Attach/Remove the leg supports Figures 8 and 9 The leg supports can be swung in/out and removed for easier movement. The supports can be released by twisting the handle (8A) inwards or outwards when the leg support is swung.
- Page 10 USING THE WHEELCHAIR Full footplate (Standard on Exigo 30 X wheelchairs) Figure 10 The full footplate can be split in two and tipped up for transfers. Ensure that the footplates lock in place when you put them back down. The footplates lock most easily into place if they are angled right in to each other when you put them Back down (see figure 10).
- Page 11 USING THE WHEELCHAIR Using the brakes Figure 13 Push the brake lever forward and down when you want to lock the brake. Warning! The brake is only designed to hold the chair when it is stationary. Under no circumstances should it be used as a driving brake.
- Page 12 USING THE WHEELCHAIR Moving in and out of the wheelchair Figures 16, 17 and 18 • Activate the brakes • Swing the leg supports away, where applicable • Sit far forward on the chair before moving to another chair, bed etc. Figure 16 Figure 17 Figure 18...
- Page 13 USING THE WHEELCHAIR Negotiating obstacles, stairs Figures 19 and 20 If the wheelchair is being lifted up/down stairs with the user sitting in it, the recommended lifting points should be used. These are marked on the product. The lifting points are the pushing handles and the leg supports.
-
Page 14: Adjusting The Chair
ADJUSTING THE CHAIR Exigo 30 has measuring scales that help you to adjust the chair accurately The following adjustments can be carried out quicker and more accurately using the different measuring scales: • Seat height – back Page 13 and 15 The scale shows the seat height in relation to the driving wheels. - Page 15 ADJUSTING THE WHEELCHAIR Adjusting the seat height The seat height can easily be adjusted. You can also change the angle of the seat by having different heights at the front and back. By changing the angle of the seat, you can achieve better stability and seating comfort.
- Page 16 ADJUSTING THE WHEELCHAIR Adjusting the seat height – front Figures 24 The seat height at the front can be adjusted using Castor wheel fork the methods below. Bearing housing Moving the bearing housing of the castor wheel up or down (see page 17). By moving the bearing housing up, the seat is lowered, and by moving it down, the seat is Castor...
- Page 17 ADJUSTING THE WHEELCHAIR Adjusting the seat height – back Figures 25 and 26 On the wheelchair frame you will find a measuring scale (26A) showing the seat height in relation to the size of the driving wheel • Remove the driving wheel •...
- Page 18 ADJUSTING THE WHEELCHAIR Adjusting the centre of gravity Figures 27 and 28 The driving wheel can be adjusted to five different positions in relation to the centre of gravity. This is shown on the scale (27A) on the wheel block. Position 1 represents the best anti-tipping position.
- Page 19 ADJUSTING THE WHEELCHAIR Adjusting the seat height - front Figures 29, 30 and 31 When adjusting the height of the wheelchair, the height of the driving wheels should be regulated before the angle. There is a scale for adjusting both the height and angle of the castor wheels, which helps to achieve equal measurements on both castor wheels.
- Page 20 ADJUSTING THE WHEELCHAIR Adjusting the height of the back Figure 32 In order to access the back tubing when adjusting the back height, open the “lid” (32C) in the back cover. The measuring scale (32A) shows the back height. For easier access to the back tubing, raise the pushing handle.
- Page 21 ADJUSTING THE WHEELCHAIR Adjusting the curvature of the back Figure 35 The wheelchair has a padded back that can be adjusted to the curvature of the back in order to achieve a comfortable sitting position and good stability. The user can sit in the wheelchair when adjustments are being made for the curvature of the back.
- Page 22 ADJUSTING THE WHEELCHAIR Adjusting the anti-tip stabiliser Figure 38 Adjust the anti-tip stabiliser when you have changed the centre of gravity of the wheelchair. Loosen screw (38A). Pull or push the anti-tip stabiliser to the correct position so that the measurement on the stabiliser’s measuring scale corresponds to the driving wheel position.
- Page 23 ADJUSTING THE WHEELCHAIR Adjusting the seat depth Figures 41, 42 and 43 Adjust the depth of the seat by pulling or pushing the seat cover until the correct seat depth is achieved. • Loosen the overlapping velcro (41A) in the seat fabric •...
- Page 24 Loosen the screw (44C) and push the clothes protector up or down. Re-tighten the screw. (The clothing protector cannot be adjusted on Exigo 30 in seat width 54–60.) Figure 44 Adjusting the depth of the armrests...
-
Page 25: Positioning Belt
POSITIONING BELT Fitting the hip belt (accessory) Figures 46, 47 and 48 • Unscrew the screw (46A). Use a 4 mm Allen key. • Fit the hip belt as shown in figure 47. Use the screw you removed. • Check that the hip belt is correctly adapted to the wheelchair user. -
Page 26: Safety
In order to ensure that the wheelchair does not move at unwanted times, ensure that the brake is locked in position. • The maximum weight capacity for Exigo 30 is 135 kg. • You should inspect the wheelchair regularly in order to ensure that all screws, bolts and other fastenings are properly secured. -
Page 27: Safety In Cars
• The front tubing of the side frame, above the bearing housing Figure 49 Warning! Sunrise relinquishes itself of all responsibility in the event that Exigo 30 is used as a passenger seat in a car using a different fastening system to the one mentioned above. MB3197-EN... - Page 28 SAFETY IN CARS Fastening the seat belt: • The pelvic-belt restraint must be fastened at as steep an angle as possible; between 30° and 75° • The shoulder-belt restraint is fastened over the shoulder and chest • The seat belt is fastened as tightly to the body as possible and must not be twisted •...
- Page 29 SAFETY IN CARS d) Both the stomach and chest belts should be used to reduce the risk of head and chest injuries in the event of colliding with parts in the car. e) In order to reduce the risk of injury to the user, tables that are fitted to the wheelchair, which are not designed for crash safety, must •...
-
Page 30: Maintenance
MAINTENANCE Maintenance covered in this section can be carried out by the user. Other maintenance work should be undertaken by the supplier’s qualified personnel in your area or by the help centre. For information concerning repairs or service, please apply to the help centre in your county. Washing the frame The frame should be washed regularly with mild soapy water. - Page 31 MAINTENANCE Quick-release catch on wheels The quick-release catch on the driving wheels requires regular inspection. Check that the bearings work properly. The release bolt and bearings should be cleaned and greased with oil regularly. Recommended air pressure The wheelchair is delivered as standard with solid wheels. Find where the size is given on the driving wheel/castor wheel, then find the recommended maximum air pressure in the table.
- Page 32 MAINTENANCE Repairs Apart from minor enamel repairs, change of tyres, tubes and adjusting the brakes, all repairs must be carried out by the supplier’s qualified personnel in your area or at the help centre. For information regarding repairs or service, enquire at the help centre in your county. Changing inflated tyres Figure 51 Inflated tyres are accessories.
-
Page 33: Technical Specifications
TECHNICAL SPECIFICATIONS Technical specifications and dimensions The wheelchair is delivered as standard in several different seat heights and seat widths. The height that best suits the user of the wheelchair depends on two factors: The height of the user and how the wheelchair will be operated. - Page 34 NS-EN 1021-2 Ignition source: Match flame equivalent 1) Exigo 30 in seat width 54 cm, 57 cm and 60 cm exceeds the maximum required dimensions for public access, it might not be fit for transport in public means for transportation like train, busses or get access to public facilities like toilets.
-
Page 35: Labelling
LABELLING Exigo 30 Product Name/SKU Number. Maximum safe slope with anti-tip tubes fitted, Depends on wheelchair setting, posture and physical capabilities of the user. max X° Seat width. XXX mm Seat depth. XXX mm Load Maximum. XXX kg CE Mark. -
Page 36: Accessories
ACCESSORIES Driving wheel and driving wheel fastening Armrests and clothes protector • Driving wheel fastening with Impera wheel • Armrests with short pads, standard height block (enables the camber angle to be • Armrests with long pads, high adjusted) • Armrests with short pads, high •... -
Page 37: Guarantee
GUARANTEE Warranty Definitions of terms Definitions of terms used in this warranty: • Consumable part: Part that is subjected to natural wear and tear or natural contamination during normal operation within the lifetime of the product (section 9 of Sunrise’s general terms and conditions of sale);... - Page 38 GUARANTEE Warranty period table Examples include, but are not limited Description Warranty period to the parts mentioned below Frame 5 years Weldment/frame New: 1 year after invoice Service Parts Brakes Repaired: 90 days after invoice Seat- and back textiles, wheels, Consumable parts 40 days after invoice griphandles etc.
- Page 39 NOTES Warning: The content of this user manual is only intended as information. This information may be changed without warning and must not therefore be interpreted as an obligation on the part of Sunrise Medical. Sunrise Medical is not responsible, either legally or financially, for any errors or inaccuracies that may appear in this user manual.
- Page 40 Sunrise Medical S.r.l. Sunrise Medical GmbH Via Riva, 20 – Montale Kahlbachring 2-4 29122 Piacenza 69254 Malsch/Heidelberg Italia Deutschland Tel.: +39 0523 573111 Tel.: +49 (0) 7253/980-0 Fax: +39 0523 570060 Fax: +49 (0) 7253/980-222 www.SunriseMedical.it www.SunriseMedical.de Sunrise Medical AG Sunrise Medical Erlenauweg 17 Thorns Road...
Need help?
Do you have a question about the Exigo 30 and is the answer not in the manual?
Questions and answers