Table of Contents
Advertisement
Advertisement
Table of Contents

Related Manuals for Carrier RTU OPEN 11-808-427-01


Summary of Contents for Carrier RTU OPEN 11-808-427-01
- Page 1 CARRIER CORPORATION ©2010 A member of the United Technologies Corporation family · Stock symbol UTX · Catalog No. 11-808-427-01 · 11/19/2010...
-
Page 3: Table Of Contents
Table of Contents Introduction ... 1 What is the RTU Open controller? ... 1 Specifications ... 3 Safety considerations... 4 Installation ... 5 Field-supplied hardware ... 5 To mount the RTU Open ... 6 To wire the controller for power... 7 Using the rooftop equipment control power transformer ... - Page 4 Table of Contents Wiring a status switch ... 31 Wiring specifications ... 31 To wire a status switch to the controller ... 32 Wiring a compressor safety ... 32 Wiring specifications ... 32 To wire a compressor safety input to the controller ... 33 Wiring an occupancy switch or door contact ...
- Page 5 Linkage ... 71 I/O Points ... 71 Appendix B: Single Point Linkage and Device Address Binding ... 73 Single Point Linkage ... 73 Device Address Binding ... 74 Index ... 75 RTU Open Table of Contents...
-
Page 7: Introduction
Introduction What is the RTU Open controller? The RTU Open controller is available as an integrated component of a Carrier rooftop unit, or as a field- installed retrofit product. Its internal application programming provides optimum rooftop performance and energy efficiency. RTU Open enables the unit to run in 100% stand-alone control mode or it can communicate to the Building Automation System (BAS). - Page 8 Introduction RTU Open...
-
Page 9: Specifications
Specifications RTU Open driver Power Access port Rnet port Comm Option port Inputs Binary outputs Analog output Output resolution Real-time clock Battery Protection Status indicators Environmental operating range RTU Open drv_rtuopn_std 24 Vac ±10%, 50–60 Hz 20 VA power consumption (26 VA with BACview 26 Vdc (25 V min, 30 V max) Single Class 2 source only, 100 VA or less To connect a BAC... -
Page 10: Safety Considerations
Introduction Overall dimensions Mounting dimensions Panel depth Weight BACnet support Listed by Safety considerations Disconnect electrical power to the RTU Open before wiring it. Failure to follow this warning could cause electrical shock, personal injury, or damage to the controller. 6-1/2 in. -
Page 11: Installation
Installation To install the RTU Open: Mount the controller (page 6). Wire the controller for power (page 7). Using the rooftop equipment control power transformer (page 7). ○ Using an auxiliary control power transformer (page 8). ○ Set the controller's address (page 9). Wire inputs and outputs (page 12). -
Page 12: To Mount The Rtu Open
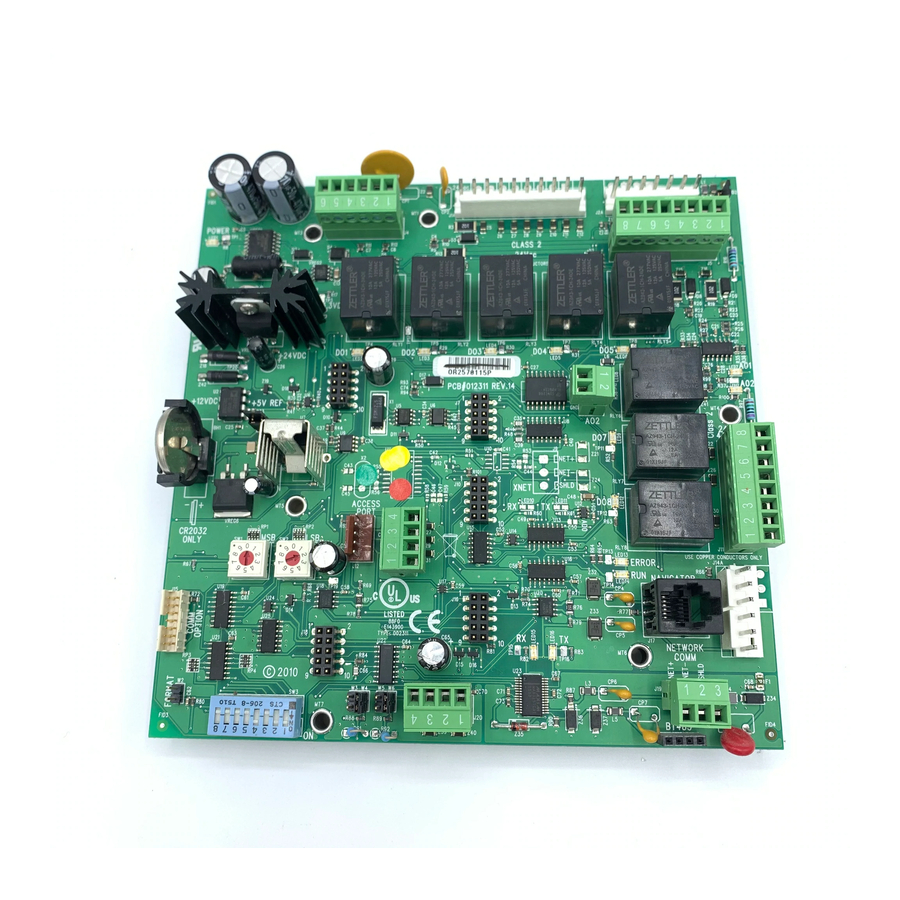
Installation To mount the RTU Open When you handle the RTU Open: • Do not contaminate the printed circuit board with fingerprints, moisture, or any foreign material. • Do not touch components or leads. • Handle the board by its edges. •... -
Page 13: To Wire The Controller For Power
Screw the RTU Open into an enclosed panel using the mounting slots on the cover plate. Leave about 2 in. (5 cm) on each side of the controller for wiring. To wire the controller for power CAUTIONS The RTU Open is powered by a Class 2 power source. Take appropriate isolation measures when ○... -
Page 14: Using An Auxiliary Control Power Transformer
Installation If the rooftop equipment has thermostat connection terminals, connect wiring harness J1 wire 1 to R, and J1 wire 3 to C. Alternately, connect the control power transformer wires to J1 connector wires 1 (24 Vac) and 3 (Gnd). Apply power to the rooftop equipment. -
Page 15: To Set The Rtu Open's Address
Optional Safety chain devices, field-installed - normally closed. Apply 24 Vac to this terminal (jumper from J1 - 1 to J1 - 9) where no safety devices are installed. Fire shutdown device, field-installed, configurable as normally open or closed Enthalpy switch, field-installed - configurable as normally open or closed To set the RTU Open's address The RTU Open's two rotary switches determine the RTU Open's MAC address when it is placed on an MS/TP network. -
Page 16: To Set The Rtu Open's Communications Protocol And Baud Rate
RTU Open's SW3 DIP switches are used to set the controller's protocol and baud rate. The protocol and speed selection is determined by the network on which the controller will be installed. For Carrier BACnet implementations, select MS/TP @ 76.8 k as follows: Power down the RTU Open. -
Page 17: Wiring Specifications
Install a BT485 on the first and last controller on a network segment to add bias and prevent signal distortions due to echoing. See the MS/TP Networking and Wiring Installation Guide for more details. Wiring specifications Cable: Maximum length: To wire the controller to the network Pull the screw terminal connector from the controller's power terminals labeled Gnd and 24 Vac or Hot. -
Page 18: Wiring Inputs And Outputs
Installation Wiring inputs and outputs Channel Type Signal Function Number Input 1 4-20 mA Space Relative Humidity Input 2 4-20 mA Space Relative Humidity Input 3 24 Vac Compressor Safety ** Fan Status Filter Status Remote Occupancy Door Contact Input 4 24 Vac Safety Chain * Input 5... -
Page 19: Input Wiring Specifications
Channel Type Signal Function Number BO - 8 N/A - Relay Power Exhaust Legend - Analog Input - Analog Output - Digital Input - Digital Output Safety Chain Feedback - 24 Vac required at this wire to provide safeties are utilized. See To wire inputs and outputs terminations. -
Page 20: Binary Outputs
Input 10 mA Jumper Input 10 Thermistor Jumper *Formatting the controller may result in lost information and should only be done under the guidance of Carrier Control Systems Support. 0 - 10 Vdc/4-20 mA In (Do not remove) Out (mA not utilized on this channel) - Page 21 Optional Safety chain devices, field-installed - normally closed. Apply 24 Vac to this terminal (jumper from Fire shutdown device, field-installed, configurable as normally open or closed Enthalpy switch, field-installed - configurable as normally open or closed J4 Inputs Turn the RTU Open's power. Connect the input and output wiring to the screw terminals on the RTU Open.
-
Page 22: Compressor Safety
Installation NOTE J4 Analog Inputs 1 and 2 may be set for the following device types: IAQ Sensor ○ OAQ Sensor ○ Space RH Sensor ○ J5 Inputs The terminals for Inputs 3, 5, and 8 are available for use in place of the flying wire leads at Molex connectors NOTE J5 binary inputs 3, 5, and 8 are the same input channels as:... -
Page 23: Additional Functions
These terminals are available for use in place of the flying wire leads at Molex connectors Binary inputs are configurable and may be used for the following functions: Input Default input function Compressor Safety Fire Shutdown Enthalpy Switch HumidiStat J11 Outputs RTU Open Additional functions Fan Status... -
Page 24: Wiring Sensors To Inputs
NOTE This document gives instructions for wiring the sensors to the RTU Open. For specific mounting and wiring instructions, see the Carrier Sensors Installation Guide. All field control wiring that connects to the RTU Open must be routed through the raceway built into the corner post. -
Page 25: Field-Supplied Sensor Hardware
(page 28) Return air enthalpy sensor (page 28) Filter status switch (page 31) Fan status switch (page 31) For specific details about sensors, see the Carrier Sensors Installation Guide. RTU Open Part numbers Notes SPS, SPPL, SPP, 33ZCT55SPT, 33ZCT56SPT, 33ZCT59SPT... -
Page 26: Wiring An Spt Sensor
• If the Rnet has multiple SPT Standard sensors, you must give each a unique address on the Rnet. See the Carrier Sensors Installation Guide. • If the Rnet has multiple BACviews, you must give each a unique address on the Rnet. See the BACview Installation and User Guide. -
Page 27: To Wire The Spt Sensor To The Controller
Strip about .25 inch (.6 cm) of the inner insulation from each wire. .25 in. Inner insulation (.6 cm) Wire each terminal on the sensor to the same terminal on the controller. See diagram below. NOTE Carrier recommends that you use the following Rnet wiring scheme: Connect this wire... Black White Green... -
Page 28: Wiring Specifications
Installation Wiring specifications Cable from sensor to controller: Maximum length: To wire the SAT sensor to the controller Connect the wiring harness (OPN-RTUHRN). For details, see To wire inputs and outputs (page 14). Wire the sensor to the wiring harness. See diagram below. Connect to J2 wires 1 and 2. -
Page 29: To Wire A Duct Sensor To The Controller
To wire a duct sensor to the controller Connect the wiring harness (Part#OPN-RTUHRN). For details, see To wire inputs and outputs (page 14). Wire the sensor to the wiring harness. See diagram below. Connect to J2 wires 1 and 2. Verify your sensor readings. -
Page 30: Wiring A Co2 Sensor
Installation Connect to J2 wires 3 and 4. Verify your sensor readings. Wiring a CO2 sensor Part #33ZCSENCO2 (Display model) Part #33ZCT55CO2 (No display) Part #33ZCT56CO2 (No display) A CO sensor monitors carbon dioxide levels. As CO dampers to increase ventilation and improve indoor air quality. A CO mounted in a return air duct. -
Page 31: Wiring An Outdoor Air Quality Sensor
Wiring diagram for #33ZCSENCO2: Wiring diagram for #33ZCT55/56CO2: Wiring an Outdoor Air Quality sensor Part #33ZCSENCO2 (Display model) An outdoor air quality (OAQ) sensor monitors outside air carbon dioxide levels. The RTU Open uses this information, in conjunction with a CO2 sensor, to adjust the outside air dampers to provide proper ventilation. An OAQ sensor is typically duct-mounted in the outside air stream. -
Page 32: Wiring Specifications
Duct sensor - Part #OPNSENRH-01 The Relative Humidity (RH) sensor may be used for zone humidity control (dehumidification) when applied to a Carrier rooftop unit equipped with the Humidi-MiZer™ option. On units not equipped for dehumidification, the sensor monitors humidity, but provides no control. -
Page 33: Wiring Specifications
Wiring a Humidistat Locally Purchased A humdistat may be used for zone humidity control (dehumidification) when applied to a Carrier rooftop unit equipped with the Humidi-MiZer™ option. On units not equipped for dehumidification, the humidistat will indicate a high humidity condition only. -
Page 34: To Wire A Humidistat To The Controller
Installation To wire a humidistat to the controller Strip the outer jacket from the cable for at least 4 inches (10.2 cm). Strip .25 inch (.6 cm) of insulation from each wire Wire the humidistat to the controller. See diagram below. Apply power and verify sensor readings. -
Page 35: To Wire An Enthalpy Switch (Outdoor Air) To The Controller
To wire an enthalpy switch (outdoor air) to the controller An enhalpy switch is typically mounted in the outdoor air inlet. Wiring diagram for a field-installed enthalpy switch: NOTES • Factory-installed enthalpy switches terminate at J2 wires 6 (switch input) and 7 (24 Vac). •... -
Page 36: To Wire An Enthalpy Switch (Differential) To The Controller
Installation Wiring diagram for factory-installed enthalpy switch: NOTE Factory-installed enthalpy switches terminate at J2 wires 6 (switch input) and 7 (24 Vac). To wire an enthalpy switch (differential) to the controller RTU Open... -
Page 37: Rtu Open I
Wiring diagram for optional enthalpy sensor mounted in the return air for differential enthalpy: Wiring a status switch Filter - Part #33CSFS-01 or field-supplied Fan status - Part #33CSAS-01 or field-supplied Filter and/or fan status switches may be installed to provide a Dirty Filter indication or Fan Running status. Wiring specifications Cable from sensor to controller: Maximum length:... -
Page 38: To Wire A Status Switch To The Controller
Installation To wire a status switch to the controller NOTES • Binary inputs 3, 5, 8, and 9 are configurable and may be used for Fan Status, Filter Status, Remote Occupancy, or Door Contacts, if they have not already been used for their default functions. •... -
Page 39: To Wire A Compressor Safety Input To The Controller
To wire a compressor safety input to the controller NOTES • An isolation relay may be required if the RTU Open is powered separately from the equipment's control power circuit. • Follow device manufacturer's installation and operating instructions. Wiring an occupancy switch or door contact Occupancy switch - field-supplied Door contact - field-supplied Occupancy or door contact switches may be installed to provide an alternate means of occupancy... -
Page 40: To Wire An Occupancy Switch Or Door Contact
Installation To wire an occupancy switch or door contact NOTES • Binary Inputs 3, 5, 8, and 9 are configurable and may be used for Fan Status, Filter Status, Remote Occupancy, or Door Contacts - provided they have not been utilized for their default functions. •... -
Page 41: Start-Up
Start-up To start up the RTU Open, you need one of the following user interfaces to the controller. These items let you access the controller information, read sensor values, and test the controller. This interface... i-Vu Open software Field Assistant software - runs on a laptop connected to controller's Local Access port Virtual BACview software - runs on a laptop connected to controller's Local Access port... -
Page 42: Service Test
Start-up Service Test Navigation: i-Vu / Field Assistant: BACview: Service Test can be used to verify proper operation of compressors, heating stages, indoor fan, power exhaust fans, economizer, and dehumidification. It is highly recommended to use Service Test at initial system start-up and during troubleshooting. -
Page 43: Configuring The Rtu Open's Properties
• Use Power Exhaust Test to activate and deactivate the power exhaust (BO - 8) output. • Use Economizer Test to set the (AO - 1) economizer output to any value from 0 to 100% of configured output (2-10 Vdc or 4-20 mA). •... - Page 44 Start-up Point Name/Description Input 2 Function – The type of sensor (4-20 mA) connected to terminals J4 – 1, 2, & 3. Input 3 Function – The usage of Input 3. You must also set Input 3 Switch Configuration Options: No Function –...
-
Page 45: Setpoint Properties
Point Name/Description Switch Configuration – The normal (de-energized) state for the set of contacts Input 9 terminated at Input Space sensor type - The type of local space temperature sensor. Setpoint properties Navigation: i-Vu / Field Assistant: BACview: Select a color band on the setpoint graph to see the current setpoints in the Heating and Cooling fields. See setpoint descriptions below. -
Page 46: Service Configuration Properties
HP O/B Ctrl – Heat Pump application, uses reversing valve output to control heating and cooling. HP Y1/W1 Ctrl – Carrier Heat Pump application only. Compressor Stages – The number of mechanical cooling stages. Economizer Exists – Set to Yes to enable economizer control for units equipped with an economizer damper. - Page 47 Point Name/Description Continuous Occupied Exhaust – Configures the exhaust fan control strategy (BO-8). If Yes, the power exhaust runs continuously in occupied mode and is off in unoccupied mode. If No, the power exhaust is controlled by the Indoor CO2 Sensor Value @min (ma) the appropriate input channel.
-
Page 48: Sequence Of Operation
Standard heat/cool unit types with up to 2-stages of mechanical cooling and gas or electric heating • Heat pump units utilizing a reversing valve output for heating and cooling control • Heat pump unit (Carrier) with an OEM control board • Economizer, CO2, Demand Limiting, and RH control strategies are available for appropriately equipped units The RTU Open may operate as part of a linked VVT system or as a stand-alone controller. -
Page 49: Supply Fan
Supply fan The RTU Open supply fan may be configured for one of three Fan Modes: • Auto - The fan cycles on/off in conjunction with heating or cooling • Continuous - The fan runs continuously during occupancy and intermittently during unoccupied periods with heating or cooling •... -
Page 50: Economizer
Sequence of Operation The cooling relays are controlled by the Cooling Control PID Loop and Cooling Stages Capacity algorithm. They calculate the desired number of stages needed to satisfy the space by comparing the Space Temperature to the: • Effective Occupied Cooling Setpoint when occupied •... -
Page 51: Unoccupied Free Cooling
Unoccupied Free Cooling Unocc Free Cool Enable allows rooftop equipment with an economizer damper to utilize outdoor air for free cooling during unoccupied periods. The following conditions must be true for unoccupied free cooling to operate: • Unocc Free Cool Enable set to Enable •... -
Page 52: Enthalpy Control
Sequence of Operation The actual equation that the controller uses to calculate Optimal Start is nonlinear. An approximation of the result is shown below. To change Optimal Start settings: In the navigation tree, select the equipment that you want to change. Click Properties page >... -
Page 53: Heating
The following conditions must be true for the Indoor Air CO2 algorithm to operate: • The system is occupied • The supply fan has been started for at least 30 seconds • The CO2 sensor has a valid reading As the air quality within the space changes, the minimum position of the economizer damper changes, which allows more or less outdoor air into the space, depending on the relationship of the indoor air CO2 level to the differential setpoint. -
Page 54: Heat Pump Operation
Dehumidification The RTU Open provides occupied and unoccupied dehumidification on units that are equipped with the Carrier Humidi-MiZer™ option from the factory. This requires a space relative humidity sensor or a humidistat for control. The following conditions must be true for the dehumidification control to operate: •... -
Page 55: Demand Limit
Compressor Safety may be configured on Binary Input 3. A compressor safety tripped indicator circuit is available on most Carrier rooftop equipment. A Compressor Safety Alarm is shown on Properties page > Equipment tab > Alarms and indicates that the equipment requires attention. -
Page 56: Fan Status
• If it's a Carrier Heat Pump, there is only one auxiliary heat stage output and the staging is done by the machine itself, if it's two-stage gas or electric. RTU Open... - Page 57 • For a non-Carrier Heat Pump, when configured for two stages of aux heat and two compressors, Compressor 1 is replaced by Aux Heat Stage 1 and Compressor 2 is replaced by Aux Heat Stage 2. The compressor output stays on when the safety alarm is present. For cooling, the alarm indicates the compressors are down.
- Page 58 Filter Service Alarm Timer value to 0 disables the filter service alarm function. Airside Linkage Alarm - An RTU Open may act as an air source in a zoned system. Carrier systems utilize a function called Linkage™ to pass data between a master zone and its air source via an MS/TP network connection.
-
Page 59: Linkage
Linkage The RTU Open may serve as an air source to an Open Variable Volume Terminal (VVT) system. When the RTU Open is part of a VVT system and the controllers are wired together to form a network, the controllers may use a method of communication known as Linkage™. -
Page 60: Linkage Air Source Modes
Sequence of Operation The system remains in that mode until all zones of that demand are satisfied or until a fixed 30 minute mode reselect timer causes a forced re-evaluation of the system. If there is no demand for the opposite mode, the reselect timer starts again and the current mode continues until all zones are satisfied or until the reselect timer expires, repeating the process. -
Page 61: Troubleshooting
Troubleshooting If you have problems mounting, wiring, or addressing the RTU Open, contact Carrier Control Systems Support. Serial number If you need the RTU Open's serial number when troubleshooting, the number is on: • a sticker on the back of the main controller board •... -
Page 62: Replacing The Rtu Open's Battery
14 flashes per second *Formatting the controller may result in lost information and should only be done under the guidance of Carrier Control Systems Support. Replacing the RTU Open's battery The RTU Open's 10-year Lithium CR2032 battery provides a minimum of 10,000 hours of data retention during power outages. -
Page 63: Compliance
Compliance FCC Compliance This equipment has been tested and found to comply with the limits for a Class A digital device, pursuant to Part 15 of the FCC Rules. These limits are designed to provide reasonable protection against harmful interference when the equipment is operated in a commercial environment. This equipment generates, uses, and can radiate radio frequency energy and, if not installed and used in accordance with the instruction manual, may cause harmful interference to radio communications. -
Page 64: Appendix A: Rtu Open Points/Properties
Appendix A: RTU Open Points/Properties Appendix A: RTU Open Points/Properties Status Navigation: i-Vu / Field Assistant: BACview: Point Name/Description System Mode – The controller's current operating status. Operating Mode – The controller's current operating mode. Supply Fan Status – The current fan status if an input is configured for Fan Status Space Temperature - Prime Variable control. -
Page 65: Unit Configuration
Unit Configuration Navigation: i-Vu / Field Assistant: BACview: Point Name/Description – The supply fan's operating mode. Fan Mode Options: Auto - The fan cycles on/off in conjunction with heating or cooling. Continuous - The fan runs continuously during occupancy & intermittently during unoccupied periods with heating or cooling. - Page 66 Appendix A: RTU Open Points/Properties Point Name/Description HP Rev Cycle Lockout Temp – The outdoor air temperature at which reverse cycle heating is locked out. Requires that the unit is configured as a Heat Pump. Heating Lockout Temperature – The outdoor air temperature at which heating is inhibited.
-
Page 67: Setpoints
Point Name/Description Input 8 Function – The usage of Input 8. You must also set Input 8 Switch Configuration Options: No Function – The input is not used. Enthalpy Switch – Indicates enthalpy status (high or low). Fan Status – Proves supply fan operation. Filter Status –... - Page 68 Appendix A: RTU Open Points/Properties Navigation: i-Vu / Field Assistant: BACview: Select a color band on the setpoint graph to see the current setpoints in the Heating and Cooling fields. See setpoint descriptions below. Occupied Setpoints The occupied setpoints described below are the setpoints under normal operating conditions. The Demand Level 1–3 setpoints apply if demand limiting is used.
- Page 69 Point Name/Description Occupied Cooling 1 – Yellow The space temperature must be greater than the Occupied Cooling 1 setpoint for the VVT Master to consider the zone a cooling caller in a linked system. In a single- zone application, the cooling requirement begins as soon as the space temperature exceeds the Occupied Cooling setpoint.
- Page 70 Appendix A: RTU Open Points/Properties Point Name/Description Heating Capacity – Used for Optimal Start, this is the rate at which the zone temperature changes when the heating system runs at full capacity to maintain designed occupied heating setpoint. Heating Design Temp –...
-
Page 71: Alarm Configuration
Point Name/Description Heating – (Occupied or Unoccupied, depending on mode) The current programmed Heating setpoint adjusted by any offset that may be in effect. Cooling – (Occupied or Unoccupied, depending on mode) The current programmed Cooling setpoint adjusted by any offset that may be in effect. Optimal Start –... -
Page 72: Service Configuration
Heat/Cool – Standard rooftop air handling unit. HP O/B Ctrl – Heat Pump application, uses reversing valve output to control heating and cooling. HP Y1/W1 Ctrl – Carrier Heat Pump application only. in the unoccupied mode. There is a sensor must exceed to Properties... - Page 73 Point Name/Description Compressor Stages – The number of mechanical cooling stages. Economizer Exists – Set to Yes to enable economizer control for units equipped with an economizer damper. Heat Type – The type of heating that the unit has. Number Of Heat Stages –...
-
Page 74: Maintenance
Appendix A: RTU Open Points/Properties Point Name/Description Compressor 2 Test – Enable to test the controller's compressor 2 output. Service Test must be set to Enable Heat 1 Test – Enable to test the controller's heat 1 output. Service Test must be set to Enable Heat 2 Test –... - Page 75 Point Name/Description Fire Shutdown – Shutdown indicates that a fire shutdown is in effect. Compressor Safety Status – Trouble tripped. Enthalpy Status – The enthalpy status determined by an enthalpy switch. Humidistat Input Status – The humidity status determined by a humidistat. Reset Supply Fan Runtime Alarm –...
-
Page 76: Alarms
Appendix A: RTU Open Points/Properties Alarms Navigation: i-Vu / Field Assistant: BACview: Point Name/Description – Indicates if the Safety Chain circuit trips. Safety Chain Fire Shutdown – Indicates if the Fire Shutdown circuit trips. Compressor Safety – Indicates if the Compressor Safety circuit trips. Space Temp Sensor –... -
Page 77: Linkage
Point Name/Description Compressor 2 Runtime – Indicates if the compressor 1 runtime exceeds the value of the Compressor 2 Service Alarm Timer Filter – Indicates a dirty filter condition when the filter runtime exceeds the value of the Filter Service Alarm Timer or in response to a filter status switch binary input. - Page 78 Space Temp – The value of the Optional SPT (Rnet) sensor. Also allows i-Vu & Field Assistant users access to sensor configuration. See Carrier Sensors Installation Guide for additional details. input 1 – Input Channel 1; 4 - 20 mA only. User-configurable for IAQ, OAQ, or Space RH.
-
Page 79: Appendix B: Single Point Linkage And Device Address Binding
Appendix B: Single Point Linkage and Device Address Binding Single Point Linkage The RTU Open receives data from other Open controllers when they are installed as part of an Open system. The data transfer may take the form of Single Point Linkage (SPL), which is automatic, or Device Address Binding, which you must configure. -
Page 80: Device Address Binding
Appendix B: Single Point Linkage and Device Address Binding Device Address Binding As described previously, Device Address Binding allows the RTU Open to receive data from other Open controllers when they are connected by a network. You must configure this method. Currently, the RTU Open allows Device Address Binding (DAB) only for System Space Temperature. -
Page 81: Index
Index BACnet compliance • 57 BACnet port • 11 BT485 • 10 Compliance • 57 Duct Air Temperature sensor • 22 Duct sensors Duct Air Temperature sensor • 22 Supply Air Temperature sensor • 21 FCC compliance • 57 Field Assistant • 58 i-Vu •... - Page 82 Operating Mode • 58 Optimal Start • 39, 61 Outdoor Air CO2 • 58 Outdoor Air Temp Sensor Alarm • 70 Outdoor Air Temperature • 58 Outdoor CO2 Sensor Value @max (ma) • 40, 66 Outdoor CO2 Sensor Value @min (ma) • 40, 66 Outside Air Temp Calibration •...
- Page 84 CARRIER CORPORATION ©2010 A member of the United Technologies Corporation family · Stock symbol UTX · Catalog No. 11-808-427-01 · 11/19/2010...
Need help?
Do you have a question about the RTU OPEN 11-808-427-01 and is the answer not in the manual?
Questions and answers