Table of Contents
Advertisement
Available languages
Available languages
Quick Links
Download this manual
See also:
Instruction Manual
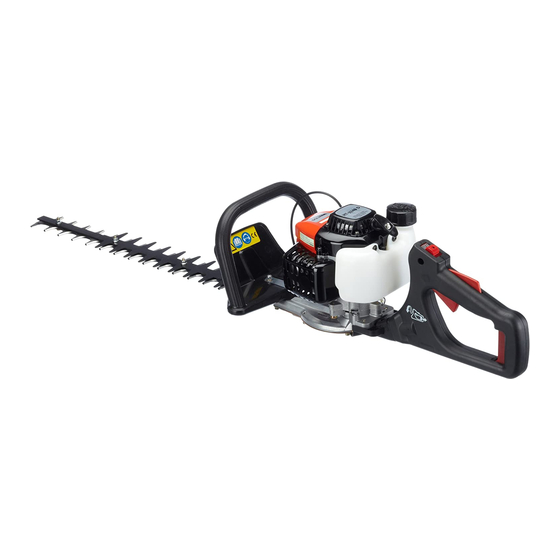
HEDGE TRIMMER
TAILLE-HAIES
CORTASETOS
INSTRUCTION MANUAL
MANUEL D'INSTRUCTIONS
MANUAL DE INSTRUCCIONES
WARNING:
To reduce the RISK of injury, user must read and understand the instruction manual before using the Hedge Trimmer.
Manufacturer reserves the right to change specifications without notice.
Specifications may differ from country to country.
Do only hand over the Hedge Trimmer together with this manual.
AVERTISSEMENT:
Afin d'éviter les blessures, l'utilisateur doit lire et comprendre les instructions de ce manuel avec attention avant d'utiliser le taille-haies.
Le fabricant se séserve le droit de modifier les spécifications sans avertissement préalable.
Les spécifications peuvent varier d'un pays à l'autre.
Lorsque vous n'utiliser pas le toujours accompagner l'appareil du manuel contenant les instructions.
ADVERTENCIA:
Para reducir el riesgo de posibles lesiones, el usuario deberà leer y entender las instrucciones de este manual antes de utilizar el cortasetos.
El fabricante se reserva el derecho de cambiar las especificaciones sin previo aviso.
Las especifficaciones pueden variar de un país a otro.
Ceda únicamente el cortasetos junto con este manual.
HT-2249 D
English / French / Spanish
HT-2249 D
C
Advertisement
Chapters
Table of Contents

Subscribe to Our Youtube Channel
Related Manuals for Dolmar HT-2249 D


Summary of Contents for Dolmar HT-2249 D
-
Page 1: Hedge Trimmer
MANUEL D’INSTRUCTIONS MANUAL DE INSTRUCCIONES WARNING: To reduce the RISK of injury, user must read and understand the instruction manual before using the Hedge Trimmer. Manufacturer reserves the right to change specifications without notice. Specifications may differ from country to country. -
Page 2: Table Of Contents
English Thank you very much for selecting the DOLMAR Hedge Trimmer. We are pleased to be able to offer you the DOLMAR Hedge Trimmer which is the result of a long development program and many ears of knowledge and experience. -
Page 3: Safety Instructions
Be familiar with all controls and the proper use of the machine. (1) It is recommended only to loan the Hedge Trimmer to people who have proven to be experienced with Hedge Trimmers. Always hand over the instruction manual. - Page 4 Always be aware of your surroundings and stay alert for possible hazards that you may not hear due to the noise of the machine. Operate the Hedge Trimmer in such a manner as to avoid inhalation of the exhaust gases. Never run the engine in enclosed rooms (risk of suffocation and gas poisoning).
- Page 5 Use only genuine spare parts and accessories supplied by DOLMAR authorized or factory service centers. Use of non-approved accessories and tools means increased risk of accidents and injuries. DOLMAR will not accept any liability for accidents or damage caused by the use of any non-approved accessories.
-
Page 6: Specification
Maximum blade speed Idling speed Clutch engagement speed Carburetor type Ignition system Spark plug Electrode gap Mixture ratio (fuel : DOLMAR 2-stroke engine oil) Gear ratio HT-2249 D 1060 x 255 x 220 WALBRO WYL type Solid state ignition type... -
Page 7: Designation Of Parts
DESIGNATION OF PARTS HT-2249 D DESIGNATION OF PARTS Blade Blunt extension Front handle Recoil starter Fuel tank cap Choke lever DESIGNATION OF PARTS Carburetor I-O Switch (ON-OFF) Throttle lever Rear handle Muffler Gearbox DESIGNATION OF PARTS Blade cover... -
Page 8: Fuels/Refueling
For lubricating the engine use a two-stroke engine oil (quality grade:TSC-3), which is added to the fuel. The engine has been designed for use with DOLMAR two-stroke engine oil and a mixture ratio of 50:1 only to protect the environment. In addition, a long service life and a reliable operation with a minumum emission of exhaust gases is guaranteed. -
Page 9: Precautions Before Starting
15 meters, also pay attention to any animals in the working vicinity. Before use always check that the Hedge Trimmer is safe for operation. Check the cutting device is not damaged, the control lever for easy action and check for proper function of the I-O Switch. -
Page 10: Starting The Machine
STARTING THE MACHINE Move at least 3 meters away from the place of refuelling. Place the Hedge Trimmer on a clean area of ground make sure that the cutting tool does not come into contact with the ground or any other objects. -
Page 11: Stopping The Machine
During the winter season beware of slippery or wet areas, ice and snow. (Risk of slipping.) Always ensure a safe footing . Never stand on a ladder and run the Hedge Trimmer. Keep both feet on the ground. Never climb up the trees with the Hedge Trimmer to perform cutting operation. -
Page 12: Angle Change Of Rear Handle
ANGLE CHANGE OF REAR HANDLE To permit vertical operation of the unit, the angle of the rear handle is designed to be changed. How to change the angle Return the throttle lever, and rotate the rear handle, pulling the rotation lock pin. -
Page 13: Maintenance Instruction
(Detection of hairline cracks by means of tapping-noise test.) Beware the teeth are sharp. Clean the Hedge Trimmer at regular intervals and check that all screw and nuts are well tightened. Never service or store the Hedge Trimmer in the vicinity of naked flames to avoid fires. - Page 14 Before operation, always check for clogging of the cooling air passage and the cylinder fins. Clean them if necessary. Perform the following work daily after use: Clean the Hedge Trimmer externally and inspect for damage. Clean the air filter. When working under extremely dusty conditions, clean the filter several times a day.
-
Page 15: Storage
STORAGE MAINTENANCE SCHEDULE General Engine assembly, screws and nuts After each refuelling Throttle lever Safety lock key I-O switch Daily Air filter Cooling air duct Cutting tool Idling speed Every 20 hours Gear case Weekly Spark plug Muffler Quarterly Suction head Fuel tank Shuting down Fuel tank... -
Page 16: Federal Emission Component Defect Warranty
EMISSON COMPLIANCE PERIOD For handheld engine : The Emissions Compliance Period referred to on the Emissions Compliance label indicates the number of operating hours for which the engine has been shown to meet Federal emission requirements. Category C=50 hours, B=125 hours, and A=300 hours. FEDERAL EMISSION COMPONENT DEFECT WARRANTY EMISSION COMPONENT DEFECT WARRANTY COVERAGE - This emission warranty is applicable in all States, except the State of California... - Page 17 3) Ignition System (i) Spark plug (ii) Flywheel Magneto (iii) Ignition Coil 4) Miscellaneous Items Used in Above Systems (i) Fuel hoses. clamps and sealing gaskets OBTAINING WARRANTY SERVICE To obtain warranty service, take your engine to the nearest Makita Factory Service Center or Service Center authorized by MAKITA.
- Page 18 If you have any questions regarding your warranty rights and responsibilities, you should contact the Makita Warranty Service Department at 1-800-4-MAKITA for the information. THINGS YOU SHOULD KNOW ABOUT THE EMISSION CONTROLL SYSTEM WARRANTY MAINTENANCE AND REPAIRS You are responsible for the proper use and maintenance of the engine. You should keep all receipts and maintenance records covering the performance of regular maintenance in the event questions arise.
-
Page 19: Symboles
Les modéles HT-2249 D légers, prafiques et compacts, allient les avantages d’une technologic de pointe à une conception ergonomique, et sont des outils de professionnels pour de norebreuses applications. -
Page 20: Consignes De Sécurité
CONSIGNES DE SECURITE Généralités CET APPAREIL PEUT PROVOQUER DES BLESSURES GRAVES. Veuillez lire attentivement le manuel d’instruction afin de manipuler, entretenir, mettre en route et arretêr correctement l’appareil. Chaque utilisateur est prié de se familiariser avec la totalite des commandes et des modes d’utilisation appropriés du taille-haies. - Page 21 Mise en marche du taille-haies – S’assurez qu’aucun enfant ou aucune autre personnene se trouve à moins de 15 mètres (5) de la zone d’utilisation du taille-haies’assurez également qu’il n’y a aucun animal dans les parages. S’assurez également qu’il n’y a aucun animal dans les parages.
- Page 22 être effectuées par des représentants antorisés. N’utilisezque des pièces et des accessoires d’origine, fournis par DOLMAR. L’utillsation d’outils et d’accessoires non agréés angrnente les risques d’accident. DOLMAR décline toute responsabilité en cas d’accident ou de dommage provoqué par l’utilisation d’accessoires ou d’outils non agréés.
-
Page 23: Caractéristiques Techniques
Vitesse de marche à vide Vitesse d’embrayage Carburateur Systéme d’allumage Bougie d’allumage Ecartement entre les électrodes Rapport du mélange (carburant:huile pour moteur 2 temps DOLMAR) Rapport d’engrenages HT-2249 D 1060 x 255 x 220 WALBRO WYL type Type Allumage électronique... -
Page 24: Liste Des Piéces
LISTE DES PIECES HT-2249 D LISTE DES PIECES Lame Extension émoussée Poignée avant Démarreur à enroulement Bouchon de réservoir de carburant Levier du starter LISTE DES PIECES Carburateur Bouton I-O (ON-OFF) Levier du papillon des gaz Poignée arrière Pot d’échappement Boîte de vitesse... -
Page 25: Carburants/Ravitaillement
- haies. Rapport de mélange correct: Benzina : Huile d’origine DOLMAR pour moteur 2 temps = 50 : 1 ou Benzina : Huile d’autres fabricants pour moteur deux temps = 25 : 1 recommandé... -
Page 26: Precautions A Observer Avant Le Demarrage
Ravitaillement Le moteur doit être coupé Coupez le moteur lors du ravitaillement, tenez - vous à distance des flammes nues et ne fumez pas. Prenez garde à ne pas renverser du carburant ou de l’huile afin d’éviter de polluer le sol (protection de l’environnement). Nettoyez immédiatement le taille - haies après que du fuel a été... -
Page 27: Demarrage De La Machine
DEMARRAGE DE LA MACHINE Se placer à au moins 3 mètres de I’emplacement de ravitaillement en carburant. Poser le taille-haies dans un endroit dégagé pour s’assurer que l’outil de coupe n’est pas en contact avec le sol ou avec d’autres objets. Démarrage à... -
Page 28: Arret De La Machine
ARRET DE LA MACHINE 1. Relâcher complètement le levier de commande. 2. Poussez le bouton I-O (1) sur la position “O” lorsque la rotation du monteur ralentit. Le moteur s’arrête. FONCTIONNEMENT DE LA MACHINE N’utilisez jamais la machine en ne la tenant pas fermement. Ne touchez jamais l’appareil de coupe lors du démarrage du moteur et du fonctionnement. -
Page 29: Changement De L'angle De La Poignee Arriere
CHANGEMENT DE L’ANGLE DE LA POIGNEE ARRIERE Afin de faire le travail vertical, cette machine est conçu à permettre de changer l’angle de la poignée arrière. Méthode de changement de l’angle Remettre la manette des gaz en état et faire tourner la poignée arrière en tirant la goupille de blocage de rotation. -
Page 30: Instructions De Maintenance
INSTRUCTIONS DE MAINTENANCE Coupez le moteur et retirez le connecteur de la bougie d’allumage lors du remplacement ou de l’afftûage des outils de coupe et lors du nettoyage des lames ou de l’outil de coupe ou lors de tout travail de maintenance. Ne dressez ou soudez jamais une lame de coupe endommagée. - Page 31 Contrôle de la bougie d’allumage– Toutes les 8 heures (journalièrement) Utilisez uniquement la clé à molette fournie pour retirer ou monter la bougie d’allumage. L’écartement entre les deux électrodes de la bougie d’allumage devrait être de 0,6-0,7mm. Si l’écartement est trop large ou trop étroit, réglez-le. Si la bougie d’allumage est bouchée avec des résidus de carbone ou si elle set encrassée, nettoyez-la soigneusement ou remplacez-la.
-
Page 32: Remisage
REMISAGE Désinfecter Humidité PROGRAMME D’ENTRETIEN Maintenance Bloc-moteur vis et écrous réguilère Après chaque plein Manette des gaz d’essence Touche de blocage Bouton I-O Chaque jour Filtre à air Conduit de ventilation Outil de coupe Vitesse de ralenti Toutes les 20 heures Carter d’engrenage Chaque semaine Bougie... -
Page 33: Símbolos
Agradeceremos muchísimo el que nos haya honrado con la elección del cortasetos de DOLMAR. Nos complace poder ofrecerle el cortasetos de DOLMAR resultado de un largo programa de desarrollo y de muchos años de conocimiento y experiencia. Los modelos del cortasetos HT-2249 D combinan las ventajas de la más avanzada tecnología con el diseño ergonómico, y son ligeros de peso,... -
Page 34: Instrucciones De Seguridad
INSTRUCCIONES DE SEGURIDAD Instrucciones Generales ESTA MÁQUINA PUEDE CAUSAR DAÑOS GRAVES. Lea cuidadosamente las instrucciones para el correcto manejo, preparación, mantenimiento, arranque y parada de la máquina correctos. Familialícese con todos los controles y el correcto uso de la màquina. (1) Se recomienda prestar el cortasetos sólo a las personas que demuestren tener experiencia con el mismo. - Page 35 Arranque del cortasetos Asegúrese de que no haya niños u otras personas de un radio de 15 metros de lugar de trabajo (5), tenga cuidado también con cualquier animal que pueda haber en las cercanías de lugar de trabajo. Nunca haga funcionar la máquina mientras personas, especialmente niños estén cerca.
- Page 36 Utilice solamente piezas de recambio y accesorios genuinos suministrados por DOLMAR. La utilización de accesorios no aprobados significará un aumento del riesgo de accidentes y heridas. DOLMAR no aceptará ninguna responsabilidad por los accidentes o los daños causados al utilizar cualquier accesorio no autorizado.
-
Page 37: Datos Técnicos
Tipo del carburador Sistema de encendido Bujía Separación entre electrodos Relación de mezcla (combustible: aceite para motores de 2 tiempos de DOLMAR) Relación de engranajes HT-2249 D 1060 x 255 x 220 WALBRO WYL type Encendido de estado sólido type NGK BPMR4A type 0.6 - 0.7... -
Page 38: Designación De Las Piezas
DESIGNACIÓN DE LAS PIEZAS HT-2249 D DESIGNACIÓN DE LAS PIEZAS Cuchilla Extensión desafilada Asidero delantero Arrancador de recular Tapón del tanque de combustible Palanca de cebador DESIGNACIÓN DE LAS PIEZAS Carburador Interruptor I-O Palanca de la mariposa de gases Asidero trasero... -
Page 39: Combustibles/Repostaje
DOLMAR). De o contrario, la función fiable del cortasetos no se podrá garantizar. Relación de mezcla correcta: Gasolina : Aceite de motor de dos carreras legitimo de DOLMAR = 50 : 1 o Gasolina : Aceite de motor de dos carreras de otros fabriantes = 25 : 1 recomendado... -
Page 40: Precauciones Antes De Poner En Funcionamiento
Repostaje El motor deberá estar apagado. Pare el motor durante el repostaje, aléjese de las llamas expuestas al aire y no fume. Tenga cuidado de no derramar combustible ni aceite para no contaminar el suelo (protección del medio ambiente). Limpie el cortasetos inmediatamente después de que se haya derramado combustible. -
Page 41: Puesta En Funcionamiento De La Máquina
PUESTA EN FUNCIONAMIENTO DE LA MÁQUINA Aléjese un mínimo de 3 metros del lugar de repostaje. Ponga el cortasetos sobre un lugar despejado del terreno asegurándose de que la herramienta de corte no esté en contacto con el suelo ni otros objetos. Arranque del motor en frío: (Cuando el motor esté... -
Page 42: Parada De La Máquina
PARADA DE LA MÁQUINA 1. Deje completamente libre la palanca de la mariposa de gases. 2. Empuje el Interruptor I-O (1) hasta la posición “O”, las revoluciones del motor estarán bajas y el motor se parará. OPERACIÓN DE LA MÁQUINA Nunca ponga en funcionamiento con un asidero flojo. -
Page 43: Cambio De Anglo Del Mango Trasero
CAMBIO DE ANGLO DEL MANGO TRASERO Para permitir la operación vertical del equipo, el ánglo del mango trasero está diseñado para ser cambiado. Cómo cambiar el ánglo Retorne la palanca del regulador y haga girar el mango trasero, tirando la aguja de retén de rotación. -
Page 44: Instrucciones De Mantenimiento
INSTRUCCIONES DE MANTENIMIENTO Pare el motor y desconecte los capuchones de las bujías al reemplazar o afilar las herramientas de corte, y también al limpiar el cortador o el dispositivo de corte, o al realizar cualquier mantenimiento. Nunca enderece o suelde una cuchilla de corte dañada. Inspeccione las cuchillas de corte con el motor puesto en marcha en intervalos cortos y regulares por daños. - Page 45 Comprobación de las bujías - 8 horas diarias Utilice solamente la llave universal suministrada para quitar o poner las bujías. La separación entre los dos electrodos de las bujías deberá ser de entre 0,6 y 0,7 mm. Si la separación es demasiado grande o pequeña, ajústela. Si las bujías están obstruidas con carbonilla o están sucias, límpielas minuciosamente o reemplácelas.
-
Page 46: Almacenaje
ALMACENAJE Quita combustible Humidad PROGRAMA DE MANTENIMIENTO General Conjunto del motor, tornillos y tuercas Después de cada repostaje Palanca de la mariposa de gases Llave de cierre de seguridad Interruptor I-O Diario Filtro de aire Conducto de aire de enfriamiento Herramienta de corte Velocidad de ralentí... - Page 47 MEMO...
- Page 48 DOLMAR GmbH Postfach 70 04 20 D-22004 Hamburg Germany 6019520600 09.11...
Need help?
Do you have a question about the HT-2249 D and is the answer not in the manual?
Questions and answers