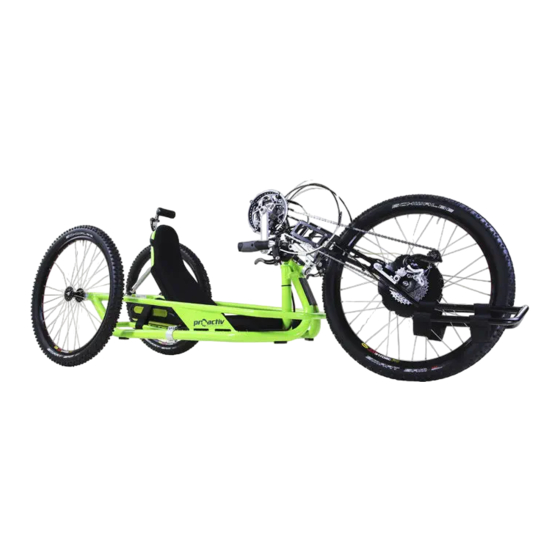
ProActiv NJ1 Usage Instructions
Hide thumbs
Also See for NJ1:
- Operating instructions manual (40 pages) ,
- Usage instructions (40 pages) ,
- Operating instructions service booklet (36 pages)

Related Manuals for ProActiv NJ1


Summary of Contents for ProActiv NJ1
- Page 1 Usage instructions for NJ1 & FREAK compact bike Usage instructions Service booklet NJ1 compact bike FREAK Compact bike...
-
Page 2: Table Of Contents
Usage instructions for NJ1 & FREAK compact bike Contents 1 Preface ............................... 4 2 Legend ..............................4 3 Conformity/other information ......................4 3.1 Classification ..........................4 3.2 Conformity........................... 4 3.3 Manufacturer ..........................4 4 Scope of delivery and testing the product on receipt ................. 4 5 Introduction ............................ - Page 3 Usage instructions for NJ1 & FREAK compact bike 16.4.2 Back-pedal brake for hub drives .................. 19 16.4.3 Parking brake ....................... 19 16.5 Lights ............................19 16.6 Bell ............................19 16.7 Manufacturer instructions ......................20 17 Backrest ............................20 17.1 Angle adjustment of the backrest ..................... 20 17.2...
- Page 4 The following instructions are intended for and may only be carried out by the rehabilita- tion specialist dealer or PRO ACTIV. This document is available in PDF format at www.proactiv-gmbh.com for visually impaired people. Using the zoom function, the font can be increased as desired.
-
Page 5: Preface
Usage instructions for NJ1 & FREAK compact bike Preface Conformity/other information Classification Dear Customer, Congratulations on purchasing your new NJ1 & FREAK compact bikes (referred to as PRO ACTIV product. You have bought a quali- the "product" below) are classified as class I ty product that has been specially customised products. -
Page 6: Introduction
Usage instructions for NJ1 & FREAK compact bike opinion that damage has occurred during tion specialist dealer on the necessary safety transit, please do the following: accessories. 1. Record a statement of facts in the pres- If you are not sure how to handle the... -
Page 7: Proper Use
Usage instructions for NJ1 & FREAK compact bike Recommended equipment: can move and coordinate their hands, Always use the safety pennon or warning flag, arms, and head (when using the chin to otherwise there is an easy risk of being over- operate the gears if manual function is un- seen due to the very low sitting position. -
Page 8: Load Weight
Ground clearance & turning circle Crank length: 155 - 195 cm Ground clearance: from 9 cm for the FREAK Compact bike and from 11 cm for the NJ1 Service life Compact bike The service life of the product is 6 years. -
Page 9: Commissioning And Handover
Usage instructions for NJ1 & FREAK compact bike 11 Introduction to the product and Date of manufacture the surroundings During the initial commissioning of the product, The product is labelled with further symbols drive at minimum speed and become accus-... -
Page 10: Safety Instructions - While Driving/Using
Usage instructions for NJ1 & FREAK compact bike the product may be damaged and above 40°C Before starting your trip, check the func- there is already the risk of burns for the user, tioning of the product's brake. If all existing... -
Page 11: Safety Instructions Regarding Obstacles
Usage instructions for NJ1 & FREAK compact bike adjusted so that the product can be safely When driving on public areas, roads, stopped at all times using the brakes. paths, and spaces, the provisions of the road traffic regulations must be observed. -
Page 12: Functional Elements
Usage instructions for NJ1 & FREAK compact bike Personal driving skills are particularly important product wheels slipping off the ramp. When in the following dangerous locations that are lifting or lowering a ramp or lifting equipment, provided as examples; the product user must... -
Page 13: Bottom Bracket Position
Usage instructions for NJ1 & FREAK compact bike 16.1.2 Bottom bracket position When equipping the product with a bottom bracket support that cannot be adjusted, a subsequent adjustment of the bottom bracket position can only be achieved by exchanging the bottom bracket support. -
Page 14: Crank Length And Grip Width
Usage instructions for NJ1 & FREAK compact bike The angle is adjusted at the top fork M6 clamp screws on the bridge. To do this, loosen the four M6 bottom bracket support clamp screws (AF 5 mm), on the clamp... -
Page 15: Grips
Usage instructions for NJ1 & FREAK compact bike 16.2 Grips 16.3 Gear shift The grips must be held firmly with both hands 16.3.1 Derailleur whilst driving and always held so that the ca- With the derailleur, the gears can only be bles and lines are oriented upwards. -
Page 16: Hub Gear
Usage instructions for NJ1 & FREAK compact bike In electronic Di2 gearshift, you can shift up or For shifting up down by pressing the button. to a higher gear For shifting down On an electronic Di2 gearshift, gear changes to a lower gear are achieved by: ... -
Page 17: Charging The Battery For Shimano Electronic Gearshifts
Usage instructions for NJ1 & FREAK compact bike Gear display For shift- ing up to a higher gear Gear changes For shift- by twisting ing down the grip to the to a lower left and right gear Figure 18: Buttons for shifting up and down... -
Page 18: Bottom Bracket Gearshift
Usage instructions for NJ1 & FREAK compact bike For this purpose, the rechargeable battery is 1. Push the recharge- removed as follows: the flap on the side is able battery in along opened and the push button is pressed-in (fig- the retaining rail ure 21). -
Page 19: Brakes
Usage instructions for NJ1 & FREAK compact bike Slotted screw Brake lever Figure 25: Slotted screw to lubricate Figure 27: Brake lever In the event of abrupt hard braking, there is a risk that you might fall forward with your upper body and thereby cause injuries to your- self. -
Page 20: Back-Pedal Brake For Hub Drives
Usage instructions for NJ1 & FREAK compact bike 16.5 Lights Setting screw on A light set with a separate rechargeable the brake lever battery including a charger can also be se- lected as an option. The front lights are in-... -
Page 21: Manufacturer Instructions
Usage instructions for NJ1 & FREAK compact bike 16.7 Manufacturer instructions 17.1 Angle adjustment of the backrest You will be instructed about the functions and For adjusting the angle of the backrest, open operation of the gears, brakes and other brand the clamp lever by turning counter-clockwise (a components during the hand-over / training. -
Page 22: Longitudinal Positioning Of The Backrest
Usage instructions for NJ1 & FREAK compact bike 17.2 Longitudinal positioning of the backrest The following instructions are intended for and may only be carried out by a rehabilita- tion specialist dealer or PRO ACTIV M6 clamp screw for Longitudinal positioning... -
Page 23: Neck Rest
Usage instructions for NJ1 & FREAK compact bike The belt system can be subsequently adjust- Once the desired height has been found, the ed. The slack of the seating surface can be two M6 clamp screws (AF 5 mm) are tightened changed using fleece hook-and-loop straps. -
Page 24: Collision Guard
Usage instructions for NJ1 & FREAK compact bike After every adjustment, check that the neck rest is firmly attached in its position. If necessary the tension can be adjusted by turn- ing the nut of the quick release lever clockwise until it reaches the end stop. -
Page 25: Adjusting The Length Of The Collision Guard
Usage instructions for NJ1 & FREAK compact bike 20.3 Adjusting the length of the colli- wheels are not properly secured. You will know this if you can see the index groove. sion guard Index groove The following instructions are intended... - Page 26 Usage instructions for NJ1 & FREAK compact bike To adjust the track proceed as follows: 1. Loosen the aluminium locking nuts on both sides (AF 41 mm). Drawing the axle height onto tyres Drive wheel bushing Axle height • Aluminium locking nuts...
-
Page 27: Tyre Pressure
Usage instructions for NJ1 & FREAK compact bike 4. Check by measuring the distance between To check or correct the tyre pressure, pro- the running wheels at the front and back ceed as follows: again at the axle height (along the mark- 1. -
Page 28: Adaptation And Decoupling The Drive Unit
Usage instructions for NJ1 & FREAK compact bike The insertion shaft – the counter item for the Clamp lever insertion shaft – is located on the adapter plate of the drive unit. Insertion maul of the drive unit adapter plate... - Page 29 Usage instructions for NJ1 & FREAK compact bike Raise the bottom bracket housing Figure 59: Insertion maul of the drive unit slips un- der the insertion shaft on the chassis Adapter plates fully resting on top of each other Lift the chassis...
-
Page 30: Decoupling The Drive Unit
Usage instructions for NJ1 & FREAK compact bike Lever of the eccentric pin closed (turned upwards) Eccentric pin removed Securing cord hung on Figure 65: Eccentric pin removed from the adapter Figure 63: Drive unit adapted completely plate, chassis lowered to the ground 22.4 Decoupling the drive unit... -
Page 31: Storage
Usage instructions for NJ1 & FREAK compact bike 24 Transport 24.1 Securing handling of the product When loading or transporting, the product can be held on the bottom bracket support and product frame. 24.2 Passenger transport in vehicles When transporting in vehicles, it... -
Page 32: Malfunctions
Usage instructions for NJ1 & FREAK compact bike 3. Objects that are installed to the product, 26 Cleaning and care but do not belong to the product, must be Regular cleaning of the product is prescribed removed and securely stowed. -
Page 33: Maintenance
Usage instructions for NJ1 & FREAK compact bike 27 Maintenance The chain should be cleaned and lubricat- ed with chain oil (observe the manufactur- 27.1 General instructions er's instructions). The product is not a maintenance-free device. Check the tyres for damage, foreign bodies Therefore, please observe the following in- and any cracks that form. -
Page 34: Proof Of Maintenance
Usage instructions for NJ1 & FREAK compact bike After extreme stresses, such as during holi- Plastic: handles, clamp lever, tube plugs, days where the product was exposed to sand, tyres, bags for packing sea water or snow, an additional deep clean... -
Page 35: Warranty
Usage instructions for NJ1 & FREAK compact bike 30 Warranty 31 Liability PRO ACTIV guarantees that the product was As the manufacturer of the product, free of any defects at the time it was handed PRO ACTIV is not responsible for its safety if: over. -
Page 36: Appendix: Tightening Torques, Securing Details And Tools
Usage instructions for NJ1 & FREAK compact bike 32 Appendix: Tightening torques, securing details and tools The following table shows the torques for shaft screws with a metric control thread (valid providing the drawing, assembly, or usage instructions do not state different values!):... -
Page 37: Appendix: Medical Product Passport/Record Of Training
Usage instructions for NJ1 & FREAK compact bike 33 Appendix: Medical product passport/record of training Product specifications: Serial number: Customer data: Surname, forename: Street: Postcode, city: Phone: Paying organisation: Training carried out by: Rehabilitation specialist dealer PRO ACTIV Field Representative/... -
Page 38: Appendix: Hand-Over Certificate
Usage instructions for NJ1 & FREAK compact bike 34 Appendix: Hand-over certificate 34.1 Required compliance criteria to authorise use Completed/ Topics Remarks fulfilled The product is suitable for the customer based on their own judgement and the customer information received regarding the disability-related restrictions. -
Page 39: Check List For Training The User
Usage instructions for NJ1 & FREAK compact bike 34.2 Check list for training the user Completed/ Topics fulfilled Advised of the applicable legal regulations when driving on public roads. All mechanical function control elements were explained and their function demonstrated. -
Page 40: Appendix: Inspection Lists
Usage instructions for NJ1 & FREAK compact bike 35 Appendix: Inspection lists Initial inspection: After 200 km or 5 months Serial number: _____________________ carried not OK resolved Kilometre reading: _______________________ Check that all screws/fastening elements are firmly seated Functional and safety check of all lights (if fitted), steering and adapta-... - Page 41 Usage instructions for NJ1 & FREAK compact bike Subsequent inspection: After another 1000 km or 1 year after the last inspection or after heavy use OK / Serial number: _____________________ carried not OK resolved Kilometre reading: _______________________ Check that all screws/fastening elements are firmly seated and replace, if...
- Page 42 Usage instructions for NJ1 & FREAK compact bike Subsequent inspection: After another 1000 km or 1 year after the last inspection or after heavy use OK / Serial number: _____________________ carried not OK resolved Kilometre reading: _______________________ Check that all screws/fastening elements are firmly seated and replace, if...
- Page 43 Usage instructions for NJ1 & FREAK compact bike Subsequent inspection: After another 1000 km or 1 year after the last inspection or after heavy use OK / Serial number: _____________________ carried not OK resolved Kilometre reading: _______________________ Check that all screws/fastening elements are firmly seated and replace, if...
- Page 44 Usage instructions for NJ1 & FREAK compact bike Subsequent inspection: After another 1000 km or 1 year after the last inspection or after heavy use OK / Serial number: _____________________ carried not OK resolved Kilometre reading: _______________________ Check that all screws/fastening elements are firmly seated and replace, if...
- Page 45 Usage instructions for NJ1 & FREAK compact bike Subsequent inspection: After another 1000 km or 1 year after the last inspection or after heavy use OK / Serial number: _____________________ carried not OK resolved Kilometre reading: _______________________ Check that all screws/fastening elements are firmly seated and replace, if...
- Page 46 Usage instructions for NJ1 & FREAK compact bike Subsequent inspection: After another 1000 km or 1 year after the last inspection or after heavy use OK / Serial number: _____________________ carried not OK resolved Kilometre reading: _______________________ Check that all screws/fastening elements are firmly seated and replace, if...
- Page 47 Usage instructions for NJ1 & FREAK compact bike Subsequent inspection: After another 1000 km or 1 year after the last inspection or after heavy use OK / Serial number: _____________________ carried not OK resolved Kilometre reading: _______________________ Check that all screws/fastening elements are firmly seated and replace, if...
- Page 48 Usage instructions for NJ1 & FREAK compact bike Your rehabilitation specialist dealer: PRO ACTIV Reha-Technik GmbH Im Hofstätt 11 D-72359 Dotternhausen – Germany Phone +49 7427 9480-0 Fax +49 7427 9480-7025 Email: info@proactiv-gmbh.de www.proactiv-gmbh.com...
Need help?
Do you have a question about the NJ1 and is the answer not in the manual?
Questions and answers