
Related Manuals for WineEnthusiast NFINITY PRO


Summary of Contents for WineEnthusiast NFINITY PRO
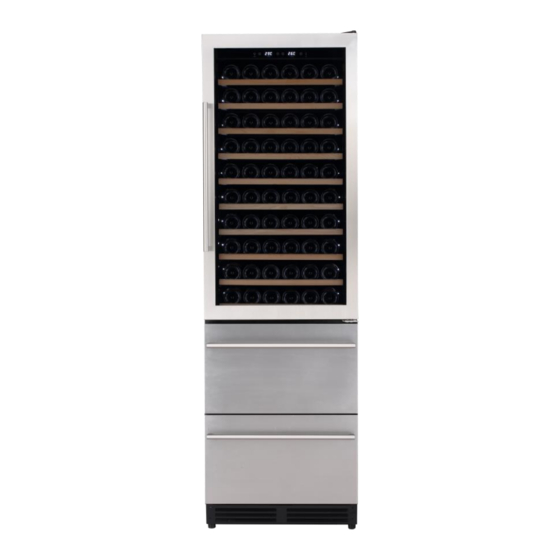
- Page 1 N’FINITY HDX WINE & BEVERAGE COOLER (Features and Size May Vary) User Manual Model # 237 02 78 0Y Y= 3 (Right Hinge) or 4 (Left Hinge) PLEASE READ THIS MANUAL CAREFULLY BEFORE INSTALLING AND OPERATING...
-
Page 2: Important Safeguards
IMPORTANT SAFEGUARDS When using this appliance, always exercise basic safety precautions, including the following: 1. Read all of the instructions before using this appliance. 2. This appliance is not intended for use by persons (including children) with reduced physical, sensory, or mental capabilities, or lack of experience and knowledge, unless they have been given supervision or instruction concerning use of the appliance by a person responsible for their safety. -
Page 3: Save These Instructions
SAVE THESE INSTRUCTIONS DANGER Risk of child entrapment. Before you throw away your old wine cellar, take off the doors. Leave the shelves in place so that children may not easily climb inside. Thank you for using our Wine Enthusiast product. -
Page 4: Table Of Contents
Table of Contents IMPORTANT SAFEGUARDS ................2 SAVE THESE INSTRUCTIONS ................. 3 Electrical Requirement ................5 Install Limitations ..................5 Use of Extension Cords ................5 Installation as a Built-In Cellar ..............5 Wine and Beverage Features and Use ............. 6 Initial Setup ..................... -
Page 5: Electrical Requirement
Electrical Requirement • Make sure there is a suitable power Outlet (115 volts, 15 amps outlet) with proper grounding to power the wine and beverage cooler. • Avoid the use of three plug adapters or cutting off the third grounding to accommodate a two-plug outlet. -
Page 6: Wine And Beverage Features And Use
Unit Unit Unit Built-In Built-In Built-In Height Width Depth Cut Out Cut Out Cut Out (Inches) (Inches) (Cabinet) Height Width Depth (Inches) (Inches) (Inches) 77.6” NFINITY HDX PRO 23.5” 24.8” 78.1” 24” 27” Wine and Beverage Features and Use Initial Setup •... -
Page 7: Shelving
Shelving (Type and number of shelves will vary per model) Your cabinet was designed to store a maximum number of bottles securely. We recommend that you observe the tips below to optimize loading: • Remove packing materials once unit is stable and ready for storage. •... - Page 8 Rearranging the Shelf Layout You can rearrange the configuration of your wine and beverage cooler by moving the location of your shelf brackets. To move a sliding shelf, first remove all bottles then remove the rolling shelf as illustrated above. You are now ready to remove the shelf guide rails.
-
Page 9: Installing The Handle
Installing the Handle 1. Pull back the door seal behind handle location. 2. Insert screws into pre-drilled screw holes. 3. Attach handle and tighten screws. 4. Press door seal back into place. Operating Your Wine and Beverage Cooler Each wine and beverage cooler includes an operating panel on the front of the unit. -
Page 10: Reprogramming The Temperature Ranges
3. Upper Wine Cooler Temperature Display 4. Lowers Wine Cooler Temperature 5. Temperature Set Button 6. Increases Drawers Temperature 7. Drawers Temperature Display 8. Lowers Drawers Temperature Setting the Temperature Control NOTE: The temperature readout indicates set temperature while programming then reverts to the actual temperature. 1. -
Page 11: Replacing The Charcoal Filter
Replace with a new filter, turn clockwise to lock in place. Reorder part #: 264 08 44 at www.WineEnthusiast.com Interior Light • To complement the look of your wine collection, a soft light has been built into the wine and beverage cooler. -
Page 12: Technical Data
Technical Data Total Volume 13.42 Cu. Ft. Installation Free-Standing or Built-In Power 115V~60Hz Current 1.6A Protection Class Climate Class SN/N/ST Start-Up Amps 9.3A Ambient Temperature 60°F - 90°F Refrigerant R600a – 1.83 oz. Temperature Control Range 41°F - 72°F Approx. Net Weight 258 LBS Dimensions (H x W x D) 77.6”... -
Page 13: Proper Wine And Beverage Center Care And Cleaning
Proper Wine and Beverage Cooler Care and Cleaning Cleaning and Maintenance Warning: To avoid electric shock always unplug your appliance before cleaning. Ignoring this warning may result in death or injury. Caution: Before using cleaning products, always read and follow manufacturer’s instructions and warnings to avoid personal injury or product damage. -
Page 14: Normal Operating Sounds You May Hear
• Petroleum jelly applied lightly on the hinge side of gaskets will keep the gasket pliable and assure a good seal. Power Interruptions • Occasionally there may be power interruptions due to thunderstorms or other causes. Remove the power cord from AC outlet when a power outage occurs. -
Page 15: Troubleshooting
Troubleshooting Many common issues with your wine and beverage cooler can be easily solved. Try the troubleshooting tips below if you experience any problems. Appliance Does Not Operate: • Check if unit is plugged in. • Check if there is power in the AC outlet, by checking the circuit breaker. - Page 16 Moisture build-up on interior or exterior of the wine and beverage cooler: • This is normal during high humidity periods. • Prolonged or frequent door openings. • Check door gaskets for proper seal. Appliance door does not shut properly: • Level the appliance. •...
-
Page 17: Limited Warranty
These extended warranties would extend this one (1) year limited warranty to two (2), three (3), or five (5) years. Details about our extended protection plans can be found @ wineenthusiast.com. Who is Protected: This Limited Warranty protects the original purchaser during the Limited Warranty Period, provided that such purchaser can present appropriate proof of original purchase. - Page 18 How to get Warranty Service: In the event your appliance is not operating within the manufacturer’s specifications, during the Warranty Period, contact customer service by email at custserv@WineEnthusiast.net or by phone 800.648.6058. Limitation of Implied Warranties: All implied warranties, including warranties of merchantability and fitness for a particular purpose, are limited in duration to the length of this Limited Warranty.
Need help?
Do you have a question about the NFINITY PRO and is the answer not in the manual?
Questions and answers
why can't i change the temp from 13?
The WineEnthusiast NFINITY PRO allows temperature adjustments using the UP (+) or DOWN (-) buttons. If you cannot change the temperature from 13, consider the following possibilities:
1. Programming Mode: Ensure the unit is in programming mode. Press the Temperature Set button, then use the UP (+) or DOWN (-) buttons.
2. Temperature Ranges: The default temperature range is 41°F - 72°F, but it can be modified. If you need a lower temperature, follow the reprogramming steps:
- Press and hold the Light (1) & Set (5) buttons for 15 seconds until you hear a beep.
- Press the Light (1) button to select the zone and adjust the temperature.
3. Idle Timeout: The panel exits programming mode after 5 seconds of inactivity. Ensure you complete the setting within this time.
4. External Factors: Temperature fluctuations may occur due to the interior light being ON or the position of the bottles.
5. Malfunction or Lock Mode: If none of the above work, check if the unit is locked or experiencing a technical issue.
If the issue persists, refer to troubleshooting steps or contact customer support.
This answer is automatically generated