Table of Contents
Advertisement
Advertisement
Table of Contents

Related Manuals for Dell 4210X


Summary of Contents for Dell 4210X
- Page 1 Dell™ 4210X Projector User’s Guide...
- Page 2 Reproduction of these materials in any manner whatsoever without the written permission of Dell Inc. is strictly forbidden. Trademarks used in this text: Dell and the DELL logo are trademarks of Dell Inc.; DLP and DLP logo are trademarks of T Microsoft and Windows are either trademarks or registered trademarks of Microsoft Corporation in the United States and/or other countries.
-
Page 3: Table Of Contents
......Connecting a DVD Player Using an HDMI Cable To control the projector that is connected to a network through an RJ45 cable. - Page 4 Turning Your Projector On Turning Your Projector Off Adjusting the Projected Image Raising the Projector Height Lowering the Projector Height Adjusting the Projector Zoom and Focus Adjusting Projection Image Size Using the Control Panel Using the Remote Control Installing the Remote Control Batteries...
-
Page 5: Specifications
Troubleshooting Your Projector Guiding Signals Changing the Lamp Specifications Contacting Dell Appendix: Glossary ........ -
Page 6: Your Dell Projector
Your Dell Projector Your projector comes with all the items shown below. Ensure that you have all the items, and contact Dell™ if anything is missing. Package Contents Power cable Carrying case CD User’s Guide & Documentation Your Dell Projector 1.8m VGA cable (VGA to VGA) -
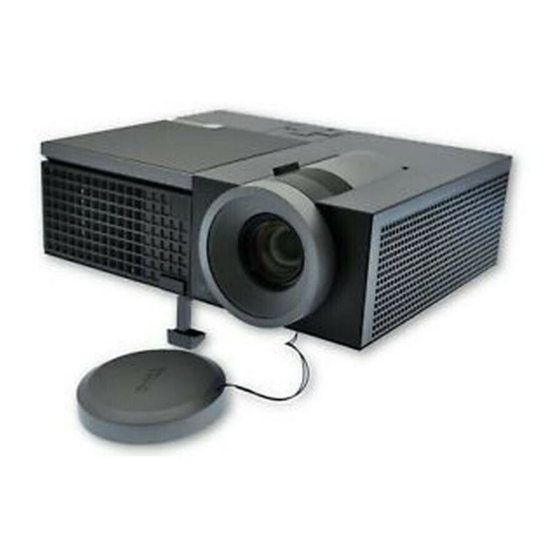
Page 7: About Your Projector
Do not use the projector near appliances that generate a lot of heat. Do not use the projector in areas where there is an excessive amount of dust. The dust may cause the system to fail and the projector will automatically shutdown. - Page 8 Do not try to touch the ventilation outlet as it can become very hot after the projector has been turned on or immediately after it is turned off. Do not look into the lens while the projector is on as it may cause injury to your eyes.
-
Page 9: Connecting Your Projector
Connecting Your Projector Composite video connector S-video connector VGA-A output (monitor loop-through) VGA-A input (D-sub) connector VGA-B input (D-sub) connector HDMI connector USB remote connector RJ45 connector Security cable slot CAUTION: Before you begin any of the procedures in this section, follow the Safety Instructions as described on page 7. -
Page 10: Connecting To A Computer
VGA to VGA cable USB-A to USB-B cable NOTE: The USB cable is not provided with your projector. NOTE: The USB cable must be connected if you want to use the Page Up and Page Down features on the remote control. -
Page 11: Monitor Loop-Through Connection Using Vga Cables
Monitor Loop-Through Connection Using VGA Cables Power cord VGA to VGA cable NOTE: Only one VGA cable is shipped with your projector. An additional VGA cable can be purchased on the Dell website at dell.com. Connecting Your Projector... -
Page 12: Connecting A Computer Using An Rs232 Cable
Connecting a Computer Using an RS232 cable Power cord RS232 cable NOTE: The RS232 cable is not shipped with your projector. Consult a professional installer for the cable and RS232 remote control software. Connecting Your Projector... -
Page 13: Connecting A Dvd Player
Connecting a DVD Player Using an S-video Cable Power cord S-video cable NOTE: The S-video cable is not shipped with your projector. You can purchase the S-Video extension (50 ft/100 ft) cable on the Dell website at dell.com. Connecting Your Projector... -
Page 14: Connecting A Dvd Player Using A Composite Video Cable
Connecting a DVD Player Using a Composite Video Cable Power cord Composite video cable NOTE: The Composite Video cable is not shipped with your projector. You can purchase the Composite Video Extension (50 ft/100 ft) cable on the Dell website at dell.com. Connecting Your Projector... -
Page 15: Connecting A Dvd Player Using A Component Video Cable
Power cord VGA to Component Video cable NOTE: The VGA to Component Video cable is not shipped with your projector. You can purchase the VGA to Component Video Extension (50 ft/100 ft) cable on the Dell website at dell.com. Connecting Your Projector... -
Page 16: Connecting A Dvd Player Using An Hdmi Cable
Connecting a DVD Player Using an HDMI Cable Power cord HDMI cable NOTE: The HDMI cable is not shipped with your projector. Connecting Your Projector... -
Page 17: Connecting To Local Area Network
Connecting to Local Area Network To control the projector that is connected to a network through an RJ45 cable. Power cord RJ45 cable NOTE: The RJ45 cable is not shipped with your projector. Local Area Network (LAN) Connecting Your Projector... -
Page 18: Professional Installation Options: Installation For Driving Automatic Screen
Power cord 12V DC Plug Automatic Screen NOTE: Use the dimension of 12V DC plug in 1.7 mm (ID) x 4.00 mm (OD) x 9.5 mm (shaft) to connect the automatic screen with the projector. Connecting Your Projector 12V DC Plug... -
Page 19: Connection With Commercial Rs232 Control Box
Connection With Commercial RS232 Control Box Power cord RS232 cable Commercial RS232 control box NOTE: The RS232 cable is not shipped with your projector. Consult a professional technician to obtain the cable. Connecting Your Projector... -
Page 20: Using Your Projector
"Connecting Your Projector" on page 9 for instructions to connect your source to the projector. By default, the input source of projector is set to VGA-A. Change the input source of projector if necessary. If you have multiple sources connected to the projector, press the Source button on the remote control or control panel to select the desired source. -
Page 21: Adjusting The Projected Image
To power off the projector quickly, press the Power button and hold for 1 second while the projectors cooling fans are still running. NOTE: Before you turn on the projector again, wait for 60 seconds to allow the internal temperature to stabilized. -
Page 22: Adjusting The Projector Zoom And Focus
Rotate the zoom tab to zoom in and out. Rotate the focus ring until the image is clear. The projector focuses at distances ranging between 3.94 ft to 32.81 ft (1.2 m to 10 m). -
Page 23: Adjusting Projection Image Size
Adjusting Projection Image Size 307"(779.78cm) 277"(703.58cm) 215"(546.10cm) 154"(391.16cm) 92"(233.68cm) 37"(93.98cm) 30" (76.20cm) 3.94'(1.2m) Using Your Projector... -
Page 24: Using The Control Panel
(63cm X 47cm) Max. 25.59" (65cm) Min. 21.26" (54cm) Distance 3.94' (1.2m) 9.8' (3.0m) * This graph is for user reference only. Using the Control Panel Using Your Projector 92" 154" 215" (233.68cm) (391.16cm) (546.10cm) 77" 128" 179" (195.58cm) (352.12cm) (454.66cm) - Page 25 • Lamp driver failure • Color wheel failure For more information, see "Troubleshooting Your Projector" on page 62 and "Guiding Signals" on page 66. If the TEMP amber indicator is on or blinking, one of the following problems could be occurring: •...
- Page 26 Press to navigate through the On-Screen Display (OSD) Menu items. Press to adjust image distortion caused by tilting the projector (+40/-35 degrees). Press to activate the OSD. Use the directional keys and the Menu button to navigate through the OSD.
-
Page 27: Using The Remote Control
Using the Remote Control Power Enter Right Down Turns the projector on or off. For more information, see "Turning Your Projector On" on page 20 and "Turning Your Projector Off" on page 20. Press to confirm the selection. Press to navigate through the On-Screen Display (OSD) Menu items. - Page 28 Press to move to previous page. NOTE: The USB cable must be connected if you want to use the Page Up feature. Press to mute or un-mute the projector speaker. Press to move to next page. NOTE: The USB cable must be connected if you want to use the Page Down feature.
- Page 29 19 Auto adjust 20 Keystone adjustment Press to adjust image distortion caused by tilting Press to synchronize the projector with the input source. Auto adjust does not operate if the OSD is displayed. the projector (+40/-35 degrees). Using Your Projector...
-
Page 30: Installing The Remote Control Batteries
Check the polarity (+/-) marking on the batteries. Insert the batteries and align their polarity correctly according to the marking in the battery compartment. NOTE: Avoid mixing different types of batteries or using new and old batteries together. Slip the battery cover back. Using Your Projector... -
Page 31: Operating Range With Remote Control
Operating Range With Remote Control Operating range Angle ±30° Distance 10m/32.8feet Angle NOTE: Actual operating range may slightly differ from the diagram. Weak batteries will also prevent the remote control from properly operating the projector. Angle Using Your Projector... -
Page 32: Using The On-Screen Display
Using the On-Screen Display • The projector has a multi-language On-Screen Display (OSD) Menu that can be displayed with or without an input source. • To navigate through the tabs in the Main Menu, press the your projectors control panel or remote control. -
Page 33: Input Select
INPUT SELECT The Input Select menu allows you to select your projector’s input source. VGA-A—Press to detect VGA-A signal. VGA-B—Press to detect VGA-B signal. —Press to detect S-Video signal. IDEO —Press OMPOSITE IDEO HDMI—Press to detect HDMI signal. —Press to activate Input Select Advanced menu. -
Page 34: Picture (In Pc Mode)
PICTURE (in PC Mode) Using the Picture menu, you can adjust the display settings of your projector. The Picture menu, provides the following options: —Allows you to optimize the display image: Presentation, Bright,... -
Page 35: Picture (In Video Mode)
IDEO MODE Movie, sRGB (provides more accurate color representation), and Custom (set your preferred settings).If you adjust the settings for Brightness, Contrast, Saturation, Sharpness, Tint, and Advanced, the projector automatically switches to Custom. NOTE: If you adjust the settings for Brightness, Contrast, Saturation, Sharpness, Tint, and Advanced, the projector automatically switches to Custom. -
Page 36: Display (In Pc Mode)
OLOR PACE YPbPr. DISPLAY (in PC Mode) Using the Display menu, you can adjust the display settings of your projector. The Picture menu, provides the following options: —Allows you to select the aspect ratio to adjust how the image SPECT ATIO appears. - Page 37 —Press to activate Zoom Navigation AVIGATION to navigate projection screen. to move the image to the left and to move the image down and to view zoomed image. to move the to move the image Using Your Projector...
-
Page 38: Display (In Video Mode)
DISPLAY (in Video Mode) Using the Display menu, you can adjust the display settings of your projector. The Picture menu, provides the following options: —Allows you to select the aspect ratio to adjust how the image SPECT ATIO appears. •... -
Page 39: Lamp
LAMP Using the Lamp menu, you can adjust the display settings of your projector. The Lamp menu provides the following options: —Allows you to select between Normal and ECO mode. Normal mode operates at full power level. ECO Mode operates at a lower power level which may provide longer lamp life, quieter operation, and dimmer luminance output on the screen. - Page 40 Front Projection-Ceiling Mount — The projector turns the image upside down for ceiling-mounted projection. • Rear Projection-Desktop — The projector reverses the image so that you can project from behind a translucent screen. • Rear Projection-Ceiling Mount — The projector reverses and turns the image upside down.
- Page 41 NETWORK The Network menu allows you to configure the network connection settings. DHCP—If a DHCP server exists in the network to which the projector is connected, the IP address will automatically be acquired when you select DHCP On. If DHCP is Off, manually set the IP Address, Subnet Mask, and Gateway. Use to select the number of IP Address, Subnet Mask, and Gateway.
-
Page 42: Information
INFORMATION The Information menu displays the current projector settings. OTHERS The Others menu allows you to change settings for Menu, Screen, Audio, Power, Security, and Closed Caption (for NTSC only). You can also perform Test Pattern and Factory Reset. —... - Page 43 To capture a full image, ensure the input signal that is connected to the projector is 1024 x 768 resolution. — Select Dell to use the Dell logo as wallpaper. Select Captured to CREEN set the captured image as wallpaper.
- Page 44 — OWER AVING projector is set to enter power saving mode after 120 minutes of no activity. A warning message appears on screen showing a 60-second countdown before switching to power saving mode. Press any key buttons during countdown period to stop power saving mode.
- Page 45 Enabled. If the password has been set before, key in the password first and select the function. This password security feature will be activated the next time you turn on the projector. If you enable this feature, you will be asked to enter the projector's password after you turn...
- Page 46 If you have entered an incorrect password, you will be given another 2 chances. After the three invalid attempts, the projector will automatically turn off. NOTE: If you forget your password, contact DELL™ or a qualified service personnel. To disable the password function, select Off to disable the function.
- Page 47 — Select On to enable close caption and activate the closed LOSED APTION caption menu. Select an appropriate closed captions option: CC1, CC2, CC3, and CC4. —Key in the original password, then enter the new Using Your Projector...
- Page 48 — Select and press ACTORY ESET warning message below appears. Reset items include both computer sources and video source settings. Using Your Projector buttons on the control panel to reset all settings to its factory default, the buttons on the...
-
Page 49: Managing The Projector From Web Management
Management Configuring the Network Setting If the projector is connected to a network, you can access the projector using a web browser by configuring the network setting (TCP/IP). When using the network function, the IP address should be unique. For configuring the network setting, refer to "NETWORK"... -
Page 50: Managing Properties
Managing Properties Home • Access the Web Management Home page by entering the projector’s IP address at the web browser. See "NETWORK" on page 41. • Language: Allows you to set the language for web management. Using Your Projector... - Page 51 (up to 21 characters for each field). Press Save to store the settings. • Choose DHCP to assign an IP address to the projector from a DHCP server automatically, or Manual to assign an IP address manually. Using Your Projector...
- Page 52 Projector Status and Control Page • Projector Status: There are 4 status: Lamp On, Standby, Power Saving and Cooling. Click the Refresh button to refresh the status and control settings. • Power Saving: Power Saving can be set to Off, 30, 60, 90, or 120 minutes.
- Page 53 • Speaker: You can select On to enable the audio function or select Off to disable the audio function. • Alert Volume: Set the alert loudness (Off, Low, Mid, or High) for power on/off, warning and command keys. adjust the brightness of the image. Using Your Projector...
- Page 54 • Alert Condition: You can select the abnormalities or warnings to be notified by email. When any of the alert conditions occur, an email will be sent to the recipients (To/Cc). • Out going SMTP server, User name and Password should be provided by your network administrator or MIS. Using Your Projector...
- Page 55 Web Management. • New Password: Enter new password • Confirm Password: Enter password again and submit • Write Community: Set security for SNMP . Enter password and submit. NOTE: Contact Dell if you forget your administrator password. Using Your Projector...
- Page 56 Login Page • Administrator Password: Enter the Administrator Password and click Login. Using Your Projector...
- Page 57 Firmware Update Use the Firmware Update page to update your projector’s firmware. Press Update to start. • Please wait till the count reaches 0. Using Your Projector...
- Page 58 • Wait for 3 seconds and it will proceed to the next step automatically. • Select the file to upgrade and click the Upgrade button. When upgrading is in progress, the Cancel button is disabled. Using Your Projector...
- Page 59 • Please wait till the count reaches 0. • When upgrade is complete, please click the ReLogin button to go back to the Web Management Home Page. Using Your Projector...
- Page 60 TIPS: I would like remote access the projector via Internet. What is the better setting for the browser? I would like to remote access the projector via Internet. What socket port number should I open for it in the firewall?
- Page 61 Some SMTP servers will check whether the mail address of "From" correlates with the "User name" and "Password". For example, you use test@dell.com as the mail address in "From". You should also use test@dell.com account information for the User name and the password to log in the SMTP server.
-
Page 62: Troubleshooting Your Projector
Troubleshooting Your Projector If you experience problems with your projector, see the following troubleshooting tips. If the problem persists, contact Dell™. See Contacting Dell™ on page 75. Problem No image appears on the screen Missing Input Source. Cannot switch to particular Input Source. - Page 63 Possible Solution Press the Auto Adjust button on the remote control or the control panel. If you are using a Dell™ portable computer, set the resolution of the computer to XGA (1024 x 768): Right-click the unused portion of your ®...
- Page 64 When the lamp reaches its end of life, it may burn out and may make a loud popping sound. If this occurs, the projector does not turn back on. To replace the lamp, see "Changing the Lamp" on page 68.
- Page 65 (continued) Problem TEMP light is blinking amber A projector fan has failed and the projector The OSD does not appear on the screen The remote control is not operating smoothly or works only within a limited range (continued) Possible Solution will automatically shut down.
-
Page 66: Guiding Signals
Ensure that the air vents are not blocked and that the ambient temperature is within operational range. If the problem persists, contact Dell. Lamp The lamp is overheated. The air vents overheated may be blocked. The projector automatically shuts down. - Page 67 Power supply has been interrupted. The supply (+12V) projector automatically shuts down. Unplug the power cord after three minutes and then turn on the projector. If this problem persists, contact Dell. Fault - DC Power supply has been interrupted. The supplies projector automatically shuts down.
-
Page 68: Changing The Lamp
Replace the lamp when the message "Lamp is approaching the end of its useful life in the operation. Replacement suggested! www.dell.com/lamps" appears on the screen. If this problem persists after replacing the lamp, contact Dell™. For more information, see Contacting Dell™on page 75. - Page 69 LAMP(S) INSIDE THIS PRODUCT CONTAIN MERCURY AND MUST BE RECYCLED OR DISPOSED OF ACCORDING TO LOCAL, STATE OR FEDERAL LAWS. FOR MORE INFORMATION, GO TO WWW.DELL.COM/HG OR CONTACT THE ELECTRONIC INDUSTRIES ALLIANCE AT WWW.EIAE.ORG. FOR LAMP SPECIFIC DISPOSAL INFORMATION CHECK WWW.LAMPRECYCLE.ORG.
-
Page 70: Specifications
Specifications Light Valve Brightness Contrast Ratio Uniformity Number of Pixels Displayable Color Color Wheel Speed Projection Lens Projection Screen Size Projection Distance Video Compatibility Power Supply Power Consumption Audio Specifications 0.55" XGA DMD Type X, DarkChip2™ 3500 ANSI Lumens (Max.) 2000:1 Typical (Full On/Full Off) 85% Typical (Japan Standard - JBMA) 1024x 768 (XGA) - Page 71 Noise Level Weight Dimensions (W x H x D) Environmental I/O Connectors 35 dB(A) Normal mode, 32 dB(A) Eco mode 6.35 lbs (2.88 kg) 11.26 x 4.33 x 9.76 inches (286 x 110 x 247.8 mm) 4.33"(110mm) Operating temperature: 5 Humidity: 80% maximum Storage temperature: 0 C to 60...
- Page 72 Lamp NOTE: The lamp life rating for any projector is a measure of brightness degradation only, and is not a specification for the time it takes a lamp to fail and cease light output. Lamp life is defined as the time it takes for more than 50 percent of a lamp sample population to have brightness decrease by approximately 50 percent of the rated lumens for the specified lamp.
- Page 73 Example: Power ON Command (Send low byte firstly) --> 0xBE, 0xEF, 0x10, 0x05, 0x00, 0xC6, 0xFF, 0x11, 0x11, 0x01, 0x00, 0x01 • Control Commands List To view the latest RS232 code, go to the Dell Support site at: support.dell.com. RS232 Pin Assignment Value 19200...
- Page 74 Compatibility Modes (Analog/Digital) Resolution 640 x 350 640 x 480 640 x 480 p60 720 x 480 p60 720 x 576 p50 720 x 400 640 x 480 848 x 480 640 x 480 800 x 600 800 x 600 800 x 600 1024 x 768 1280 x 720 p50...
-
Page 75: Contacting Dell
Dell product catalog. Dell™ provides several online and telephone-based support and service options. Availability varies by country and product, and some services may not be available in your area. To contact Dell for sales, technical support, or customer service issues: Visit support.dell.com. -
Page 76: Appendix: Glossary
Compressed Resolution — If the input images are of higher resolution than the native resolution of the projector, the resulting image will be scaled to fit the native resolution of the projector. The nature of compression in a digital device means that some image content is lost. - Page 77 (usually a wide-top narrow-bottom effect) of a projected image caused by improper projector to screen angle. Maximum Distance — The distance from a screen the projector can be to cast an image that is usable (bright enough) in a fully darkened room.
- Page 78 Zoom Lens Ratio — Is the ratio between the smallest and largest image a lens can projector from a fixed distance. For example, a 1.4:1 zoom lens ratio means that a 10 foot image without zoom would be a 14 foot image with full zoom.
- Page 79 Audio output connector 9 Composite video connector 9 Power cord connector 9 RS232 connector 9 Security cable slot 9 S-video connector 9 USB remote connector 9 VGA-A input (D-sub) connector VGA-A output (monitor loop-through) 9 VGA-B input (D-sub) connector Contact Dell 6 Index...
- Page 80 Control Panel 24 DC Adapter 9 Dell contacting 75 HDMI 9 Main Unit 7 Control panel 7 Elevator button 7 Focus ring 7 IR receiver 7 Lens 7 Zoom tab 7 Menu Position 42 Menu Settings 42 Menu Timeout 43...
- Page 81 Power Supply 70 Projection Distance 70 Projection Lens 70 Projection Screen Size 70 RS232 Protocol 73 Uniformity 70 Video Compatibility 70 Weight 71 support contacting Dell 75 telephone numbers 75 Test Pattern 48 Troubleshooting 62 Contact Dell 62 Volume 44 Index...
Need help?
Do you have a question about the 4210X and is the answer not in the manual?
Questions and answers