Table of Contents
Advertisement
Quick Links
Advertisement
Table of Contents

Related Manuals for Actel Silicon Explorer II

Summary of Contents for Actel Silicon Explorer II
- Page 1 Actel Silicon Explorer II ® User’s Guide Windows Environments ®...
- Page 2 U.S. Toll Free Line: 888-99-ACTEL • Customer Service: 408-739-1010 • Customer Service FAX: 408-522-8044 Customer Applications Center: 800-262-1060 • Customer Applications FAX: 408-739-1540 Actel Europe Ltd. • Maxfli Court, Riverside Way • Camberley, Surrey GU15 3YL • United Kingdom Tel: +44 (0)1276.401452 • Fax: +44 (0)1276.401490 Actel Japan •...
- Page 3 Actel Silicon Explorer II ® User’s Guide Windows Environments...
- Page 4 No part of this document may be copied or reproduced in any form or by any means without prior written consent of Actel. Actel makes no warranties with re- spect to this documentation and disclaims any implied warranties of merchantabil- ity or fitness for a particular purpose.
-
Page 5: Table Of Contents
....3 Powering Silicon Explorer II ....3 Connector Types ..... . . 4 Connecting Silicon Explorer II . -
Page 7: Introduction
Silicon Explorer II uses the remaining 16 channels of the logic analyzer to examine other signals on the board. Actel also offers Silicon Explorer II Lite. SE II Lite enables only the Command module and relies on an external scope or logic analyzer for... -
Page 8: System Requirements
® • 8 MB RAM (minimum); 16 MB recommended Connecting to the PC Silicon Explorer II and Silicon Explorer II Lite connect to a standard serial port using an 8250 or 16550 UART. Establish communication via the 9-Pin D-Sub connector. -
Page 9: Connecting Silicon Explorer Ii
Connecting Silicon Explorer II This section describes the procedures required to connect Silicon Explorer II to your device, powering Silicon Explorer II, SE II connector types, logic analysis, and the Explore software. Powering Silicon Explorer II SE II draws power from the external power supply (provided) or by... -
Page 10: Connector Types
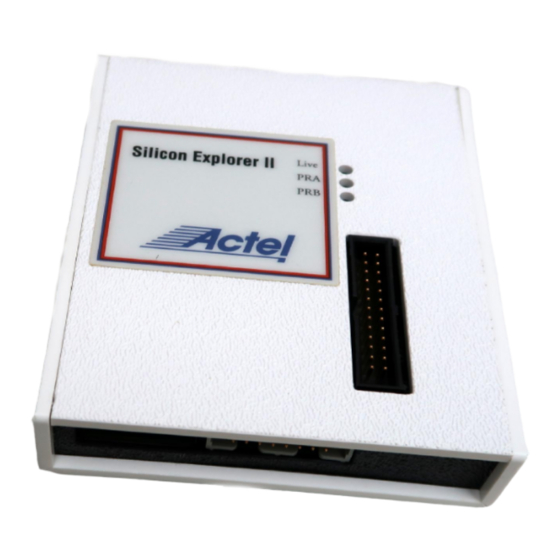
100 MHz 700ma Connector Types Silicon Explorer II has a 22-pin (18 channels, a clock, VIO, GND, and clock GND) and a 16-pin connector for controlling the ActionProbe circuitry and reading the design checksum. Silicon Explorer II Lite has only the 16-pin and 26-pin connector (the large 26-pin connector is not used). - Page 11 Actel Silicon Explorer II ships with a replaceable target cable assembly (TCA-8020A) that interfaces Silicon Explorer II with your target system. To connect Silicon Explorer II, align the short red wire on the TCA- 8020 with the red dot on the case and fully insert the 2mm header. The contacts on the TCA-8020 accept standard 0.025"...
-
Page 12: Connecting Silicon Explorer Ii
You may connect any or all GND pins. Connecting Silicon Explorer II The diagrams below describe, in detail, how to connect the Silicon Explorer II for the various device families. Figure 1-2 shows how to connect Silicon Explorer II to the ACT1/A40MX devices, Figure 1-3... - Page 13 Silicon Explorer Setup 16 Logic Analyzer Channels ACT1/A40MX Serial Connection MODE Silicon to Windows PC DCLK Explorer Figure 1-2. ACT1/A40MX Silicon Explorer II Setup ACT2/XL/ACT3/DX/A42MX Silicon Explorer Setup 16 Logic Analyzer Channels ACT2/XL/DX/ACT3 A42MX Serial Connection MODE Silicon to Windows PC...
- Page 14 Figure 1-4. SX/SX-A/eX Silicon Explorer II Setup The probing of an SX-A or eX device may require special setup because it Actel recommends that you use a series 70 ohm termination on all the probe connectors (TDI, TDO, TCK, TMS, PRA, PRB). The 70 ohm series termination is used to prevent data transmission corruption during probing and reading checksum.
-
Page 15: Silicon Explorer Software
Silicon Explorer Software The Explorer software consists of two components, the Command module and the Analyze module. The Command module of the Explore software lists all the observable nets in the FPGA. Use the Command module to verify that you programmed the correct design in the FPGA. -
Page 16: Using The Command Module
Chapter 2: Silicon Explorer Software Using the Command Module The Command module is the interface used to select internal nodes in the Actel FPGA family. The following sections describe exploring with the probe. Figure 2-2. Command Module Explore the The following procedures describe how to use the Command module FPGA to examine an Actel FPGA. - Page 17 Using the Command Module the desired probe file. You may also open a probe file in Silicon Explorer by double-clicking the “Open Actel Probe File” icon. Explore uses a .prb file exported from Designer during analysis. The exported file contains device information, net names, and node location information.
- Page 18 Use multiple wildcard characters (“*”) to restrict your search. 2. Click the PRA or PRB button. Silicon Explorer II routes the selected node to the probe pin and switches the corresponding analyzer input to the probe connector. The Analyze module displays the net name.
-
Page 19: Using The Analyze Module
This section does not apply to Silicon Explorer II Lite, since it does not contain the Analyze module. Open Silicon Explorer II and check the status in the lower right corner of the display. If you have properly selected the COM port and... - Page 20 Chapter 2: Silicon Explorer Software module captures 64K samples of each channel and uploads them to the host over the serial port. Figure 2-5. Analyze Module Set acquisition parameters from the tool bar or the pull-down menus. See Table 2-2 for a summary of the parameters. Table 2-2.
- Page 21 “PRE” for the pretrigger state (although you may not see it if the trigger pattern matches quickly). Next, Silicon Explorer II enters the “POST” state and samples data after the trigger pattern (or stop button) until it fulfills the posttrigger requirement.
-
Page 23: A Debugging Sx/Sx-A/Ex Devices Using Silicon Explorer
Probe Circuit Control Pins The Silicon Explorer II tool uses the IEEE 1149.1 ports (TDI, TCK, TMS and TDO) to select the desired nets for debugging. The user assigns the selected internal nets to the PRA/PRB pins for observation. -
Page 24: Diagnostic Pin Consideration
JTAG Mode Dedicated JTAG mode, which configures TDI, TCK, and TDO pins for JTAG boundary scan or in-circuit debug with Silicon Explorer II. Also, you enable an internal pull-up resistor on both the TMS and TDI pins (Figure A-8). In addition, by checking the “Reserve JTAG Pin” box,... - Page 25 Note that you require an external 10K Ohm pull-up resistor on the TMS pin in this mode (Figure A-9). Silicon Explorer II transforms TDI, TCK and TDO pins from user I/Os into JTAG diagnostic pins when a rising edge at TCK is detected while TMS is at logical low.
- Page 26 Appendix A: Debugging SX/SX-A/eX Devices Using Silicon Explorer II Table 1 enumerates all the possible configuration of the diagnostic pins. Table 1. Diagnostic Pin Configuration Dedicated JTAG Mode Flexible JTAG Mode • Use TCK, TDI and TDO as I/Os. •...
-
Page 27: Location Of The Sdo Pin
Location of the SDO Pin Figure B-1. SDO Pin Location Table... -
Page 29: Termination Of The Vpp And Mode Pin For Act1 Devices In A Radiation Environment
Termination of the VPP and Mode Pin for ACT1 Devices in a Radiation Environment There is a concern about the use of Actel RH1020 or RH1280 Field Programmable Gate Arrays (FPGA) in a space-flight, radiation- environment with the MODE and/or VPP pins left unterminated. The effects of a floating VPP pin are difficult to assess. -
Page 30: Vpp Pin
Appendix C: Termination of the VPP and Mode Pin for ACT1 Devices in a Radiation Environment Actel recommends that you terminate the MODE pin to a GND with a hard jumper in parallel with a 10k W resistor. The hard jumper protects against resistor failure. - Page 31 (VPP tied high), this diode cannot be forward-biased and the device draws normal operating current as outlined in the Actel FPGA Data Book. If this diode becomes forward biased (a potential risk if VPP floats and gets driven low), the device draws excessive current.
-
Page 33: Troubleshooting
Q: I’ve connected Silicon Explorer II and the window display reads N/C. Why? A: Look on the top of the Silicon Explorer II for the flashing yellow “heartbeat.” If it isn’t flashing make sure you have properly connected an adequate power supply. - Page 34 Explorer II window flashes an error message and returns to IDLE. Why? A: If the target power is incapable of supplying the necessary current, then Silicon Explorer II resets and returns to IDLE. Many current- limiting supplies will trip when set too close to the operating current.
- Page 35 A: Your cable will not have the TMS and the SDO pin cables if it was bought before the SX probing capability was introduced. To order a new cable (Si-Ex-Ribbons), contact Actel customer service at Customer.Service@actel.com. Q: Is the Silicon Explorer displaying an incorrect signal? A: Make sure that the signal is sampled at a sufficiently high frequency.
- Page 36 Appendix D: Troubleshooting Q: What are the limitations in probing Actel devices using Silicon Explorer? A: Probing limitations are described in Table D-1. Note that -- indicates that the feature is unavailable, and * indicates that the feature only applies to devices that have Qclock.
-
Page 37: General Information
SI-EX-TCA: Flying lead cable assembly Q: Can we use Silicon Explorer to debug devices which have their security fuses programmed? A: As a part of the Actel FPGAs security feature the Silicon Explorer cannot be used on devices which have their security fuse programmed. -
Page 38: Software Setup
Appendix D: Troubleshooting Software Setup Q: How do I set up triggering? A: You have an option of setting trigger either EARLY that displays the values in the ratio of (25% 75%), where the first % represents the % of data sampled before the trigger point and the later % represent % sampled after the trigger point. - Page 39 A: Please refer to the following guru document for detailed information about the connector. http://www.actel.com/GURU_docs/feb00/ns853.html. Q: Where can I find the pin layout of the Silicon Explorer? A: The pin layout for the Silicon Explorer is found on the back of the Silicon Explorer case.
- Page 40 SDO pin of the Silicon Explorer. Q: What are the power requirements for Silicon Explorer II? A: Silicon Explorer II must be connected to a power supply of 5V for 5V tolerant devices, 3.3V for 3.3V tolerant devices, and 2.5V for...
-
Page 41: Index
Index Probe Leads, Connecting 5 Probe Pilot 33 Analyze Module 13 Probing View Data 15 Software 10 Checksum Error Messages 12 Sampling Rate 32 Command Module 10 SDO Pin Location 21 Explore FPGA 10 Security Fuses 31 Export a Probe File 11 Settings, Software 2 Probing a Node 12 Silicon Explorer...
Need help?
Do you have a question about the Silicon Explorer II and is the answer not in the manual?
Questions and answers