Table of Contents
Advertisement
Quick Links
Advertisement
Table of Contents

Related Manuals for Gudsen MOZA Pro


Summary of Contents for Gudsen MOZA Pro
- Page 1 User manual...
-
Page 2: User Note
2. Gudsen is responsible for the warranty and maintenance of the product itself. However, Gudsen assumes no liability for damage or injuries incurred directly or indirectly from misuse of the product. 3. By reading this disclaimer, you also acknowledge... -
Page 3: Table Of Contents
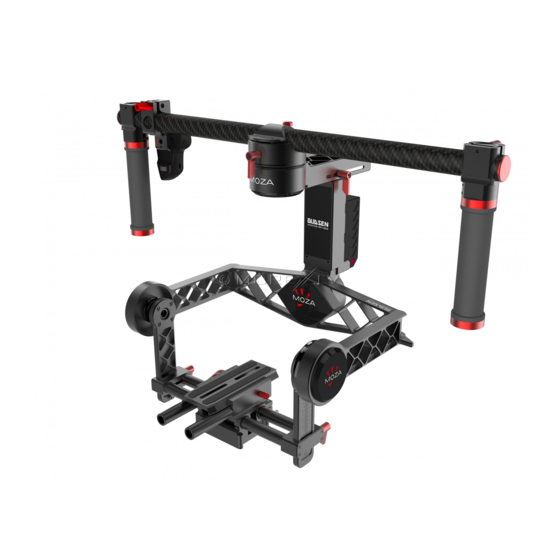
Firmware Upgrade on Thumb Controller MOZA Pro Diagram· · · · · · · · · · · · ·4 · · · · · · · · · · · · · · · · · · · · · · · · · · · · · ·38 Installation·... - Page 4 Designed for professional film production, the MOZA Pro is an intelligent 3-axis electronic gyroscope stabilizer made by Gudsen Technology to create smooth video. MOZA Pro has a maximum payload of 10kg that can support most large cinema cameras. The wireless thumb controller designed exclusively by Gudsen Technology works perfectly with MOZA Pro for camera recording and focus control.
-
Page 5: In The Box
In the Gimbal X 1 Stand X 1 Handle Bar X 1 Accessory Mount X 2 Intelligent Battery X 1 Battery Charger X 1 Pan Extension Arm X 1(Assembled) Roll Extension Arm X 1 (Assembled) Counterweight Set(Securing Rods & Counterweights)X 1(Optional) Wireless Thumb Controller(accessory mount assembled)... -
Page 6: Safety Instructions
Safety Instructions 1. The MOZA Pro is a precision machine, but it is not waterproof. Keep it away from rain and other damp conditions. Do not place it on items containing liquid or store any items on it that contain liquid. - Page 7 1. Handle bar 2. Slide Handle 3. Safety Pin for Handle Bar 4. Locking-knob for Handle Bar 5. Pan/Yaw Motor 6. Pan/Yaw Arm 7. Mainboard 8. Roll Motor 9. Roll Arm (U-shaped arm) 10. Tilt Motor 11. Camera Upper Mount Assembly 12.
- Page 8 1. Top Handle 2. Locking-knob for Handle Bar 3. Intelligent Battery 4. Communication Port (CAN/USB/PPM) 5. Knob to Lock Camera Upper Mount Assembly 6. Knob to Adjust Tilt Balance of Camera Upper Mount Assembly 7. Knob to Adjust Tilt Balance of Camera Lower Mount Assembly 8.
-
Page 9: Installation
Each blue light indicates 20% power. The battery is charged when the last small light is blinking. The charge port is on the right. The intelligent battery functions only when installed on the MOZA Pro. It will shut down automatically when it is not installed on the MOZA Pro. - Page 10 Insert the two shorter rods with grooves into the upper rod holder and make sure the groove is upwards. This will make it convenient to hold the MOZA Pro. Tighten all knobs and screws to finish installation of the tuning stand.
- Page 11 4. Install the intelligent battery Insert the intelligent Slide down until the battery directly into the locking-pin is secured. battery slot. 5. Attach the camera to the gimbal There are two different screws in the mounting plate: ¼” and 3/8”. Choose the correct screw holes for your camera’s configuration.
- Page 12 6. Install the extension arms Loosen the screw [1], take out the baffle plate [2], and insert the extension arm into the yaw axis. Secure it with 4 M4*20 screws [3]. Tighten it with 1 M3*10 head screw [4]. You are now finished installing the yaw-axis extension arm.
- Page 13 Installing Counterweights When the weights of the camera and lens are not distributed evenly, the balance cannot be adjusted. Adding counterweights can adjust the centre of gravity. The counterweight kit is made up of 3 large counterweights (326g each), 3 small counterweights(155g each) and 1 weight connector.
- Page 14 Balance...
- Page 15 3.Balance the roll arm Loosen the two lock-knobs to slide the camera left or right until the roll axis be comes level. Then, tighten the two lock-knobs. 4. Balancing the pan axis Loosen the lock-knob to slide the compartment forward or backwards until the pan axis stays still when released.
-
Page 16: Getting Started
Getting Started Some things to remember before you get started: 1. Heavy lenses may be necessary in certain cases, but heavy lenses change the camera’ s center of gravity, causing oscillation. Use the lens support in these situations. Remove the lens support from the tool bag and install it on the pan axis quick release. -
Page 17: Follow Modes
Function Instructions Follow Mode Usually, by default a lens will keep level in all circumstances. When the Follow Mode is on, the lens will follow the movement of the operation instead of locking in a level direction. There are 3 types of Follow Modes. Quickly press the ’Option’ button to switch among the modes. For more specific operations, refer to the thumb controller function instructions. -
Page 18: Operation Modes
Operation Modes There are 3 operation modes for the MOZA Pro. It is very flexible and can change its shape adapt to various situations. Users can choose the proper mode for their shooting circumstances. The specific steps for transformation are as... - Page 19 Gimbal Movement Control The gimbal's movement can be controlled by the thumb or SBUS controller. The thumb controller works effectively within 30 meters of the gimbal. It can control the pan and tilt axis movements in all Follow and Operation Modes. The gimbal will stop and hold the last position. The last position will then become the new stable position, and MOZA will balance according to it.
- Page 20 Wireless Thumb Controller Interface Diagram LOGO OLEO JOYSTICK SPEED ON/OFF OPTION ROLLER...
- Page 21 Button Introductions JOYSTICK The main interface controls the up, down, and sideways movements. On the menu interface, vertical movements will select projects. Moving leftwards will return you to the previous menu. Moving rightwards confirms your selection. On the Data Input interface, vertical movements increase or decrease the number, and move you to the left exit.
-
Page 22: Thumb Controller
Using the Main Menu LOGO Connection State Gimbal Power level Thumb Controller Power Charing icon 录制状态 Recording State Focus Speed 调焦速度 Gimbal Speed 遥控速度 Follow Operation Mode REC: Ready Ready to record Recording Recording SPEED Status: Focus Adjustment Speed Remote Control Speed L Low L Low M Medium... - Page 23 1.Starting or stopping the recording A single press of the ON/OFF button. ON/OFF 2.Adjusting the focus and gimbal movement speeds A single press will change speeds between Low/Medium/High. A long press will change the speed settings between the gimbal movement and focus control. A Single Press SPEED button A Single Press SPEED button Long Press SPEED...
- Page 24 3. Switching the Follow Modes A single press will switch the Follow Modes between pan follow, tilt follow, and all locked. OPTIONS button 4. Adjusting the camera focus Roll the roller. 5. Adjusting the camera focus Entering the Main Menu interface, long press the ’OPTIONS’ button. 6.
- Page 25 Thumb Controller Menu Content menu Third Fourth Secondary m Pair Camera Lens ultralight EOS DSLR Lens l ight Lens heavy Lens ltra l ight Cinema Lens light Lens heavy Alpha Ditto BMCC Ditto BMPC Ditto BMPCC Di tto Habits Joystick Mode Direct ions...
- Page 26 Pairing It is necessary to pair the MOZA with the thumb controller when you change the thumb controller or MOZA gimbal. Long press OPTIONS to enter the menu. Then choose ‘Pair’ and move the joystick rightwards to enter the secondary menu. Move the joystick downwards to choose the YES option, and move the joystick rightwards again to enter the ‘Pairing’...
- Page 27 ‘Set OK’. Choose ON when you need the motor to work. Place the MOZA Pro on a sturdy and stationary surface. Turn on the wireless thumb controller and enter the main menu. Click ‘Calibrate.’ Then choose YES. The wireless thumb controller screen will display ‘Calibrating’.
- Page 28 Preference The preference setting can customize parameters and the backlighting time of the screen. Click "Joystick" to enter the setting menu. Click "Mode" to set the operation mode. Either 4 (up, down, right, left) or 8 directions are possible. When done, the screen will display "Set OK". ‘Up Down’...
-
Page 29: Software And App
Android 4.0 above It is necessary to manually install the Virtual Serial Port Driver the first time you connect the MOZA Pro to a windows computer. There are a few devices that cannot install the drive, due to compatibility issues. - Page 30 Connecting the MOZA Assistant to the MOZA Pro There are three different interfaces in the MOZA Assistant software. Each represents a different status of the MOZA Pro and thumb controller. I、Adjust Parameters(after MOZA Pro is balanced) : 1.Install the intelligent battery and turn on the gimbal 2.Connect the USB cable...
-
Page 31: Sensor Calibration
Use Software to Adjust Parameters Follow the steps below to enter the parameter adjustment mode. Turn off motor: Tick this box to shut down the motor’s power. It's required to check this box before calibrating the sensor. Otherwise, data errors in the calibration may occur. Adjust the motor’s working state and not make any noise. - Page 32 Follow:Adjust the parameters in each Follow Mode。 Check to start Follow Mode. Accel: Adjusts the accelerated speed from still to rotate. Dead Corner: Deviation angle allowed before a Follow movement Smoothi ng: The smoothing each axis when the outer remote operates the gimbal.
- Page 33 Mechanical Angle: Each motor’s rotation angles from its initial position. Monitor: real-time view of the video captured by the camera. The mechanical angle is the actual rotation angle of the motor. The monitor angle is the angle calculated by the gyro-sensor, which is the deviation angle of the camera along three axes.
- Page 34 Follow Speed: The specific values of the different speed levels of the gimbal’s follow movement. There are three options of follow speed: Low/Middle/High Remote Speed: The specific values of the thumb controller operating the gimbal. There are three options for the thumb controller: Low/Middle/High. Dead Range:The gimbal will not rotate when moving the joystick of the thumb controller in the dead range.
- Page 35 Angle Offset: When there is a slight deviation between the locked and absolute positions, the angle offset can be used to offset the deviation.
- Page 36 Whether the MOZA Pro enters the parameter-adjustment or firmware-upgrade mode is decided by if you first open the software or turn on the battery. A few computers may fail to enter the firmware-upgrade state. Setting the upgrade wait time will help avoid such errors. This...
- Page 37 Calibrating the Sensor Before calibration, turn off the motor and uncheck the Follow Mode. Place the gimbal on a sturdy and stationary surface. Click “Sensor Calibrate” to begin calibration. Wait for at least three minutes, and then check for any changes in the gyroscope’s data.
- Page 38 Upgrade the MOZA Pro Firmware Follow the steps below to upgrade the MOZA Pro firmware. 1.Open the MOZA Assistant software 2.Connect the USB Cable 3.Install the intelligent battery and turn it on First, connect the gimbal to a PC or Mac through the USB cable. Then, turn on the MOZA Pro.
- Page 39 Upgrade the Wireless Thumb Controller Firmware Follow the steps below to upgrade the thumb controller firmware. 1.Open the MOZA Assistant software 2.Turn off the wireless thumb controller 3.Long press on SPEED and connect the USB cable The MOZA Assistant software will automatically access information from the wireless thumb controller and download the latest firmwareyou’re your network connection.
-
Page 40: Specifications
Specifications MOZA PRO Wireless Thumb Controller GENERAL Weight 100g Weight 3.6kg Battery Capacity 600mAh Dimensions 50*25*35(CM) Battery Voltage 3.7V Max Payload 10.0kg Working Current 50mA Resting Current 10mA Extended Interface Battery Life Bluetooth BLUETOOTH 4.0 Wireless Type 2.4G Wireless Remote Control 2.4G... -
Page 41: Faqs
7. In the case of a power motor shutdown, it is likely that the three axes of the MOZA Pro have engaged the self-protection function. When there are abnormal conditions, the self-protection mode shuts off the power. -
Page 42: Maintenance
The stand should be used for MOZA Pro storage. Do not hang other heavy items on the stand. Without the stand, the L-shaped handle bar can be detached and the MOZA Lite 2 can be... - Page 43 Please retain this user manual. Website: www.gudsen.com Customer Service: support@gudsen.com...
- Page 44 经销商信息(签章)...
Need help?
Do you have a question about the MOZA Pro and is the answer not in the manual?
Questions and answers