Advertisement
Quick Links
Advertisement

Related Manuals for Crosley CO7179


Summary of Contents for Crosley CO7179
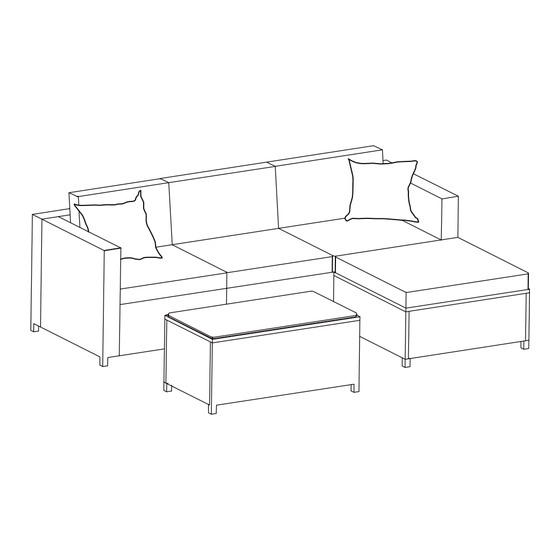
- Page 1 5 Piece Wicker Sofa Set CO7179...
-
Page 2: Part List
PART LIST (armless & corner chair) (armless chair) (armless chair) (corner chair) (corner chair) Seat Panel Side Panel Seat Panel Back Panel Arm Panel 1 PC 4 PCS 1 PC 2 PCS 2 PCS (corner chair) (ottoman) (ottoman) (ottoman) (coffee table) Long Side Panel Short Side Panel Wicker Top... -
Page 3: Hardware List
HARDWARE LIST M6*50mm M6mm M6*30mm M6mm M6mm M6mm Long Bolt Bolt Flat Washer Hex Nut Allen Wrench 2 PCS 96 PCS 28 PCS 40 PCS 28 PCS M6mm Wrench 2 PCS EXTRA HARDWARE LIST M6*50mm M6*30mm M6mm M6mm M6mm Long Bolt Bolt Flat Washer Hex Nut... - Page 4 Step 1. Lay seat panel (part A) upside down on a soft flat surface, such as carpet, as shown below. Attach side panels (part B) to seat panel (part A) using bolts (part M), flat washers (part O) and allen wrench (part Q). NOTE: Please do not fully tighten bolts until unit is fully assembled.
- Page 5 Step 3. Carefully turn the assembled unit upright. Add seat cushion (part T) and back cushion (part U) as shown below.
- Page 6 Step 4. Lay seat panel (part D) upside down on a soft flat surface, such as carpet, as shown below. Attach side panel (part B) to seat panel (part D) using bolts (part M), flat washers (part O) and allen wrench (part Q). NOTE: Please do not fully tighten bolts until unit is fully assembled.
- Page 7 Step 6. Attach assembled unit (parts B & D) to arm panel (part E) and back panel (part F) using long bolts (part N), flat washers (part O), hex nuts (part P), allen wrench (part Q) and wrench (part R). NOTE: Please fully tighten all bolts at this time.
- Page 8 Step 8. Lay wicker top (part G) upside down on a soft flat surface, such as carpet, as shown below. Attach long side panels (part H) to wicker top (part G) using bolts (part M), flat washers (part O) and allen wrench (part Q). NOTE: Please do not fully tighten bolts until unit is fully assembled.
- Page 9 Step 10. Carefully turn the assembled unit upright. Add seat cushion (part V) as shown below.
- Page 10 Step 11. Lay wicker top (part J) upside down on a soft flat surface, such as carpet, as shown below. Attach long side panels (part K) to wicker top (part J) using bolts (part M), flat washers (part O) and allen wrench (part Q). NOTE: Please do not fully tighten bolts until unit is fully assembled.
- Page 11 Step 13. Carefully turn the unit upright. Place glass top (part S) on wicker top (part J). Step 14. Add pillows (part W) as shown below.
Need help?
Do you have a question about the CO7179 and is the answer not in the manual?
Questions and answers