Table of Contents
Advertisement
Quick Links
Advertisement
Table of Contents

Related Manuals for Crosley CO1011A


Summary of Contents for Crosley CO1011A
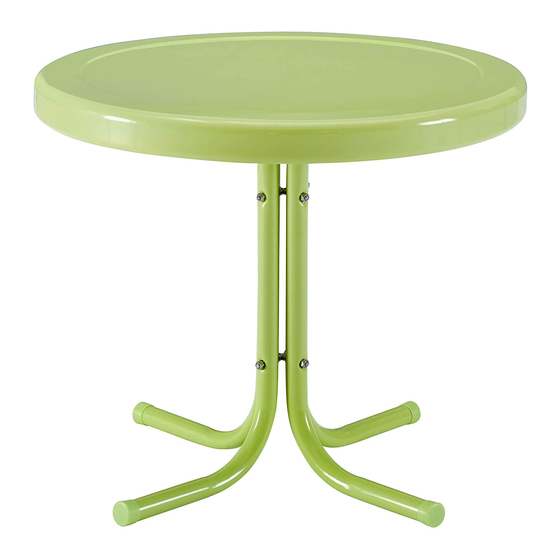
- Page 1 C R O S L E Y F U R N I T U R E METAL SIDE TABLE CO1011A...
- Page 2 C R O S L E Y F U R N I T U R E Congratulations! You have purchased a stylish piece of Crosley Furniture. We strive to provide fine furniture products, built with quality materials. Please carefully follow the assembly instructions to ensure your furniture is assembled correctly to provide long lasting enjoyment.
- Page 3 PART LIST Leg Connector HARDWARE LIST ST4.2 X 33 MM 6.5 X 1.0 MM 1/4" X 15 MM BOLT BOLT COVER 1/4" NUT WASHER BOLT 3 PCS 3 PCS 3 PCS 3 PCS 6 PCS FOOT CAP HEX WRENCH Allen Wrench FACTORY ASSEMBLY 1 PC 1 PC...
- Page 4 Step1: Place tabletop upside down on a flat, non-abrasive surface. Attach table leg to tabletop using 1/4"x 15mm bolt (1) and 1/4" (2) washer as shown in (Figure 1). Add 1/4" nut (4) to the end of bolt. Tighten a few revolutions only. Do not tighten completely at this time as some adjustments may be necessary to the alignment of the table legs.
- Page 5 Step3: Make any adjustments to the parts to ensure they are properly aligned. At this time tighten all nuts and bolts using Allen Wrench (6) and hex wrench (7). Tighten each bolt connection a few revolutions at a time, rotating between bolt connections until all nuts and bolts are completely tightened.
- Page 6 In accordance with the "Moss-Magnuson Warranty Act" of July 10, 1975, this is termed a "limited warranty" which in no way compromises Crosley Furniture's high standards of Quality and Workmanship. 5 of 5...
Need help?
Do you have a question about the CO1011A and is the answer not in the manual?
Questions and answers