Table of Contents
Advertisement
Quick Links
Advertisement
Table of Contents

Related Manuals for Casio CTK-691


Summary of Contents for Casio CTK-691
- Page 1 CTK691ES01-01_cover1-4.fm 1 ページ 2003年9月29日 月曜日 午後4時56分...
- Page 2 CTK691ES01-01_cover1-4.fm 2 ページ 2003年10月23日 木曜日 午後5時2分...
- Page 3 CTK691E01-01.book 1 ページ 2003年9月29日 月曜日 午後4時47分 Safety Precautions Safety Precautions Congratulations on your selection of the CASIO electronic musical instrument. Before using the instrument, be sure to carefully read through the instructions contained in this manual. Please keep all information for future reference.
- Page 4 Never twist or stretch the cord. Should the electric cord or plug become damaged, contact your original retailer or authorized CASIO Service Provider. AC Adaptor Never touch the AC adapter while your hands are wet. Doing so creates the risk of electric shock.
-
Page 5: Safety Precautions
CTK691E01-01.book 3 ページ 2003年9月29日 月曜日 午後4時47分 Location Avoid locating the product on an unstable stand, on an uneven surface, or any other unstable location. An unstable location can cause the product to fall over, creating the risk of personal injury. AC Adaptor Misuse of the AC adaptor creates the risk of fire and electric shock. - Page 6 CTK691E01-01.book 4 ページ 2003年9月29日 月曜日 午後4時47分 Safety Precautions Sound Volume Do not listen to music at very loud volumes for long periods. Particular care concerning this precaution is required when using headphones. High volume settings can damage your hearing. Heavy Objects Never place heavy object on top of the product. Doing so can make the product top heavy, causing the product to tip over or the object to fall from it, creating the risk of personal injury.
-
Page 7: Introduction
100 original tones in user tone memory. Flash Memory Built-in Flash memory lets you expand your selection of tones and rhythms by downloading data from the CASIO MUSIC SITE, or from other sources. You can also store up to 200 SMF format music files for playback. - Page 8 Keyboard setups can be stored in memory for later recall and instant set up whenever you need them. Up to 32 setups (4 setups x 8 banks) can be stored in registration memory. Data download from your computer You can use your computer to download data from the CASIO MUSIC SITE. 705A-E-008A...
-
Page 9: Table Of Contents
CTK691E01-01.book 7 ページ 2003年9月29日 月曜日 午後4時47分 Contents Safety Precautions ... E-1 Introduction ... E-5 General Guide ... E-9 Attaching the Score Stand ...E-10 Playing a Demo Tune...E-11 About the display...E-12 Power Supply ... E-14 Using batteries ...E-14 Using the AC Adaptor ...E-15 Auto Power Off...E-16 Turning Off the Keyboard ...E-16 Memory Contents...E-16... - Page 10 CTK691E01-01.book 8 ページ 2003年9月29日 月曜日 午後4時47分 Contents Storing a User Tone In Memory ...E-49 Registration Memory .. E-50 Registration Memory Features...E-50 To Save a Setup in Registration Memory ...E-51 To Recall a Setup from Registration Memory ...E-52 Song Memory Function ... E-53 Tracks ...E-53 Basic Song Memory operations ...E-54 Using Real-time Recording ...E-54...
-
Page 11: General Guide
CTK691E01-01.book 9 ページ 2003年9月29日 月曜日 午後4時47分 General Guide General Guide 705A-E-011A... -
Page 12: Attaching The Score Stand
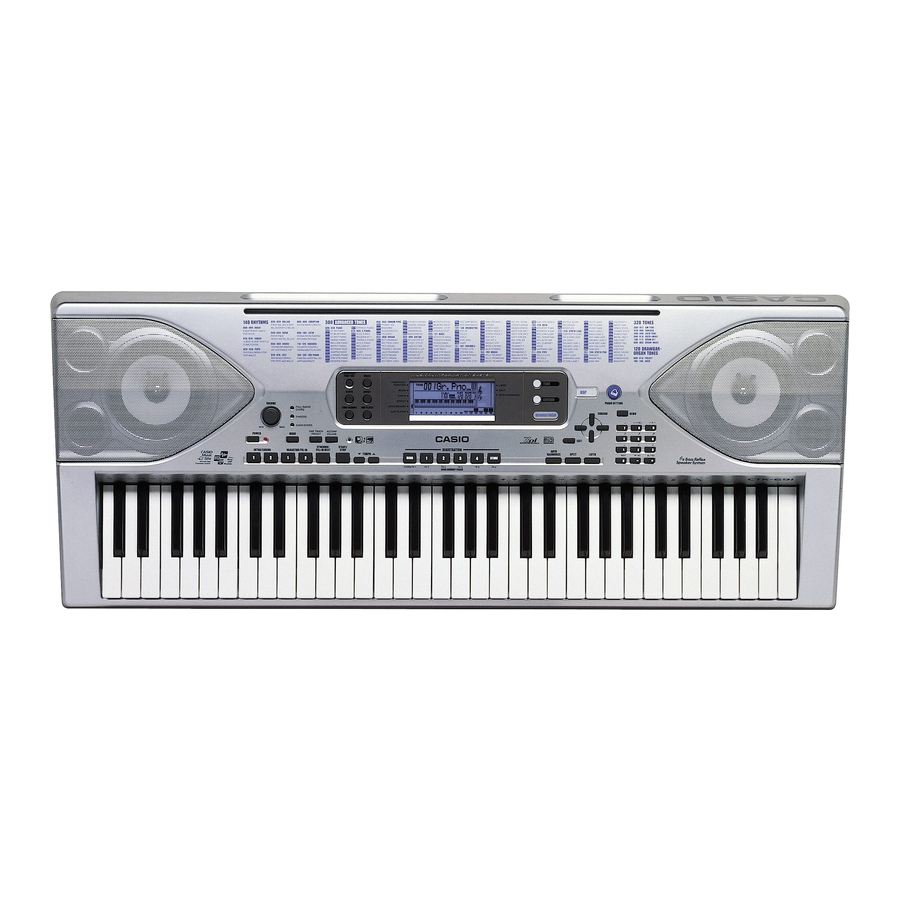
CTK691E01-01.book 10 ページ 2003年9月29日 月曜日 午後4時47分 General Guide POWER button Power indicator SONG MEMORY button SYNTH button TRANSPOSE/FUNCTION button MIXER button EFFECT button SMF PLAYER button VOLUME knob MODE button ONE TOUCH PRESET button ACCOMP VOLUME button DATA ACCESS indicator RHYTHM button TONE button DRAWBAR ORGAN button DSP button... -
Page 13: Playing A Demo Tune
CTK691E01-01.book 11 ページ 2003年9月29日 月曜日 午後4時47分 Rear Panel Playing a Demo Tune (*3) Pressing the DEMO button starts demo tune play. There are 3 demo tunes, which continuously play in sequence. To stop demo tune play, press either the DEMO button or the START/STOP button. Pressing the [ + ]/[–] buttons skips to the next demo tune. -
Page 14: About The Display
CTK691E01-01.book 12 ページ 2003年9月29日 月曜日 午後4時47分 General Guide About the display Pointers appear here to show when Transpose, the Keyboard Setting Mode, the Mixer Mode, Synthesizer, Effect, Song Memory, or SMF player is being used. The TONE indicator appears when you are selecting or viewing the TONE setting, while RHYTHM appears for the RHYTHM setting. - Page 15 CTK691E01-01.book 13 ページ 2003年9月29日 月曜日 午後4時47分 You can turn on the metronome to provide a reference beat for your keyboard play. This display shows the note played on the keyboard, notes being played back from Song Memory, chord forms, and received MIDI data*. The name of the chord being played is shown on the display while Auto Accompaniment is being used.
-
Page 16: Power Supply
CTK691E01-01.book 14 ページ 2003年9月29日 月曜日 午後4時47分 Power Supply Power Supply This keyboard can be powered by current from a standard household wall outlet (using the specified AC adaptor) or by batteries. Always make sure you turn the keyboard off whenever you are not using it. Using batteries Always make sure you turn off the keyboard before loading or replacing batteries. -
Page 17: Using The Ac Adaptor
Never twist or stretch the cord. Should the electric cord or plug become damaged, contact your original retailer or authorized CASIO Service Provider. Never touch the AC adaptor while your hands are wet. Doing so creates the risk of electric shock. -
Page 18: Auto Power Off
CTK691E01-01.book 16 ページ 2003年9月29日 月曜日 午後4時47分 Power Supply Auto Power Off When you are using battery power, keyboard power turns off automatically whenever you leave it on without performing any operation for about 6 minutes. When this happens, press the POWER button to turn power back on. Auto Power Off is disabled (it does not function) when you are using the AC adaptor to power the keyboard. -
Page 19: Connections
When connected to a musical instrument amplifier, set the volume of the keyboard to a relatively low level and make output volume adjustments using the amplifier’s controls. -
Page 20: Accessories And Options
CTK691E01-01.book 18 ページ 2003年9月29日 月曜日 午後4時47分 Connections Soft Pedal Depressing the pedal softens the sound of the notes being played. Rhythm Start/Stop Pedal In this case, the pedal performs the same functions as the START/STOP button. Accessories and Options Use only the accessories and options specified for this keyboard. -
Page 21: Basic Operations
CTK691E01-01.book 19 ページ 2003年9月29日 月曜日 午後4時47分 Basic Operations Basic Operations VOLUME Number buttons This section provides information on performing basic keyboard operations. To play the keyboard Press the POWER button to turn the keyboard Use the VOLUME knob to set the volume to a relatively low level. - Page 22 CTK691E01-01.book 20 ページ 2003年9月29日 月曜日 午後4時47分 Basic Operations Drawbar Organ Tones: 50 Preset Tones + 100 User Tones Number of Number Tone Type Tones 000-049 Preset Tones 100-199 User Tones (*6) *1: See “Changing Tones and Configuring DSP Effect Settings” on page E-21. *2: Memory area for tones created by you.
-
Page 23: Piano Setting Button
CTK691E01-01.book 21 ページ 2003年9月29日 月曜日 午後4時47分 Digital Sampling A number of the tones that are available with this keyboard have been recorded and processed using a technique called digital sampling. To ensure a high level of tonal quality, samples are taken in the low, mid, and high ranges and then combined to provide you with sounds that are amazingly close to the originals. -
Page 24: Using The Drawbar Organ Mode
CTK691E01-01.book 22 ページ 2003年9月29日 月曜日 午後4時47分 Using the Drawbar Organ Mode Using the Drawbar Organ Mode DRAWBAR ORGAN Number buttons Your keyboard has built-in “drawbar organ tones” that can be altered using nine digital drawbars whose operations are similar to the controls on a drawbar organ. You can also select percussion or key click. There is room in memory for storage of up to 100 user- created drawbar tone variations. -
Page 25: To Select A Drawbar Organ Tone
CTK691E01-01.book 23 ページ 2003年9月29日 月曜日 午後4時47分 To select a drawbar organ tone Find the drawbar organ tone you want to use in the tone list and note its tone number. Press the DRAWBAR ORGAN button. This causes the drawbar organ tone selection screen to appear. -
Page 26: Parameter Details
CTK691E01-01.book 24 ページ 2003年9月29日 月曜日 午後4時47分 Using the Drawbar Organ Mode Parameter Details The following provides details about the parameters you can configure using the drawbar organ tone editing screen. Drawbar Position This parameter defines the position of each drawbar, and the volume of each overtone. -
Page 27: To Save An Edited Drawbar Organ Tone
CTK691E01-01.book 25 ページ 2003年9月29日 月曜日 午後4時47分 To save an edited drawbar organ tone After editing parameters, use the [ CURSOR buttons to display “More?”. Press the [ ] CURSOR button three times to display the screen for inputting a tone name and assigning a tone number. -
Page 28: Applying Effects To Tones
CTK691E01-01.book 26 ページ 2003年9月29日 月曜日 午後4時47分 Applying Effects to Tones Applying Effects to Tones EFFECT ] CURSOR This keyboard provides you with a selection of effects that you can apply to tones. The built-in effects include a wide variety of variations that give you access to a selection of general digital effects. - Page 29 CTK691E01-01.book 27 ページ 2003年9月29日 月曜日 午後4時47分 Press the [ ] CURSOR button. The DSP type setting screen will appear automatically about fives seconds after you press the button. Use the [+] and [–] buttons or the number buttons to select the type of DSP you want. See the “Effect List”...
-
Page 30: Dsp Button
CTK691E01-01.book 28 ページ 2003年9月29日 月曜日 午後4時47分 Applying Effects to Tones Saving the Settings of DSP Parameters You can save up to 100 modified DSPs in the user area for later recall when you need them. User DSP areas 100 through 199 initially contain the same data as DSP types 000 through 099. -
Page 31: Selecting Chorus
CTK691E01-01.book 29 ページ 2003年9月29日 月曜日 午後4時47分 After selecting the reverb type you want, use the [ ] and [ ] CURSOR buttons to display the parameter whose setting you want to change. This displays the parameter setting screen. Example: To set the Reverb Time parameter Use the [ + ] and [–] buttons or the number buttons to input the parameter setting you want. -
Page 32: Using The Equalizer
CTK691E01-01.book 30 ページ 2003年9月29日 月曜日 午後4時47分 Applying Effects to Tones Press the EFFECT or EXIT button. This returns to the tone or rhythm selection screen. CHORUS Parameters Chorus Level (Range: 000 to 127) Specifies the size of the chorus sound. Chorus Rate (Range: 000 to 127) Specifies the undulation speed of the chorus sound. -
Page 33: Auto Accompaniment
CTK691E01-01.book 31 ページ 2003年9月29日 月曜日 午後4時47分 Auto Accompaniment Auto Accompaniment MODE RHYTHM VARIATION/FILL-IN 1/2 TEMPO [ + ]/[–] This keyboard automatically plays bass and chord parts in accordance with the chords you finger. The bass and chord parts are played using sounds and tones that are automatically selected to select the rhythm you are using. -
Page 34: Selecting A Rhythm
CTK691E01-01.book 32 ページ 2003年9月29日 月曜日 午後4時47分 Auto Accompaniment Selecting a Rhythm This keyboard provides you with 140 exciting rhythms that you can select using the following procedure. You can also transfer accompaniment data from your computer and store up to 16 of them as user rhythms in keyboard memory. -
Page 35: Using Auto Accompaniment
The accompaniment keyboard can be used for playing chords only. No sound will be produced if you try playing single melody notes on the accompaniment keyboard. Chord Types CASIO CHORD accompaniment lets you play four types of chords with minimal fingering. Chord Types Example... - Page 36 CTK691E01-01.book 34 ページ 2003年9月29日 月曜日 午後4時47分 Auto Accompaniment FINGERED FINGERED provides you with a total of 15 different chord types. The following describes the FINGERED “accompaniment keyboard” and “melody keyboard”, and tells you how to play a C-root chord using FINGERED. FINGERED Accompaniment Keyboard and Melody Keyboard The accompaniment keyboard can be used for playing chords only.
-
Page 37: Using An Intro Pattern
Before starting, you should first select the rhythm you want to use, set the tempo, and use the MODE button to select the chord play method you want to use (NORMAL, CASIO CHORD, FINGERED, FULL RANGE CHORD). To insert an intro Press INTRO/ENDING button 1 or 2. -
Page 38: Using A Rhythm Variation
Before starting, you should first select the rhythm you want to use, set the tempo, and use the MODE button to select the chord play method you want to use (NORMAL, CASIO CHORD, FINGERED, FULL RANGE CHORD). To use synchro start Press the SYNCHRO/FILL-IN NEXT button to put the keyboard into synchro start standby. -
Page 39: Using One-Touch Preset
Auto Harmonize turns off temporarily whenever you start demo tune play. It turns back on as soon as the operation or function that caused it to turn off is finished. Auto Harmonize is enabled only when the Auto Accompaniment mode is FINGERED or CASIO CHORD. E-37... -
Page 40: Adjusting The Accompaniment Volume
CTK691E01-01.book 38 ページ 2003年9月29日 月曜日 午後4時47分 Auto Accompaniment Auto Harmonize Types Auto Harmonize lets you select from among the 10 Auto Harmonize types. Type changing is performed by the setting item using the TRANSPOSE/FUNCTION button. See “Changing Other Settings” on page E-71 for more information. -
Page 41: Mixer Function
When this keyboard is being used as the sound source for an externally connected computer or other MIDI device, all 16 channels are assigned musical instrument parts. The notes played over the channel selected by steps 1 and 2 under “Turning Channels On and Off” on page E-40 are shown on the displayed keyboard and staff. -
Page 42: Turning Channels On And Off
CTK691E01-01.book 40 ページ 2003年9月29日 月曜日 午後4時47分 Mixer Function Turning Channels On and Off Turning a channel off mutes any instrument recorded in the channel. To turn channels on and off Press the MIXER button. This causes a pointer to appear on the display next to MIXER. -
Page 43: How Parameters Work
main10.fm 41 ページ 2003年10月29日 水曜日 午後2時12分 Use the [ ] and [ ] CURSOR buttons to select the parameter whose setting you want to change. Example: Select volume setting by displaying “Volume”. Each press of the [ ] or [ ] CURSOR buttons cycles through the parameters. -
Page 44: Effect Parameters
CTK691E01-01.book 42 ページ 2003年9月29日 月曜日 午後4時47分 Mixer Function Octave Shift (Range: –2 to 0 to +2) You can use octave shift to shift the range of the tone up or down. When using the piccolo tone, there may be cases when very high notes you want to play are not included within the range of the keyboard. - Page 45 CTK691E01-01.book 43 ページ 2003年9月29日 月曜日 午後4時47分 DSP System Reverb Send (Range: 000 to 127) This parameter adjusts how much reverb is applied to all parts. DSP System Chorus Send (Range: 000 to 127) This parameter adjusts chorus. Changing the tone, volume, pan pot, coarse tune, fine tune, reverb send, or chorus send setting causes the corresponding MIDI message to be output from the MIDI terminal.
-
Page 46: Synthesizer Mode
CTK691E01-01.book 44 ページ 2003年9月29日 月曜日 午後4時47分 Synthesizer Mode Synthesizer Mode SYNTH Number buttons The Synthesizer Mode of this keyboard provides the tools for creating your own original tones. Simply select one of the built-in tones and change its parameters to create your own original sound. - Page 47 CTK691E01-01.book 45 ページ 2003年9月29日 月曜日 午後4時47分 Tone Characteristic Waveform Tone Setting Specifies which of the preset tones should be used as the original tone. Volume Characteristic Parameters These parameters control how the tone changes over time, from when the keyboard key is pressed until the tone decays. You can specify changes in volume and sound characteristics.
- Page 48 CTK691E01-01.book 46 ページ 2003年9月29日 月曜日 午後4時47分 Synthesizer Mode Saving User Tones The group of tone numbers from 600 through 699 (User 001 through User 100) is called the “user area” because they are reserved for storage of user tones. After you recall a preset tone and change its parameters to create your own user tone, you can store it in the user area for later recall.
-
Page 49: Creating A User Tone
CTK691E01-01.book 47 ページ 2003年9月29日 月曜日 午後4時47分 Creating a User Tone Use the following procedure to select a preset tone and change its parameters to create a user tone. First, select the preset tone you want to use as a basis for your user tone. Press the SYNTH button. - Page 50 CTK691E01-01.book 48 ページ 2003年9月29日 月曜日 午後4時47分 Synthesizer Mode Vibrato Delay (Range: –64 to 00 to +63) Specifies the amount of time before vibrato starts. Vibrato Rate (Range: –64 to 00 to +63) Rate (speed) of the vibrato effect Vibrato Depth (Range: –64 to 00 to +63) Depth of the vibrato effect Octave Shift (Range: –2 to 0 to +2) Up/down octave shift...
-
Page 51: Storing A User Tone In Memory
CTK691E01-01.book 49 ページ 2003年9月29日 月曜日 午後4時47分 User Tone Creation Hints The following hints provide helpful advice on making user tone creation a bit quicker and easier. Use a preset tone that is similar to the one you are trying to create. Whenever you already have a rough idea of the tone you are trying to create, it is always a good idea to start with a preset tone that is similar. -
Page 52: Registration Memory
CTK691E01-01.book 50 ページ 2003年9月29日 月曜日 午後4時47分 Registration Memory Registration Memory MODE STORE Registration Memory Features Registration memory lets you store up to 32 keyboard setups (4 sets x 8 banks) for instant recall whenever you need them. The following is a list of settings that are saved in registration memory. -
Page 53: To Save A Setup In Registration Memory
CTK691E01-01.book 51 ページ 2003年9月29日 月曜日 午後4時47分 Setup Names You can assign setups into one of 32 areas, which you can select using BANK buttons 1 through 4 and the four REGISTRATION buttons. Area names range from 1-1 through 8-4 as shown below. Use the BANK button to select the bank. -
Page 54: To Recall A Setup From Registration Memory
CTK691E01-01.book 52 ページ 2003年9月29日 月曜日 午後4時47分 Registration Memory To Recall a Setup from Registration Memory Use the BANK button or the number buttons to select the bank. If you do not perform any operation for about five seconds after pressing the BANK button, the keyboard automatically clears the registration memory recall screen. -
Page 55: Song Memory Function
CTK691E01-01.book 53 ページ 2003年9月29日 月曜日 午後4時47分 Song Memory Function Song Memory Function MODE DRAWBAR ORGAN VARIATION/FILL-IN 1/2 TEMPO [ + ]/[–], YES/NO This keyboard lets you record up to five separate songs in song memory for later playback. There are two methods you can use to record a song: real-time recording where you record the notes as you play them on the keyboard, and step recording where you input chords and notes one-by-one. -
Page 56: Basic Song Memory Operations
CTK691E01-01.book 54 ページ 2003年9月29日 月曜日 午後4時47分 Song Memory Function Selecting a Track Use the SONG MEMORY TRACK buttons marked CHORD/ TR1 through TR6 to select the track you want. SONG MEMORY TRACK Buttons Track 1 Track 2 Track 3 Track 4 Track 5 Track 6 Basic Song Memory operations The status of the Song Memory changes each time you press... -
Page 57: Mixer Mode Settings
CTK691E01-01.book 55 ページ 2003年9月29日 月曜日 午後4時47分 Play something on the keyboard. You can also record Auto Accompaniment chords by selecting the applicable mode with the MODE button. Optional pedal operation is also recorded. See “Track 1 Contents After Real-time Recording”. Press the START/STOP button to end recording when you are finish playing. -
Page 58: Playing Back From Song Memory
CTK691E01-01.book 56 ページ 2003年9月29日 月曜日 午後4時47分 Song Memory Function To synchro start Auto Accompaniment with an intro pattern In place of step 4, press the SYNCHRO/FILL-IN NEXT button and then INTRO/ENDING 1 or INTRO/ENDING 2 button. Auto-accompaniment will start with the intro pattern when you play a chord on the accompaniment keyboard. - Page 59 Press the SYNCHRO/FILL-IN NEXT button. Play a chord. Use the chord play method that is specified by the current MODE setting (FINGERED, CASIO CHORD, etc.). When the accompaniment mode is set to NORMAL, specify the chord using the root input keyboard and chord type input keyboard.
- Page 60 When the accompaniment mode is set to NORMAL during step recording, you can specify chords using a method that is different from CASIO CHORD and FINGERED fingerings. This chord specification method can be used to input 18 different chord types using only two keyboard keys, so chords can be specified even if you don’t know how to...
-
Page 61: Recording Multiple Tracks
CTK691E01-01.book 59 ページ 2003年9月29日 月曜日 午後4時47分 Track 1 Step Recording Variations The following describes a number of different variations you can use when recording to Track 1 using step recording. All of these variations are based upon the procedure described under “To record chords with step recording” on page E-57. To start accompaniment with an intro pattern In step 4, press INTRO/ENDING 1 or INTRO/ENDING 2 button after the SYNCHRO/FILL-IN NEXT button. -
Page 62: Track Contents After Real-Time Recording
CTK691E01-01.book 60 ページ 2003年9月29日 月曜日 午後4時47分 Song Memory Function Track Contents After Real-time Recording In addition to keyboard notes, the following data is also recorded to the selected track during real-time recording. This data is applied whenever the track is played back. Tone number Optional pedal operations The following data is recorded in the header whenever you... -
Page 63: Correcting Mistakes While Step Recording
CTK691E01-01.book 61 ページ 2003年9月29日 月曜日 午後4時47分 Level Meter Contents During Record/Edit Standby Channels 11 through 16 correspond to Tracks 1 through 6. Whenever the keyboard is in record or edit (page E-62) standby, the level meter display shows which tracks already contain recorded data and which are still empty. Tracks with four lit segments already contained recorded data, while tracks with one lit segment are not yet recorded. -
Page 64: Editing Memory Contents
CTK691E01-01.book 62 ページ 2003年9月29日 月曜日 午後4時47分 Song Memory Function Press the [ ] CURSOR button. Press the YES button. This deletes all data from the location you specified and enters step record standby. Pressing the [ ] CURSOR button or the NO button cancels deleting the data. - Page 65 To change a chord Use the chord fingering method selected by the MODE button (FINGERED, CASIO CHORD, etc.) to input a chord. To change a tone number Use the number buttons or [ + ] and [–] buttons to change a tone number.
-
Page 66: Editing A Song
CTK691E01-01.book 64 ページ 2003年9月29日 月曜日 午後4時47分 Song Memory Function To change a rhythm controller operation * * INTRO/ENDING 1 button, INTRO/ENDING 2 button, VARIATION/FILL IN 1 button, VARIATION/FILL IN 2 button, SYNCHRO/FILL IN NEXT button operations Press the rhythm controller button you want to change to. Editing a Song You can perform the following operations in the song editing mode. - Page 67 CTK691E01-01.book 65 ページ 2003年9月29日 月曜日 午後4時47分 To rewrite song header data (Panel Record) You can use a procedure called “Panel Record” to change the initial Mixer, tempo and other settings stored in the song header. Press the SONG MEMORY button once to enter playback standby.
-
Page 68: Keyboard Settings
CTK691E01-01.book 66 ページ 2003年9月29日 月曜日 午後4時47分 Keyboard Settings Keyboard Settings MODE EXIT LAYER [ + ]/[–], YES/NO Parts Up to four parts (numbered 1 through 4) can be used simultaneously during keyboard play. These parts can be used by the layer and split functions explained below. Part 1: Main tone part Part 2: Layered tone part Part 3: Split tone part... -
Page 69: Using Split
CTK691E01-01.book 67 ページ 2003年9月29日 月曜日 午後4時47分 Press the LAYER button again to unlayer the tones and return the keyboard to normal. Turning on layering switches the currently selected part from Part 1 to Part 2, and displays the layered tone. At that time, you can use the [ ] and [ ] CURSOR buttons to... -
Page 70: Using Layer And Split Together
Song Memory Mode, or while you are using the SMF Player Mode. When the accompaniment mode is set to CASIO CHORD or FINGERED, the accompaniment keyboard range is in accordance with the split point you specify with the above procedure. -
Page 71: Transposing The Keyboard
CTK691E01-01.book 69 ページ 2003年9月29日 月曜日 午後4時47分 Transposing the Keyboard Transpose lets you raise and lower the overall key of the keyboard in semitone units. If you want to play an accompaniment for a vocalist who sings in a key that’s different from the keyboard, for example, simply use transpose to change the key of the keyboard. -
Page 72: Tuning The Keyboard
CTK691E01-01.book 70 ページ 2003年9月29日 月曜日 午後4時47分 Keyboard Settings Tuning the Keyboard The tuning feature lets you fine tune the keyboard to match the tuning of another musical instrument. To tune the keyboard Press the TRANSPOSE/FUNCTION button. Use the [ ] and [ ] CURSOR buttons to display the tuning screen. -
Page 73: Changing Other Settings
main14.fm 71 ページ 2003年10月29日 水曜日 午後2時36分 Changing Other Settings Setting Types The table below shows the parameters whose settings you can change. Setting menu Transpose Adjusts overall keyboard tuning by semitone units. (Trans.) Auto Harmonize Selects the Auto Harmonize Type. (AutoHarm) Touch Response Specifies how sound should change with keyboard pressure. - Page 74 CTK691E01-01.book 72 ページ 2003年9月29日 月曜日 午後4時47分 Keyboard Settings To use the keyboard settings menu Press the TRANSPOSE/FUNCTION button. This causes a pointer to appear on the display next to TRANSPOSE/FUNCTION. Use the [ ] and [ ] CURSOR buttons, and the [ settings you want to change.
- Page 75 CTK691E01-01.book 73 ページ 2003年9月29日 月曜日 午後4時47分 Use the [ + ] and [–] buttons or the number buttons to change the values. Settings you make are applied even if you do not press the EXIT button. See the following section titled “Setting Menu Items” for details on each setting. After making the settings you want, press the TRANSPOSE/FUNCTION button or EXIT button to return to the tone or rhythm selection screen.
- Page 76 CTK691E01-01.book 74 ページ 2003年9月29日 月曜日 午後4時47分 Keyboard Settings Setting Menu Items Auto Harmonize Types You can select from among the 10 different types of auto harmonize listed below. Type Duet1 Adds a 1-part harmony to keyboard play. Duet2 Adds a 1-part harmony to keyboard play. Duet2 harmony is more open than Duet1. Country Adds a country-flavor harmony to keyboard play.
- Page 77 CTK691E01-01.book 75 ページ 2003年9月29日 月曜日 午後4時47分 MIDI Settings Setting menu Range Keyboard Channel 01 to 16 (Keybd Ch) MIDI In Chord Judge on/oFF (Chord) Accomp/Song MIDI Out on/oFF (Ac/sg Out) Local Control Setting on/oFF (Local) Delete/Initialize Settings Setting menu Range SMF Delete —...
-
Page 78: Using The Smf Player
The Flash Memory built into your keyboard lets you store SMF format music data for playback whenever you want. You can have up to 200 music files* in Flash Memory at one time. You can download SMF data from the CASIO MUSIC SITE and then transfer it from your computer to the keyboard’s flash memory. - Page 79 CTK691E01-01.book 77 ページ 2003年9月29日 月曜日 午後4時47分 Using the SMF Player SMF Player Mode Operational Flow E-77 705A-E-079A...
-
Page 80: Playing Back An Smf
CTK691E01-01.book 78 ページ 2003年9月29日 月曜日 午後4時47分 Using the SMF Player Playing Back an SMF To play back an SMF Press the SMF PLAYER button to display the file selection screen. This causes the SMF player pointer to appear on the display. SMF are those whose file names end with the extension “MID”. - Page 81 CTK691E01-01.book 79 ページ 2003年9月29日 月曜日 午後4時47分 Press the [ ] CURSOR button to display the output mode selection screen. Use the [ ] and [ ] CURSOR buttons or the [ + ] and [–] buttons to select the output mode. You can select from among the following two output types.
-
Page 82: Midi
CTK691E01-01.book 80 ページ 2003年9月29日 月曜日 午後4時47分 MIDI MIDI What is MIDI? The letters MIDI stand for Musical Instrument Digital Interface, which is the name of a worldwide standard for digital signals and connectors that make it possible to exchange musical data between musical instruments and computers (devices) produced by different manufacturers. -
Page 83: Sending And Receiving Midi Messages
: Outputs auto accompaniment or Song Memory as MIDI messages through the keyboard’s MIDI OUT terminal. oFF : Does not output auto accompaniment or Song Memory. For details about MIDI specifications, visit the CASIO Website. http://world.casio.com E-81... -
Page 84: Using The Data Download Service
CTK691E01-01.book 82 ページ 2003年9月29日 月曜日 午後4時47分 MIDI Using the Data Download Service You can download the following type of data from CASIO MUSIC SITE (http://music.casio.com) to your computer, and then transfer it to the keyboard. Tones Tones with waves Drum sets with waves... -
Page 85: Troubleshooting
2. Power is not turned on. 3. Volume setting is too low. 4. Playing in the accompaniment keyboard area while the MODE button setting is CASIO CHORD or FINGERED. 5. Local Control is off. 6. Mixer channel 1 is turned off. - Page 86 CASIO Service Provider to request repair. Use the TRANSPOSE/FUNCTION button to perform the system reset operation. If this does not correct the problem, contact your nearest authorized CASIO Service Provider to request maintenance. Action See page E-67 E-69, 70...
-
Page 87: Specifications
Equalizer (10 types, 4 bands) 156 (internal, 16 user areas*) Variable (226 steps, = 30 to 255) 3 fingering methods (CASIO CHORD, FINGERED, FULL RANGE CHORD) START/STOP, INTRO/ENDING 1 and 2, VARIATION/FILL-IN 1 and 2, SYNCHRO/ FILL-IN NEXT 0 to 127 (128 steps) Recalls settings for tone, tempo, layer on/off, and harmonize on/off in accordance with rhythm. - Page 88 main18.fm 86 ページ 2003年10月23日 木曜日 午後5時9分 Specifications Mixer Function Channels: Parameters: MIDI: Other Functions Transpose: Tuning: LCD: SMF Player Flash Memory Terminals MIDI Terminals: Sustain/Assignable Terminal: Headphone/Output Terminal: Power Supply Terminal: Power Supply: Batteries: Battery Life: AC Adaptor: Auto Power Off: Speaker Output: Power consumption: Dimensions: Weight:...
-
Page 89: Care Of Your Instrument
CTK691E01-01.book 87 ページ 2003年9月29日 月曜日 午後4時47分 Care of your Instrument Avoid heat, humidity or direct sunlight. Care of your Instrument Do not overexpose the instrument to direct sunlight, or place it near an air conditioner, or in any extremely hot place. Do not use near a TV or radio. This instrument can cause video or audio interference with TV and radio reception. -
Page 90: Dsp Algorithm List
CTK691E01-01.book 88 ページ 2003年9月29日 月曜日 午後4時47分 DSP Algorithm List DSP Algorithm List 00 :Auto Pan Function Continually performs left-right panning of the input signal in accordance with an LFO. Parameters Rate (Range: 0 to 127) Adjusts the panning rate. Depth (Range: 0 to 127) Adjusts the panning depth. - Page 91 CTK691E01-01.book 89 ページ 2003年9月29日 月曜日 午後4時47分 Parameters Input Level (Range: 0 to 127) Adjusts the input level. The input signal can become distorted when the level of the sound being input, the number of chords, or the Resonance value is large. Adjust this parameter to eliminate such distortion.
- Page 92 CTK691E01-01.book 90 ページ 2003年9月29日 月曜日 午後4時47分 DSP Algorithm List Parameters Resonance (Range: 0 to 127) Adjusts the resonance of the sound. Manual (Range: –64 to 0 to +63) Adjusts the phaser shift volume, which is used for reference. Rate (Range: 0 to 127) Adjusts the rate of the LFO.
- Page 93 CTK691E01-01.book 91 ページ 2003年9月29日 月曜日 午後4時47分 High Gain (Range: 0 to 127) Adjusts the high range enhancer gain. 14 :Ring Modulator Function This is a ring modulator (AM modulator) that makes it possible to modulate the frequency of internal oscillator (OSC) in accordance with an internal LFO. Parameters OSC Frequency (Range: 0 to 127) Sets the reference frequency of the internal...
- Page 94 CTK691E01-01.book 92 ページ 2003年9月29日 月曜日 午後4時47分 DSP Algorithm List Wet Level (Range: 0 to 127) Adjusts the level of the effect sound. 19 :Tri 2-Phase Chorus Function This is stereo chorus in accordance with triangular wave LFO. Parameters LFO Rate (Range: 0 to 127) Adjusts the rate of the LFO.
- Page 95 CTK691E01-01.book 93 ページ 2003年9月29日 月曜日 午後4時47分 Parameters LPF (Range: 0 to 127) Adjusts the cutoff frequency of the low-pass filter. A smaller value cuts the high range. HPF (Range: 0 to 127) Adjusts the cutoff frequency of the high-pass filter. A larger value cuts the low range. Feedback (Range: 0 to 127) Adjusts the repeat of the reverb.
- Page 96 CTK691E01-01.book 94 ページ 2003年9月29日 月曜日 午後4時47分 DSP Algorithm List ER Level (Range: 0 to 127) Adjusts the level of the initial reflection. Wet Level (Range: 0 to 127) Adjusts the level of the effect sound. 28 :2-Tap Delay Function This is left/right 2-tap delay. Parameters Delay Time (Range: 0 to 127) Adjusts the delay time.
- Page 97 CTK691E01-01.book 95 ページ 2003年9月29日 月曜日 午後4時47分 Delay Wet Level Delay Feedback Delay High Damp M04 : Multi04 (Stereo Phaser – Stereo Delay 1) Function This is a multi effector that is related to Stereo Phaser – Stereo Delay 1. Parameters Phaser Resonance Phaser Manual Phaser Rate Phaser Depth...
- Page 98 CTK691E01-01.book 96 ページ 2003年9月29日 月曜日 午後4時47分 DSP Algorithm List M09 :Multi09 (Sin 2-Phase Chorus – Tremolo) Function This is a multi effector that is related to Sin 2-Phase Chorus – Tremolo. Parameters Chorus LFO Rate Chorus LFO Depth Chorus Feedback Chorus Wet Level Tremolo Rate Tremolo Depth M10 : Multi10 (Stereo Phaser –...
- Page 99 CTK691E01-01.book 97 ページ 2003年9月29日 月曜日 午後4時47分 Reflection Wet Level Reflection Feedback Reflection Tone M15 : Multi15 (Distortion – Lo-Fi) Function This is a multi effector related to Distortion – Lo-Fi. Parameters Distortion Gain Distortion Low Distortion High Distortion Level Lo-Fi Noise1 Lo-Fi Noise2 Lo-Fi Tone Lo-Fi Resonance M16 : Multi16 (Drive Rotary –...
- Page 100 CTK691E01-01.book 98 ページ 2003年9月29日 月曜日 午後4時47分 DSP Algorithm List Parameters Phaser Resonance Phaser Manual Phaser Rate Phaser Depth Chorus LFO Rate Chorus LFO Depth Auto Pan Rate Auto Pan Depth M21 :Multi21 (Auto Wah – Tri 2-Phase Chorus – 2- Tap Delay) Function This is a multi effector that is related to Auto Wah –...
- Page 101 CTK691E01-01.book 99 ページ 2003年9月29日 月曜日 午後4時47分 Parameters Compressor Depth Distortion Gain Distortion Low Distortion High Distortion Level Delay Time Delay Wet Level Delay Feedback M26 :Multi26 (Auto Wah – Distortion – 2-Tap Delay) Function This is a multi effector that is related to Auto Wah – Distortion –...
- Page 102 CTK691E01-01.book 100 ページ 2003年9月29日 月曜日 午後4時47分 DSP Algorithm List Distortion Level Chorus LFO Rate Chorus LFO Depth Chorus Feedback Chorus Wet Level M31 : Multi31 (Distortion – Flanger) Function This is a multi effector related to Distortion – Flanger. Parameters Distortion Gain Distortion Low Distortion High Distortion Level...
-
Page 103: Appendix
Appendix-ES.fm 1 ページ 2003年9月29日 月曜日 午後5時13分 Appendix/Apéndice Appendix/Apéndice Tone List/Lista de sonidos Advanced Tones/Sonidos avanzados Tone Group/ No./ Grupo de Tone Name/Nombre de sonido Nº Sonido PIANO STEREO GRAND PIANO PIANO STEREO MELLOW PIANO PIANO STEREO BRIGHT PIANO PIANO GRAND PIANO PIANO MELLOW PIANO PIANO BRIGHT PIANO... - Page 104 Appendix-ES.fm 2 ページ 2003年9月29日 月曜日 午後5時13分 Appendix/Apéndice Tone Group/ No./ Grupo de Tone Name/Nombre de sonido Nº Sonido 49 ORGAN ROCK ORGAN 50 ORGAN ROTARY ELEC. ORGAN 51 ORGAN ROTARY PERC. ORGAN 2 52 ORGAN CHURCH ORGAN 1 53 ORGAN CHAPEL ORGAN 54 ORGAN ACCORDION 55 ORGAN...
- Page 105 Appendix-ES.fm 3 ページ 2003年9月29日 月曜日 午後5時13分 Tone Group/ No./ Grupo de Tone Name/Nombre de sonido Nº Sonido 106 BASS RESO. SAW BASS 1 107 BASS DISTORTION SQR BASS 108 BASS RESO. SAW BASS 2 109 BASS DIGITAL BASS 1 110 BASS RIDE BASS 111 BASS CHORUS FINGERED BASS 112 BASS...
- Page 106 Appendix-ES.fm 4 ページ 2003年9月29日 月曜日 午後5時13分 Appendix/Apéndice Tone Group/ No./ Grupo de Tone Name/Nombre de sonido Nº Sonido 163 BRASS VELO. TRUMPET 164 BRASS VELO. TROMBONE 165 BRASS MUTE TRUMPET 166 BRASS OCTAVE FRENCH HORN 167 BRASS STEREO BRASS 168 BRASS BRASS + SYNTH 169 BRASS DEEP SYNTH-BRASS 1 170 BRASS...
- Page 107 Appendix-ES.fm 5 ページ 2003年9月29日 月曜日 午後5時13分 Tone Group/ No./ Grupo de Tone Name/Nombre de sonido Nº Sonido 220 PIPE SYNTH-PAN FLUTE 221 PIPE SYNTH-RECORDER 222 PIPE WHISTLE 223 SYNTH-LEAD SAW TOOTH LEAD 224 SYNTH-LEAD MELLOW SAW LEAD 225 SYNTH-LEAD GR LEAD 1 226 SYNTH-LEAD SQUARE LEAD 1 227 SYNTH-LEAD...
- Page 108 Appendix-ES.fm 6 ページ 2003年9月29日 月曜日 午後5時13分 Appendix/Apéndice Tone Group/ No./ Grupo de Tone Name/Nombre de sonido Nº Sonido 277 SYNTH-PAD VIBE PAD 278 SYNTH-PAD MOVIE SOUND 279 SYNTH-PAD CRYSTAL PAD 2 280 SYNTH-PAD ATMOSPHERE PAD 281 SYNTH-PAD BRIGHTER 282 SYNTH-PAD GOBLIN PAD 283 SYNTH-PAD STAR THEME 284 SYNTH-PAD...
- Page 109 Appendix-ES.fm 7 ページ 2003年9月29日 月曜日 午後5時13分 Tone Group/ No./ Grupo de Tone Name/Nombre de sonido Nº Sonido 325 GM STEEL GUITAR GM 326 GM JAZZ GUITAR GM 327 GM CLEAN GUITAR GM 328 GM MUTED GUITAR GM 329 GM OVERDRIVE GT GM 330 GM DISTORTION GT GM 331 GM...
- Page 110 Appendix-ES.fm 8 ページ 2003年9月29日 月曜日 午後5時13分 Appendix/Apéndice Tone Group/ No./ Grupo de Tone Name/Nombre de sonido Nº Sonido 382 GM CALLIOPE 383 GM CHIFF 384 GM CHARANG 385 GM PLAIN SOLO VOX 386 GM FIFTH SAW 387 GM BASS LEAD 388 GM FANTASY 389 GM WARM SYNTH...
- Page 111 Appendix-ES.fm 9 ページ 2003年9月29日 月曜日 午後5時13分 Tone Group/ No./ Grupo de Tone Name/Nombre de sonido Nº Sonido 439 VARIOUS PULSE CLAVI GM 440 VARIOUS VIBRAPHONE WIDE 441 VARIOUS MARIMBA WIDE 442 VARIOUS TREMOLO ORGAN GM 443 VARIOUS DRAWBAR ORGAN 2 GM 444 VARIOUS 70’S ORGAN GM 445 VARIOUS JAZZ ORGAN GM...
- Page 112 Appendix-ES.fm 10 ページ 2003年9月29日 月曜日 午後5時13分 Appendix/Apéndice Tone Group/ No./ Grupo de Tone Name/Nombre de sonido Nº Sonido 496 VARIOUS SOPRANO PAD 497 VARIOUS FAST SWEEP 498 VARIOUS WOOD PAD 499 VARIOUS SYNTH-MALLET Drum Sets/Ajustes de batería Tone Group/ No./ Grupo de Tone Name/Nombre de sonido Nº...
- Page 113 Appendix-ES.fm 11 ページ 2003年9月29日 月曜日 午後5時13分 Tone Group/ No./ Grupo de Tone Name/Nombre de sonido Nº Sonido 20 DRAWBAR Even Organ 21 DRAWBAR Flute Organ 1 22 DRAWBAR Chorus Organ 2 23 DRAWBAR Overdrive Organ 3 24 DRAWBAR 16’ Organ 25 DRAWBAR Soul Organ 3 26 DRAWBAR Perc.
-
Page 114: Drum Assignment List
Appendix-ES.fm 12 ページ 2003年9月29日 月曜日 午後5時13分 Appendix/Apéndice Drum Assignment List/Lista de asignación de batería “ ” indicates the same sound as STANDARD SET./“ ” indica el mismo sonido que STANDARD SET. A-12 705A-E-222A... - Page 115 Appendix-ES.fm 13 ページ 2003年9月29日 月曜日 午後5時13分 Appendix/Apéndice A-13 705A-E-223A...
-
Page 116: Rhythm List
Appendix-ES.fm 14 ページ 2003年9月29日 月曜日 午後5時13分 Appendix/Apéndice Rhythm List/Lista de Ritmo No./ Rhythm Name/Nombre de Ritmo Nº 8 BEAT 8 BEAT 1 8 BEAT 2 8 BEAT 3 8 BEAT POP 1 8 BEAT POP 2 8 BEAT POP 3 60’S SOUL 8 BEAT DANCE POP ROCK 1 POP ROCK 2... - Page 117 Appendix-ES.fm 15 ページ 2003年9月29日 月曜日 午後5時13分 No./ Rhythm Name/Nombre de Ritmo Nº LATIN/VARIOUS BOSSA NOVA 1 BOSSA NOVA 2 SAMBA MERENGUE CUMBIA CHA-CHA-CHA SALSA BEGUINE BOLERO MAMBO RHUMBA TANGO 1 TANGO 2 REGGAE 1 REGGAE 2 BLUEGRASS COUNTRY COUNTRY SHUFFLE COUNTRY WALTZ FAST GOSPEL SLOW GOSPEL BROADWAY...
-
Page 118: Fingered Chord Chart
Appendix-ES.fm 16 ページ 2003年9月29日 月曜日 午後5時13分 Appendix/Apéndice Fingered Chord Chart/Cuadro de acordes Fingered This table shows the fingerings for commonly used chords, including inverted fingerings. Esta tabla muestra las digitaciones para los acordes usados comúnmente, incluyendo las digitaciones invertidas. A-16 705A-E-226A... - Page 119 Appendix-ES.fm 17 ページ 2003年9月29日 月曜日 午後5時13分 * You can change the keyboard range of dim7 chords for roots A, B b , and B, and aug chords for roots B b and B by adjusting the split point setting (page E-67). * Puede cambiar la gama del teclado de los acordes dim7 para las notas fundamentales A, B b y acordes aumentados (augment) para las notas fundamentales B b y B mediante el ajuste del punto de división (página S-70).
-
Page 120: Effect List
Appendix-ES.fm 18 ページ 2003年9月29日 月曜日 午後5時13分 Appendix/Apéndice Effect List/Lista de efecto REVERB Effect List/ Lista de efectos de reverberación (REVERB) No./ Display Name/Nombre TypeName/Nombre de Nº de display Room 1 Room 1 Room 2 Room 2 Room 3 Room 3 Hall 1 Hall 1 Hall 2 Hall 2... - Page 121 Appendix-ES.fm 19 ページ 2003年9月29日 月曜日 午後5時13分 Algorithm Display No./ Name/ Identificación DSP Name/Nombre DSP Nº Nombre de (ID) de display algoritmo Chorus [07] Chorus 1 Chorus 1 [08] Chorus 2 Chorus 2 [09] Chorus 3 Chorus 3 [10] Chorus 4 Chorus 4 [11] Enha Cho Enhancer - Chorus...
- Page 122 CTK691E01-01.book 1 ページ 2003年9月29日 月曜日 午後4時47分 705A-E-234A...
Need help?
Do you have a question about the CTK-691 and is the answer not in the manual?
Questions and answers