Table of Contents

Related Manuals for Dictator DICTAMAT OPENDO


Summary of Contents for Dictator DICTAMAT OPENDO
- Page 1 DICTAMAT OPENDO TECHNICAL MANUAL DICTAMAT OPENDO You can find the current version of our manual on our website under «Downloads»: https://en.dictator.de/products/door-drives-gate-drives/operators-sliding-doors/dictamat-opendo/...
-
Page 2: Table Of Contents
6.1 Control functions 6.2 Overview 6.3 Adjusting the potentiometer 6.4 Setting the DIP switches 6.5 Accepting the settings 7. Commissioning 8. Error indication 9. Maintenance 10. Inspection book 04.2 DICTATOR Technik GmbH · +49 (0)821 246730 · info@dictator.de · en.dictator.de · 21.10.28... -
Page 3: General Notes
Between power pack and controller up to 20 m: 2 x 0,50 mm² 20 bis 50 m: 2 x 0,75 mm² 50 bis 100 m: 2 x 1,50 mm² 04.3 DICTATOR Technik GmbH · +49 (0)821 246730 · info@dictator.de · en.dictator.de · 21.10.28... -
Page 4: Components
4 aluminum brackets for wall mounting of the rail including spacer plates 2 wheel hangers with slide bearings 1 floor guide 2 final stopping devices for installation in the rail 04.4 DICTATOR Technik GmbH · +49 (0)821 246730 · info@dictator.de · en.dictator.de · 21.10.28... -
Page 5: Componentes Included 710653
8 aluminum brackets for wall mounting of the rail including spacer plates 4 AISI 316 wheel hangers with ball bearings 2 floor guides 3 final stopping devices for installation in the rail 04.5 DICTATOR Technik GmbH · +49 (0)821 246730 · info@dictator.de · en.dictator.de · 21.10.28... -
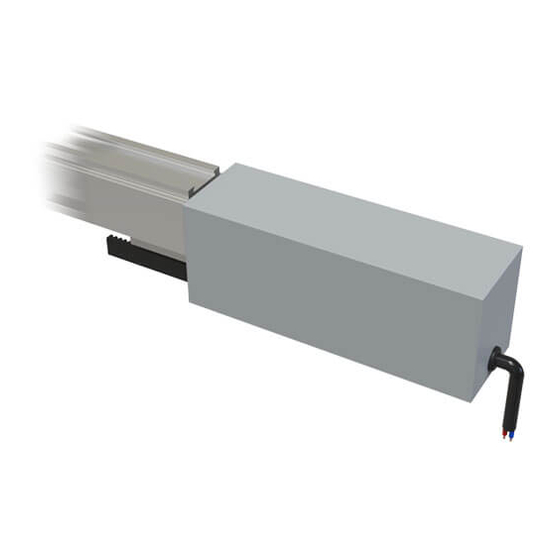
Page 6: Installation
The drive is mounted directly on the supplied rail. To do this, insert the clamping block into the rail, place the lateral mounting plate and counter plate underneath the rail and screw all components together with the supplied M6 x 25 mm screws. Fig. 1 04.6 DICTATOR Technik GmbH · +49 (0)821 246730 · info@dictator.de · en.dictator.de · 21.10.28... -
Page 7: Preparing The Door
Recommended: 125 mm distance to the outer edge on both sides of the door If not already present, an additional slot must be prepared in the door leaf for the floor guide (Fig. 12). Fig. 2 04.7 DICTATOR Technik GmbH · +49 (0)821 246730 · info@dictator.de · en.dictator.de · 21.10.28... -
Page 8: Inserting The Components Into The Rail
In order to ensure a stable hold of the rail, please ensure a distance of max. 600 mm between the individual brackets during installation (Fig. 5). Fixing brackets Rail Spacer plate Fig. 4 max. 600 mm Fig. 5 04.8 DICTATOR Technik GmbH · +49 (0)821 246730 · info@dictator.de · en.dictator.de · 21.10.28... -
Page 9: Adjusting The Door
Now the door can be hung up and adjusted to the required height with the screws of the hangers. Then secure the door with the lock nuts. Fig. 6 Lock nut Adjust the required height Fig. 7 04.9 DICTATOR Technik GmbH · +49 (0)821 246730 · info@dictator.de · en.dictator.de · 21.10.28... -
Page 10: Placing And Tightening The Toothed Belt
To tension the toothed belt, move the idler pulley in the rail until the belt is well tensioned. This must not hang slack in the system. Then secure the position by tightening the idler pulley. Fig. 8 Fig. 9 04.10 DICTATOR Technik GmbH · +49 (0)821 246730 · info@dictator.de · en.dictator.de · 21.10.28... -
Page 11: Installing The Controller
(see Fig. 11). This must first be installed by the customer (flush-mounted box according to DIN 49073, rocker dimension 55 mm; installation opening 60 mm). Information on the electrical connection can be found on page 04.13. Fig. 11 04.11 DICTATOR Technik GmbH · +49 (0)821 246730 · info@dictator.de · en.dictator.de · 21.10.28... -
Page 12: Floor Guide And Final Stopping Devices
If necessary, check again that the door hangs vertically (Fig. 13). The final stopping devices can easily be secured in the desired position using grub screws. 7 mm Fig. 12 Fig. 13 04.12 DICTATOR Technik GmbH · +49 (0)821 246730 · info@dictator.de · en.dictator.de · 21.10.28... -
Page 13: Technical Data
When connecting, it is imperative that the correct polarity is obser ved! 24 VDC (+) power pack Earth (-) power pack Earth brown Stop Open yellow Close white Earth Fig. 14 04.13 DICTATOR Technik GmbH · +49 (0)821 246730 · info@dictator.de · en.dictator.de · 21.10.28... -
Page 14: Setting The Desired Functions
The following diagram shows where these components are located on the controller. LEDs for function indication 1 2 3 4 5 6 7 8 Potentiometer P1 Reset button DIP switches Fig. 15 04.14 DICTATOR Technik GmbH · +49 (0)821 246730 · info@dictator.de · en.dictator.de · 21.10.28... -
Page 15: Adjusting The Potentiometer
6. Weight of door leaf max. 80 kg: 20 cm/s 7. Weight of door leaf max. 60 kg: 23 cm/s 8. Weight of door leaf max. 40 kg: 25 cm/s 04.15 DICTATOR Technik GmbH · +49 (0)821 246730 · info@dictator.de · en.dictator.de · 21.10.28... -
Page 16: Accepting The Settings
The control unit is in start state. Now perform a movement in any direction. The door drive moves in creep speed. ---> The red LED goes out, the configuration has been accepted. 04.16 DICTATOR Technik GmbH · +49 (0)821 246730 · info@dictator.de · en.dictator.de · 21.10.28... -
Page 17: Commissioning
The drive moves to end position Open. The LEDs go out, now the desired functions can still be checked. If these functions work, commissioning is now complete. 04.17 DICTATOR Technik GmbH · +49 (0)821 246730 · info@dictator.de · en.dictator.de · 21.10.28... -
Page 18: Error Indication
20 s. The green LED flashes according to the error code. The cycle is repeated until the error is reset. 20 s Example for error code 4 In case of a defect, please always contact our technical support, if possible with information about the code. 04.18 DICTATOR Technik GmbH · +49 (0)821 246730 · info@dictator.de · en.dictator.de · 21.10.28... -
Page 19: Maintenance
* Depends on type of use ** Only recommended if the function is no longer ensured due to visible wear. 04.19 DICTATOR Technik GmbH · +49 (0)821 246730 · info@dictator.de · en.dictator.de · 21.10.28... -
Page 20: Inspection Book
Checklist: Filled in declaration of conformity All documents handed over to end user Filled in inspection book Signature on receipt Warning signs placed in suitable locations 04.20 DICTATOR Technik GmbH · +49 (0)821 246730 · info@dictator.de · en.dictator.de · 21.10.28...
Need help?
Do you have a question about the DICTAMAT OPENDO and is the answer not in the manual?
Questions and answers