
Related Manuals for Edwards APG200


Summary of Contents for Edwards APG200
- Page 1 APG200 Active Pirani Gauge INSTRUCTION MANUAL edwardsvacuum.com D1G0000880_A Original instructions...
- Page 2 Copyright notice ©Edwards Limited 2021. All rights reserved. Trademark credit Edwards and the Edwards logo are trademarks of Edwards Limited, Innovation Drive, Burgess Hill, West Sussex RH15 9TW. Swagelok® is a registered trademark of Swagelok Company ® is a registered trademark of Swagelok Company ®...
-
Page 3: Table Of Contents
5.2.2 Voltage to pressure conversion for APG200....24 5.2.3 APG200 with non-linear pressure output..... . 27 5.3 Gas dependency. - Page 4 6.1.2 Vacuum adjustment........36 6.1.3 Remote adjustment - APG200 with transistor setpoint [blank] option.
- Page 5 Figure 18: Adjustment of APG200........
-
Page 6: Safety And Compliance
Information about properties or instructions for an action which, if ignored, will cause damage to the equipment. We reserve the right to change the design and the stated data. The illustrations are not binding. Keep the instructions for future use. D1G0000880_A Page 6 07/2021 - ©Edwards Limited... -
Page 7: Safety Symbols
An appropriate safety instruction must be followed or caution to a po- tential hazard exists. WEEE symbol The equipment must be discarded carefully. Obey local and national reg- ulations for disposal of this equipment. D1G0000880_A Page 7 07/2021 - ©Edwards Limited... -
Page 8: Introduction
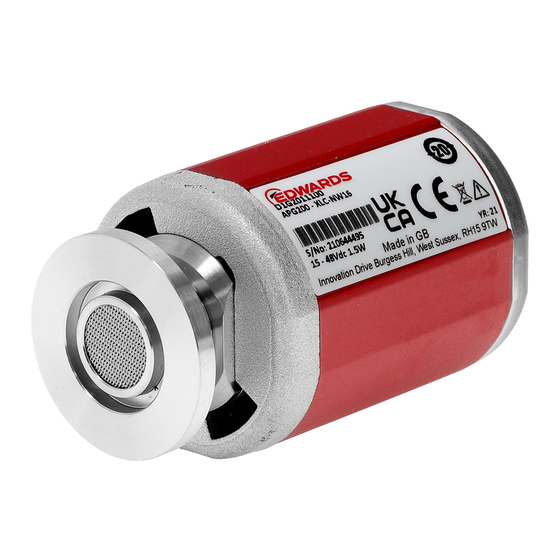
D1G0000880_A - Introduction 2. Introduction 2.1 Description The APG200 Pirani gauge operates on the principle of thermal conductivity in which the rate of heat loss from a heated filament is dependent on the pressure of the gas (around filament). Refer to Figure: General view. -
Page 9: Item Number And Description Matrix
Setpoint Transistor setpoint or 2 solid state relays Flange Different vacuum flanges are available Connector Different electrical connectors are available Other Gauges can be ordered with calibration certificates D1G0000880_A Page 9 07/2021 - ©Edwards Limited... -
Page 10: Figure 2 Item Description Matrix
9 pin DSUB : 9 pin D - subminiature (male) Other [Blank] : No additional features CAL : supplied with calibration certificate The complete range of available options can be found in the Item number and description matrix on page 9. D1G0000880_A Page 10 07/2021 - ©Edwards Limited... -
Page 11: Figure 3 Item Number Matrix
4 : 1.875 V to 8.875 V log linear with pressure 5 : 2.0 to 10.0 V non linear with pressure Other 0 : No additional features C : supplied with calibration certificate D1G0000880_A Page 11 07/2021 - ©Edwards Limited... -
Page 12: Technical Data
Pressure range Accuracy Filament 100 mbar to 1000 mbar ±50% reading ±15% reading M or MP 1 x 10 mbar to 100 mbar ±50% reading 5 x 10 mbar to 1 x 10 mbar D1G0000880_A Page 12 07/2021 - ©Edwards Limited... -
Page 13: Mechanical Data
±15% reading 1 x 10 mbar to 10 mbar ±50% reading 1 x 10 mbar to 1 x 10 mbar Table 5 APG200 with standard voltage output Characteristic Pressure range Voltage output Filament X (Log-linear with pressure) M or MP... -
Page 14: Electrical Data
Maximum output current 1 mA 3.5.1 ID resistor Table 9 ID resistor Characteristic ID resistor Voltage output Filament/Pressure range APG200 with standard voltage output M or MP 36 kW X (Log-linear with pressure) 43 kW D1G0000880_A Page 14 07/2021 - ©Edwards Limited... -
Page 15: Pressure Output Signal
ID resistor Voltage output Filament/Pressure range M or MP 27 kW [blank] (Non-linear) 33 kW APG200 with matched voltage output O, G, Q M, MP or LC 27 kW (Log-linear with pressure) 3.5.2 Pressure output signal Table 10 Pressure output signal... - Page 16 Parameter Data Solid State relay 2 (Quantity) Single Pole Single Throw (SPST), Normally Form Open (N.O.) Rating 48 V d.c. maximum, 500 mA Relay on series resistance Typical 0.2 W, maximum 0.3 W D1G0000880_A Page 16 07/2021 - ©Edwards Limited...
-
Page 17: Installation
You can install the gauge in any direction. In factory, the gauge is installed vertically and calibrated for nitrogen. For the correct pressure indication at the direction of installed gauge, calibrate the gauge again at atmospheric pressure. D1G0000880_A Page 17 07/2021 - ©Edwards Limited... -
Page 18: Connect The Gauge
Refer to Figure: Recommended electrical connections for schematic diagram of the electrical connections to the gauge. Use the pins on the electrical connector as shown in Table: Pins on the APG200 electrical connector. Refer to Technical data on page 12 for more specifications. - Page 19 Not connected Relay 1 common Setpoint output signal Relay 1 N.O. Not connected Relay 2 common Remote calibration input Relay 2 N.O. Signal ground Not connected Relay common Remote calibration input Relay 2 N.O. D1G0000880_A Page 19 07/2021 - ©Edwards Limited...
-
Page 20: Figure 6 9 Way D-Sub Connector With Setpoint Transistor
C. DC relay (optional) D. Back EMF suppression diode (optional) D. Back EMF suppression diode (optional) E. Electrical supply E. Electrical supply F. Voltmeter F. Voltmeter G. Grounding switch (optional) G. Grounding switch (optional) D1G0000880_A Page 20 07/2021 - ©Edwards Limited... -
Page 21: Figure 7 9 Way D-Sub Connector With Dual Relays
C. Electrical supply D. Voltmeter D. Voltmeter E. DC relay (optional) E. DC relay (optional) F. Back EMF suppression diode (optional) F. Back EMF suppression diode (optional) G. Grounding switch (optional) G. Grounding switch (optional) D1G0000880_A Page 21 07/2021 - ©Edwards Limited... -
Page 22: Maximum Cable Length
For accurate pressure measurements, do not connect the electrical supply ground to signal ground. Both ground connections are linked within the gauge. D1G0000880_A Page 22 07/2021 - ©Edwards Limited... -
Page 23: Operation
The pulsing function enabled/disabled is unaffected by power cycling the gauge. Error indication If an error occurs within the gauge, the LED indicator will illuminate red and flash. Refer Fault finding on page 39. D1G0000880_A Page 23 07/2021 - ©Edwards Limited... -
Page 24: Pressure Measurement
The gauge models with matched voltage outputs are not compatible with our controllers. The gauge may not be recognised or the pressure output may not be correct. 5.2.1 APG200 with Log linear with pressure output If the gauge is connected to a voltmeter, convert the voltage (V) to pressure (P) -
Page 25: Figure 10 Xm, Xmp
D1G0000880_A - Operation Figure 10 XM, XMP Figure 11 XLC D1G0000880_A Page 25 07/2021 - ©Edwards Limited... -
Page 26: Figure 12 "O" Output Curves
D1G0000880_A - Operation Figure 12 "O" output curves Figure 13 "G" output curves D1G0000880_A Page 26 07/2021 - ©Edwards Limited... -
Page 27: Apg200 With Non-Linear Pressure Output
D1G0000880_A - Operation Figure 14 Q, LC variant Figure 15 Q, M, MP variants 5.2.3 APG200 with non-linear pressure output If the gauge is connected to a voltmeter, convert the voltage (V) to pressure (P) according to the following tables. - Page 28 D1G0000880_A - Operation Table 17 APG200 with non-linear pressure output Voltage Pressure M, MP (mbar) LC (mbar) < 1 x 10 < 1 x 10 2.05 2.31 x 10 8.26 x 10 6.21 x 10 2.27 x 10 1.36 x 10 5 x 10 2.97 x 10...
-
Page 29: Gas Dependency
Table: Gas calibration factors below 1 mbar for the conversion factors of the gases of pressures less than 1 mbar. The conversion formula is: True pressure = Gas Calibration Factor (GCF) x indicated pressure. D1G0000880_A Page 29 07/2021 - ©Edwards Limited... -
Page 30: Figure 16 Gas Dependency Of Apg200 With M, Mp Filament/Pressure Characteristic
D1G0000880_A - Operation Figure 16 Gas dependency of APG200 with M, MP filament/pressure characteristic Figure 17 Gas dependency of APG200 with LC filament/pressure characteristic Note: X-axis - True pressure Y-axis - Indicated pressure D1G0000880_A Page 30 07/2021 - ©Edwards Limited... -
Page 31: Advanced Functions
The multi-function button can be used during the operation and maintenance of the gauge. A tool for the purpose of adjustment is provided with the product. D1G0000880_A Page 31 07/2021 - ©Edwards Limited... -
Page 32: Setpoint Adjustment
D1G0000880_A - Operation Figure 18 Adjustment of APG200 ▪ Press the button and the LED indicator changes colour and begins flashing. If the button remains depressed, the colour of the flashing LED indicator changes every 2 seconds to allow the selection of different functions. - Page 33 - By ensuring the setpoint is set to permanently ON, the setpoint can be used to indicate that the gauge is operating correctly. - For the gauge models with a non-linear voltage output, the setpoint cannot be switched permanently on or permanently off. D1G0000880_A Page 33 07/2021 - ©Edwards Limited...
-
Page 34: Operation Errors
After 3 seconds, the LED indicator stops flashing and the LED indicator pulsing and setpoint(s) are restored to their previous values. 5.5 Operation errors If a gauge error occurs during operation, then the LED indicator illuminates red signifying an error. D1G0000880_A Page 34 07/2021 - ©Edwards Limited... -
Page 35: Bakeout
Figure: Replace the gauge tube, remove the electronics housing. ▪ Bake the tube on your vacuum system. Do not exceed 150 °C. ▪ Allow the tube to cool before refitting the electronics housing. D1G0000880_A Page 35 07/2021 - ©Edwards Limited... -
Page 36: Maintenance
After 3 seconds, the LED indicator stops flashing and the vacuum adjustment parameters are stored in the gauge. 6.1.3 Remote adjustment - APG200 with transistor setpoint [blank] option The gauge with transistor setpoint has a remote adjustment feature. You can perform atmosphere adjustment and vacuum adjustment through the appropriate pin on the electrical connector. -
Page 37: Replace The Gauge Tube
D1G0000880_A - Maintenance Refer to Table: Pins on the APG200 electrical connector depending on the electrical connector on your gauge. Momentarily (> 100 msec) connect the remote calibration input to electrical supply ground and the atmosphere or vacuum adjustment will be performed. -
Page 38: Figure 19 Replace The Gauge Tube
D1G0000880_A - Maintenance Figure 19 Replace the gauge tube 1. Gauge tube 1. Gauge tube 2. Retaining clip 2. Retaining clip 3. Electronics housing 3. Electronics housing D1G0000880_A Page 38 07/2021 - ©Edwards Limited... -
Page 39: Fault Finding
Check that the correct type of tube is installed (M, MP, or LC). Cause New tube has been installed. Remedy Refer to Remote adjustment - APG200 with transistor setpoint [blank] option page 36. Cause Tube has drifted outside permissible limits and can not be adjusted. Remedy Replace the tube. - Page 40 Install the tube. Remove the electrical connector and insert back. Cause Wrong type of tube is installed. Remedy Check that the correct type of tube is installed (M, MP or LC). Cause Filament is broken. Remedy Replace the tube. D1G0000880_A Page 40 07/2021 - ©Edwards Limited...
-
Page 41: Disposal
▪ For European customers we offer a recycling service for the gauge and cables at the end of the product’s life. ▪ Be careful if the gauge is contaminated with dangerous process substances. D1G0000880_A Page 41 07/2021 - ©Edwards Limited... -
Page 42: Spares
2 : 1.9 V to 10.0 V log linear with pressure 3 : 2.2 V to 8.5 V log linear with pressure 4 : 1.875 V to 8.875 V log linear with pressure 5 : 2.0 to 10.0 V non linear with pressure D1G0000880_A Page 42 07/2021 - ©Edwards Limited... -
Page 43: Accessories
3 m (10 feet) D40001030 5 m (15 feet) D40001050 10 m (30 feet) D40001100 15 m (50 feet) D40001150 25 m (80 feet) D40001250 50 m (150 feet) D40001500 100 m (325 feet) D40001999 D1G0000880_A Page 43 07/2021 - ©Edwards Limited... -
Page 44: Service
HS1, fill in the electronic HS2 form, print it, sign it, and return the signed copy to us. NOTICE: If we do not receive a completed HS2 form, your equipment cannot be serviced. D1G0000880_A Page 44 07/2021 - ©Edwards Limited... -
Page 45: Appendix - Multi-Function Button Operation
D1G0000880_A - Appendix - Multi-function button operation 12. Appendix - Multi-function button operation Figure 22 Multi-function button operation D1G0000880_A Page 45 07/2021 - ©Edwards Limited... - Page 46 Czech Republic RH15 9TW T: +42(0) 580 582 728 documentation@edwardsvacuum.com The products specified and listed below APG200 Active Pirani Gauge nAPG200 Active Pirani Gauge Is in conformity with the relevant requirements of European CE legislation: 2014/30/EU Electromagnetic compatibility (EMC) directive...
- Page 47 You must retain the signed legal declaration for future reference This declaration becomes invalid if modifications are made to the product without prior agreement. Signed for and on behalf of Edwards Ltd Nick Barratt - Engineering Manager, Eastbourne Andy Marsh – General Manager, Eastbourne...
- Page 48 ADDITIONAL LEGISLATION AND COMPLIANCE INFORMATION RoHS (EU, UK): Material Exemption Information This product is compliant with the following Exemptions Annex III: 6(b) Lead as an alloying element in aluminium containing up to 0.4% by weight • • 6(c) Copper alloy containing up to 4% lead by weight •...
- Page 49 edwardsvacuum.com...
Need help?
Do you have a question about the APG200 and is the answer not in the manual?
Questions and answers