Advertisement
Available languages
Available languages
Quick Links
1. BEFORE YOU BEGIN
PRODUCT REQUIREMENTS
S
Deep rough-in kit #73444 allows an additional 1/2"
(1.3cm) of tile thickness.
S
Plaster guard diameters are approximately 1-5/8"
(4.1cm) for the valve and 7/8" (2.2cm) for the spout.
S
Installer-supplied copper tubing to be: 5/8" O.D. (1/2"
nominal).
S
Install water hammer arrestors in supply lines near
the valves.
TOOLS AND MATERIALS REQUIRED
S
Open end/adjustable wrenches
S
Adjustable arc pliers
S
1/2" Nom. (5/8" O.D.) tubing
S
Tubing Cutter
S
Hole cutting equipment
S
Soldering equipment and supplies
S
Phillips screwdriver
S
Hex wrenches
2. INSTALLATION
PREPARATION
For installations with 8" (20.3cm) centers using copper
tubing (1/2" nominal, 5/8" O.D.), cut tubing to the lengths
as follows:
2-pieces: 2-7/8" (7.3cm) long
1-piece: 2-3/8" (6cm) long (for finished deck or bath rim
installation only).
INSTALL SPOUT SUPPLY TUBE
Slide brass washer from bottom of spout supply tube over
threads until washer reaches supply tube shoulder.
Insert spout supply tube through mounting hole from top
of deck/bath rim. Ensure flat portion of washer faces
forward. Spout supply tube will be suspended by washer.
Slide plate (oriented with tabs toward deck) and washer
onto spout supply tube from bottom and thread on
mounting nut. Tighten nut.
Secure plate to deck or wooden support with two wood
screws.
NOTE: Leave protective sleeve on spout supply tube until
spout installation.
B
1012829-2-
R
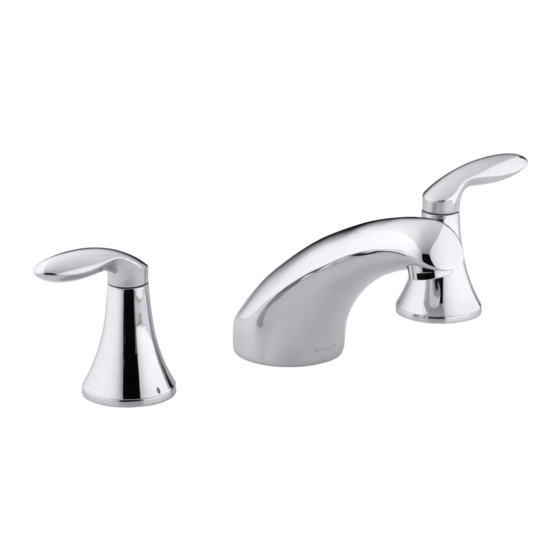
CORALAIS
DECK-MOUNT BATH FAUCET
K-15290, K-15290M,
K-15294, K-15294M
INSTALLER INFORMATION
S
These instructions cover two methods of installation:
installation on finished deck or bath rim, and
installation on rough (unfinished) deck (to be covered
later with tile or other finish material).
S
Leave protective sleeve on spout supply tube until
spout installation. This is an O-ring sealing surface
which may be damaged when unprotected.
S
Finish deck material must fit closely to the diameters
of the plaster guards, especially the spout plaster
guard.
S
Provide an access panel to the valves from the
underside of the deck.
S
Observe all local plumbing and building codes.
For non-8" (20.3cm) center installations, adjust tubing
lengths as necessary.
Spout Supply Tube
Supply Tube Shoulder
Wood Screw
Nut
Fig. #1
BATH AND
Brass Washer
Plate
Wood Screw
Washer
Advertisement

Related Manuals for Kohler CORALAIS K-15290


Summary of Contents for Kohler CORALAIS K-15290
- Page 1 CORALAIS BATH AND DECK-MOUNT BATH FAUCET K-15290, K-15290M, K-15294, K-15294M 1. BEFORE YOU BEGIN PRODUCT REQUIREMENTS INSTALLER INFORMATION Deep rough-in kit #73444 allows an additional 1/2” These instructions cover two methods of installation: (1.3cm) of tile thickness. installation on finished deck or bath rim, and installation on rough (unfinished) deck (to be covered Plaster guard diameters are approximately 1-5/8”...
- Page 2 Solder copper tubes to valve bodies, tee and spout supply tube. Cold Solder hot and cold water tubes to valve body inlets. Supply Ensure cold supply is on right hand side. Solder Proceed to Section 3. Solder Solder Supply Fig. #4 Kohler Co., Kohler WI, U.S.A. 1012829-2-...
- Page 3 Install tubing into tee. Mate copper tube from tee with spout supply tube. Pivot the valve bodies onto the two Mounting pieces of copper tubing. Do not solder at this time. Copper Tube Fig. #7 1012829-2- Kohler Co., Kohler, WI U.S.A.
- Page 4 Thread pipe plug into spout supply tube. Leave pipe plug installed until spout and handle installation. Install cardboard plaster guards over both valves and spout supply tube. Leave in place until spout and handle Fig. #10 installation. Kohler Co., Kohler WI, U.S.A. 1012829-2-...
- Page 5 Cut off the spout supply tube 1-1/4” (3.2cm) above the rim, Finish finish deck, or tile. Be sure all burrs are removed from the supply tube to prevent damage to the O-ring seal on the sleeve. Rough Deck Fig. #13 1012829-2- Kohler Co., Kohler, WI U.S.A.
- Page 6 Align the spout as desired, and tighten the setscrew. Plug Button If included, press the plug button into the setscrew hole. Setscrew Sleeve Finished Deck Fig. #16 Kohler Co., Kohler WI, U.S.A. 1012829-2-...
-
Page 7: Check Installation
Ensure that both faucet handles are turned off (hot = clockwise close; cold = counterclockwise close). Turn on the main water supply, and check for leaks. Repair as required. Turn off both hot and cold valves. 1012829-2- Kohler Co., Kohler, WI U.S.A. - Page 8 Questions? Problems? First review the installation instructions to ensure correct installation. For additional assistance, call our Customer Service Department for direct help. You may also contact us at our web site listed below. In the U.S.A., call 1-800-4-KOHLER In Mexico, call 001-877-680-1310 In Canada, call 1-800-964-5590 www.kohler.com...
-
Page 9: Antes De Comenzar
Asegure la tuerca. Fig. #1 Fije la placa a la cubierta y el soporte de madera con dos tornillos para madera. NOTA: Deje la manga protectora en el tubo de suministro hasta instalar el surtidor. 1012829-2- Kohler Co., Kohler, WI U.S.A. - Page 10 Solde los tubos de agua fría y caliente a las entradas del de agua fría cuerpo de la válvula. Verifique que el suministro del agua Soldadura fría esté a la derecha. Soldadura Prosiga a la Sección 3. Soldadura Suministro de agua caliente Fig. #4 Kohler Co., Kohler WI, U.S.A. 1012829-2-...
- Page 11 Tuerca de con el tubo de suministro del grifo. Rote el cuerpo de las montaje válvulas sobre las dos piezas de tubería de cobre. Tubo de No solde en este momento. cobre Fig. #7 1012829-2- Kohler Co., Kohler, WI U.S.A.
- Page 12 Fig. #10 Instale los protectores de yeso sobre ambas válvulas y el tubo de suministro del surtidor. Deje los protectores de yeso en su lugar hasta instalar el surtidor y la llave. Kohler Co., Kohler WI, U.S.A. 1012829-2-...
- Page 13 Corte la tubería de suministro del surtidor 1-1/4” (3,2cm) por encima del borde, cubierta acabada o azulejo. Asegúrese de desbarbar la tubería de suministro para Cubierta evitar daños al sello del empaque de anillo en la manga. sin acabar Fig. #13 1012829-2- Kohler Co., Kohler, WI U.S.A.
- Page 14 Alinee el grifo a la posición deseada y asegure el tornillo de fijación. Si está incluido, presione el botón del obturador en el hoyo Tornillo de fijación del tornillo de fijación. Manga Cubierta acabada Fig. #16 Kohler Co., Kohler WI, U.S.A. 1012829-2-...
- Page 15 3. REVISE LA INSTALACIÓN Verifique que las llaves del grifo estén cerradas (caliente=sentido horario; fría=sentido antihorario). Abra el suministro del agua y verifique que no haya fugas. Repare de ser necesario. Cierre ambas válvulas. 1012829-2- Kohler Co., Kohler, WI U.S.A.
- Page 16 ¿Preguntas? ¿Problemas? Primero, revise las instrucciones para asegurarse de haber realizado la instalación correcta. Para mayor asistencia, llame a nuestro Departamento de Atención al Cliente. También puede localizarnos en la dirección de Internet escrita abajo. En los Estados Unidos, llame al 1-800-4-KOHLER En México, llame al 001-877-680-1310 En Canadá, llame al 1-800-964-5590 www.kohler.com...
-
Page 17: Avant De Commencer
Fig. #1 Fixer la plaque au comptoir ou au support de bois à l’aide de deux vis à bois. REMARQUE : Ne pas retirer les protections de tube d’arrivée d’eau de bec avant la pose. 1012829-2- Kohler Co., Kohler, WI U.S.A. - Page 18 Souder les tuyaux d’arrivñee d’eau chaude et d’eau froide aux corps de robinet. S’assurer que l’arrivée d’eau froide Soudure soit sur la droite. Soudure Passer à la Section 3. Soudure Arrivée d’eau chaude Fig. #4 Kohler Co., Kohler WI, U.S.A. 1012829-2-...
- Page 19 Té au tube d’arrivée d’eau de bec. Faire pivoter les corps de robinet sur les deux pièces de tube en cuivre. Tube en cuivre Raccord en Té Ne pas souder à ce moment. Fig. #7 1012829-2- Kohler Co., Kohler, WI U.S.A.
- Page 20 Fig. #10 Installer les renforts de plâtre sur les deux robinets et tubes d’arrivée d’eau de bec. Laisser en place jusqu’à ce que le bec et la poignée soient installés. Kohler Co., Kohler WI, U.S.A. 1012829-2-...
- Page 21 (3,2 cm) au-dessus du rebord, du plan de meuble fini ou du carrelage. S’assurer d’éliminer toutes les bavures sur le tube Plan brut d’arrivée d’eau afin d’éviter d’endommager le joint torique sur le manchon. Fig. #13 1012829-2- Kohler Co., Kohler, WI U.S.A.
- Page 22 Aligner le bec et resserrer doucement la vis de retenue. Bouchon capsule Le cas échéant, poser le bouchon capsule sur le trou de vis. Vis de retenue Manchon Plan fini Fig. #16 Kohler Co., Kohler WI, U.S.A. 1012829-2-...
-
Page 23: Vérifier L'installation
S’assurer de fermer les deux poignées, (eau chaude, tourner à droite et eau froide à gauche). Ouvrir les robinets d’arrivée d’eau principale et vérifier s’il y a des fuites. Réparer au besoin. Fermer les robinets d’eau. 1012829-2- Kohler Co., Kohler, WI U.S.A. - Page 24 Pour toute assistance additionnelle, contactez notre département de service à la clientèle pour une aide directe. Vous pouvez aussi nous joindre sur notre site Web à l'adresse donnée ci dessous. Aux É.-U., composez le 1-800-4-KOHLER Au Mexique, composez le 001-877-680-1310 Au Canada, composez le 1-800-964-5590 www.kohler.com...
Need help?
Do you have a question about the CORALAIS K-15290 and is the answer not in the manual?
Questions and answers