
Related Manuals for Oliver 6303


Summary of Contents for Oliver 6303
- Page 1 Sander Model 6303 Owner’s Manual For Models Manufactured Since 07/2017 Oliver Machinery 1-800-559-5065 921 Thomas Ave SW, Renton, WA 98057 Stock Number: 6903.001 Manual Version: 2.0.0 info@olivermachinery.net...
- Page 2 USAGE OF SAFETY AND PROTECTION DEVICE. OLIVER MACHINERY DISCLAIMS ANY LIABILITY FOR MACHINES THAT HAVE BEEN ALTERED OR ABUSED. OLIVER MACHINERY RESERVES THE RIGHT TO EFFECT AT ANY TIME, WITHOUT PRIOR NOTICE, THOSE ALTERATIONS TO PARTS, FITTINGS, AND ACCESSORY EQUIPMENT WHICH THEY MAY DEEM NECESSARY FOR ANY REASON WHATSOEVER.
-
Page 3: Table Of Contents
Safety Guidelines Specific to Sander ·········· 10 Horizontal Sanding ··································· 29 Electricals ···············································11 Contour Sanding ······································· 30 Minimum Circuit Size Required for Model 6303 Sander ············································· 11 Accessories ············································ 31 Grounding ················································ 11 Maintenance ········································· 32 Electrical Wiring ······································· 12 Changing Sanding Belt ······························... -
Page 4: Introduction
Introduction Thank you for choosing Oliver! This manual contains important information on how to safely set up, operate, and maintain this machine. Please take the time to read through this manual, and make sure you understand all instructions. While this manual may provide tips on optimizing the result of your workpiece, the manual is not intended as a substitute for formal woodworking training. -
Page 5: Specifications
Specifications Quick View Model 6303 Sander Stock Number 6303.001 Power Requirement 115V / 230V, 1Ph, 60Hz Motor TEFC 1.5HP, 115V / 230V, 1Ph Sanding Belt Size 6” x 89” Sanding Belt Tilt 0° - 90° Dimensions 48“(W) x 23”(D) x 48”(H) Footprint 21-1/2”(W) x 16-1/2”(D) - Page 6 Dust Port Size 4” Minimum CFM Required 650 CFM Sound Rating @ 2’ distance 100 dB Others Serial Number Location On the back of the machine stand. Certification CSA 175381 Country of Origin Taiwan 6 | Page Oliver Machinery 6303 Sander...
-
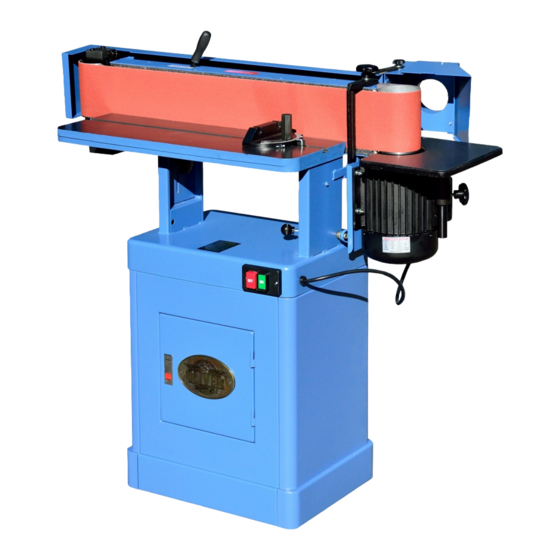
Page 7: Identification
Identification 7 | Page 6303 Sander OLIVERMACHINERY.NET... -
Page 8: Safety
Safety Oliver Machinery has made every attempt to provide a safe, reliable, easy-to-use piece of machinery. Safety, however, is ultimately depending on the individual machine operator. Before operating this machine, please become familiar with the following safety labels and guidelines. - Page 9 13. PROPER USE: Do not use this machine for other than its intended use. If used for other purposes, Oliver Machinery disclaims any real or implied warranty and holds itself harmless for any injury or damage which may result from that use.
-
Page 10: Safety Guidelines Specific To Sander
Correct Wrong After Operation STOP THE MACHINE when the operator leaves the machine for any reason. WAIT until the motor comes to a complete stop. CLEAN UP before departure. 10 | Page Oliver Machinery 6303 Sander... -
Page 11: Electricals
Please ensure the electrical circuit for this machine meets the minimum circuit size requirement. The minimum circuit size requirement applies to a dedicated circuit that provides power to one 6303 Sander. If more machines are sharing the same circuit, consult a qualified electrician to ensure the designated circuit is properly sized for safe operation. -
Page 12: Electrical Wiring
*NR: Not Recommended Use properly sized wires that meet or exceed the power requirement of your machine. Using undersized wires may cause overheating and increase the risk of fire WARNING and machine damage. 12 | Page Oliver Machinery 6303 Sander... -
Page 13: Setup
Air resistance and leakage in a dust collection system impact its effectiveness. Use a dust collection system that is rated above 650 CFM at the dust port. Doing so CAUTION improves air quality in the workplace, and prevents the machine from jamming. 13 | Page 6303 Sander OLIVERMACHINERY.NET... -
Page 14: Receiving
On the day of delivery, please be sure help is available to move the machine to its final location. 6303 Sander has a gross weight of 273 lbs. and a net weight of 257 lbs. Safe moving techniques and proper lifting equipment are required, or serious WARNING personal injury may occur. -
Page 15: Inventory
Nuts (5/16”) Lock washers Package 2 – Mounting hardware Washers Package 5 – Dust chute and mounting screws Item Description Quantity Fender washers (5/16”) Washers (5/16”) Lock washers (5/16”) Hex nuts (5/16”) Hex nuts (5/16”) 15 | Page 6303 Sander OLIVERMACHINERY.NET... - Page 16 Protection Disposable gloves Protection Paper Towel Cleaning Rust Inhibitor Cast iron table top rust protection. 12mm Wrench (1 Pair) Machine Assembly Straight Head Screw Driver Machine Assembly Philips Head Screw Driver Machine Assembly 16 | Page Oliver Machinery 6303 Sander...
-
Page 17: Initial Assembly
2. Insert the round head screw and washer into the rubber feet. 3. Mount the feet at the bottom of the side panel. Thread a nut into the screw. 17 | Page 6303 Sander OLIVERMACHINERY.NET... -
Page 18: Cabinet Assembly
Quantity Fender washers (5/16”) Washers (5/16”) Lock washers (5/16”) Hex nuts (5/16”) Hex nuts (5/16”) 3. The shelf and it’s mounting hardware: Item Description Quantity Pan head screws (M5x10) 2 Lock washers Washers 18 | Page Oliver Machinery 6303 Sander... - Page 19 Tighten the bolts to hold the panels together, but do not fully tighten them yet. 5. Place the cabinet right side up. Make sure it does not rock on the ground. Adjust the joints of the panels as needed. Fully tighten all the bolts before the next step. 19 | Page 6303 Sander OLIVERMACHINERY.NET...
-
Page 20: Mounting Sander
Once all rust protectant is removed, routinely coat the tabletops with rust preventive such as Boeshield® T-9 or paste wax. Do not use rust preventives that contain silicon, which is known to interfere with certain finishes and glues. 20 | Page Oliver Machinery 6303 Sander... -
Page 21: Sanding Belt Installation
“Tight” position. When the sanding belt is properly tensioned, it should not slip off from the drums. 9. Reinstall the belt guard and tighten the lock knobs. 21 | Page 6303 Sander OLIVERMACHINERY.NET... -
Page 22: Dust Chute Installation
3. Secure the dust chute with the mounting screws. 3. Secure the bracket with a lock knob. 4. Close the dust chute and lock it in place. 22 | Page Oliver Machinery 6303 Sander... -
Page 23: Set Up Contour Sanding Table
3. Loosen the dust chute lock knob. Swing the dust chute to the back of the machine to allow room to install the table. 6. Tighten the mounting bolt and lock nut to secure the table on the post. 23 | Page 6303 Sander OLIVERMACHINERY.NET... -
Page 24: Dust Collection
Running this sander without a dust collection system, or using a dust collection system with inadequate suction may damage the machine and cause other IMPORTANT hazardous situations. Check your dust collection system regularly to make sure it is not jammed or filled up. 24 | Page Oliver Machinery 6303 Sander... -
Page 25: Test Run
8. Turn off the sander to complete the test run. Congratulations for completing the test run! If you discover any issues from the tests, refer to the troubleshooting section and maintenance section to diagnose issues and make adjustments. 25 | Page 6303 Sander OLIVERMACHINERY.NET... -
Page 26: Operation
6” long, and for those that are difficult to feed steadily. Always wear high quality dust masks when operating the sander. 26 | Page Oliver Machinery 6303 Sander... -
Page 27: Adjustments
Position the table at least 1/16” above the bottom edge of the sanding belt. Doing so prevents materials or body parts from getting caught between the table and WARNING the belt, which can cause serious injury. 27 | Page 6303 Sander OLIVERMACHINERY.NET... -
Page 28: Edge Sanding
5. Before starting the sander, clear the table cause serious injuries and machine damage. and turn on the dust collection system. 6. Turn on the sander. 28 | Page Oliver Machinery 6303 Sander... -
Page 29: Horizontal Sanding
8. Remain in full control of the workpiece and keep hands away from the abrasive surface. Use the fence and stop bracket to provide additional support when applicable. 29 | Page 6303 Sander OLIVERMACHINERY.NET... -
Page 30: Contour Sanding
Keeping the dust chute closed at most times improves dust IMPORTANT collection effectiveness for edge/horizontal sanding, and reduces the risk of accidental body contact with the sanding surface and moving parts. 30 | Page Oliver Machinery 6303 Sander... -
Page 31: Accessories
Accessories Touchup Paint Keeping all painted surfaces in good condition not only makes your machine looking nice, but also keeps rusts away. Oliver Machinery has pre-mixed spray paint available in Oliver-Blue for purchase. Accessories are available on our website: OLIVERMACHINERY.NET To order by phone, please call us at 1-800-559-5065. -
Page 32: Maintenance
Monthly Disconnect the machine from the power source before any maintenance work is performed. After servicing the sander, remove all tools before restarting the WARNING machine. Failure to comply can cause serious injury! 32 | Page Oliver Machinery 6303 Sander... -
Page 33: Changing Sanding Belt
10. Reinstall the belt guard and close the dust chute. Tighten all lock knobs. 5. Loosen the sanding belt by moving the belt tensioning lever to the “Loose” position. 6. Gently slide the sanding belt off the drums. 33 | Page 6303 Sander OLIVERMACHINERY.NET... -
Page 34: Inspect / Adjust Belt Tracking
4. Adjust belt tracking by rotating the bolt 1/4 turn at a time. Tighten the lock nut and turn on the machine to verify the adjustment. 5. Repeat steps 1-4 as needed. 34 | Page Oliver Machinery 6303 Sander... -
Page 35: Troubleshooting
Replace tension spring as needed. Worn/broken sanding Replace sanding belt. belt. Improper motor / Check, adjust and tighten motor / component component mounting. mounting. Motor bearing issue. Contact customer service for further assistance. 35 | Page 6303 Sander OLIVERMACHINERY.NET... - Page 36 Avoid storing sanding belt in extreme off the belt easily temperature and humidity which may cause the belt to fail prematurely. Do not fold or smash sanding belt as it may disintegrate the bonding material on the belt. 36 | Page Oliver Machinery 6303 Sander...
-
Page 37: Wiring Diagrams
Wiring Diagrams 37 | Page 6303 Sander OLIVERMACHINERY.NET... -
Page 38: Parts List
Parts List Table and Base 38 | Page Oliver Machinery 6303 Sander... -
Page 39: Stand
Stand 39 | Page 6303 Sander OLIVERMACHINERY.NET... -
Page 40: Motor And Sander Assembly
Motor and Sander Assembly 40 | Page Oliver Machinery 6303 Sander... -
Page 41: Idler Drum
Idler Drum 41 | Page 6303 Sander OLIVERMACHINERY.NET... - Page 42 Special Screw S0111000M S0230308 Spring Washer 3/8" 20101013 Guide Block 20101014 Fence 20101015 Knob 8*12 20101016 Drive Drum 6303 MGA Miter Gauge Assembly 20102017 Guide Bar S0310306 S0050404 Set Screw 1/4"*20UNC*1/4" 10104049Q Position Plate 10104050 Pointer 20102020 Position Block Local Purchase Sanding Belt 6"...
- Page 43 S0110500 Hex Nut 5/16"-18UNC 90100063 Hinge Bracket 20103044 Belt Tracking Tool S0040512M Flat Head Screw S0040420M Flat Head Screw 4*20 10401029 Rubber Pad S0090512 Round Head Screw 5/16"-18*3/4" 90100062 Hinge Bracket 20101051 Extension Table 43 | Page 6303 Sander OLIVERMACHINERY.NET...
- Page 44 S0040412M Flat Head Screw 4*12 21700017 Bearing Base C1206202 Ball Bearing 6202ZZ 21700046 Bearing Cover C1106003 Ball Bearing 6003ZZ S0010409 Cap Screw I2000010 Direction Label 21700031 Spacer C1106800 Ball Bearing 6800ZZ 21700010 Worm Gear 44 | Page Oliver Machinery 6303 Sander...
- Page 45 5*5*40 21700009 Worm S0400425 4*4*25 W1017W-2 Cord Strain Relief 21700032 Connecting Plate 11108024 Knob S0520030 Ring STW-30 21700056 Eccentric Cam 21700054G Foam Plate S0010540M Cap Screw 5*40 21600025 Connecting Rod Bushing S0530019 Ring R-19 45 | Page 6303 Sander OLIVERMACHINERY.NET...
-
Page 46: Maintenance Record
Maintenance Record Date Task Operator 46 | Page Oliver Machinery 6303 Sander... -
Page 47: Notes
Notes 47 | Page 6303 Sander OLIVERMACHINERY.NET... -
Page 48: Warranty And Service
Oliver Machinery makes every effort to assure that its equipment meets the highest possible standards of quality and durability. All products sold by Oliver Machinery are warranted to the original customer to be free from defects for a period of two (2) years on all parts excluding electronics and motors which are warranted for one (1) year from the date of shipment. - Page 50 Oliver Machinery is always adding new Industrial Woodworking products to the line. For complete, up-to-date product information, visit us online at: WWW.OLIVERMACHINERY.NET or call toll free 1-800-559-5065 ** SAVE THIS MANUAL FOR FUTURE REFERENCES. **...
Need help?
Do you have a question about the 6303 and is the answer not in the manual?
Questions and answers