
Related Manuals for Oliver 6910


Summary of Contents for Oliver 6910
- Page 1 Sander Model 6910 Owner’s Manual For Models Manufactured Since 04/2006 175381 Oliver Machinery 1-800-559-5065 921 Thomas Ave SW Renton, WA 98057 Stock Number: 6910.003 Manual Version: 2.0.0 info@olivermachinery.net...
- Page 3 USAGE OF SAFETY AND PROTECTION DEVICES. OLIVER MACHINERY DISCLAIMS ANY LIABILITY FOR MACHINES THAT HAVE BEEN ALTERED OR ABUSED. OLIVER MACHINERY RESERVES THE RIGHT TO EFFECT AT ANY TIME, WITHOUT PRIOR NOTICE, THOSE ALTERATIONS TO PARTS, FITTINGS, AND ACCESSORY EQUIPMENT WHICH THEY MAY DEEM NECESSARY FOR ANY REASON WHATSOEVER.
-
Page 4: Table Of Contents
Clear the Work Area ········································ 24 Electricals ···············································13 Table Tilt Adjustment ······························· 25 Minimum Circuit Size Required for Model 90° Sanding ·············································· 26 6910 Sander ············································· 13 Bevel Sanding ··········································· 26 Grounding ················································ 13 Accessories ············································ 27 Indoor Use Only ······································· 13 Maintenance ·········································... -
Page 5: Introduction
Introduction Thank you for choosing Oliver! This manual contains important information on how to safely set up, operate, and maintain this machine. Please take the time to read through this manual, and make sure you understand all instructions. While this manual may provide tips on optimizing the result of your workpiece, the manual is not intended as a substitute for formal woodworking training. -
Page 6: Specifications
Specifications Quick View Model 6910 Sander Stock Number 6910.003 Power Requirement 115V / 230V, 1Ph, 60Hz Motor TEFC 2HP, 115V / 230V, 1Ph Spindles Included Spindle Diameters 1/4” – 4” Spindle Speed 1720 RPM Oscillation Stroke Length 1-1/2" Table Dimensions 27“(W) x 25”(D) - Page 7 Dust Port Size 4” Minimum CFM Required 300 CFM Sound Rating @ 2’ distance 72 dB Others Serial Number Location On the left-hand side of the machine stand. Certification CSA 175381 Country of Origin Taiwan 7 | Page 6910 Sander OLIVERMACHINERY.NET...
-
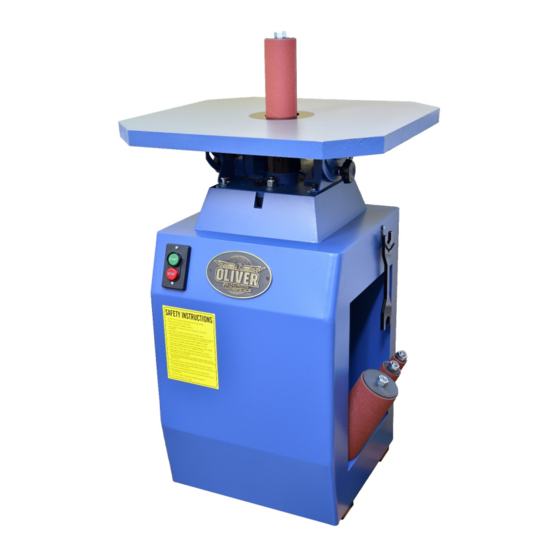
Page 8: Identification
Identification 8 | Page Oliver Machinery 6910 Sander... - Page 9 9 | Page 6910 Sander OLIVERMACHINERY.NET...
-
Page 10: Safety
Safety Oliver Machinery has made every attempt to provide a safe, reliable, easy-to-use piece of machinery. Safety, however, is ultimately depending on the individual machine operator. Before operating this machine, please become familiar with the following safety labels and guidelines. -
Page 11: Safety Guidelines Specific To Sander
12. PROPER USE: Do not use this machine for anything other than its intended use. If used for other purposes, Oliver Machinery disclaims any real or implied warranty and holds itself harmless for any injury or damage which may result from that use. - Page 12 After Operation STOP THE MACHINE when the operator leaves the machine for any reason. WAIT until the motor comes to a complete stop. CLEAN UP before departure. 12 | Page Oliver Machinery 6910 Sander...
-
Page 13: Electricals
Please ensure the electrical circuit for this machine meets the minimum circuit size requirement. The minimum circuit size requirement applies to a dedicated circuit that provides power to one 6910 Sander. If more machines are sharing the same circuit, consult a qualified electrician to ensure the designated circuit is properly sized for safe operation. -
Page 14: Electrical Wiring
*NR: Not Recommended Use properly sized wires that meet or exceed the power requirement of your machine. Using undersized wires may cause overheating and increase the risk of fire WARNING and machine damage. 14 | Page Oliver Machinery 6910 Sander... -
Page 15: Setup
Air resistance and leakage in a dust collection system impact its effectiveness. Use a dust collection system that is rated above 300 CFM at the dust port. Doing so CAUTION improves air quality in the workplace, and prevents the machine from jamming. 15 | Page 6910 Sander OLIVERMACHINERY.NET... -
Page 16: Receiving
On the day of delivery, please be sure help is available to move the machine to its final location. 6910 Sander has a gross weight of 319 lbs. and a net weight of 286 lbs. Safe moving techniques and proper lifting equipment are required, or serious WARNING personal injury may occur. -
Page 17: Inventory
(4”, 3”, 2”, 1-1/2”, 1”) Package 2: Small sanding spindles and sanding Package 5: Wrenches sleeves (3/4”, 5/8”, 1/2”, 3/8”, 1/4”) Package 3: Table Inserts • 29/32mm Wrenches (2x) • 2mm Hex Wrench 17 | Page 6910 Sander OLIVERMACHINERY.NET... -
Page 18: Cleaning
Discard oily rags in a fireproof container and keep them away from combustible WARNING materials. Oily rags can heat up and trigger spontaneous combustion under certain conditions. 18 | Page Oliver Machinery 6910 Sander... -
Page 19: Assembly
4. Align the table so the quill sits at the center of the table opening. 5. Use an 8mm hex wrench to fasten all four mounting cap screws to secure the table on the trunnion. 19 | Page 6910 Sander OLIVERMACHINERY.NET... -
Page 20: Sanding Spindle Installation/Removal
Make sure to use an insert that leaves at least a 3/16” gap with the spindle. If the insert catches the spindle, the insert may dislodge from the table and cause serious injuries. 20 | Page Oliver Machinery 6910 Sander... - Page 21 9. Make sure the notch on the outer edge of the insert aligns with the pin on the table opening, and the entire insert is flush with the table. 10. Clear the table before starting the sander. 21 | Page 6910 Sander OLIVERMACHINERY.NET...
-
Page 22: Spindle And Table Insert Storage
Running this sander without a dust collection system, or using a dust collection system with inadequate suction may damage the machine and cause other IMPORTANT hazardous situations. Check your dust collection system regularly to make sure it is not jammed or filled up. 22 | Page Oliver Machinery 6910 Sander... -
Page 23: Test Run
3. Put on personal protection devices. 4. Press the “ON” button to turn on the sander. The motor should run and the spindle should oscillate. 5. Press the “OFF” button to turn off the machine when testing completes. 23 | Page 6910 Sander OLIVERMACHINERY.NET... -
Page 24: Operation
Always wear high-quality dust masks when operating the sander. Clear the Work Area Before turning on the sander, make sure the sander table is free of debris, and the workpiece is not engaging the spindle. 24 | Page Oliver Machinery 6910 Sander... - Page 25 3/16” gap with the spindle. If the insert catches the spindle, the insert may dislodge from the table and cause serious injuries. 4. Use the table tilt scale for setting the tilt angle. 25 | Page 6910 Sander OLIVERMACHINERY.NET...
-
Page 26: 90° Sanding
4. Turn on the sander. other locations of the spindle creates an 5. Hold the workpiece firmly on the table. Feed edge with an incorrect angle. the workpiece gently against the rotation direction of the sanding spindle. 26 | Page Oliver Machinery 6910 Sander... -
Page 27: Accessories
4" x 9" Touchup Paint Keeping all painted surfaces in good condition not only makes your machine look nice but also keeps rusts away. Oliver Machinery has pre-mixed spray paint available in Oliver-Blue for purchase. Accessories are available on our website: OLIVERMACHINERY.NET To order by phone, please call us at 1-800-559-5065. -
Page 28: Maintenance
Disconnect the machine from the power source before any maintenance work is performed. After servicing the sander, remove all tools before restarting the WARNING machine. Failure to comply can cause serious injury! 28 | Page Oliver Machinery 6910 Sander... -
Page 29: Cleaning Sanding Sleeves
3. Retighten the sanding sleeve set screw to secure the sanding sleeve. 4. Try pulling the sanding sleeve away from the spindle to make sure it is securely mounted onto the spindle. 29 | Page 6910 Sander OLIVERMACHINERY.NET... - Page 30 Over- sleeve to deform and detach from the metal tightening the nut can cause the sanding spindle. sleeve deform, overstretch, disintegrate. 30 | Page Oliver Machinery 6910 Sander...
- Page 31 Repeat steps 4-6 as needed. 8. Make sure the pointer of the table tilt scale is now pointing at 0°. If the pointer needs to be adjusted, loosen the screw to readjust the pointer’s position. 31 | Page 6910 Sander OLIVERMACHINERY.NET...
-
Page 32: Lubrication
Monitor the oil level window while filling the lubricant. The oil level needs to be between the high (H) and the low (L) marks. 6. Reinstall the oil cap when the oil change is done. 32 | Page Oliver Machinery 6910 Sander... -
Page 33: Troubleshooting
Ensure the spindle is securely fastened on the correctly. quill. Worn/broken sanding Replace sanding sleeve. sleeve. Improper Check, adjust, and tighten motor/component motor/component mounting. mounting. Motor bearing issue. Contact customer service for further assistance. 33 | Page 6910 Sander OLIVERMACHINERY.NET... - Page 34 Do not fold or smash the sanding sleeve as it may disintegrate the bonding material on the sleeve. 34 | Page Oliver Machinery 6910 Sander...
-
Page 35: Wiring Diagram
Deenergize the electrical circuit before touching any enclosed, electrified parts. DANGER Touching an electrified part WILL result in serious personal injury or death. All electrical work must be done by a qualified electrician and must meet the electrical code in your area. WARNING 35 | Page 6910 Sander OLIVERMACHINERY.NET... -
Page 36: Parts List
Parts List 36 | Page Oliver Machinery 6910 Sander... - Page 37 37 | Page 6910 Sander OLIVERMACHINERY.NET...
- Page 38 HEX SOCKET CAP SCREW 3/8"-16UNCx5/8" S0210600d WASHER 3/8*22*0.7 40301032 SCALE POINTER S0030304 SCREW 3/16"*24UNC*1/4" 30101049 30101050 15/16"24UNF*2 30105054A WRENCH 30105055 ARBOR 30105056 HEX NUT S0313525 SPRING PIN 3.5*25 30105057 SANDING SPINDLE 4" 30105058 WASHER 30105059 3/4" 38 | Page Oliver Machinery 6910 Sander...
- Page 39 BRASS BUSHING BRACKET 30105088 SHAFT BRASS BUSHING 30101005 KNOB S0010510 SCREW 5/16"*18UNC*5/8" 30101030A BRACKET BASE S0210500C WASHER 5/16"x18x2t 10105052N SWITCH BOX S0030324 SCREW 3/16"*24*1 1/2" 143A S0110300 3/16"-24UNC 30101002J-1 STAND ACCESS PANEL 30101002JM STAND 39 | Page 6910 Sander OLIVERMACHINERY.NET...
- Page 40 3010500GH COMPLETE ASSEMBLY w/ABRASIVE SLEEVE 2" X 9" 3010500GI COMPLETE ASSEMBLY w/ABRASIVE SLEEVE 3" x 9" 3010500GJ COMPLETE ASSEMBLY w/ABRASIVE SLEEVE 4" x 9" *NS: Item not shown in the exploded view diagram. 40 | Page Oliver Machinery 6910 Sander...
-
Page 41: Maintenance Record
Maintenance Record Date Task Operator 41 | Page 6910 Sander OLIVERMACHINERY.NET... -
Page 42: Notes
Notes 42 | Page Oliver Machinery 6910 Sander... -
Page 43: Warranty And Service
Oliver Machinery makes every effort to assure that its equipment meets the highest possible standards of quality and durability. All products sold by Oliver Machinery are warranted to the original customer to be free from defects for a period of two (2) years on all parts excluding electronics and motors which are warranted for one (1) year from the date of shipment. - Page 44 Oliver Machinery is always adding new Industrial Woodworking products to the line. For complete, up-to-date product information, visit us online at: WWW.OLIVERMACHINERY.NET or call toll free 1-800-559-5065 ** SAVE THIS MANUAL FOR FUTURE REFERENCES. **...
Need help?
Do you have a question about the 6910 and is the answer not in the manual?
Questions and answers