Table of Contents
Advertisement
Quick Links
101-1040: Mark 7® Primer Orientation Sensor Evolution
/ Revolution / Apex 10
Instruction Manual V 1.1
Read this manual completely. Understand all safety and operating instructions. Failure to
comply with the warnings and instructions may result in serious injury, illness or death.
PRIMER ORIENTATION SENSOR INSTRUCTION MANUAL VERSION 1.1
1
Advertisement
Table of Contents

Related Manuals for Mark 7 101-1040


Summary of Contents for Mark 7 101-1040
- Page 1 101-1040: Mark 7® Primer Orientation Sensor Evolution / Revolution / Apex 10 Instruction Manual V 1.1 Read this manual completely. Understand all safety and operating instructions. Failure to comply with the warnings and instructions may result in serious injury, illness or death.
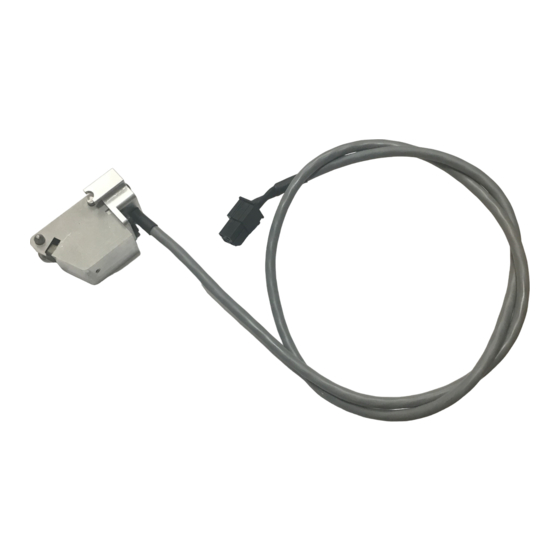
- Page 2 Packaging Contents: The Primer Orientation Sensor is compatible on all Revolution, Evolution and APEX 10 Press platforms, including systems equipped with No priming, Standard priming and Automated priming Systems. The sensor is packaged in a single corrugated box (6” X 6” X 1-1/4"). Please check the packaging contents below before installing the sensor.
- Page 3 Installation Instructions: The Primer orientation sensor installs into station # 5, the station after the primer seating station. To install the sensor the Shellplate must be removed or lifted to remove the spacer housing. Although it’s not required, we do recommend to remove the tool head for full access. Below are the installation steps for installing the sensor on a Revolution (shown).
- Page 4 Step 2: Installing Probe Retractor and Springs Place the two springs into the spring wells in the primer housing as shown. Apply a small amount of red and tacky grease on the springs. Once the springs are installed, insert the probe retractor into the large spring.
- Page 5 Step 3: Installing the Primer Orientation Sensor Main Body Carefully lower the sensor body straight down so the probe retractor enters the bronze sleeve bearing and the indicator finger pin enters the spring. The sensor should mount fully flush into the pocket with no resistance.
- Page 6 Step 5: Adjusting Optical Sensor to Desired Primer Depth With the machine powered off and the tool head in the UP POSITION place a case with a seated primer to the desired depth into station #5. Make sure the Shellplate nut is fully threaded down to the desired tightness.
- Page 7 Operating Instructions: Software version 2.11 or newer is required for the sensor to operate properly. Visit https://www.markvii-loading.com/knowledgebase navigate to the appropriate section depending on your unit. Then click on the User Manual and Firmware Updates dropdown to find the latest software. Before entering the Loader application make sure the press manually cycles smoothly with the sensor installed and the sensor is plugged into Port #2.
- Page 8 Troubleshooting Refer to the knowledge base section on our website under SUPPORT for troubleshooting articles relating to setup and operation. http://www.markvii-loading.com/knowledgebase Please contact us for technical support Phone: 1-888-462-7577 Hours: 9:00am-4:30pm, ET, M–F Primer Orientation Sensor Instruction Manual Version 1.1...
Need help?
Do you have a question about the 101-1040 and is the answer not in the manual?
Questions and answers