Table of Contents
Advertisement
Quick Links
Advertisement
Table of Contents

Subscribe to Our Youtube Channel
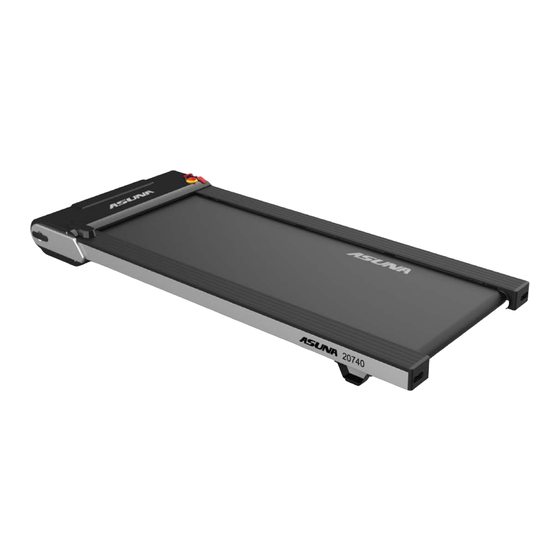
Summary of Contents for ASUNA TREADPAD 20740
- Page 1 ASUNA 20740 TREADPAD WALKING TREADMILL...
-
Page 2: Table Of Contents
INDEX IMPORTANT SAFETY INFORMATION………………………………………………………… EXPLODED DRAWING……………………………………………………………………… PARTS LIST……………………………………………………………………………………………. TOOLS & HARDWARE………………………………………………………………..… LUBRICATION…………………………………………………………………………………….. MOVING INSTRUCTIONS……………………………………………………..……………..….. SPECIFICATION………………………………………………………………………………..…. IMPORTANT ELECTRICAL INFORMATION……………………………………………… OPERATING INSTRUCTIONS……………………………………………………………….…. DISPLAY CONSOLE……………………………………………………………………………... 11-12 MAINTENANCE GUIDELINES…………………………………………………………………. ATTENTION: Please verify that all parts associated with this product are in good condition and accounted for. During the assembly process, please be sure to follow each step accordingly, as it has been explained within this manual. -
Page 3: Important Safety Information
IMPORTANT SAFETY INFORMATION We thank you for choosing our product. To ensure your safety and health, please use this equipment correctly. It is important to read this entire manual before assembling and using the equipment. Safe and effective use can only be achieved if the equipment is assembled, maintained, and used properly. It is your responsibility to ensure that all users of the equipment are informed of all warnings and precautions. -
Page 4: Exploded Drawing
Exploded Drawing... -
Page 5: Parts List
Parts List ITEM DESCRIPTION Q’TY ITEM DESCRIPTION Q’TY Frame Front Main Frame Support Pad Edging Buckle T1.5*40*24.5 Side Rail L Wire Sheet T1.5*10*30L Side Rail R Transportation Running Board Wheel Axis Shock Pad Nut Clamp Silicon Oil Transportation Front Roller Wheel Rear Roller Single Wire... - Page 6 Q’T ITEM DESCRIPTION Q’TY ITEM DESCRIPTION Φ9*Φ13*t1.5 Φ8.1*Φ12.3*t2.1 Flat Washer Spring Washer BT4*15 M4*12 Screw Screw 10.9 Grade 10.9 Grade M4*10 10.9 M6*25 Screw Screw Grade 10.9 Grade M4*15 10.9 Screw Screw M8*35 10.9 Grade Grade Φ4.1*Φ4.4*t1.0 Spring Washer Screw M5*8 10.9 Grade Screw M4*8 10.9 Grade...
-
Page 7: Tools & Hardware
Tools & Hardware When you open the carton, you will find the below spare parts. #28 Silicon Oil #37 Power Cord #74 Safety Key #42 Remote Control Safety Key Motor Upper Cover Side Rail Allen Wrench Rear End Cap Running Belt... -
Page 8: Lubrication
Lubrication *IMPORTANT NOTE: This treadmill does come pre-lubricated, but it is recommended to lubricate your treadmill before the first use. RUNNING BELT & TREADMILL LUBRICANT: Lubricating the Running Board (No. 8) and Running Belt (No. 9) is essential as the friction affects the life span and operation of the treadmill. -
Page 9: Moving Instructions
Moving Instructions Hold the end of Main Frame (No. 1) using two hands to lift up the treadmill. While lifting up, use one foot to help support the lifting motion. Once the Transportation Wheels (No. 29) touch the ground, you can safely move the treadmill to your desired location. -
Page 10: Specification
Specification Assembly Size Speed Range 0.3—4MI/H 60(L)*30.3(W)*40(H) (INCHES) (MI/H) Folded Standing Rating 560W 58.1(L)*24.9(W)*5.4(H) Size (INCHES) Running Size Motor Spec 51(L)*17.5(W) 1.5HP(PEAK) (INCHES) (HP) N.W. (LBS) Input Volt (V) 100-120V Max User Weight Operating 0-82°F (LBS) Temperature Blue Single Display Speed, Time, Distance, Calories, Steps... -
Page 11: Important Electrical Information
Important Electrical Information WARNING: This treadmill requires a power source of 10 amps (100-120V) in order to properly operate. For your safety as well as the safety of others, please verify that the power source is correct before powering in the equipment. Any power supply source above or below this level could cause significant damage to the equipment and/or user. -
Page 12: Operating Instructions
Operating Instructions 1. Plug the Power Cord (No. 37) into an outlet with appropriate voltage. 2. Turn on the Power Switch (No. 33). 3. Insert the Safety Key (No. 74). 4. Press the Start key on the Remote Control (No. 42). Syncing Remote with Treadmill: Remote must be synced to the treadmill before use. -
Page 13: Display Console
Display Console 1. Connect the power cord to an outlet and attach the Safety Key (No. 74) with the Meter (No. 43) until a long beep is heard. It will enter standby mode after two seconds. Next, press and hold the Remote Control (No. - Page 14 3. Remote Battery Replacement: A. Open the remote battery cover by inserting a coin and turning it to the left until it points to the unlock symbol. B. Remove and replace with 1pc CR2032 Battery. Please ensure the positive side of battery is facing up and battery is under metal slot.
-
Page 15: Maintenance Guidelines
Maintenance Guidelines General cleaning will help prolong the life and performance of your treadmill. Keep the unit clean and maintained by dusting the components on a regular basis. Clean both sides of the Running Belt (No. 9) to prevent dust from accumulating underneath. Keep your running shoes clean so that dirt from your shoes does not wear out the Running Board (No.


Need help?
Do you have a question about the TREADPAD 20740 and is the answer not in the manual?
Questions and answers