Table of Contents
Advertisement
Advertisement
Table of Contents

Related Manuals for ASUNA 7750


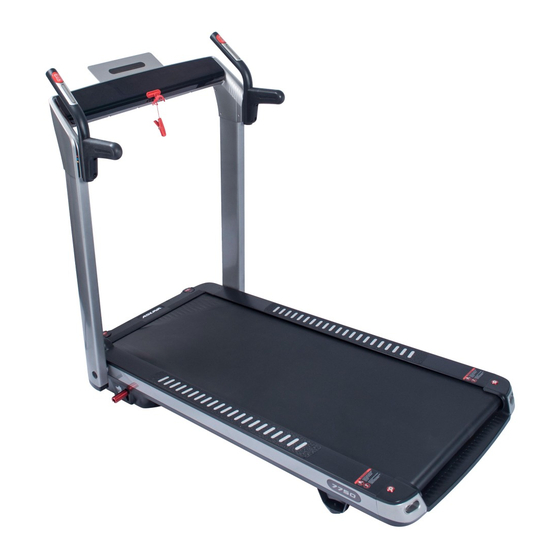
Summary of Contents for ASUNA 7750
-
Page 2: Table Of Contents
INDEX IMPORTANT SAFETY INFORMATION………………………………………………………… EXPLODED DIAGRAM……………………………………………………………………… PARTS LIST……………………………………………………………………………………………. TOOLS & HARDWARE…………………………………………………………………….… ASSEMBLY INSTRUCTIONS………………………………………………………………..FOLDING INSTRUCTIONS……………………………………………………..……………..… MOVING INSTRUCTIONS……………………………………………………………………..… SPECIFICATION………………………………………………………………………………..…. IMPORTANT ELECTRICAL INFORMATION…………………………………………… OPERATING INSTRUCTIONS……………………………………………………………….…. DISPLAY CONSOLE……………………………………………………………………………... 15-20 MAINTENANCE INSTRUCTIONS……………………………………………………………… MAINTENANCE GUIDELINES…………………………………………………………………. LUBRICATION…………………………………………………………………………………….. ATTENTION: Please verify that all parts associated with this product are in good condition and accounted for. -
Page 3: Important Safety Information
IMPORTANT SAFETY INFORMATION We thank you for choosing our product. To ensure your safety and health, please use this equipment correctly. It is important to read this entire manual before assembling and using the equipment. Safe and effective use can only be achieved if the equipment is assembled, maintained, and used properly. -
Page 4: Exploded Diagram 1
Exploded Diagram 1... - Page 5 Exploded Diagram 2...
-
Page 6: Parts List
Parts List DESCRIPTION SPEC. DESCRIPTION SPEC. Main Frame Running Board Incline Bracket Running Belt Handlebar Multi-groove Belt Tablet Bracket Ring Wire Plug Meter Bracket Motor Seat Horizontal Tube Loudspeaker Rear Cover Fixed Seat Tablet Bracket Motor Under Fixed Seat Cover Motor Upper Adjusting Sheet Cover... - Page 7 DESCRIPTION SPEC. DESCRIPTION SPEC. Safety Key Seat C-shape Φ10 Snap Ring Upright Stopper Loudspeaker Light Shade Φ9*Φ23*T1.5 Flat Washer Screw M8*15 Light Transmitting M6*12 Screw Plate nickel-chrome M6*15 half-thread Handlebar Stopper Screw nickel-chrome Module Fixer Screw M6*50 Silicone Oil Screw M6*60 Bolt M8*20...
- Page 8 DESCRIPTION SPEC. DESCRIPTION SPEC. Φ12.2*Φ17*T0.5 Flat Washer Screw M8*35 inner Φ13 O Shaped Ring Screw M4*12 wire Φ1.5 Running Board Screw M6*25 Baffle BT2.2*5 Power Cord Screw nickel-plating Speed Shortcut End Socket Key Seat Pad Decorating Power Switch Light Loudspeaker Overload Protector Decorating Light Incline Shortcut...
-
Page 9: Tools & Hardware
Tools & Hardware When you open the carton, you will find the below spare parts. #20 Allen Wrench 1 PC #103 MP3 Line 1 PC #75 Screw M6*12 4 PCS #96 Power Cord 1 PC #55 Silicone Oil 1 PC #114 Handrail 2 PCS #128 Safety Key 1 PC... -
Page 10: Assembly Instructions
Assembly Instructions STEP 1: Hold the Handlebars (No. 3L & No. 3R). Press the Foot Lever (No. 115) until you hear a click, then raise the Handlebars (No. 3L & No. 3R) to a vertical position until you hear a click. Lightly shake the Handlebars (No. - Page 11 STEP 3: Remove Plugs (No. 137). Save the Plugs (No. 137) for later use when you remove the Handrails (No. 114). Attach the Handrails (No. 114) to the treadmill bracket with 4 Screws (No. 75). STEP 4: Power Cord (No. 96) to the treadmill.
-
Page 12: Folding Instructions
Folding Instructions Before you fold the treadmill, remove the 4 Screws (No. 75) and remove the Handrails (No. 114). If you saved the Plugs (No. 137), you can plug in the holes. Stand in front of the treadmill. Fold the Tablet Bracket (No. -
Page 13: Moving Instructions
Moving Instructions Before moving the treadmill, fold the treadmill first. Pull out the supporting moving wheels according to the drawing, to ensure the folded treadmill is stable when standing upright. To store the treadmill upright, lift the treadmill so it stands vertically. To move the treadmill, tilt the treadmill towards you until the transportation wheels on the front base touch the ground. -
Page 14: Specification
Specification Assembly Size Speed Range 57.3(L)*29.3(W)*48(H) (INCHES) (MI/H) 0.6—8.0 Folded Standing Rating 930W 29.3(L)*10.4(W)*57.3(H) Size (INCHES) Running Size Motor Spec 2.5HP(PEAK) (INCHES) 51.2(L)*19(W) (HP) N.W. (LBS) Input Volt (V) 110-120V Max User Weight Operating (LBS) Temperature 0-82° F Incline 0-12% Blue Single Display Speed, Time, Distance, Calories, Pulse, Incline... -
Page 15: Important Electrical Information
Important Electrical Information WARNING: This treadmill requires a power source of 10 amps (100-120V) in order to properly operate. For your safety, as well as the safety of others, please verify that the power source is correct before plugging in the equipment. Any power source above or below this level could cause significant damage to the equipment and/or user. -
Page 16: Operating Instructions
Operating Instructions 1. Plug the power cord into an outlet with appropriate voltage. 2. Turn on the power switch. 3. Insert the Safety Key. 4. Press the START button on the console. Never start the treadmill while you are standing on the running belt. After connecting the power, there may be a pause after the running belt begins to move, you should always stand on the treadmill side plastic non-slip rails until the belt starts moving. -
Page 17: Display Console
Display Console Windows Display: a. “ Incline”: Displays current incline value. b. “ Pulse/ Calorie”: Displays current pulse value and the calories burned. c. “ Time/ Program”: Displays current exercise time and the current program. d. “ Distance/ Mode”: Displays current exercise distance and current mode. e. - Page 18 Instant Start: a. Turn on the power. Insert the safety key in the meter. b. Press “ Start”, system enters into 3 second countdown and the treadmill makes a beeping sound. “ Program” window displays the countdown numbers at the same time. Time/ After the 3 second countdown, the treadmill starts at 0.6 MI/H speed.
- Page 19 Manual Mode: a. In standby mode, press “ Start”, and the treadmill starts at 0.6 MI/H speed and 0% incline. b. In standby mode, press “ Mode”, to enter time countdown. “ Program” window displays “30:00” and flashes and the time icon will light up. Time/ Press the handrail buttons on either side to set exercise time: setting range is: 5:00-99:00.
- Page 20 TIME PROGRAM speed incline speed incline speed incline speed incline speed incline speed incline speed incline speed incline User Customized Program Except the 8 system built-in programs, there are still 3 user customized programs that allow the user to set according to personal condition: U1, U2, U3. a.
- Page 21 Audio: When the power is on, you can connect the MP3 wire to audio device to play music. When the treadmill powers down and enters sleep mode, the music will stop. Pressing any key will reactivate the treadmill. USB Interface: USB connection can only charge your device.
- Page 22 Treadmill Error Codes: treadmill displays error code, please contact Customer Service support@sunnyhealthfitness.com. Er1: Display panel couldn’t receive the signal. Er3: Over voltage. Er4: IGBT short circuit (Over current). Er5: Over load. Er6: The motor is not connected, (only direct current). Er7: The controller couldn’t receive the signal.
-
Page 23: Maintenance Instructions
Maintenance Instructions Cleaning Please make sure the treadmill's power plug is unplugged before cleaning the machine. Keep the treadmill clean by dusting it regularly. Be sure to clean the exposed parts on both sides of the running belt. This can reduce the dust underneath. Make sure your shoes are clean to avoid any foreign material damaging the running belt and running board. -
Page 24: Maintenance Guidelines
Maintenance Guidelines 1. In order to maintain and prolong the life of your treadmill, we suggest you power it off for 10 minutes after every 2 hours of use. 2. A loose running belt will slip off when running. The tightness of the running belt will affect the performance of the motor. -
Page 25: Lubrication
Lubrication *IMPORTANT NOTE: This treadmill does come pre-lubricated, but it is recommended to lubricate your treadmill before the first use. RUNNING BELTS & TREADMILL LUBRICANT: Lubricating the Running Board (No. 24) and Running Belt (No. 25) is essential as the friction between the two affects the life span and function of the treadmill.
Need help?
Do you have a question about the 7750 and is the answer not in the manual?
Questions and answers